How to grow plant cuttings
how to root plant cuttings in water for propagation
Hello! Thanks for being here! Today I’m going to show you how to root plant cuttings in water. This is a great way of multiplying the plants you have and sharing the plant love with friends. I will say, it’s kind of hard to give away a plant that you’ve been nursing from its beginning. But, it’s so rewarding and so cool to get results! I just gave two Chain of Hearts cuttings away today to super awesome homes. I can’t wait to check in on their progress.
In the beginning
When I was in my early 20s I worked at a golf course that had a 30 foot Monstera deliciosa. You read that right…30 FEET! That’s where my love of plants began. It’s actually my favorite plant of all time (if you didn’t already know). Anyway, some of the leaves were 2 feet wide and absolutely beautiful!
One day I saw this tiny leaf pop out of soil. It was so tiny and cute! Once it got a little bigger, I asked my supervisor if I could pluck it out and take it home, of course he said yes. I wrapped it in a wet cloth, and home I went.
I took it home, put it in a glass container of water, it rooted, and it made me so happy! I was so in love with this amazing method of reproduction. So let’s talk about How to Root Plant Cuttings in Water.
Most common house plants can be propagated by water method. Right now my new subject is a tiny little stem from my big Fiddle Leaf Fig. So far no roots but there is a tiny green leaf!! If you’re not sure, just try it!
Let’s get startedSTEPS
- Identify the location where you will snip your cutting from the main plant. Not all cutting that will root in water have root nodes, but most of them do so find the root node on your plant.
- Carefully cut just below the node with a clean sharp knife or scissors. About 1/4″ below the node.
- Place the cutting in a clean glass. Poor enough room temperature water to cover the nodes of the cutting.
- Change out the water every 3-5 days with fresh room temperature water.
- Wait and watch as your roots grow! This can take weeks to months depending on the plant.
- Once your roots reach approximately 3″-5″ then it’s time to put the cutting in soil!
Need a visual? Watch my propagation tips on AM Northwest.
Place your rooting plants in an area with bright indirect light if possible. You’ll also need patience…serious patience! If you are trying a new cutting and two weeks go by with no roots, it’s not always bad news. I know someone who stuck a fiddle leaf fig leaf in water and 3 months later she started to see roots.
When you change out the water, be sure to give the roots a little rinse and a little rub with your fingers. The roots can get a mucky film (that’s the technical term) and you want to wipe that away before placing them in the new water.
That’s all you have to do! It’s so simple. Now you can make your own plants and trade with your friends.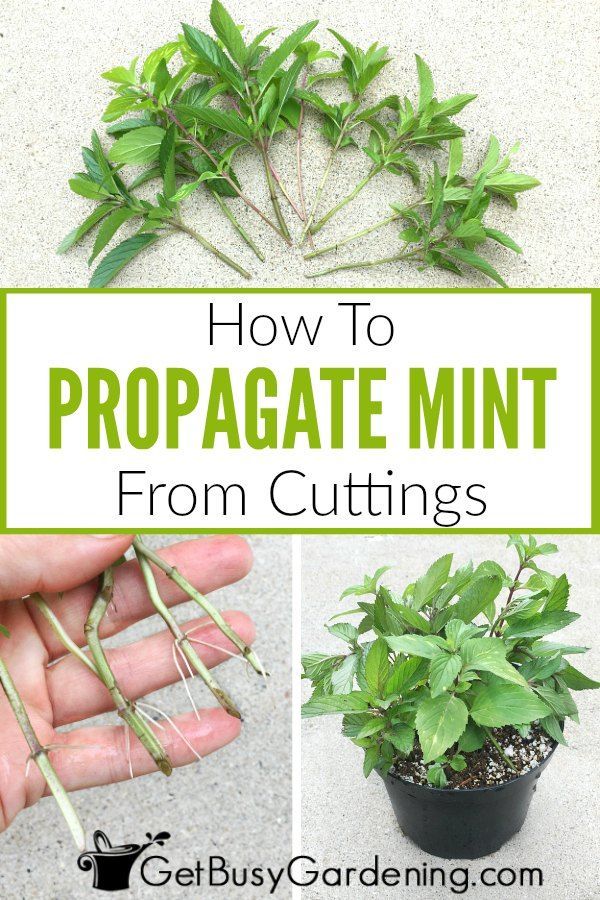 It’s one of my most favorite things to do. Once you are ready to pot your rooted plant, check out my How to Repot a Houseplant post. There are some good potting tips there!
Lastly, take a look here for my favorite propagation stations! Have a great day and thank you for being here 🙂
Check out my Instagram for daily plant love and inspiration!
This post has affiliate links for your convenience
How to Grow Plants From Cuttings
Grow New Plants at Home With This Easy Propagation Method
By
Marie Iannotti
Marie Iannotti
Marie Iannotti is a life-long gardener and a veteran Master Gardener with nearly three decades of experience. She's also an author of three gardening books, a plant photographer, public speaker, and a former Cornell Cooperative Extension Horticulture Educator. Marie's garden writing has been featured in newspapers and magazines nationwide and she has been interviewed for Martha Stewart Radio, National Public Radio, and numerous articles.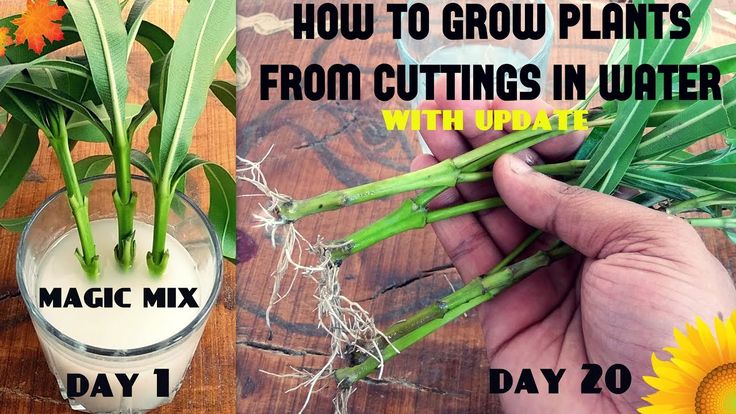
Learn more about The Spruce's Editorial Process
Updated on 10/25/22
Reviewed by
Kathleen Miller
Reviewed by Kathleen Miller
Kathleen Miller is a highly-regarded Master Gardener and Horticulturist who shares her knowledge of sustainable living, organic gardening, farming, and landscape design. She founded Gaia's Farm and Gardens, a working sustainable permaculture farm, and writes for Gaia Grows, a local newspaper column. She has over 30 years of experience in gardening and sustainable farming.
Learn more about The Spruce's Review Board
The Spruce / Jiaqi Zhou
Project Overview
Garden plants can be propagated in many ways, but one of the easiest methods is taking stem cuttings. How to grow plants from cuttings is simple: Trim off a healthy portion of stem, place it in water or a growing medium until it develops roots, and then plant it in a pot or the ground.
Growing plants from cuttings is a common way to create new houseplants, but it can also work for many garden plants. In cold-weather zones, some gardeners take clippings of tender annuals and root them indoors to prepare a supply of new plants for garden planting in the spring.
Here's what to know about how you grow a plant from a stem cutting.
Watch Now: How to Propagate Dipladenia
When to Take Stem Cuttings
Stem cuttings can be taken and rooted at almost any time during the parent plant's active growth period. You also can take cuttings from many woody plants (plants with hard stems) during their dormancy. In cold climates, you can take cuttings in the fall before frost arrives, root them indoors, and then transfer them to pots. By springtime, you will have vigorous potted plants that can go back into the garden.
Types of Plants to Grow From Cuttings
Soft-stemmed herbaceous plants are the easiest to grow from cuttings, but many woody plants can also be propagated with this method.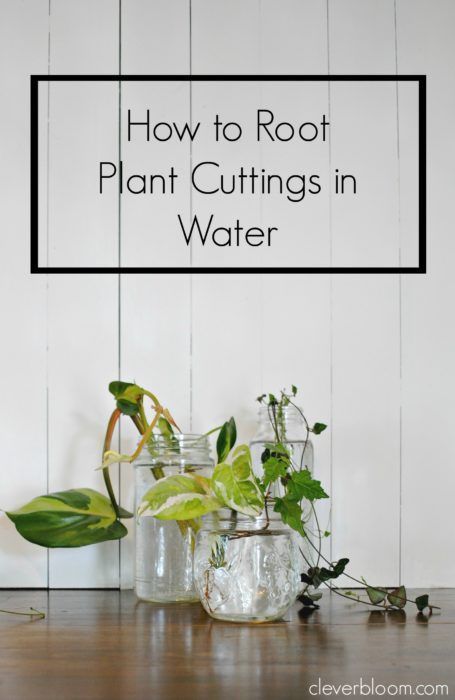 The following list includes examples of plants that grow from cuttings.
- Semi-hardwood cuttings are woody around their base but have softer stems up top. Examples of plants that can be propagated via semi-hardwood cuttings include holly, hydrangeas, and azaleas.
- Hardwood cuttings have woody stems throughout. Examples of plants that can be propagated via hardwood cuttings include crepe myrtle, forsythia, and rose species.
- Softwood cuttings have flexible soft stems. Examples of plants that can be propagated via softwood cuttings include clematis, asters, and chrysanthemums.
- Greenwood cuttings are very similar to softwood cuttings, except that their base is slightly harder and they take a bit longer to grow. Examples of plants that can be propagated via greenwood cuttings include boxwoods, dahlias, and gardenias.
Before You Begin
The key to successful rooting of stem clippings is to find the moisture and temperature level appropriate for each type of plant.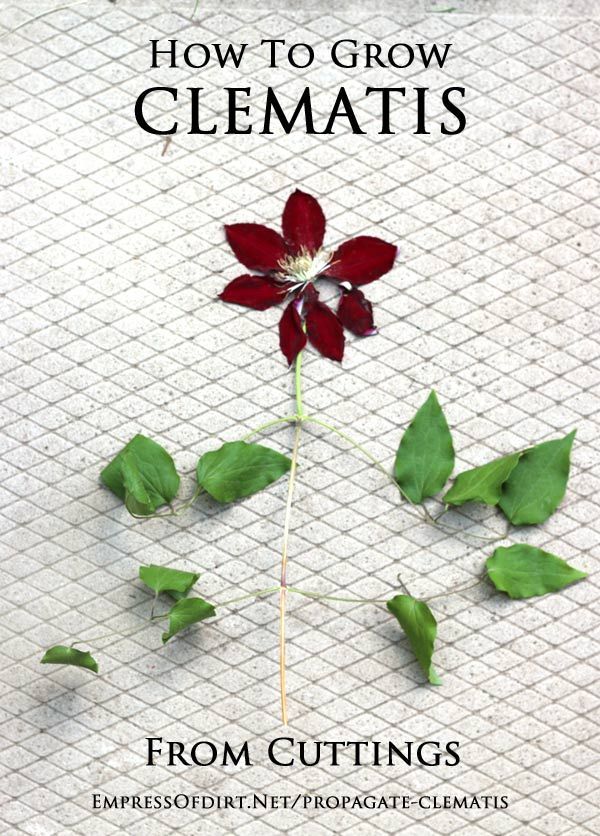 Do some research on the species you are trying to propagate to learn the conditions it likes best. You can make your plant cuttings grow faster not only by providing the conditions they like but also by applying rooting hormone to the cut end, which helps to encourage root production. It's also best to take several clippings to maximize your chances of success.
How long plant cuttings take to root varies widely depending on the type of plant. Many herbaceous annuals will quickly grow to maturity. But cuttings from perennials and woody plants, such as shrubs, can be harder to root and take longer to reach maturity.
Tip
It is possible to grow a plant from a cutting in water. Simply place the cut end down in a container partially filled with plain water, and refresh the water every few days until a substantial root system has formed. However, transferring a water-rooted seedling to soil is not always successful, so it's generally better to plant cuttings straight into soil.
Equipment / Tools
- Razor blade or scissors
- Small container for rooting hormone (optional)
- Pencil or stick
Materials
- 6-inch containers for planting
- Soilless potting mix
- Existing plant (parent plant)
- Alcohol
- Rooting hormone (optional)
- Plastic bag
The Spruce / Loren Probish
How to Grow Plants From Cuttings
-
Prepare a Container
Fill a clean 6-inch-deep container with soilless potting mix to hold cuttings for rooting. A soilless mix drains well and provides suitably moist conditions that encourage the cutting to root. Don't use ordinary garden soil, as it might contain pathogens that can kill the cutting before it ever takes root.
The Spruce / Loren Probish
-
Choose a Parent Plant
Select a healthy parent plant from which to take cuttings. Avoid plants with diseases or lots of drooping or dying foliage.
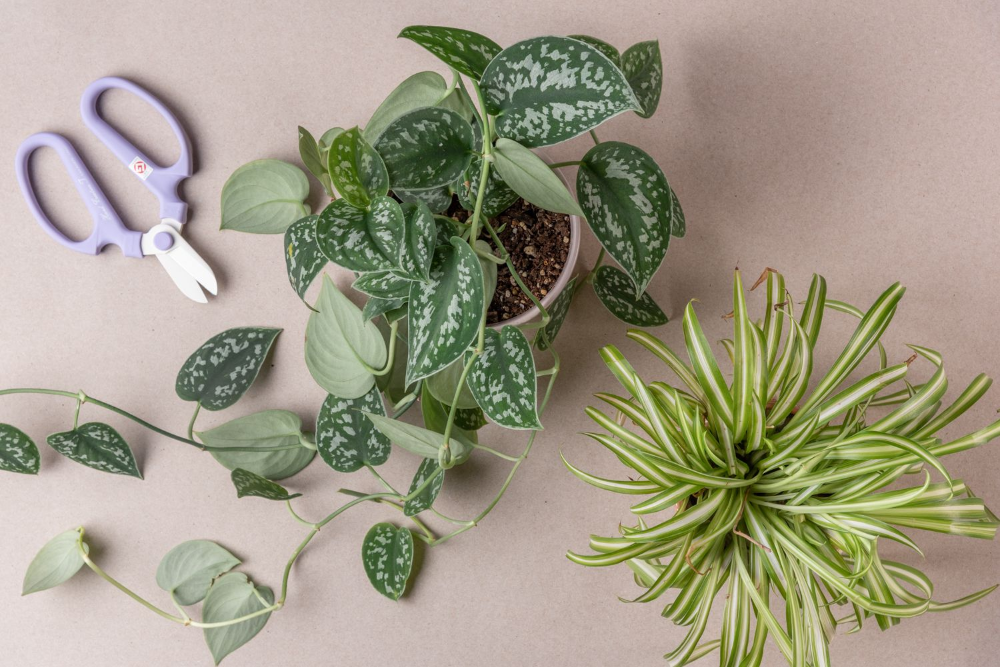 The best specimens for cuttings will have plenty of new growth and be large enough that taking cuttings will not harm them.
 Tip
Good green growth is more important in a parent plant than plentiful flower buds. Too many flowers can actually hinder the ability of a cutting to grow roots.
The Spruce / Loren Probish
-
Find the Best Stems for Cutting
Choose green, soft (non-woody) stems for cuttings. Newer growth is easier to root than woody, older stems. Look for a stem with a node—a bump along the stem where a leaf or flower bud attaches. This point is where new roots will emerge.
The Spruce / Loren Probish
-
Take the Plant Cutting
Use a pair of scissors or a razor blade that has been sterilized in alcohol to make a clean cut just below a node. The cutting doesn’t need to be long, but it should contain at least two leaves and one node. A cutting that is 4 to 6 inches long is usually sufficient.
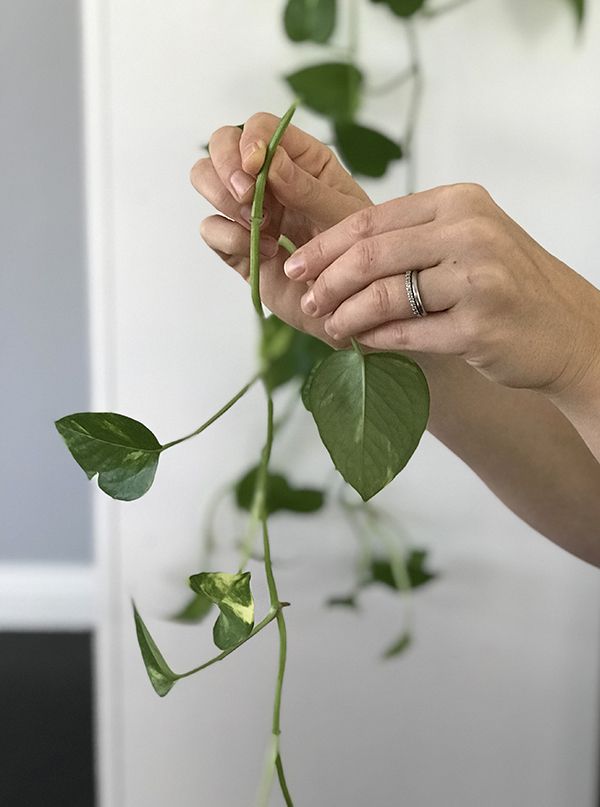 Longer cuttings sometimes dry out when placed in their growing medium.
 The Spruce / Loren Probish
-
Prepare the Cutting
Place the cutting on a flat, hard surface, and make a clean, partial slice through the middle of the node with a sterilized razor blade. Scarring the node will increase the chances of roots emerging from this spot.
Then, remove all but one or two leaves on the cutting. The cutting needs some leaf growth to continue photosynthesis, but too many leaves will consume energy that would otherwise go to root creation. If the leaves are very large in proportion to the stem, cut off the top halves of the leaves.
The Spruce / Loren Probish
-
Apply Rooting Hormone (Optional)
Wet the node end of the cutting, and then dip it in a small container of rooting hormone. Tap off any excess hormone; too much actually hinders chances for success. This step is optional. Some plants root easily on their own, but rooting hormone can help others by stimulating the cutting into sending out new roots.

The Spruce / Candace Madonna
-
Bore a Planting Hole
Use a pencil or similar pointed object to poke a planting hole into the potting mix, rather than planting the cutting straight into the soil. Make the hole slightly larger than the stem diameter. Doing so will prevent rooting hormone from being wiped away when you embed the stem in the pot, and it's also gentler on the stem.
The Spruce / Loren Probish
-
Plant the Cutting in the Soil
Carefully plant the cutting in the hole you made in the potting mix, and gently tamp the soil around it. You can fit several cuttings into one container, but space them so the leaves do not touch one another.
The Spruce / Loren Probish
-
Cover the Pot With Plastic
Place the container with the cutting into a plastic bag. The bag will keep the humidity high and hold in heat. But don’t seal the bag completely because some airflow is necessary to prevent fungal rot.
Keep the container in a warm spot in the house, ideally in an area that has indirect bright light. Don’t put the cutting in full sunlight until new leaves begin appearing along the stem.
The Spruce / Loren Probish
-
Monitor the Cutting
Until roots form, keep the soil slightly moist but not so wet that condensation forms on the inside of the plastic bag. Check regularly for signs of rot, and remove any suspect cuttings as soon as you spot trouble.
After two to three weeks, begin checking for roots by tugging gently on the cutting. When you begin to feel resistance, it means roots have developed. At this point, you can transplant the cutting into its own pot or the ground.
The Spruce / Loren Probish
30 Plants That Grow From Cuttings in Soil
Article Sources
The Spruce uses only high-quality sources, including peer-reviewed studies, to support the facts within our articles. Read our editorial process to learn more about how we fact-check and keep our content accurate, reliable, and trustworthy.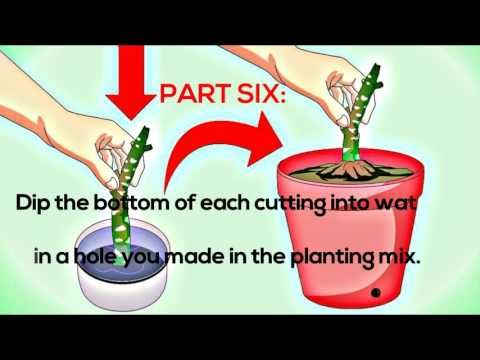
Plant Propagation. University of Maine Extension.
How to properly root cuttings of houseplants
Most houseplants can be propagated vegetatively by cuttings, layering, sucklings or by dividing an adult plant. At first glance, everything is simple, cut off the stalk, stuck it in the ground and wait for it to take root. In fact, such a focus is not always obtained and not for everyone. This job requires experience and skill.
In some people, everything planted grows and prospers, they are called "green hands" in England. Most of us sometimes manage to root a cutting and grow a plant from it, but more often the planting material rots or dries. What you need to know about rooting cuttings in order to propagate your favorite indoor flowers without any problems?
What needs to be done
Before proceeding with cuttings and their rooting, it is important to decide on the following issues:
- Find out what kind of indoor plant it is, whether it can be propagated by cuttings and read tips on how to do it specifically for this species;
- Properly select and cut the stem;
- Prepare the rooting dish and suitable soil for the plant;
- Treat with root growth stimulator if needed;
- Plant a cutting and care for it properly.
Some indoor plants take root easily and quickly. There are no problems with the rooting of balsam, zonal pelargonium, tradescantia, coleus. Large-flowered pelargoniums are more capricious. Ficus and begonias are almost always successfully propagated by cuttings. Azaleas and gardenias are difficult to root. If there is no experience, then it is better to practice on the most non-capricious and easily rooted home flowers.
How to properly cut cuttings.
- For rooting, cuttings are taken from a healthy specimen. Indoor plants affected by pests and fungal diseases must first be cured.
- Cuttings are cut with a sharp knife, lignified shoots with secateurs. Thin and tender stems cannot be cut with scissors, although this seems convenient - the cut is compressed, the tissues are injured and the stalk then quickly rots.
- Cuttings are cut small, they should have 3-4 leaves.
 The length of the cutting itself for different houseplants can be different, it depends on the distance between the leaves. In some species, the apical cuttings take root better, in the majority - the same apical and lateral.
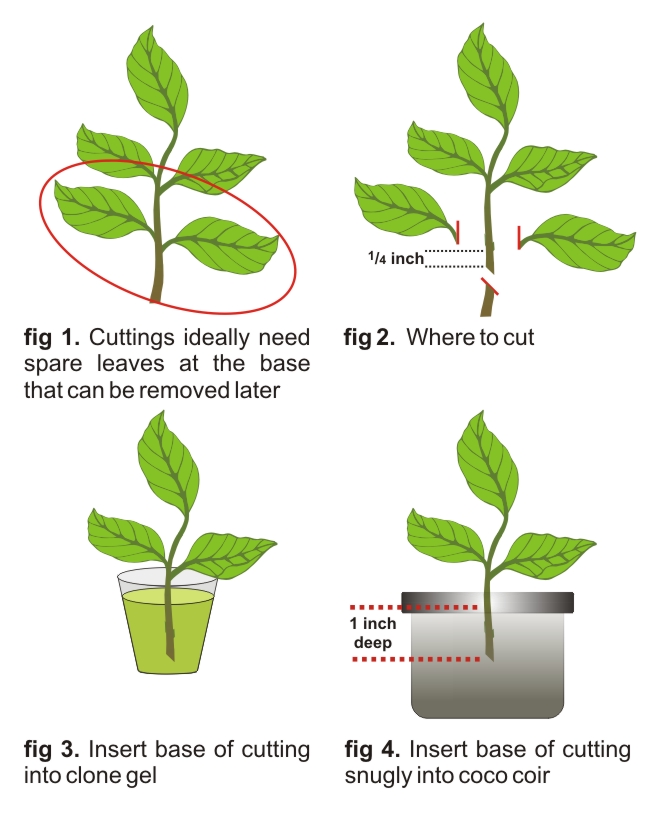
 - The bottom cut must be just below the knot. The stems of many indoor flowers easily break off at the internode, this is the best place to separate. Even better, if the stalk with a "heel" - the place where this branch grew from the main trunk. When rooting in water, you can see that the roots of some plants (balsam or zonal pelargonium, for example) appear along the entire length of the cutting, immersed in water. In others, they grow only from the bottom cut. There are plants in which roots appear only from the node.
- The lower leaves are removed immediately; on contact with damp soil or water, they rot, affecting the cutting itself.
- In some plants, the leaf area is large, planted cuttings evaporate a lot of water.
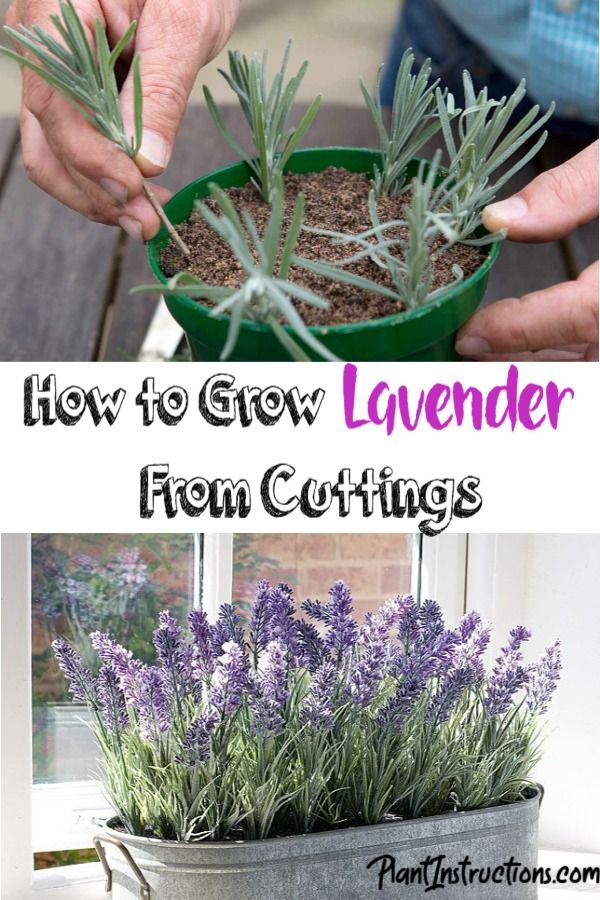 Leaf blades are partially cut off (by a third or by half).
 - If there are buds or flowers on the cutting, they must be removed, otherwise the cutting may simply not have enough strength to form roots.
- Freshly cut cuttings are not recommended to be placed immediately in water or soil. For most houseplants, they should lie outdoors for several hours before planting.
Rooting in water.
The easiest way to propagate houseplants is to cut a twig, put it in water and wait for the roots to appear. But not all plant species develop roots under such conditions. Many simply rot after a while. Saintpaulia, balsam, zonal pelargonium, tradescantia, ivy, coleus are usually propagated in water.
What to root? In any small glass or plastic container. In a glass, for example. It is noteworthy that roots appear faster in dark glassware. The cuttings are placed so that the lower part is immersed shallowly.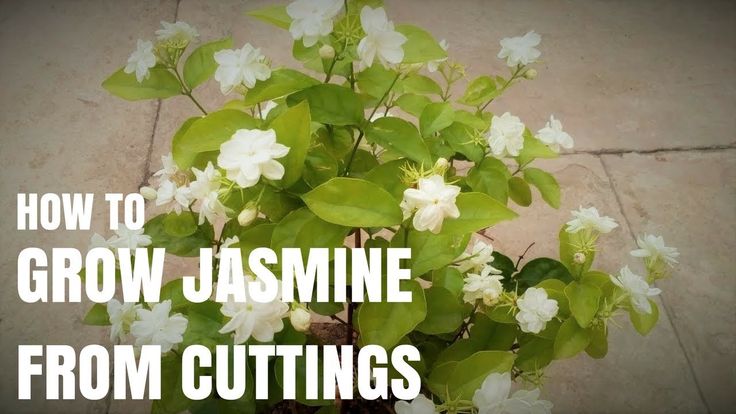 For the formation of roots, the presence of oxygen is necessary, they are formed at the border of water and air. The water level in the glass should be such that the ends of the cuttings are in the water, but most of them are above the water level.
What kind of water should I use? Plain, from the tap. Some advise taking only boiled, it does not contain microbes, but in fact they are brought there as soon as the stalk is placed in it. A plant cannot be disinfected without killing it. In addition, in the ordinary air of an apartment there are more than enough various microorganisms. Melt water is useful, it does not contain salts and is effective for rooting.
Is it necessary to change the water in the vessel with cuttings? No, you should not change the water under the cuttings, but only top up if necessary. Often they die after changing the water. Probably, some kind of stable environment is formed in the glass from the waste products of the plant, which promotes the growth of roots. Saintpaulia leaves, passionflower cuttings, which have already given roots, sometimes die after a change of water. Place an activated charcoal tablet in the water to keep putrefaction at bay.
How many cuttings can be placed in one glass? A little, 1 or 2. The more capricious the plant, the less. In a large mass, the cuttings usually all die. It is worth starting to rot one, as this process will affect all the others.
Rooting in the ground
Some plant species do not root in water. They can stand in it for a month and not let out a single root, while in the ground they will appear in a week. The general rule is that plants from swamps and tropical rainforests are easy to root in water, species from arid areas are best planted in the ground.
Petunias, large-flowered pelargoniums, fuchsias, begonias, hydrangeas, hibiscus are rooted in the soil.
Rooting soil
What kind of soil to use for rooting cuttings? Loose, able to retain moisture well, with neutral acidity. For most crops, a simple mixture is most often used: peat in half with coarse sand. Or another inert soil that is not prone to decay. Perlite and vermiculite, coconut fiber can be added to peat. Sphagnum moss is useful, it has disinfectant properties and retains water well. Too loose soil dries quickly.
Soil sterility . The soil for rooting cuttings of indoor plants should not contain fungal infections and insect pests. Many flower lovers steam garden soil, roast or freeze it. It is safest to buy ready-made soil in garden centers and add roasted sand to it. This purchased land is treated with fungicides and insecticides, which reliably protects the plants for a while.
Soil acidity . The acid reaction of the soil affects rooting. Usually they take earth with neutral acidity in the store. Most types of houseplants take root best in it. Hydrangeas need acidic soil, their cuttings root most effectively in soil with a slightly acidic reaction. The general rule for most plants is that the acidity of the soil for rooting should be close to that required for an adult plant of this species, but a little closer to neutral.
Rooting dishes
Disposable plastic cups are well suited for rooting cuttings. If one cutting rots, then the rot will not be transferred to other cuttings. Through the transparent walls you can see the emerging roots. Be sure to make a drainage hole in the bottom of the glass. At the bottom for free flow of excess water, it is advisable to put a little perlite or pieces of foam.
The disadvantage of cups is their small volume. If you missed a glass when watering, then the cutting may dry out.
Convenient for rooting a large number of cuttings are ordinary seedling boxes or special pallets (cassettes, trays) with cells. In the boxes, moisture is distributed more evenly, the cuttings are more compact and easier to care for.
For small cuttings, plastic food containers with a transparent lid are the most convenient option.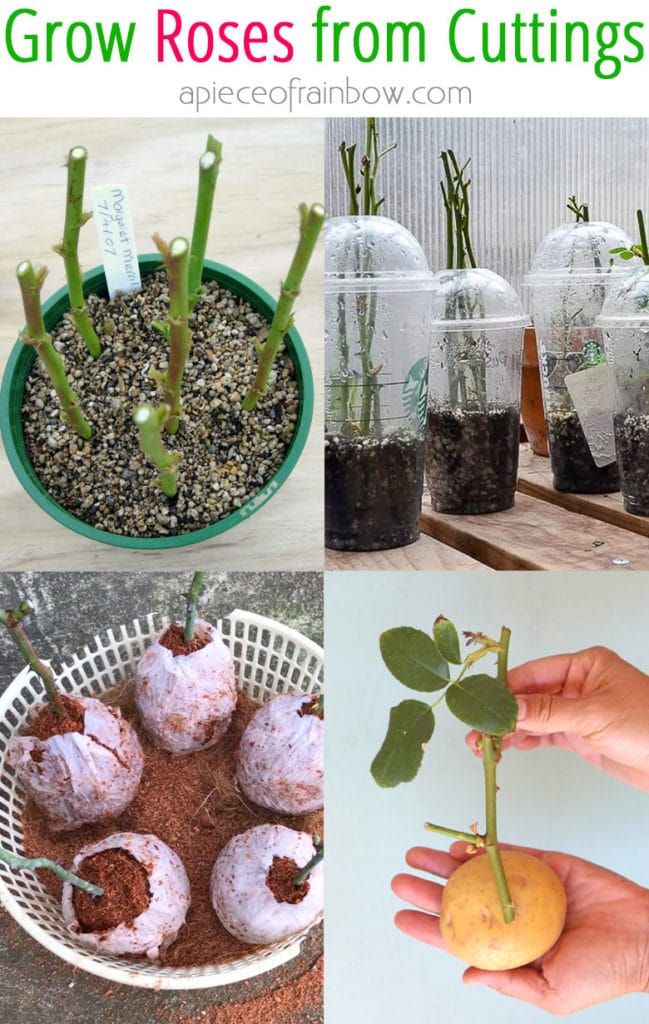 They are quite rigid, the lid is easy to open when airing, it is easy to make drainage holes in them.
When choosing dishes for rooting, follow these rules:
- If the plant does not tolerate transplanting well, take cups;
- If there are many cuttings, their survival rate is low - choose boxes or pallets.
Citrus cuttings, myrtle, oleander are usually planted in boxes. The crowns of these plants need shaping and pruning, after which there are many branches that are quite suitable for cuttings. Not all of them will take root, but some of them will take root.
How to plant a cutting
The question seems simple. At first sight. In some plants, roots grow along the entire length of the stem buried in the soil. The deeper you plant, the more roots you will get. In others, they appear only from a thickening at the cut site, and new shoots will grow from there. This place should not be very deep from the soil surface.
The universal way is to plant the cuttings not strictly vertically, but obliquely, approximately at an angle of 45 degrees. Then the lower end of the cutting is not deep, and a fairly large part of the shoot is in contact with the soil.
Some plants (scindapsus, syngonium, monstera) have large distances between nodes, the cutting length can be 20-30 cm. They are unstable when planted in the ground. Convenient for them are tall plastic glasses or bottles with a cut top. The soil is poured on the bottom of the vessel, and the walls serve as a support.
Some indoor vines are able to grow aerial roots, they root easily when in contact with the ground. Cuttings of Wood's ceropegia, philodendron can be rooted if you simply put them on moist soil, pressing down with pebbles at the nodes, and spray regularly.
Root stimulants
Some growers soak cuttings in a solution of heteroauxin or other root stimulator before planting. Such substances contribute to the regeneration of plants, stimulate the formation of roots in cuttings, accelerate root formation in seedlings and adult plants, and enhance the growth of adventitious roots.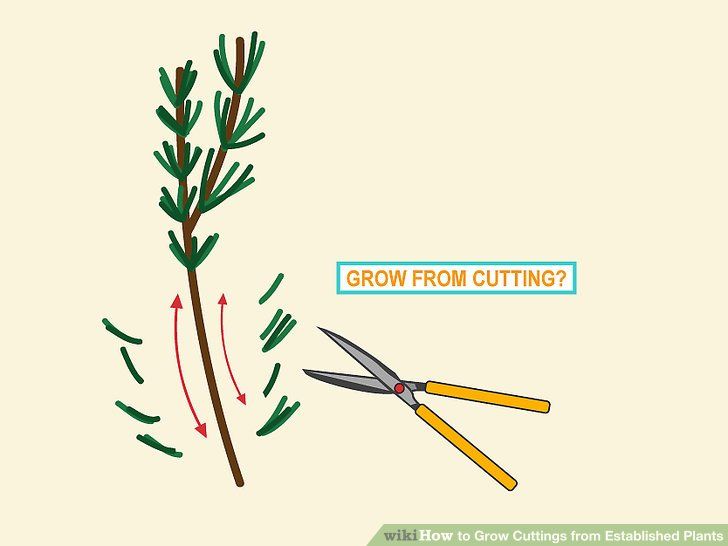 The drugs are different. The cuttings are either soaked in a solution, or sprinkled with powder, or watered under the root strictly according to the instructions.
These root stimulators allow you to get new specimens from cuttings of even the most difficult plants to propagate.
Care of cuttings
90% of rooting success depends on proper care of planted cuttings of indoor plants. Caring for cuttings largely depends on the type of plant, but there are general rules for all.
Moisture retention and watering
Do I need film? Almost always, rooting shoots are recommended to be covered with a film or glass to protect them from drying out, leaving a small hole for ventilation. It is enough to put a small plastic bag on top of the cuttings planted in cups.
This requirement is not true for all plants, but will not hurt, especially in the early days. Succulent plants, as a rule, do not cover anything.
Important ! Always ventilate regularly! How often? If it's cool, it's enough to open it once a day for half an hour, if it's hot and there are a lot of water droplets on the film - 3 times for 10-15 minutes. From excess condensate, the cuttings easily rot. Frequent spraying accelerates rooting, but plants with pubescent leaves or shoots are not recommended to be sprayed.
When the first roots appear, the film can be removed. Spraying continues.
Should I trim the leaves? Plant cuttings with large leaves evaporate a lot of moisture, the soil dries quickly. It is useful to cut the leaf blades of the cuttings in half or 2/3. This is done with cuttings of lemons, indoor roses, hibiscus, gardenia. Fleshy thick leaves do not shorten. They hold moisture well, and when damaged, they begin to rot.
How to water? Film-covered cuttings are watered infrequently, only make sure that the soil is slightly moist. It is better to water with soft settled water at room temperature or a few degrees warmer. When roots appear, the plant begins to absorb more moisture from the soil and evaporate more of it, watering is increased, and the shelter is removed.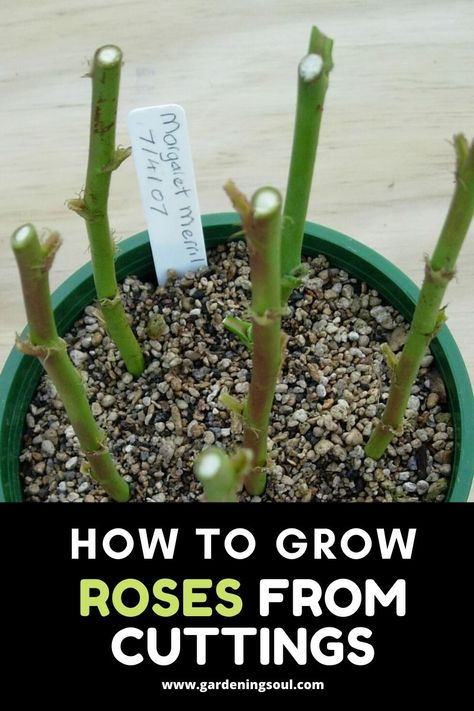
Temperature
The temperature factor is the most important for most plants. Chopped shoots actively develop in the heat. The optimum temperature is 22-28°C. And not only the air should be warm, but also the soil. In winter, even the most non-capricious plants fail to root on cold window sills.
Plants of the tropics require a higher temperature, many representatives of subtropics and temperate climates form roots even at 20 degrees. Very heat-loving exotic species take root only with bottom heating! To do this, a container with cuttings can be placed on a warm windowsill above the battery or you can buy a special box for heated seedlings.
When it's very hot, that's bad too! At temperatures above 30 degrees, most cuttings die.
As soon as you notice the appearance of roots (transparent containers are very convenient in this regard) or the beginning of the growth of a new leaf, it is advisable to lower the temperature to normal room temperature.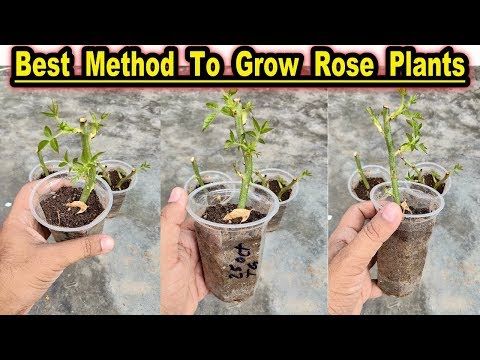
Most houseplant websites advise rooting cuttings in spring or late summer. These tips are correct for most species. And often the point here is not that at other times the roots do not grow. Grow! But during these periods, it is easiest to provide the desired temperature and light conditions without any special tricks.
Lighting
Sunlight stimulates growth. It would be a mistake to put the cuttings in the shade, where the sun practically does not penetrate. There should be a lot of light, but it should be diffused. In the summer heat, it is better not to keep them in the midday sun to prevent overheating. But the morning and pre-sunset rays will benefit, especially the cuttings of sun-loving species (hibiscus, gloxinia, pelargonium).
Some plant species take root from cuttings without leaves (grapes, barberries), they can also be kept in a shady place. The reason for this is that if the cutting was harvested in the fall, at a time when the plant no longer had leaves, then it contains a certain amount of heteroauxin, which stimulates the formation of roots.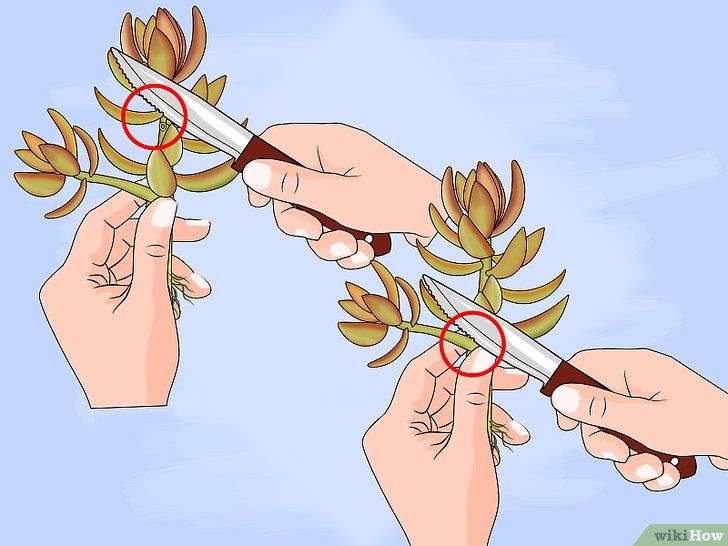
Transplantation of young plants
The resulting seedlings should be transplanted into individual pots. For many plants, this stage is considered the most difficult. Many species do not tolerate root damage. Others do not like changes in temperature or soil.
How to transplant? The rule is simple - rooted cuttings transplant only by transshipment, without shaking off the ground, trying not to damage weak roots .
When to transplant ? Shoots rooted in cups are transplanted when it is clear that the roots are well braided with a clod of earth. If the walls are not transparent, then they are transplanted if roots appear in the drainage hole. Cuttings in a common box are more difficult to separate from each other, they are usually transplanted when they start to grow, they will give a new leaf. Late transplanting from a single cell or cup will not hurt much, it will only slow down the development of the plant a little, while in the box the roots can become so intertwined that it will be difficult to separate them.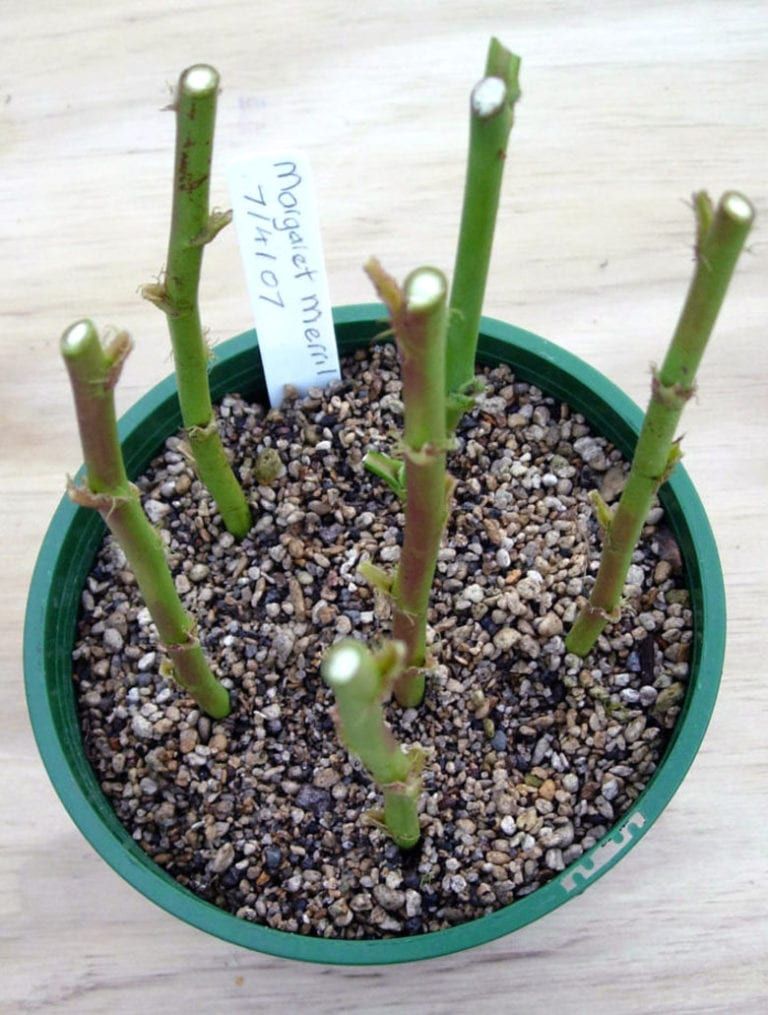
How to adapt? An abrupt change in conditions can destroy plants obtained with such difficulty. If the seedling is moved to another place or to the open air, then before transplanting it must be accustomed to a new habitat. Shelter is removed from him, transferred to another place, first for several hours, then the time is increased. Plants need to get used to both lower temperatures and different lighting.
Unusual ways of cuttings
There are quite exotic, but effective ways of rooting. Often they allow rooting even plants that are difficult to propagate.
For example, in potatoes. To do this, the tuber is thoroughly washed, all eyes are removed from it, and the desired cutting is inserted into the hole made. Then the tuber is buried in the ground, and the stalk is covered with a glass jar or film and watered regularly. At the same time, the cuttings are supplied with a large amount of nutrients and actively give roots, and the plants grow and develop well in the future. Even capricious roses can be rooted like this!
Or, another way: a twig is stuck into a piece of a special floral sponge to prolong the life of cut flowers. It retains moisture for a long time and is treated with special antibacterial substances. For example, it is good to root fuchsia in this sponge.
The burrito method works well for roses. In this way, cuttings can be rooted with a thickness no less than a pencil. Take cuttings with 3-4 buds, remove all leaves. They are treated with a root growth stimulator and wrapped in several pieces in a wet newspaper. The cuttings packed in paper are folded into a dark plastic bag and left for 3 weeks at a temperature of 14-18 degrees. Basement is good. After the specified time, they are taken out, the newspapers are carefully removed. If roots appear on the branches, they are planted one at a time in pots so that the upper bud rises above the surface. The pot is covered with a film to reduce evaporation. The temperature should now be higher than 23-25 degrees.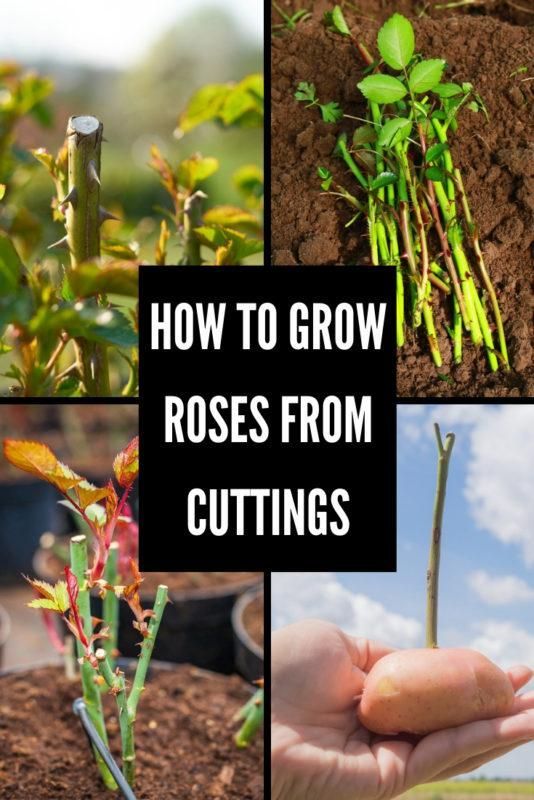
greendom.net
- < Back
- Next >
how to propagate more plants by cuttings
Why is this method so popular? And because the offspring during cuttings will be an exact copy of the parent, will quickly take root in a new place and will please with endurance in harsh conditions. And most importantly, you will receive a new planting material for free.
Types of cuttings
Cuttings are different. Which option to choose depends on the type of plant.
Green cuttings
In most cases, lignified cuttings are used for propagation, but some plants prefer to propagate by young green shoots.
Suitable for: barberry, weigela, hydrangea, deren, viburnum, vesicle, lilac, chaenomeles, mock orange.
How to root. Actively growing young lateral shoots are cut with a sharp knife into segments with 2 to 3 internodes. The lower cut should be oblique at a distance of 0.5 - 1 cm from the kidney. The top cut is straight. It is even more reliable not to cut the cuttings, but to tear them off with the "heel" - the part of the stem from which they depart. Cut off the lower leaves.
Then the cuttings are treated with a root formation stimulator - Kornevin or Heterauxin (1): either the lower part of the shoot is powdered with powder, or the drug is diluted in water and the cuttings are placed there for 6 hours. Then they are planted in a garden or pot to a depth of 2 cm. 3–5 cm of coarse sand must be poured over the ground: it protects the cuttings from decay.
Stem cuttings
This variant is suitable for herbaceous perennials, which use cuttings for propagation. They are cut until mid-summer.
Suitable for: Aquilegia, astilbe, cornflower, gelenium, delphinium, stonecrop, paniculata phlox.
Photo: shutterstock.com How to root. The stems are cut into pieces with two internodes. They are dusted with any root formation stimulant and planted in the ground - preferably in a greenhouse. Such cuttings will take root quickly - if, for example, at the end of June you plant cuttings of panicled phlox, then in August you will get young plants with roots - they can already be transplanted into a flower garden.
Semi-lignified cuttings
These are shoots that have begun to bark at the bottom, but the top is still green.
Suitable for: hydrangeas, rhododendrons.
How to root. At the end of June, the tops of semi-lignified shoots of the current year are cut off and cut into cuttings with two internodes. Cut off the lower leaves. Longitudinal incisions 1–2 cm long are made on the bark. The cuttings are powdered with a root formation stimulator and planted in pots in a mixture of peat and sand in equal amounts. After 2 - 3 months roots are formed, and young plants can be transplanted into open ground.
General rules for cuttings
Each type of cuttings has its own characteristics, but there are also general rules that must also be taken into account.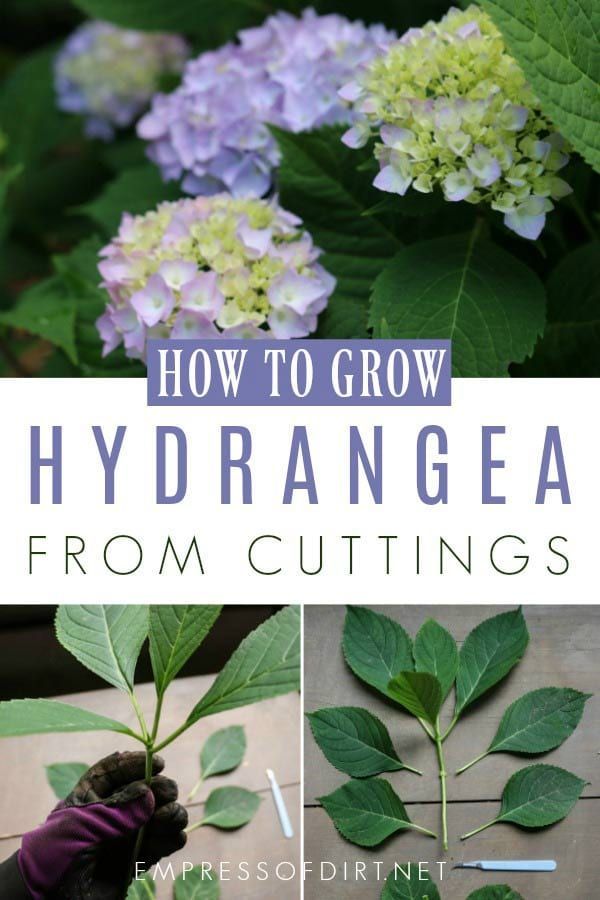
Cut in the morning or on cloudy days. At this time, there is more juice in the cuttings - these take root better.
Cover with bottle. Regardless of where the cuttings are planted - in pots or directly in the garden - they need to arrange a mini-greenhouse. The easiest way is to cover them with a plastic 5-liter bottle without a bottom, or put them in a large jar with a lid (2). Such a shelter will help maintain high humidity around the cutting.
In a few weeks young shoots will emerge from the buds. At the end of summer, they begin to gradually open the bottle so that the seedlings get used to the fresh air, and then the shelter is completely removed.
Spray. One shelter with a bottle is not enough, because it is very hot in summer. Cuttings should be regularly sprayed with warm water. Ideally, daily. It is possible once a week (many people come to the country house for the weekend), but in this case, the soil around the cuttings should be constantly moist.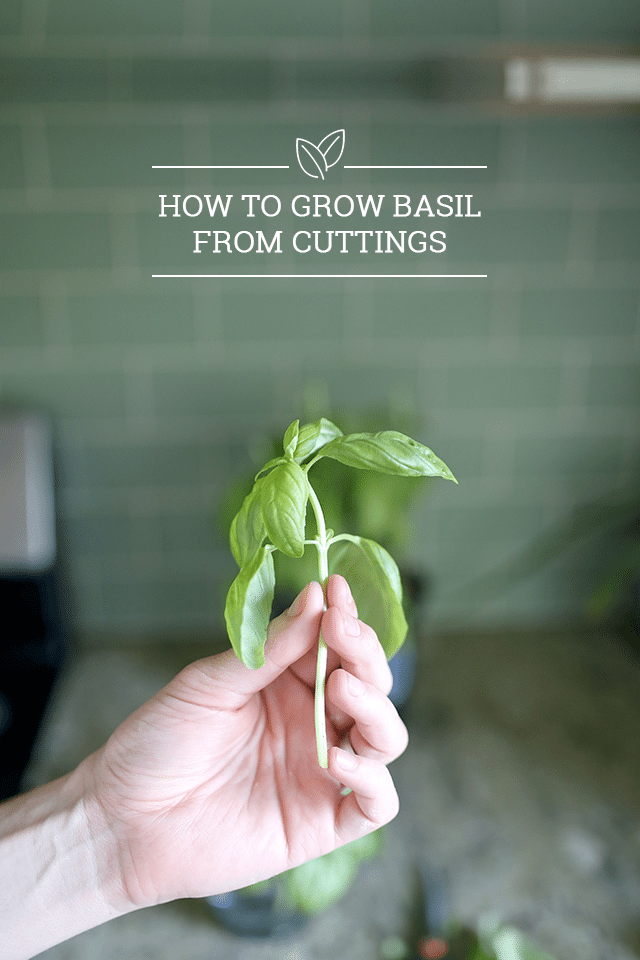 So water them properly.
Protect from the sun. During rooting cuttings should be in partial shade.
Insulate in winter. Winter rooted cuttings are left where they were planted. And so that they do not freeze, in late October - early November, the soil around them is covered with a thick layer of fallen leaves or covered with several layers of non-woven fabric.
In the spring or autumn of the following year, young plants are transplanted to a permanent place.
Popular questions and answers
Typical questions of summer residents about plant cuttings we asked agronomist-breeder Svetlana Mikhailova.
Which fruit crops can be propagated by cuttings?
Many varieties of cherries, almost all varieties of cherry plums and some plums propagate well with green cuttings. But cherries and apricots do not give roots on cuttings.
Can apple trees be propagated by cuttings?
In the vast majority of apple varieties, cuttings do not take root.
