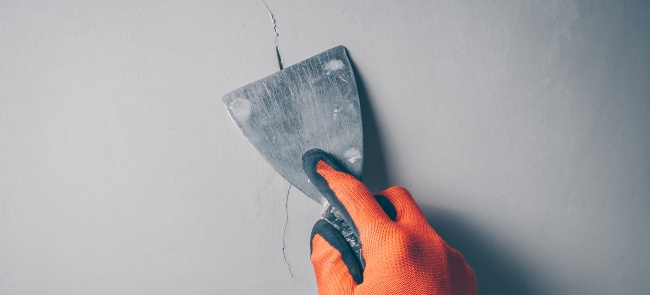
How to fix cracked plaster ceilings
How to Fix Plaster Ceilings
By using modern materials and a traditional technique, it is possible to repair plaster ceilings that are cracking and delaminating. Here is a step-by-step guide to how to fix plaster ceilings in your old house.
- Author:
- Peter and Noelle Lord
- Publish Date:
- Updated Sep 2, 2021
What old-house owner doesn’t have a cracking or sagging plaster ceiling in need of repair somewhere? Besides the normal wear and tear of living, plaster-and-lath ceilings are at the mercy of gravity, and they can take only so many water leaks and structural movements before they pull away from the framing.
The good news is, it’s possible to repair and rescue plaster ceilings from further damage. We have successfully reattached many old ceilings by injecting adhesive between the plaster and lath where the keys (anchors) have broken away over time. Though variations of this technique are not new–texts from the 1920s recommend liquid sulfur as an adhesive–we use modern materials that are easy to handle and inflict minimal damage to sound plaster. With these methods and good tool skills it’s possible to restore the integrity of plaster ceilings for many more years of service.
Sizing up Plaster Ceilings
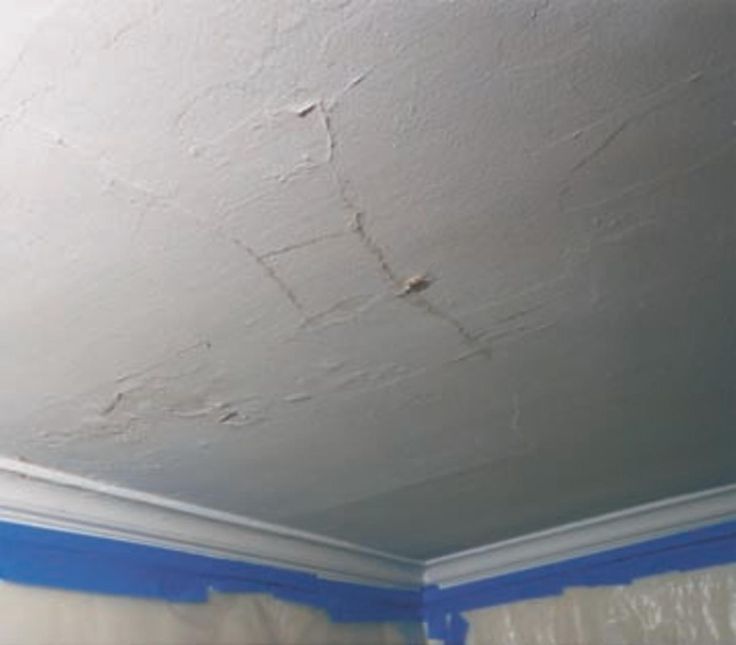
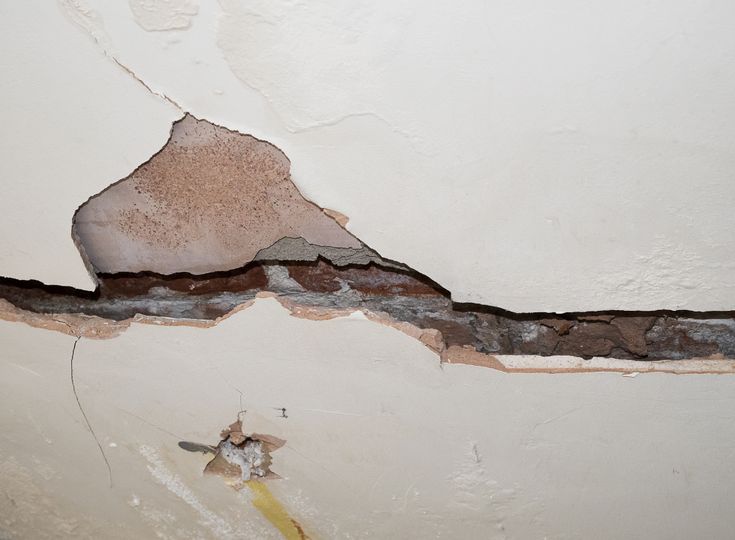
Stained cracks and suspicious shadows—the telltale signs of a delaminating plaster ceiling.
After correcting whatever problem made the ceiling loose in the first place (leaky roof, structural alterations), the first step is to assess how far the ceiling has pulled away. Gently push on the surface and judge the amount of play between plaster and lath. Hopefully, you will feel it move back into place like a jigsaw puzzle piece sliding into its own unique spot.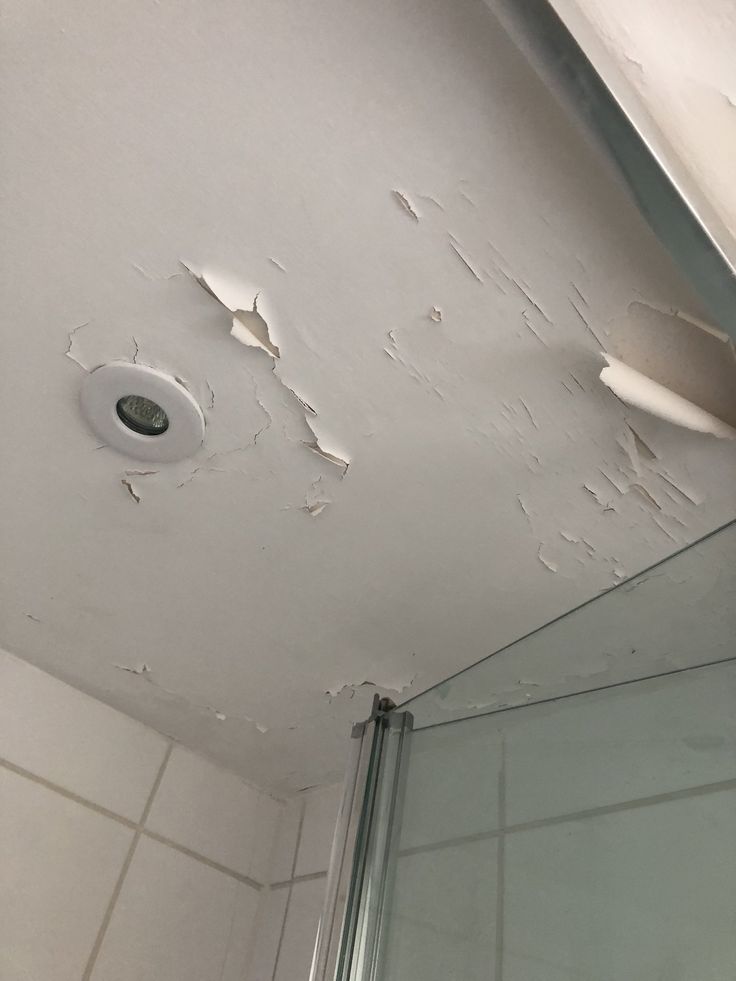
If there are broken keys or debris in the way, the plaster will resist seating, and it will feel and sound “crunchy” akin to breaking eggshells or crushing popcorn. Do not force it back into place or more plaster may break. Instead, just gently encourage the plaster with the flat of your hand. If the separation is slight—say, between 1/4″ and 1/2″—good reattachment is likely because the plaster will usually push back into place solid and flat against the lath. If the plaster sags 1/2″ to 1″ from the lath, there is often too much debris (broken keys, years of silt) between the plaster and lath for success.
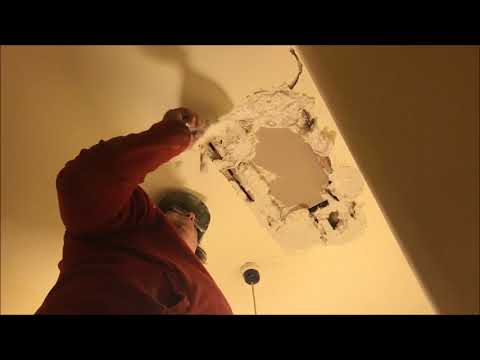
Remove the Debris
Unless you can vacuum out all this debris from above, reattachment is probably not an option. Often we find that the worst part of the ceiling has too much debris, and we have to remove this section, reattach the edges, then infill the lost parts with new plaster. Plaster that is soft and crumbly will not hold up during the pushing and drilling and has to be removed as well.
Holding a vacuum nozzle on the drill bit helps suck the 1/4″ injection holes clear of dust.
Removing areas of damaged plaster—particularly in a ceiling—will encourage more plaster to come down, especially if you use a chisel-edged tool. (We call this the domino-delamination effect.) To control this tendency we recommend carefully marking out your repair plan, then removing any areas with a sharp utility knife. Mark with a lumber crayon or pencil; a pen will bleed through your paint later on.
Find The Wood Laths
The holes you bore to inject the adhesive must be directly beneath the wood lath—not the spaces between the lath—so that the adhesive can bond to something solid. If you have removed any plaster, or dug out a crack for repair, then you can see the positions of the lath. In a reattachment-only repair, however, finding lath is basically hunt-and-peck. Sometimes, if the plaster is not too thick, you can stand back and look for ghosts or shadows of the lath showing through the finish coat.
Once you have a solid fix on one lath, assume that the rest of the lathing is 1 1/2″ to 2″ wide and spaced approximately 1/4″ to 1/2″ apart. If you have an infill area that needs reattachment at its edges, mark for injection sites 1 1/2″ to 2″ back from the edges. If you are only reattaching plaster, plan for injection holes every 3″ to 4″, no more than 6″ apart.
Drill Injection Holes
We bore injection holes with a 1/4″ carbide drill bit. Making these holes presents a second challenge because it is very important to bore only through the injection surface. For example, if you are reattaching from the plaster side, you must bore completely through the plaster, yet stop before going into the wood lath.
The 1/4″ injection hole is an effective size for a good seal with the adhesive tube.
Conversely, if you are reattaching from above, you need to bore through the lath, but stop before the plaster. By paying attention to the changing resistance of the materials on the drill bit, it’s possible to develop a feel for these different layers.
Vacuum Again
After you have bored your injection holes, you need to vacuum out the debris and drilling dust. Older plaster is soft, so be careful not to suck it off the ceiling with the vacuum! Place your hand near the hole to gently support the plaster while you vacuum using the other hand. Do not push the plaster back up into place, however; the void will allow the vacuum to pull some of the debris out through the hole.
If you have access from above, you can vacuum more of the silt and debris. Remove keys that are visibly loose or broken as well. Use a wet/dry shop vacuum designed to handle the fine dust. Plaster will kill a household vacuum in short order. Next, wet the injection holes by either spraying down the lath with a squirt bottle or squirting up into the drilled holes from the plaster surface. Wetting encourages the adhesive to travel farther when it is compressed and will also slow the drying time slightly for a stronger bond.
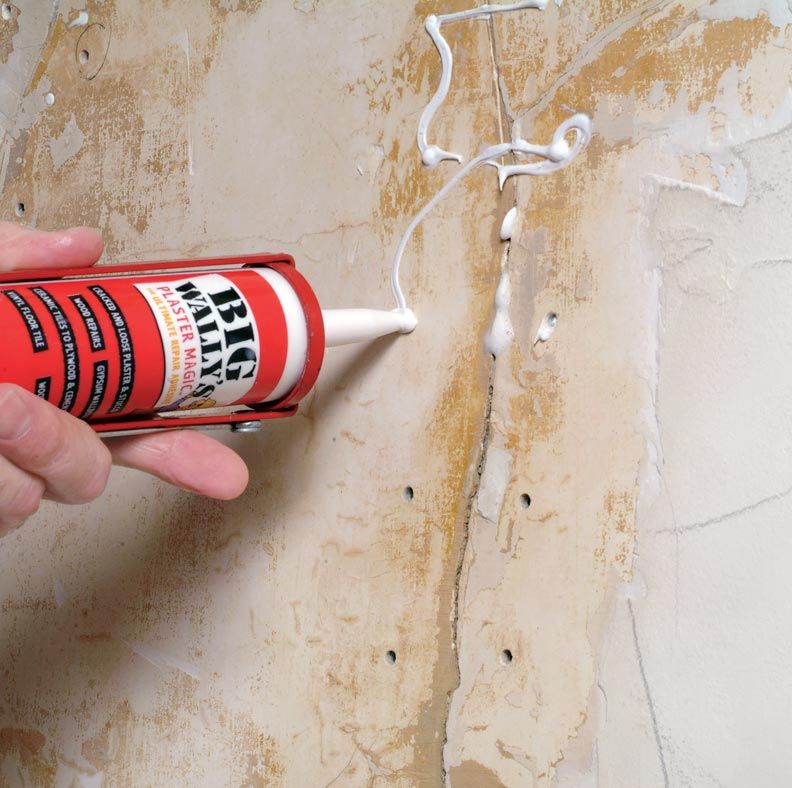
Inject The Adhesive
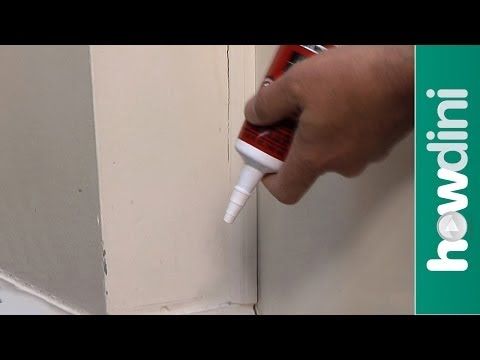
Finally it’s time to inject adhesive.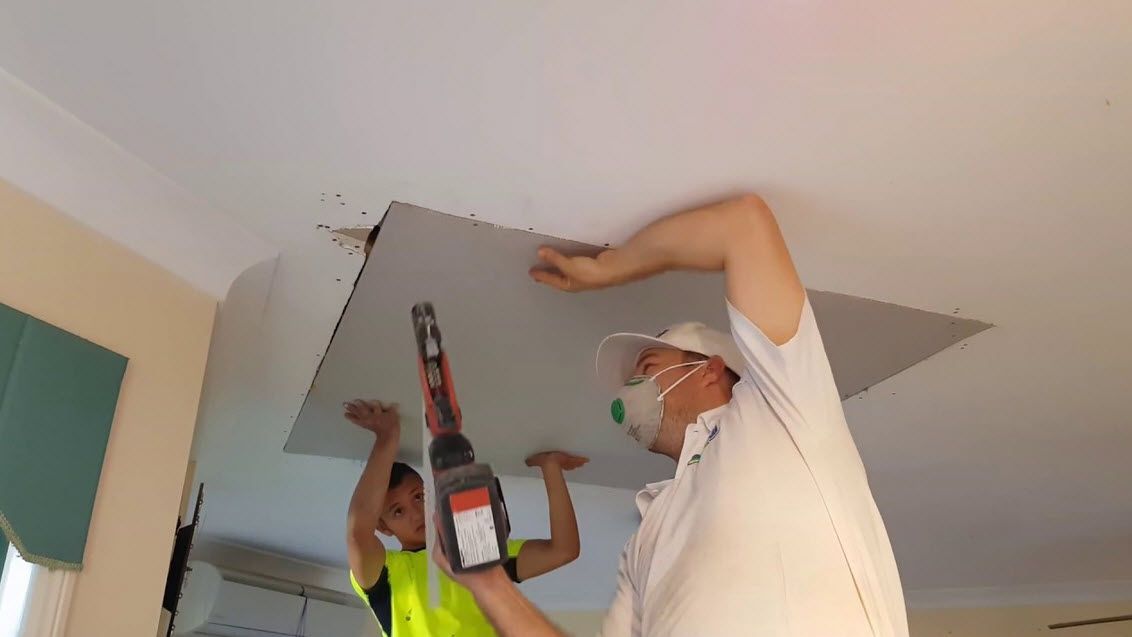 We use a water-based, latex product that is actually a vinyl floor adhesive. However, any good-quality latex or acrylic adhesive can work (for example, Liquid Nails or floor adhesive). You can purchase these products at construction supply houses and hardware stores in caulking tubes for small projects or five-gallon pails for large jobs.
We use a caulking gun with the tip cut to fit snugly in our 1/4″ holes, and inject the adhesive until the plaster moves ever so slightly (one squeeze of the average caulking gun is usually enough). If you inject too much adhesive you will actually push the plaster off the ceiling. As you inject, follow along with a damp sponge to wipe away the excess adhesive that leaves the holes when you remove the nozzle.
Adding wire lath over wood lath improves an infill repair.
Complete your entire series of holes, then go back over the plaster with a clean, damp sponge to remove further glue residue. Follow the same process if you’re working on the lath side, leaving adhesive wipe-up as an optional step.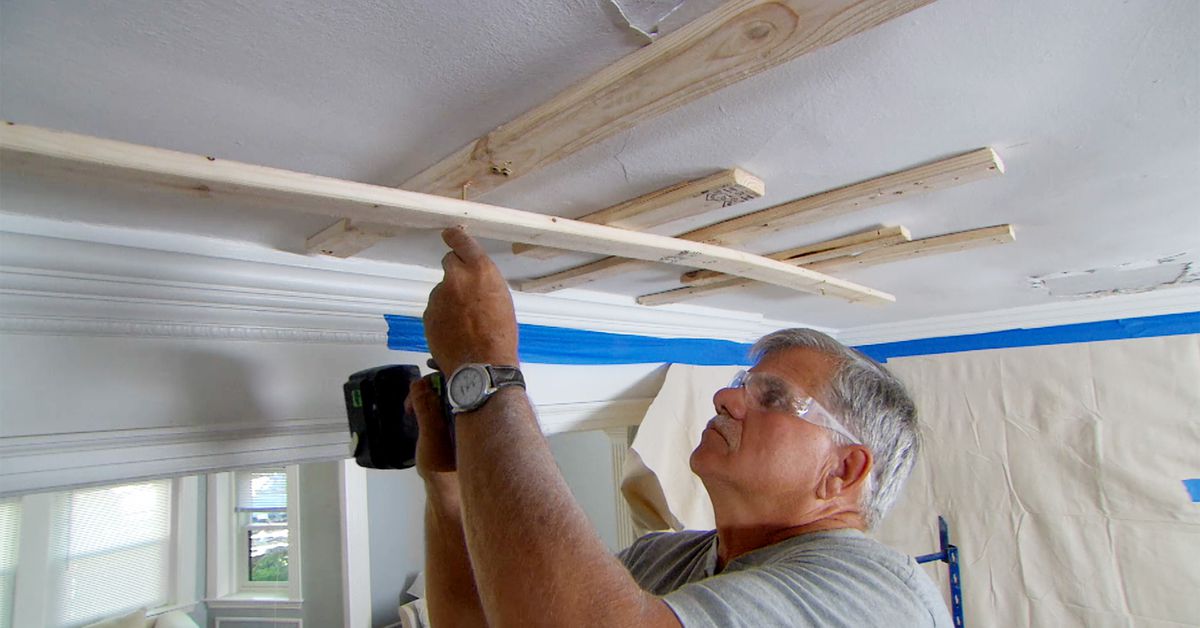
Secure The Plaster With Forms
Once we have injected adhesive into the repair area, we push the plaster back into place against the lath and secure it with forms. This step spreads the adhesive so that it bonds to a greater surface area.
We use flexible plywood squares (1/2″ to 3/8″ thick) covered with a layer of sheet polyethylene. Do not underestimate the importance of this layer of poly; if you forget it you will glue the plywood to the ceiling and take all the plaster with it if you attempt to remove the form. (Sound like first-hand experience?) Last, we secure these in place with screws or wood shores running to the floor, then allow the adhesive to set up for 24 hours.
Screws Versus Shores
Screws save the time of fitting wooden shores and keep the work area clear, but they can damage the plaster and leave more holes to fill later. Shores are more appropriate for fragile, decorative, or museum-quality plaster, and we use them for both plaster-side and lath-side reattachment.
Remove The Forms
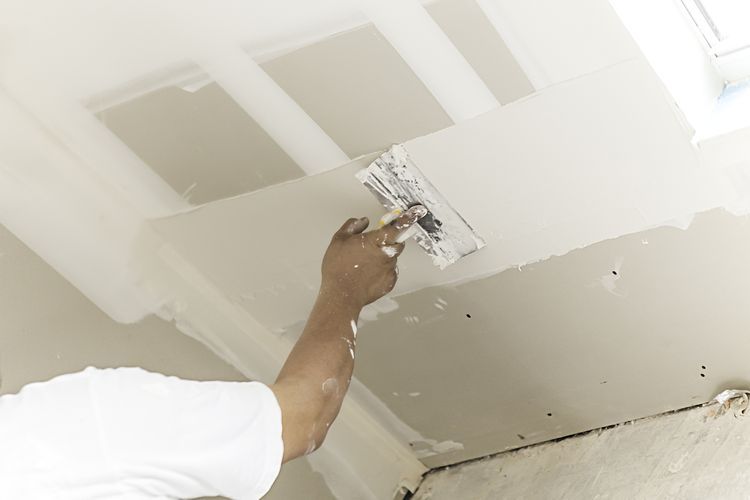
The next day you can remove the forms. Where some of the plastic sticks to adhesive injected from the plaster side, simply scrape it off with a putty knife. The adhesive is still soft around the holes at this point, but has set up enough to remove the forms. On the plaster side, scrape off the dried adhesive residue with a drywall or putty knife, then use the corner of a putty knife to gently scallop out excess adhesive showing from the hole.
Fill the Injection & Screw Holes
As with all good restorations, a successful repair is hard to see.
As it dries fully over another day or so (depending on heat and humidity) the adhesive will further retreat into the hole, leaving a clear space to fill. We usually fill the injection and screw holes with Durabond 45 (sandable), mixed to the consistency of peanut butter, because this product has a quick set-up time and dries very hard with minimal shrinkage. However, any vinyl paste filler or plaster/joint compound can be used for this step.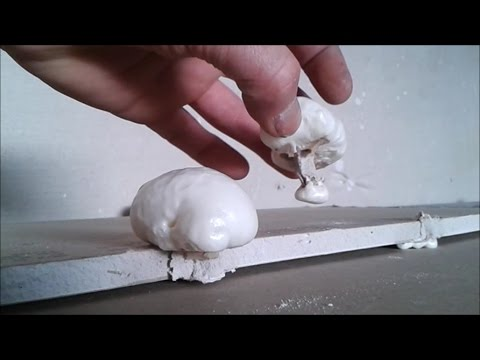 Usually, it takes two to three applications to fill the holes flush with the ceiling, depending upon the product. Other than this, the ceiling is now reattached and ready for a skim-coat of plaster or a fresh coat of paint.
Read more:
- Plaster 101: DIY Repairs, Tools & Techniques
- Repairing Historic Flat Plaster Walls & Ceilings
- How to Repair Failing Plaster
- How to Repair Plaster Cracks
- How to Repair Textured Plaster
Tags: adhesives ceilings Noelle Lord OHJ January/February 2001 Old-House Journal Plaster repairs
restore its smooth surface |
When you purchase through links on our site, we may earn an affiliate commission. Here’s how it works.
(Image credit: Getty Images)
By Tara King
last updated
Wondering how to repair a plaster ceiling? There are a few different ways you can do it.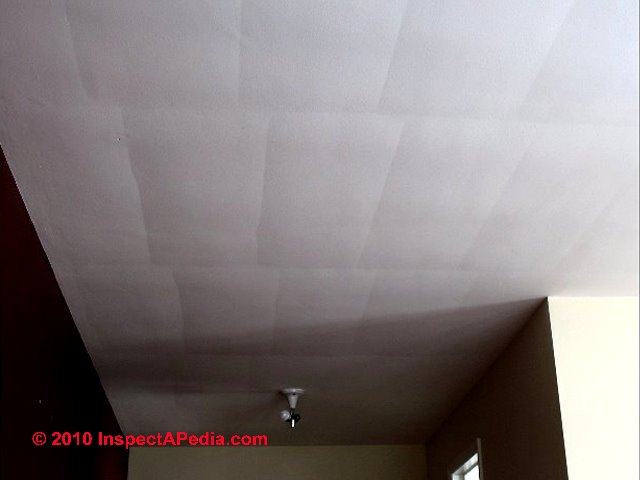 Which method you use ultimately comes down to the cause of the damage and how extensive it is (and sometimes the structure of your ceiling, but more on that later), so it’s always best to start with a little investigation.
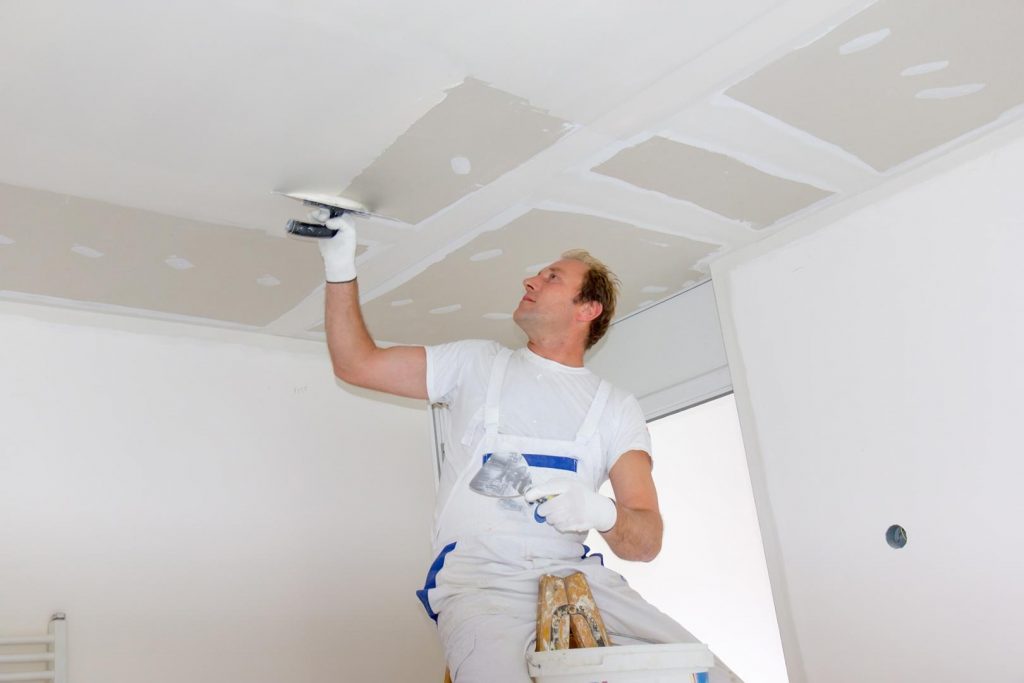
The good news is that in most cases, it’s relatively simple to restore the surface to its smooth former glory, meaning that you won't have to plaster a ceiling in its entirety.
‘You can usually scrape away any cracks or holes in the plaster using a putty knife and then repaint the area. Another option is to patch up smaller areas that are damaged using drywall compound or spackle. If the damage is particularly severe, replacing the ceiling altogether might be the best route to go down’, says Luke Lee, co-founder of Ever Wallpaper .
In this case, learning how to patch a drywall ceiling or how to hang a drywall ceiling can prove useful.
How to repair a plaster ceiling
Before you start fixing, it’s worth establishing the structure of your plaster ceiling, and find out, perhaps, why your ceiling is cracking.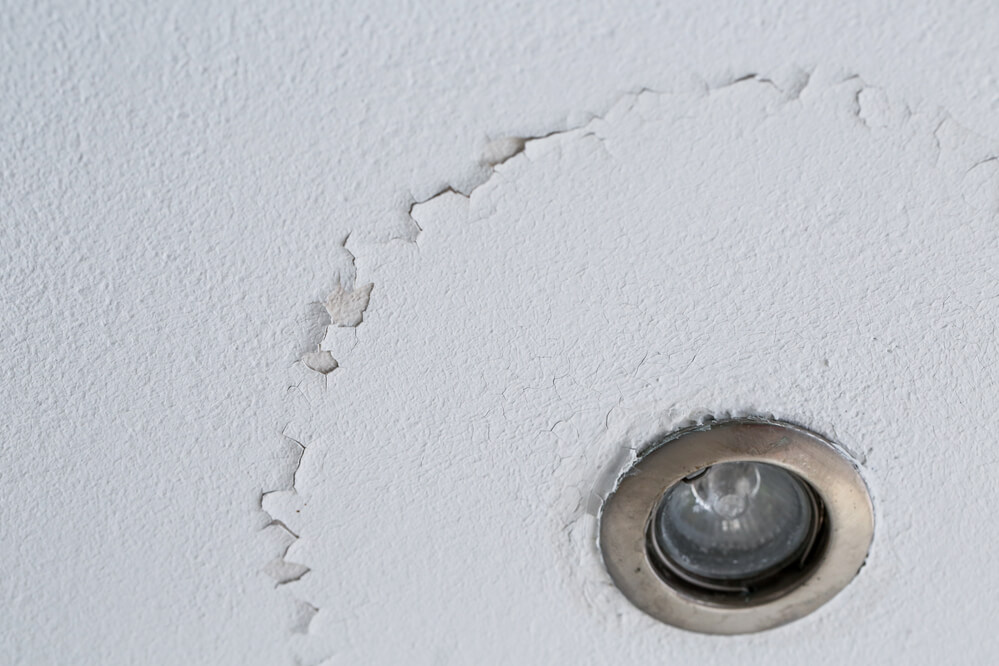 Moisture could be the cause, in which case you’ll need to know how fix a ceiling with water damage. Modern building methods have seen traditional lath-and-plaster ceilings replaced by drywall or plasterboard that’s then skimmed with a thin layer of plaster to achieve the same smooth surface. Repair methods will vary depending on the type of plaster ceiling you have in your home.
Whether the damage has come as a result of fixing a ceiling leak, shoddy DIY work, simple wear and tear or something a little more serious, we’ve put together an easy guide to help you recognize the warning signs and know how to repair a plaster ceiling accordingly.
Track down the cause of the problem
Before you start any repair work on your ceiling, you’ll need to work out what caused the damage in the first place. Sometimes it’s obvious; unsightly yellow stains are a clear sign of a moisture problem, so you’d be best off researching how to fix a ceiling with water damage for example. Other times it can be a little trickier.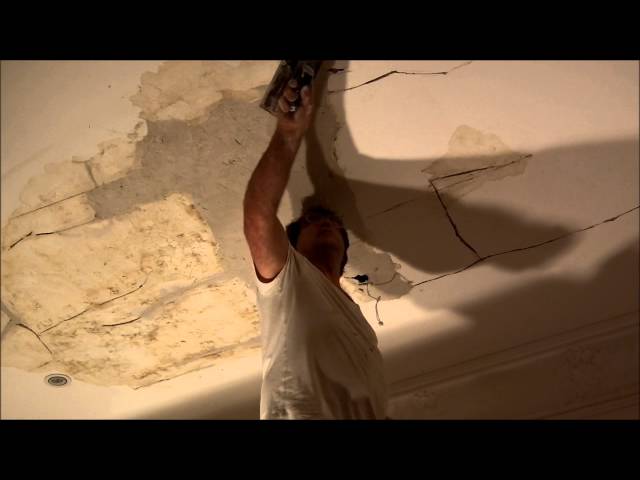
The cause of a crack in a plaster ceiling is more than likely cosmetic, occurring due to changes in temperature or as a result of DIY work, for example. However, it’s better to investigate.
‘While minor cracks are usually nothing to worry about, thicker ones (anything more than 1/10 of an inch) can be a warning sign that structural problems may be afoot. In this case, you should bring in a professional to inspect in more detail’, says Ash Reed, interiors expert at Living Cozy .
If the crack in question traverses the wall as well as the ceiling, you will want to know what causes cracks in walls to help solve the problem.
Only once you’ve established the cause – and resolved any issues – are you in a position to think about how to repair a plaster ceiling.
Protect the area
Regardless of the extent of repair work necessary, you’ll need to wear protective gear including a face mask and goggles, particularly when working with old plaster. Cover walls and furniture with plastic and lay down drop cloths so any dust and scrapings can be easily cleaned up afterwards.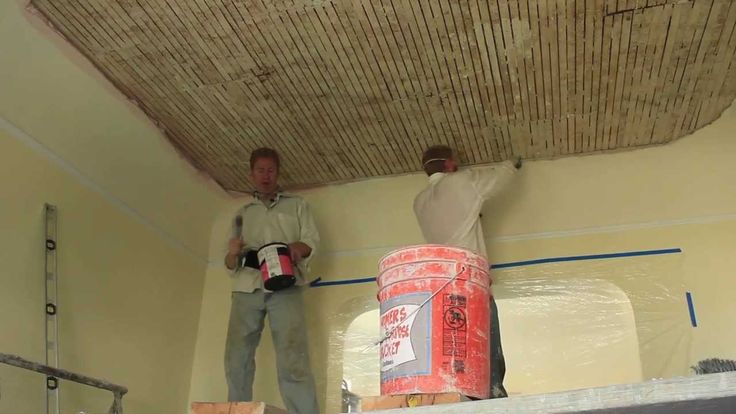
How to repair cracks and holes in a plaster ceiling
Cosmetic issues such as repairing nail holes and gouges caused by DIY work and fixing ceiling cracks that are fine in a plaster ceiling are relatively easy to deal with. It may seem counterintuitive, but the best thing you can do is to make the crack slightly wider. ‘This will ensure you get enough easy sand into the crack for a substantial strong fill’, explains Nicholas Smacchia from Westchester-based company, Plastering by Nicholas .
Ensure you have brushed out any debris before applying joint compound or filler with a putty knife, scraping off the excess as you go. After applying several thin layers, let it dry and sand the area to create a flat, smooth finish. Then prime and paint to match the wall.
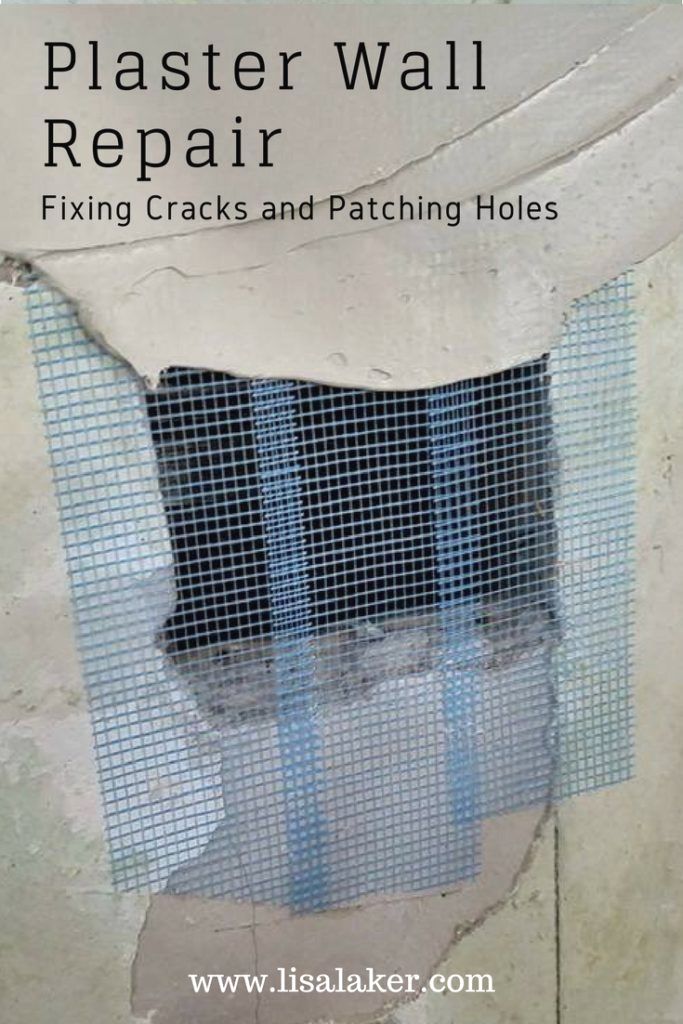
For wider cracks, consider applying mesh or fiberglass tape over it before spreading joint compound over the top and smoothing out. This same method works for small holes, too.
How to repair a sagging plaster ceiling
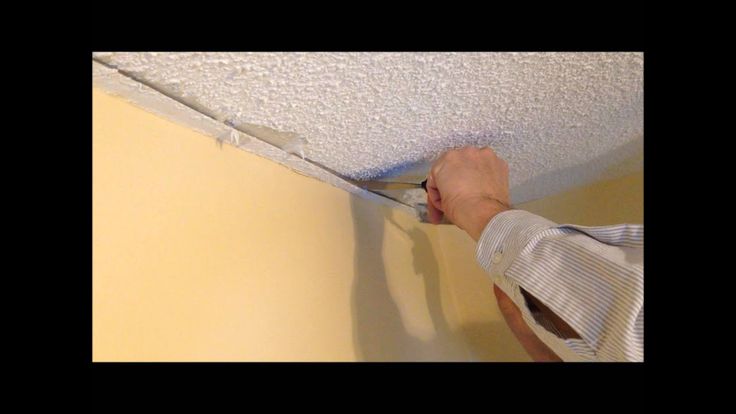
Typically found in older homes, traditional lath-and-plaster ceilings are formed by nailing strips of wood or metal mesh (referred to as laths) to the ceiling joists to form a strong base, then adding layers of plaster on top.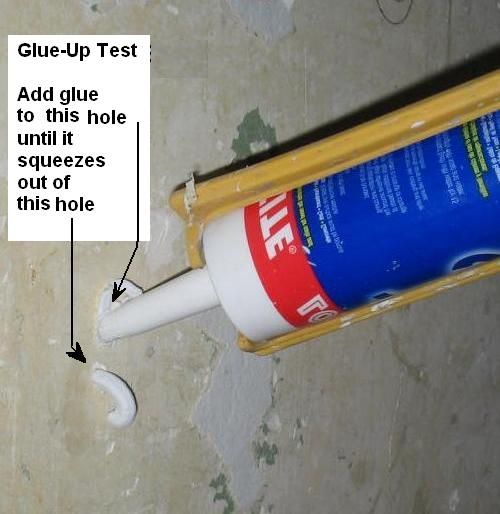
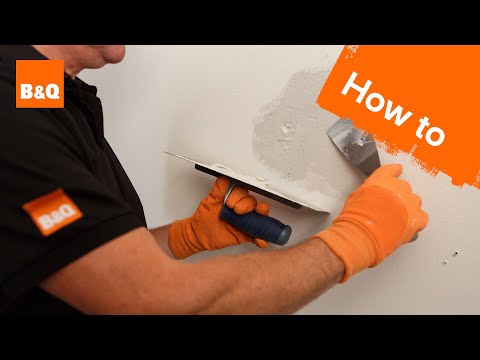
Over time, plaster can dry out, weaken and lose its holding strength, and the laths can start to pull away. The first sign of this is sagging or bulging plaster. We’d advise calling in a professional for a job like this, however, it you want to attempt it yourself, here’s how the DIY experts at B&Q advise you do it:
‘Prop up the sagging plaster using a flat piece of chipboard or plywood nailed to a length of 38mm-square timber. This should reach from the floor to the ceiling. Lift the floorboards in the room above and vacuum between the joists over the bulge to collect up loose plaster.
'Mix fairly runny boding undercoat plaster and pour it over the damaged area to replace the broken plaster. Leave the supporting prop in place until the plaster has dried and bonded to the laths’.
You can then either remove the old plaster or leave it in place and reface the entire area with a new drywall.
Does water damaged plaster need replacing?
It depends. If modern plastering applications have been used, you’ll need to assess whether the drywall underneath has suffered extensive water damage. Indicators include large holes or sagging in the ceiling, as well as mold and discoloration.
‘In this case, the ceiling would need to be fully replaced, including structural elements such as beams’, says Adam Graham, construction analyst at Fixr .
Repairs aren’t usually that drastic, however. Assuming the water damage is surface-level and the laths are still intact, you can simply replaster over the top.
Can you repair part of the ceiling?
If only a small part of your ceiling is affected, you can make a simple repair with a plasterboard or drywall patch. Cut out the damaged area of plaster, then use drywall to patch it, securing it in place with drywall screws.
‘It’s a good idea to take off the old plaster before you buy the plasterboard to make a repair patch. Then you can choose the thickness closest to the depth of your plaster’, say the DIY experts at B&Q.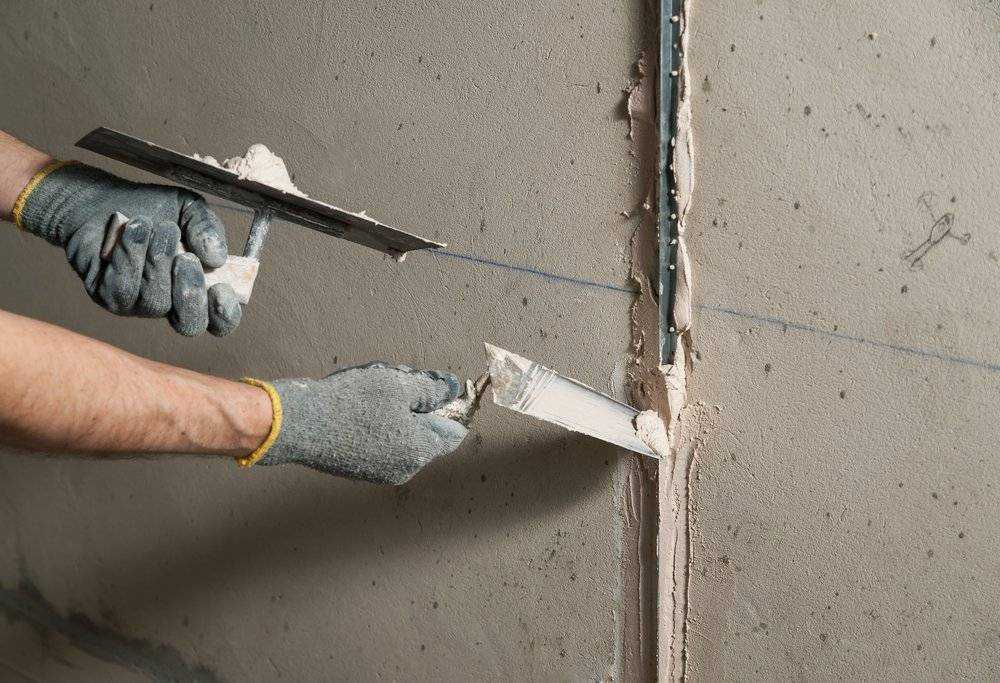
Can I fix my own ceiling?
It depends on the extent of the repair work required and the finish you’re expecting. Minor issues such as cracks and water damage are easy enough to DIY, however, larger fixes should be dealt with by professionals to ensure the ceiling is repaired to recommended safety standards.
‘Whether you decide to do the work yourself or hire an expert, it's important to address repair issues as soon as possible. Leaving them unaddressed for too long can lead to costly problems further down the line’, says Luke Lee.
For 10 years, Tara King worked as a Content Editor in the magazine industry, before leaving to become freelance, covering interior design, wellbeing, craft and homemaking. As well as writing for Ideal Home, Style at Home, Country Homes & Interiors, Tara’s keen eye for styling combined with a passion for creating a happy – and functional – family home has led to a series of organization and cleaning features for H&G.
Ways to eliminate cracks in a plasterboard ceiling - the causes of occurrence
One of the commonly used building materials for finishing the ceiling surface is drywall (gypsum plasterboard).
The material won its popularity due to its excellent technical characteristics, in particular environmental friendliness, ease of installation and the ability to create the most incredible structures, niches, arches. But there are cases when, after repair, cracks appear on the plasterboard ceiling. How to repair a crack in a plasterboard ceiling with high quality will be described below. nine0003
Contents
- 1 What Causes Cracks in Plasterboard Ceilings
- 2 Repair Materials and Tools
- 3 Preparing for Grouting, Checking the Ceiling
- 4 Like it? 9 Repairing Cracks Share on social networks!
- 6 ������� �������
- 7 ������� ���������� �����������
- 8 Causes of the phenomenon
- 9 Ways to eliminate damage
- 10 Causes of cracking joints on ceilings
- 11 Fixing shallow cracks
- 12 How to fix deep cracks
Causes of cracks in plasterboard ceiling
Among the most common factors that can provoke these troubles are:
- Simultaneous measures taken to install the air conditioner, heating system and puttying.
 With changes in the temperature regime in the room during repair work, cracks often form on the ceiling after 2-3 days
 - Non-compliance with the installation rules when installing a plasterboard structure. A common mistake is the incorrect location of metal profiles - too much distance between them. Poor quality putty can also lead to trouble. The integrity of the plasterboard ceiling can also be violated by non-observance of the sequence in actions, for example, the installation of lighting fixtures and the design of openings for ventilation were made after sealing the seams
- Gypsum ceiling installation too rigid to walls or columns. With this approach, there is a “movement” of the ceiling in the space of the joints of the ceiling and walls. The bottom line is the appearance of lines of distortion that went along the seams between the drywall sheets. Since the main profiles were attached to the rails with self-tapping screws, and the sheets were fixed to the rails, which determined the excessive rigidity of the finished structure.
 nine0012
 - "Dry" method of mounting ceiling structures to the overall parts of the gypsum board. It would be better to use delimiter tape and putty to separate these structures. That is, the joint had to be performed not close to the treated wall.
- Incorrect laying of reinforcing tape. You must first apply the right amount of putty under this tape to create a strong bonding layer and remove the resulting air bubbles. To correct the error, you will need to do everything again with better quality. nine0012
- Use of insufficiently well-dried grating or solid flooring made of natural material - wood. Due to the deformation during shrinkage of new rafters or beams, prerequisites arise for significant sheathing shifts, which leads to the appearance of cracks.
- The presence of dust particles on the seams does not allow them to connect well with the putty. How to fix cracks in a plasterboard ceiling in this case? It is necessary to use a deep penetration primer before filling measures.
nine0012
Materials and tools for repairs
To repair the defects that have arisen on a plasterboard ceiling, you will need a whole set of construction tools and knowledge of the technology for eliminating such troubles. Tools include:
- hard spatula
- special hard knife
- chisel for cracks
- sandpaper
- special diamond mesh
- spatula with a width of 100-150 mm
- composition Uniflot or Funefuller
- paint roller
- deep penetration primer
- water spray bottle
- containers for paint, primer
- quality paint
Once you have the tools you need, you can begin repairing cracks in your drywall construction.
Mortgage preparation, ceiling inspection
To understand how to repair cracks in a plasterboard ceiling, it is recommended that you familiarize yourself with the construction sequence. First of all, it is necessary to assess the size of the problem, the condition of the plaster layer, determine the true depth and width of the gap formed.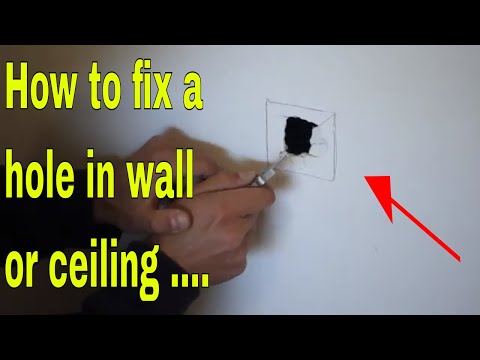 nine0003
Preparatory work to eliminate defects begins with the removal of loose plaster sections, it is removed to layers that have retained their strength.
Cracks caused by the displacement of ceiling slabs must be well cleaned of plaster, decorative coating, putty, etc. You can remove the crumbling layer with a knife or spatula.
The resulting gap between the sheets of drywall must be freed from the reinforcing material and cleaned with a sharp knife, after chamfering the edges of adjacent boards. Surfaces to be corrected should be cleaned of dust particles by using a spray bottle with water. Modern putty mixes made on the basis of building gypsum have a low level of adhesion to a dry surface, so it is advisable to wet the surface to be sealed. nine0003
To find out if there will be cracks in the ceiling in the future, it is necessary to stick paper beacons on the crack. If after 2 days the paper remains intact, then you can start repairing defects.
Large sections of the ceiling will need to be replaced if errors are found during installation of the drywall construction.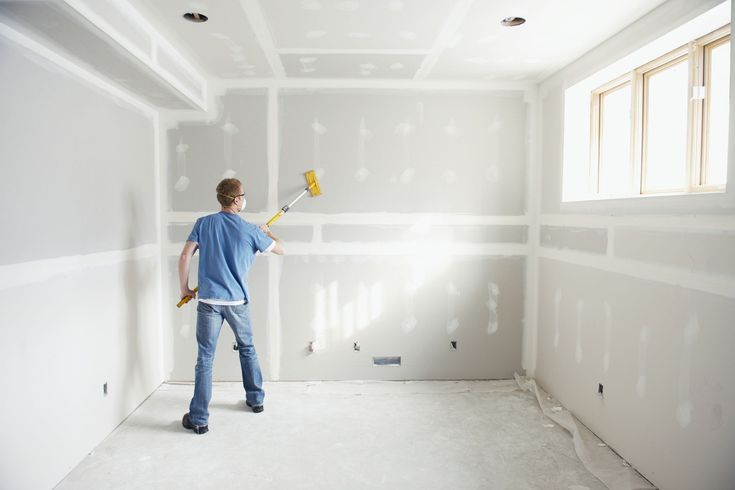
To repair and reinforce the framework, all drywall is removed and the primary ceiling is created. The level of the new surface must completely coincide with the rest of the sheets, and the joints must be carefully sealed. nine0003
Fixing a crack
So, how to fix cracks in a plasterboard ceiling.
Step-by-step instructions:
- After cleaning and preparing the surface, treat it 1-2 times with a primer emulsion of deep penetration;
- Prepare the working solution (putty) following the instructions on the packaging;
- Fill gaps. Perform all actions carefully, leveling the putty well with a spatula;
- Leave the repaired area to dry overnight; nine0012
- Using sandpaper, finish the surface to the maximum smoothness;
- The corrected plane is ready for finishing (painting, wallpapering, etc.).
This option is suitable for patching shallow gaps.
Larger cracks require the use of a sickle.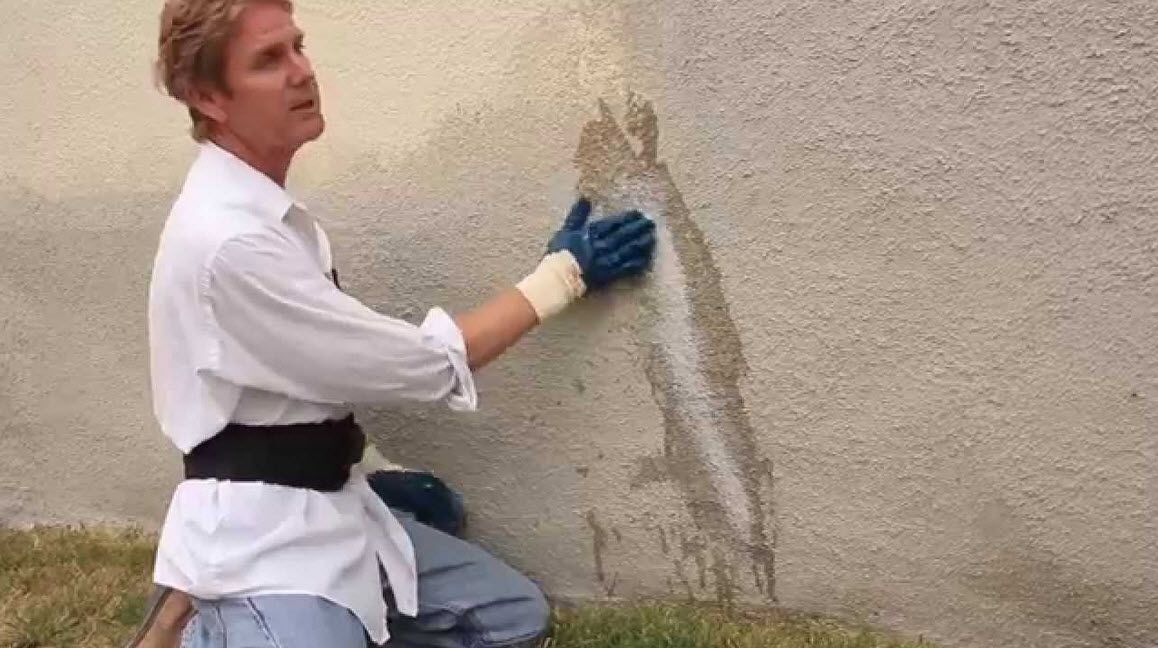 The sealing process consists of:
- Filling deep gaps;
- Sickle stickers;
- Re-filling after the first coat has dried; nine0012
- Grouts and paints.
Preferably paint the surface with the same paint as for the first finish, from the same manufacturer. This is an excellent solution when repairing a badly damaged surface.
In the most difficult situations, when it is necessary to close pronounced defects, you can use various waterproof sealants, mounting foam. Especially these measures help with the possible risk of leaks from above.
Alternatively, to remove the crack, you can make a special bandage from linen or cotton fabric. A strip of fabric should not only cover the gap, but also cover its edges by at least 2-3 cm.
To prevent shrinkage of this bandage, it must be washed and ironed. After that, the fabric is moistened in a container with an adhesive composition, squeezed out and applied to the repaired area. The strip is leveled, puttyed after drying.
After studying the above information, it becomes clear how to remove cracks in the plasterboard ceiling after painting.
Did you like it? Share on social networks!
����� �� ������ ��������������, �� ����� ������� ������ ��������� ������� �� ��� ������� �� �������� �������. nine0003
���, ������, ������ ��������. ��������� ��������, ���� � ��������� � ������� ���������� . ������ ���������� ������ �� ������, ���������� �� ������ ������, � ���� �� ���� ����������, ���� ���������� � ���� ���� �����.
������ ��������
�� ������ ����, �������� ������ ������ ���� ������� � �������� ����������� ������� �������� � �� � ���������� �������� ���������� ���� � ����� ������� �� � �������������� ����������, �������������� ���� �������� �������. ��, ���� �������� �������� ������, ���� �������, ���� �� �� �� ��������������, �� ���������� �������� ���� ������ � �������. nine0003
- ������������ ������ ����.
 �� ���� �� ���������� � �������� ������ �� ���� �������� ���� ����� �������� � ��������������.
 - ������������ ������ ������ ��������������. �������, � �������� ������ ���������� ����������, ������ �������������� �� �� ����������, � ������. �� ���� �������� �������� ������������.
- ����� ��������� ���������� ������� �������� ���������� . �� �� ���������� ������ ������ ������ �� ���������� ���� ��������� ���� ��� ��������.
- ���������� ��������. ����� �������, � ������ �������, ������� � �������������� ��������������� �������. nine0012
- ������� ��������. ���� �������� ������������ �� ������ ������ ������, ���� ���, ������������ ������ ������ �������� �������� ������ ��, �������� �������� � ���������� ������ ���� �� ������ �� ����������, �� ������ �� � ����.
. ��������, ������ ��������, ���������� ������, �� �������� �. ����� � ������������ ������ ��������� �� ������� �� ����� �� ������, ��, ���������� �� �� �� ����������.
���� � ���������� ��� ������ ������������ ������������ � ����� � ��������� ����������������. nine0003
��� ������������ �������� ����������� ����������. ���� ������, ���� �������� � � ������������ ����������. ��� ��� ������������, �� ������ ������������ ������ � ���� ��������� ������������ ��������.
�������� ���������� ������� ��� �������� ��� ���� �� ��� �������� � ���� ������ ��������� ����������� � ������ ��� ���������� �������, ����� ��������� ������ ������ ���� � �� ��������� ����� ������ ������.
������ ���������� ������������
���� �������� �� �� �, ��� �� ��������� ������� �� ��������� ������ ��������, � � ����� ���������. nine0003
� ��� �� ���������� ������������ ���������� �������� ���� ���������� ����������. ������, ���� ���������� ������ ������ �� �������, ������ ���� ��������� ������� � ���������� ������� � ���������� � ��������� ���������. � ����������� �� �������� ������, ���������� ���� ����� �������� ������ ������.
�������, ����� ���, ��� �� ��������, ���� ������� ����� �. ��, ������ �� � ��������� �������� ������, �������� ��� � ��������. ��� ����������, ���� ������������� ��� ������ �������� ���� ������� ������� ��� ��������� � ������������, � ���� �� ������ ���� ������ ���� �������� ���������� �������� ������ ���. nine0003
�� ������ �� �������� ������ 2- 3 ������������. �������� �� �� ���� �� ������, �� � ���������� �������� � � �� ���������� ������ ���������� ����������.
������ ���� � ������ ����������, ���� ��������� ����� �������� ������. ����� ������������ ������, �� �� ������. ���� ������ �� ������ ������ ������ ��������� � ��������� ��.
����� ���������� ��������, ��������� ������ ���� ���� �������� ������. ��� ������������� ������������, ���� ����� �� ��������� � ������� ����� ��� ����������� ������������� �������. ���� �� ������������ ������ ��������, ���� ������ �������� ���. nine0003
������ ������ ���� ������������ �������������� �������� ������, ���� ���� ���� �������� ����������. ����� ����� ����� �������� �������� ��������� ���, � ����� � � �������� ��������� � �������� �������� ����� � ��� �� �� � ���������� �������� �������� ������.
����� ���������� ���� ����, ���� ���� ������������ ���� ����������� � ����������. �� ����, ������ �������� �� ������������ ����� ������� � ��� �� ���������� � ������.
0003
No one can guarantee that after finishing a plasterboard ceiling, cracks will never appear on it.
It's more of a matter of time. The appearance of cracks, albeit small ones, is an inevitable phenomenon. Why cracks appear on the ceiling made of plasterboard, and how to get rid of them, you can read in this material.
Causes of the phenomenon
In fact, the appearance of cracks can be associated with a huge number of external factors - from the impact of vibrations of a tram passing near the house to poor-quality material used in finishing work. But, there are several main reasons, knowing which, if not prevented, then maximize the life of the coating. nine0003
- Natural shrinkage of the house. You can’t get rid of it, and the appearance of cracks for this reason is most often possible in new buildings.

- Improper installation of drywall sheets. Often, in an attempt to save a little materials, installation is carried out not “in a run”, but end-to-end. Seams will inevitably be damaged.
- General violations of the technology of finishing similar materials. From not properly sealed joints to the lack of a primer layer during finishing.
- Frame sag. This phenomenon is primarily due to the use of low-quality fasteners. nine0012
- External vibrations. If the apartment is located on the first floors of the building, often heavy vehicles passing nearby cause vibrations that can lead to cracking even on concrete floors, not to mention the plasterboard.
Not all of these reasons can be eliminated completely. For example, it will not work to remove vibrations coming from outside. You can largely reduce their impact on the finished ceiling, but not completely get rid of them.
But with the sagging of the frame, you can fight very effectively - it is enough to use high-quality parts and mounting accessories during installation.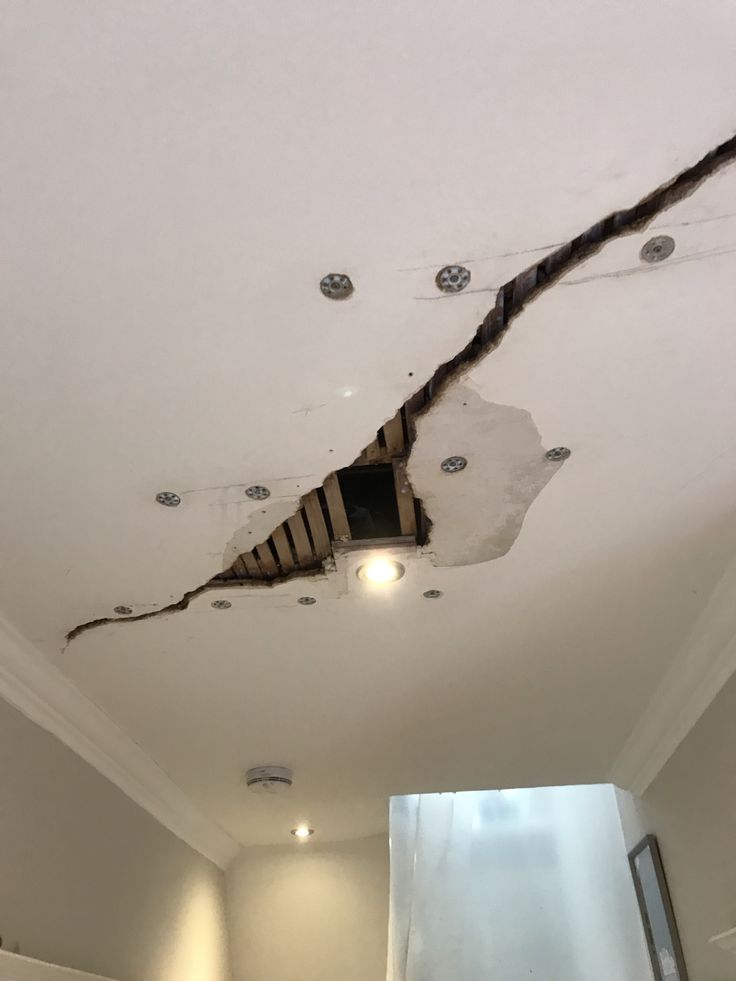
This virtually eliminates the possibility of sagging. The same can be said for the materials used. The better they are, the greater the likelihood of a long and trouble-free operation of the ceiling.
Violations of the technology of finishing or fixing gypsum boards are also easy to avoid - you just need to follow the instructions and follow the laying technology, then you can not be afraid of cracks for a very long time. nine0003
Troubleshooting
If, despite everything, defects still appear on the plane of the new coating, they can be repaired.
And this does not require significant financial investments or special skills. Usually, in order to repair cracks in the ceiling, primary skills in finishing work and a small amount of material are enough. Depending on the size of the defect, a little more material may be required.
A crack needs to be made larger before it can be repaired. Yes, that's right - to expand the existing defect, increasing it in size. This is necessary so that the material applied during the repair has a large area for adhesion to the surface, and it is also possible to remove all loose particles of the coating. nine0003
At the edges of the resulting recess, it is necessary to remove the paint to a distance of about 2-3 centimeters. This is done for the same reason as the previous operation - to increase the adhesion area of the putty.
After removing dust and other contaminants, carefully prime the recess. Better to use a brush than a roller. The pile of the roller does not always apply the primer well in the recesses.
After the primer has dried, the first layer of putty mixture is applied. When using a fugenfüler, it will be possible not to use paper tape to reinforce the repaired area. If another putty is used, tape will be needed. nine0003
When the first layer of putty applied has dried, it is primed again. Next, it will be possible to apply a finishing putty or, in the case of conventional compositions, stick a paper tape and apply a finishing composition on its surface.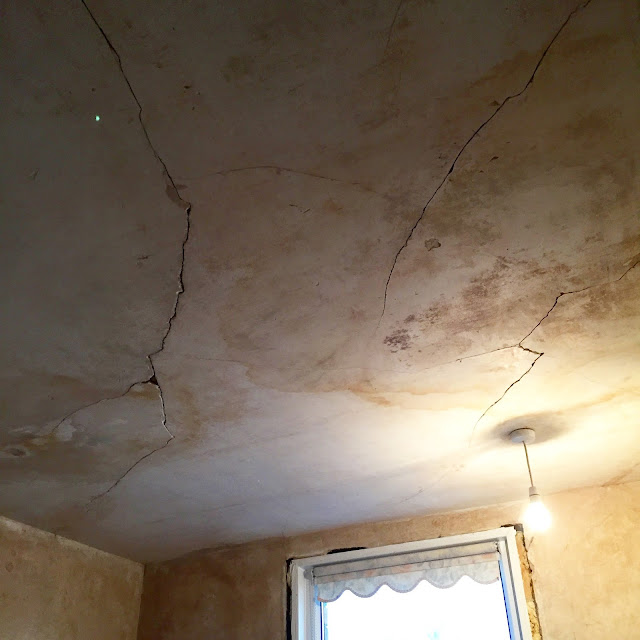
After this layer has dried, it must be sanded if necessary and painted. On this, the repair of the plasterboard ceiling will be completed and you can start cleaning.
Having made a chic plasterboard ceiling, after a while you may find that it cracked in some places. Moreover, the master is not always to blame. There are many objective reasons that provoke a divergence or displacement of the GKL joints. nine0003
If the crack is small, you can reanimate it yourself. The main thing is to figure out which factor caused the trouble, eliminate it, and only after that proceed with the repair. Let's figure out how to fix a crack in the ceiling without calling the master.
Causes of cracked ceiling joints
The first thing the owner should do when he finds a cracked joint is to press down on the ceiling and see how well it holds. If the plate moves, then local repairs are useless. We will have to carry out a complete dismantling and eliminate the shortcomings of the frame fastening.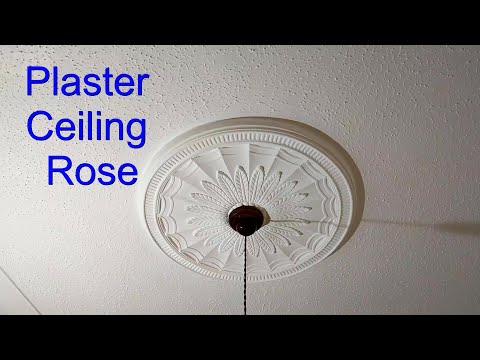 nine0003
An objective factor in the appearance of cracks in the ceiling in new buildings is house shrinkage.
If the building was built in a short time or on clay soil, the foundation will still “play” for three or four years, which means that there may be movements in the walls and ceiling slabs. In this case, you should not do expensive repairs at all in the next three years. And if the ceiling is already sewn up and cracks have appeared, you will have to endure until the building shrinks completely, since it is useless to repair.
Another common cause of cracks in the ceiling of a large room is the installation of sheet-to-sheet drywall, i.e. without moving seams. And if the house is located on a busy street, where the walls vibrate from constant transport or the neighbors from above made major repairs, then the seam can burst along the entire length of the room. nine0003
Installation of gypsum boards must be done in a checkerboard pattern, with offset seams, otherwise strong vibration may result in a crack along the entire length of the room mixture and GKL) or the chamfer was not cut off to improve the surface monolith.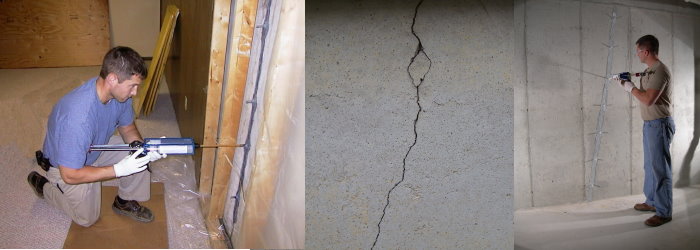 In any case, fix the problem for you.
Filling shallow cracks
The first step is to check how deep the ceiling burst.
And for this you will need a narrow spatula, which is used to carefully scrape off all the paint from the cracked seam until a sickle mesh is found. If the mesh itself is intact, then the problem was in poor putty or in the wrong application of layers. We will analyze in stages what to do with such a ceiling and how to cover it up.
The entire cracked surface is expanded at the edges by a few cm to completely remove the crumbled drywall
- We expand the edges of the crack by 2-3 cm from the sides, using a spatula or chisel.
- We clean the problem area with a mesh in order to remove the remnants of putty as much as possible.
- We pass with a mesh (or sandpaper) the edges of the cut out place to remove the water-based emulsion layer. It will interfere with the reliable bonding of putty and drywall.
- We brush off the resulting dust with a dry brush and coat the surface with a primer.
- We are waiting for complete drying (at least 12 hours). nine0012
- Putty with a wide spatula. If the crack is deep, putty in several stages, applying a second layer after the first has dried.
- The puttied surface must be smooth and level with the overall surface of the ceiling.
- We are waiting for drying and primer again.
- It remains to paint over the place of repair, and it is better to do it not pointwise, but to walk with a roller along the entire ceiling. Otherwise, fresh paint may be whiter than last year.
How to fix deep cracks
If on your plasterboard ceiling, after stripping the old putty, it turned out that the craftsman did not use sickles or it cracked, you will have to strengthen this place with adhesive tape yourself. Otherwise, cracks will appear regularly.
If the junction of sheets of hl is not reinforced with sickle tape, sooner or later the seams will open.
- Remove the old tape and sand the surface to the width of the new one.
- If there was no sickle, widen the crack to the width of the tape, completely removing the remnants of putty (so that the GKL sheet is clearly visible). nine0012
- Check if there is a chamfer at the joints of the sheets - a corner cut at 25 degrees. It is made for better adhesion of the layers. If there is no chamfer, make it yourself with a sharp knife.
- Dust off with a brush and primer twice.
- Cover the created corner and the joint of the sheets with putty.
- Glue the sickle on top and coat it with putty to fix it.
- When dry, prime the area.
- Further, the technology of work repeats the one that we described for shallow cracks. nine0012
Tip! When you choose a putty mixture to repair cracks in the ceiling, ask the sellers for a fugenfüller. It is stronger than ordinary putty, so it holds the joints more securely.
Fugenfüller is specially designed for joint putty, so cracks in it appear less often than in conventional putty.
No one is immune from cracks in the ceiling, but if the drywall is installed by professional teams that give a guarantee and have a good reputation, there will be fewer problems with it. nine0003
Sources:
- remontcap.ru
- remstrdom.ru
- wikipotolok.com
- toppotolok.su
How to fix cracks in a plasterboard ceiling
Getting rid of cracks in a plasterboard ceiling correctly
How good - the installation of a plasterboard ceiling is complete, everything is beautiful and beautiful. But even if the repair was done with high quality, after a while cracks may appear on the plasterboard ceiling. nine0368
Why this happens, and how you can quietly and quickly eliminate such a blatant defect in the ceiling structure, our article will tell.
Why the fuss
Why do such defects appear on the ceiling some time after the repair has been completed? Various situations can provoke the appearance of cracks, which do not always depend on you or the construction team that carried out repairs at your home.
The reasons for the appearance of cracks in the ceiling, even in a situation of perfect repairs made by professionals, can be very different:
- building shrinkage. This situation can occur even several years after the installation of the ceiling. And it certainly does not depend on the quality of the repair,
Sheet to sheet installation
Please note! If it was the shrinkage of the building that caused the cracks to appear, then the cracks can be repaired only after the shrinkage has been eliminated. Otherwise, the crack will periodically appear.
- when installing drywall sheets in a large room without moving the seam, and sheet to sheet. nine0367 Here, the appearance of a defect can cause even a large vehicle that will pass next to the building.
 Crack appears after puttying the ceiling,
 - use for mounting dowel sheets, which were sold in one package together with screws. They cannot always support the weight of the ceiling structure. This is due to the fact that the screw has a slightly smaller diameter than the dowel. Therefore, the walls of the dowel do not expand enough. As a result, after several years, sagging and crack formation occurs, nine0012
U-shaped hanger
These are the main reasons that can lead to the appearance of this kind of deformation. But there are still situations that are independent of us.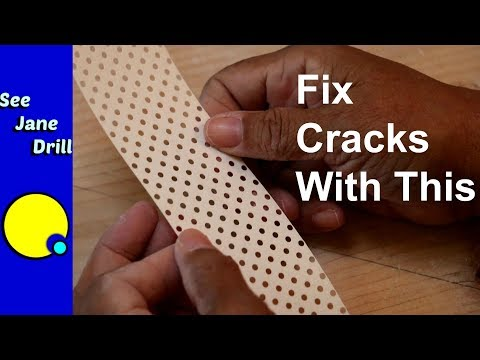 For example, even a small earthquake can cause cracks to appear after repairs have been completed. As a rule, the main cause of cracks is the deformation of the ceiling due to various situations. nine0375 Thus, every owner of a plasterboard ceiling must know what to do in such a situation.
How to be?
If a crack or any other kind of deformation is found on the ceiling structure, there is no need to rush to make hasty decisions to restore the ceiling covering. Here you should first find out what led to this state of affairs. Otherwise, you will have to do restoration work several times.
Very often, finding out the reasons for the appearance of deformation can show that a complete alteration of the ceiling is necessary. In this case, the repair must be done again. nine0375 Pay attention! To find out whether it is necessary to rework the ceiling, you should press the ceiling with your hand. If, after pressing, the design will "breathe", then the repair needs to be redone. Otherwise, the crack will have to be permanently sealed.
In a situation where the defect is isolated and does not lead to sheet mobility, then you can simply fix it locally, and leave the repair the same. Sometimes a small piece of canvas will need to be replaced.
What you need
You will need the following tools to fix the crack:
- hard and short spatula,
- wide spatula 100-150mm,
- hard knife,
- chisel for jointing cracks,
- sandpaper. It can be replaced with a diamond mesh,
- paint roller and tray.
From the list of materials you should have:
- fugenfüller or satengypsum,
- primer,
- paint the same color as the entire ceiling.
If you need to replace part of the ceiling, then you must also have a standard set of tools for installing drywall. nine0003
Filling cracks involves the following preparatory manipulations:
- First, the crack should be widened.
 To do this, use a chisel, spatula or knife. Expandable to 5-10mm,
 - scrape putty down to drywall,
- remove all crumbling elements, as well as those that do not adhere well,
- remove the paint from the edges of the crevice by 1-3 cm. This is easily done with a knife or spatula,
- after this, we process the edges with sandpaper,
- remove all dust with a brush or broom,
- then prime the edges and let dry,
Please note! The primer can be used by any brand.
As if by magic
After the preparatory work carried out, a high-quality sealing of the crack is possible.
Some experts recommend repairing the defect with ordinary putty. But when using putty, you must additionally use adhesive tape to complete the putty with satengypsum. nine0375 If a Fugenfüller is used, the use of adhesive tape can be dispensed with. Furenfüller is a putty that sets more quickly and becomes stiff when hardened. Therefore, it is her that many experts advise using to eliminate cracks in the ceiling.
Filling a defect with putty is carried out as follows:
- prepare the mortar, exactly following the instructions given on the back of the package. You can also take a ready-made solution,
- apply a small part of the solution on a spatula and carefully distribute it over the entire surface of the crack,
- if necessary, apply several layers of mortar,
- try to bring the solution flush with the rest of the ceiling.
After carrying out the above steps, the solution should dry for about a day. As a result, you will get a perfectly flat ceiling. To remove the bumps and roughness remaining after the putty has dried, we grout them with sandpaper. nine0375 Professionals get to cover the defect evenly and without bumps the first time. But beginners can easily eliminate all the bumps with sandpaper. After that, you need to prime the surface and it will be ready for painting.
Pay attention! It is not necessary to paint only the place of termination, because.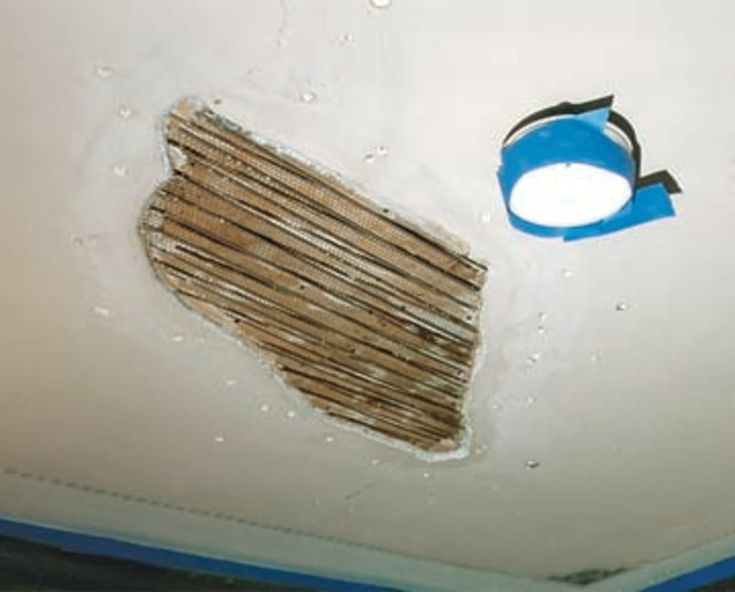 this will most likely result in the appearance of a bright spot. After all, it is almost impossible to pick up paint of the same color and tone. Therefore, you need to paint the entire ceiling in order to avoid an uneven tone. nine0375 If everything is done correctly, then the repair of such a defect as a crack in the ceiling will pass quickly and without nerves. This way you will avoid the risk of such a defect in the future. And your ceiling, regardless of the circumstances, will always look great and cheer you up with its beauty.
Cracks in the plasterboard ceiling
Posted on 08/31/2017 in the category Construction materials // 0 comments // Author: Admin
- 5
- 4 nine0011 3
- 2
- 1
(0 votes, average: 0 out of 5)
One of the commonly used building materials for finishing the ceiling surface is drywall (gypsum board). The material won its popularity due to its excellent technical characteristics, in particular, environmental friendliness, ease of installation and the ability to create the most incredible structures, niches, arches. But there are cases when, after repair, cracks appear on the plasterboard ceiling. How to repair a crack in a plasterboard ceiling with high quality will be described below. nine0003
Causes of cracks in plasterboard ceiling
Among the most common factors that can provoke these troubles are:
- Simultaneous measures taken to install the air conditioner, heating system and puttying. With changes in the temperature regime in the room during repair work, cracks often form on the ceiling after 2-3 days
- Non-compliance with the installation rules when installing a plasterboard structure. A common mistake is the incorrect location of metal profiles - too much distance between them. Poor quality putty can also lead to trouble. The integrity of the plasterboard ceiling can also be violated by non-observance of the sequence in actions, for example, the installation of lighting fixtures and the design of openings for ventilation were made after sealing the seams
- Gypsum ceiling installation too rigid to walls or columns.
 With this approach, there is a “movement” of the ceiling in the space of the joints of the ceiling and walls. The bottom line is the appearance of lines of distortion that went along the seams between the drywall sheets. Since the main profiles were attached to the rails with self-tapping screws, and the sheets were fixed to the rails, which determined the excessive rigidity of the finished structure. nine0012
 - "Dry" method of mounting ceiling structures to the overall parts of the gypsum board. It would be better to use delimiter tape and putty to separate these structures. That is, the joint had to be performed not close to the treated wall.
- Incorrect laying of reinforcing tape. You must first apply the right amount of putty under this tape to create a strong bonding layer and remove the resulting air bubbles. To correct the error, you will need to do everything again with better quality. nine0012
- Use of insufficiently well-dried grating or solid flooring made of natural material - wood.
 Due to the deformation during shrinkage of new rafters or beams, prerequisites arise for significant sheathing shifts, which leads to the appearance of cracks.
 - The presence of dust particles on the seams does not allow them to connect well with the putty. How to fix cracks in a plasterboard ceiling in this case? It is necessary to use a deep penetration primer before filling measures. nine0012
Materials and tools for repairs
To repair the defects that have arisen on a plasterboard ceiling, you will need a whole set of construction tools and knowledge of the technology for eliminating such troubles. Tools include:
- hard spatula
- special hard knife
- chisel for cracks
- sandpaper
- special diamond mesh
- spatula with a width of 100-150 mm
- composition Uniflot or Funefuller
- paint roller
- deep penetration primer
- water spray bottle
- containers for paint, primer
- quality paint
Once you have the tools you need, you can begin repairing cracks in your drywall construction.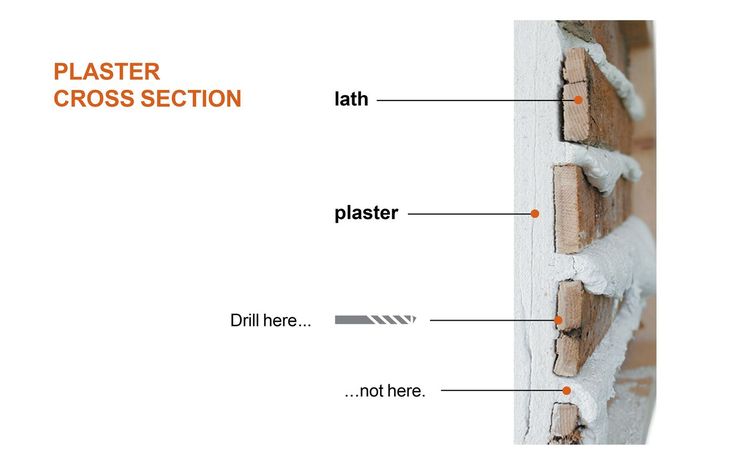
Mortgage preparation, ceiling inspection
To understand how to repair cracks in a drywall ceiling, it is recommended that you familiarize yourself with the construction sequence. First of all, it is necessary to assess the size of the problem, the condition of the plaster layer, determine the true depth and width of the gap formed. nine0003
Preparatory work to eliminate defects begins with the removal of loose plaster sections, it is removed to layers that have retained their strength.
Cracks caused by the displacement of ceiling slabs must be well cleaned of plaster, decorative coating, putty, etc. You can remove the crumbling layer with a knife or spatula. The resulting gap between the sheets of drywall must be freed from the reinforcing material and cleaned with a sharp knife, after chamfering the edges of adjacent plates. Surfaces to be corrected should be cleaned of dust particles by using a spray bottle with water. Modern putty mixes made on the basis of building gypsum have a low level of adhesion to a dry surface, so it is advisable to wet the surface to be sealed.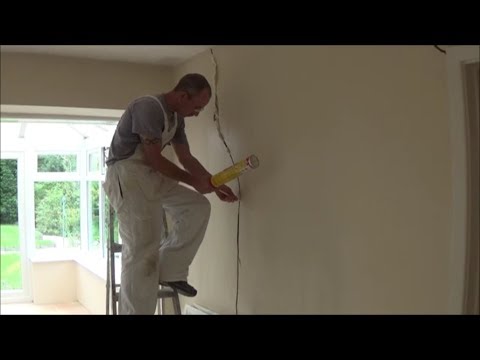 nine0003
To find out if cracks will form in the ceiling in the future, it is necessary to stick paper beacons on the crack. If after 2 days the paper remains intact, then you can start repairing defects.
Large sections of the ceiling will need to be replaced if errors are found during installation of the drywall construction.
To repair and reinforce the framework, all drywall is removed and the primary ceiling is created. The level of the new surface must completely coincide with the rest of the sheets, and the joints must be carefully sealed. nine0003
Fixing a crack
So, how to fix cracks in a plasterboard ceiling.
- After cleaning and preparing the surface, treat it 1-2 times with Deep Penetrating Primer Emulsion,
- Prepare the working solution (putty) following the instructions on the package,
- Fill gaps. Perform all actions carefully, leveling the putty well with a spatula,
- Leave the repaired area to dry overnight,
- Use sandpaper to achieve maximum smoothness,
- The corrected plane is ready for finishing (painting, wallpapering, etc.
 ).
).
This option is suitable for patching shallow gaps.
For larger cracks, use a sickle. The sealing process consists of:
- Filling deep gaps,
- Sickle stickers,
- Re-filling after the first coat has dried,
- Grouts and paints.
Preferably paint the surface with the same paint as for the first finish, from the same manufacturer. This is an excellent solution when repairing a badly damaged surface. nine0003
In the most difficult situations, when it is necessary to close pronounced defects, you can use various waterproof sealants, mounting foam. Especially these measures help with the possible risk of leaks from above.
Alternatively, to remove the crack, you can make a special bandage from linen or cotton fabric. A strip of fabric should not only cover the gap, but also cover its edges by at least 2-3 cm. To avoid shrinkage of such a bandage, it must be washed and ironed. After that, the fabric is moistened in a container with an adhesive composition, squeezed out and applied to the repaired area.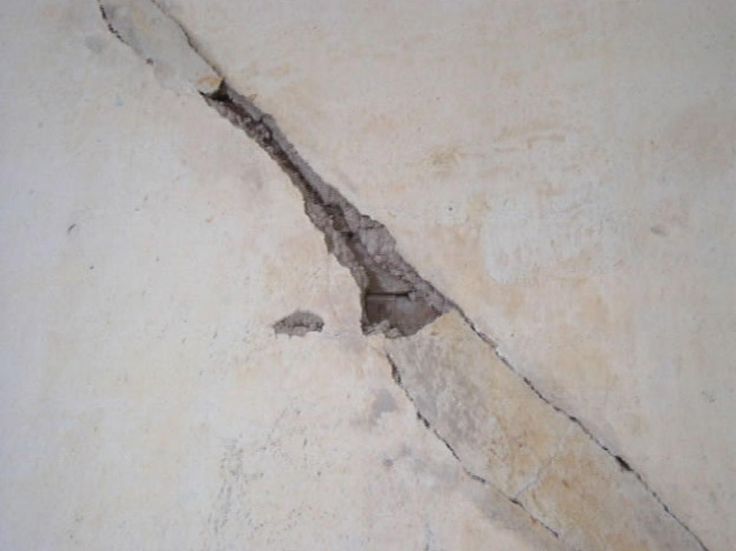 The strip is leveled, puttyed after drying. nine0003
After studying the above information, it becomes clear how to remove cracks in the plasterboard ceiling after painting.
How to repair drywall cracks yourself: a step-by-step description of work
Having made a chic plasterboard ceiling, you can find out after a while that it cracked in some places. Moreover, the master is not always to blame. There are many objective reasons that provoke a divergence or displacement of the GKL joints. If the crack is small, you can reanimate it yourself. The main thing is to figure out which factor caused the trouble, eliminate it, and only after that proceed with the repair. Let's figure out how to fix a crack in the ceiling without calling the master. nine0003
Causes of cracked ceiling joints
The first thing a homeowner should do when discovering a cracked joint is press down on the ceiling and see how well it holds up. If the plate moves, then local repairs are useless.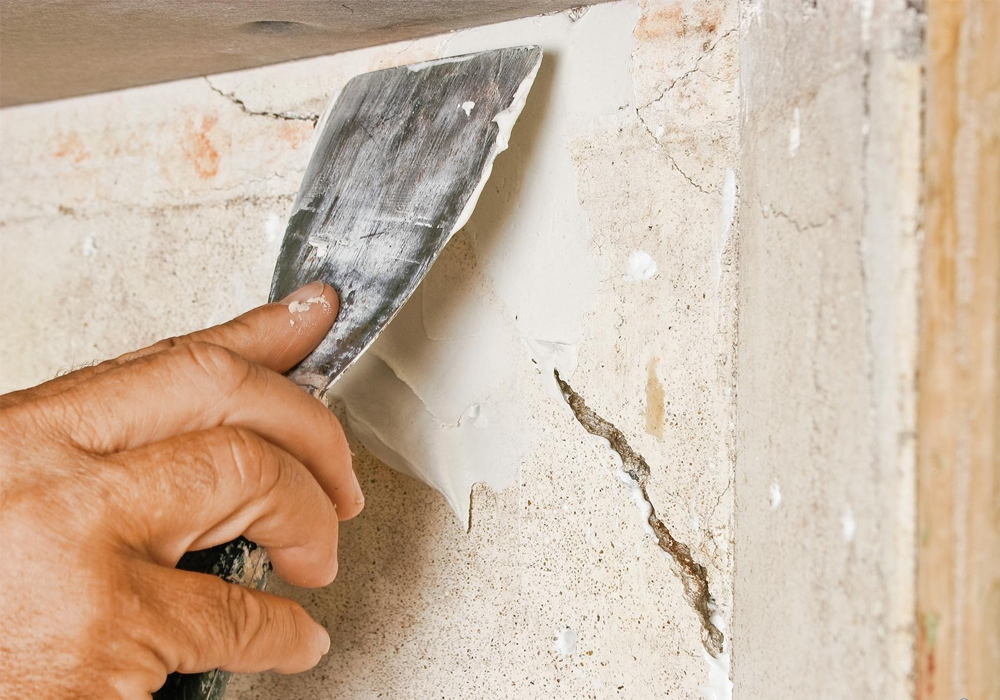 We will have to carry out a complete dismantling and eliminate the shortcomings of the frame fastening.
An objective factor in the appearance of cracks in the ceiling in new buildings is house shrinkage. If the building was built in a short time or on clay soil, the foundation will still “play” for three or four years, which means that there may be movements in the walls and ceiling slabs. In this case, you should not do expensive repairs at all in the next three years. And if the ceiling is already sewn up and cracks have appeared, you will have to endure until the building shrinks completely, since it is useless to repair. nine0003
Another common cause of cracks in the ceiling of a large room is sheet-to-sheet drywall installation. without moving seams. And if the house is located on a busy street, where the walls vibrate from constant transport or the neighbors from above made major repairs, then the seam can burst along the entire length of the room.
Minor cracks are not ruled out if, at the time of sealing the joints on the plasterboard ceiling, a primer was not used (thus reducing the adhesion of the putty mixture and plasterboard) or a chamfer was not cut off to improve the surface monolith. In any case, fix the problem for you. nine0003
Repairing shallow cracks
The first step is to check how deep the ceiling has cracked. And for this you need a narrow spatula, which gently scrape off all the paint from the cracked seam until a sickle mesh is found. If the mesh itself is intact, then the problem was in poor putty or in the wrong application of layers. We will analyze in stages what to do with such a ceiling and how to cover it up.
- We expand the edges of the crack by 2-3 cm from the sides, using a spatula or chisel. nine0012
- We clean the problem area with a mesh in order to remove the remnants of putty as much as possible.
- We pass with a mesh (or sandpaper) the edges of the cut out place to remove the water-based emulsion layer. It will interfere with the reliable bonding of putty and drywall.
- We brush off the resulting dust with a dry brush and coat the surface with a primer.
- We are waiting for complete drying (at least 12 hours).
- Putty with a wide spatula. If the crack is deep, putty in several stages, applying a second layer after the first has dried. nine0012
- The puttied surface must be smooth and level with the overall surface of the ceiling.
- We are waiting for drying and primer again.
- It remains to paint over the place of repair, and it is better to do it not pointwise, but to walk with a roller along the entire ceiling. Otherwise, fresh paint may be whiter than last year.
How to fix deep cracks
If on your plasterboard ceiling, after stripping the old putty, it turned out that the craftsman did not use sickles or it cracked, you will have to strengthen this place with adhesive tape yourself. Otherwise, cracks will appear regularly. nine0003
- Remove the old tape and sand the surface to the width of the new one.
- If there was no sickle, widen the crack to the width of the tape, completely removing the remnants of putty (so that the GKL sheet is clearly visible).
- Check if there is a chamfer at the joints of the sheets - a corner cut at 25 degrees. It is made for better adhesion of the layers. If there is no chamfer, make it yourself with a sharp knife.
- Dust off with a brush and primer twice.
- Cover the created corner and the joint of the sheets with putty. nine0012
- Glue the sickle on top and coat it with putty to fix it.
- When dry, prime the area.
- Further, the technology of work repeats the one that we described for shallow cracks.
Tip! When you choose a putty mixture to repair cracks in the ceiling, ask the sellers for a fugenfüller. It is stronger than ordinary putty, so it holds the joints more securely.
No one is immune from cracks in the ceiling, but if the drywall is installed by professional teams that give a guarantee and have a good reputation, there will be fewer problems with it. nine0003
Cracks in the plasterboard ceiling - causes and remedies
It seems that you try, you do everything carefully, but after a while you encounter a very unpleasant surprise - cracks in the plasterboard ceiling.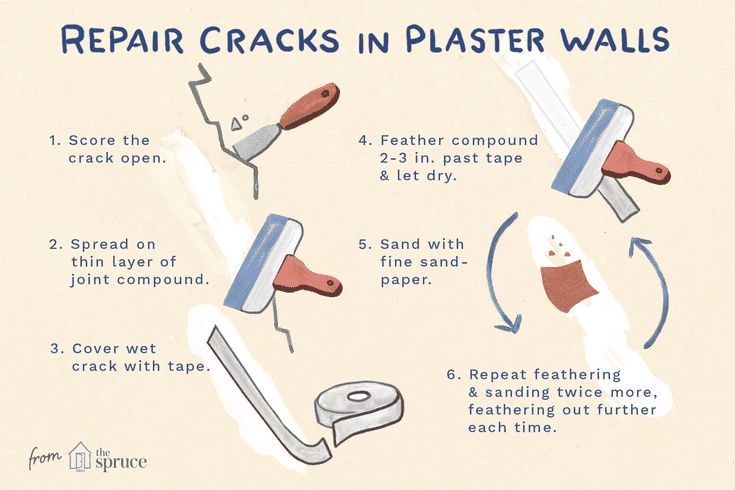 Good if spotted before priming and painting. In this case, the situation can be corrected. Otherwise - jointing, puttying and painting the entire ceiling.
First experience
Being mainly engaged in surface finishing, I also had to deal with the installation of plasterboard structures. Well, what's so difficult? He beat off the level, attached the profile with a step of 60 cm, fixed the sheets, closed up the junctions. But, the cracks along the seam made me think a little. nine0003
The first time I got out of this situation as follows:
- I widened the crack.
- Closed up with gypsum plaster.
- Reinforced with sickle.
- Additionally reinforced with a wide strip of fiberglass (cobweb).
- Filled and painted.
As a result: out of six problem areas, one crack did appear after a year. Most likely because of the "walking" frame.
Faced with the second object, which also needs to mount a false ceiling, I decided to take a closer look at the technology and the main mistakes during work.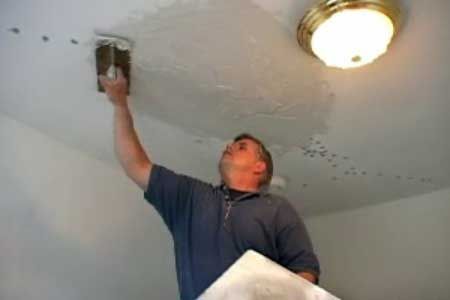 nine0003
Causes of cracks in plasterboard ceilings
Analyzing information from construction blogs and forums, we can identify the main factors contributing to the appearance of defects in suspended ceilings:
- Violation of frame assembly technology.
- Poor quality installation of plasterboard sheets.
- Use of fasteners of dubious quality.
- Poor joint preparation.
- Shrinkage and building vibration.
These are the main reasons that are mentioned on almost all construction websites. It’s hard to disagree with them, so let’s take a closer look at them. nine0003
Frame assembly technology
Detailed information on piece-by-piece suspended ceilings from gypsum building boards and gypsum fiber sheets on wooden and metal frames for residential, public and industrial buildings is presented in a separate instruction.
You can familiarize yourself with this manual in more detail. And within the framework of the issue under consideration, we highlight only the main points.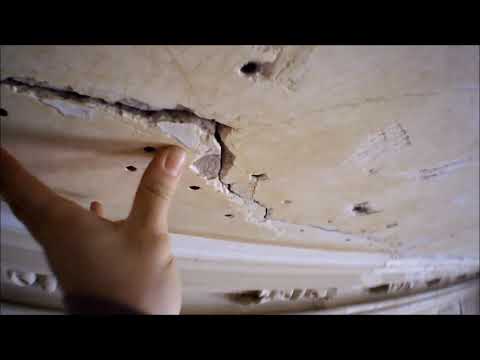
First of all, we are interested in the most common ceiling design KNAUF P113 (P213) :
On sections A-A, B-B, the junction of sheets to the wall is conditionally shown for a gypsum building board. In the case of a gypsum-fiber sheet, look at the adjunction of the sheet with a gap of about 5 mm without chamfering the edge of the sheet.
Frankly speaking, these recommendations led to a little confusion. But, if the manufacturer recommends, then it is worth adhering to the technical documentation.
For those who find it difficult to orient themselves in the schemes discussed above, we highlight the main ones:
- Center distance of main profiles 1200 mm. It is to them that suspensions are attached and drywall sheets are joined.
- Drywall does not curl with the guide profile. To fix the edges, load-bearing profiles are used, mounted with a distance of ≤ 100 mm from the walls.
Fastening GKL (GVL) sheets
Fastening gypsum building boards and gypsum-fiber sheets to profiles (bars) is carried out mainly across the supporting profiles. For the convenience of subsequent puttying, it is recommended to cut off the longitudinal edge from the sheets adjoining the long side to the wall. nine0003
Plasterboard sheets are fitted to each other and connected to the frame with screws. In this case, deformation of the plates should not be allowed. When installing a false ceiling, adjacent sheets must be mounted apart with an offset relative to each other by at least one step of the supporting profile.
From the end edges of boards not pasted over with cardboard, using an edge planer or a clerical knife, it is necessary to chamfer at an angle of about 22.5 ° to a depth of 2/3 of the sheet thickness.
When attaching to the frame, place self-tapping screws (self-tapping screws) with a pitch of 150 mm apart on adjacent sheets at a distance of:
- For gypsum building boards at least 10 mm from the edge of the sheet pasted over with cardboard and at least 15 mm from the cut edge.
- For gypsum fiber boards, at least 10 mm from the edge of the sheet.
- When using gypsum boards with a thickness of 12.5 mm, the pitch of the screws is increased to 200 mm.
When using gypsum plasterboard, a self-tapping screw TN is used, for gypsum-fiber sheets - a self-tapping screw MN.
Fixing screws must enter the gypsum building board or GVL at a right angle and penetrate into the metal profile of the frame to a depth of at least 10 mm (into a wooden beam - at least 20 mm). The heads of the screws must be recessed to a depth of about 1 mm for the purpose of their subsequent sealing with putty. nine0003
Why cracks appear on a plasterboard ceiling
No one is safe from cracks in a plasterboard ceiling, most often they appear at the junction of floor slabs and the whole appearance of the structure suffers from this. Even experienced craftsmen cannot give a 100% guarantee that after creating a plasterboard ceiling, cracks will not occur over time. And the speech here is not in the skill of the construction team, but due to the presence of many concomitant factors.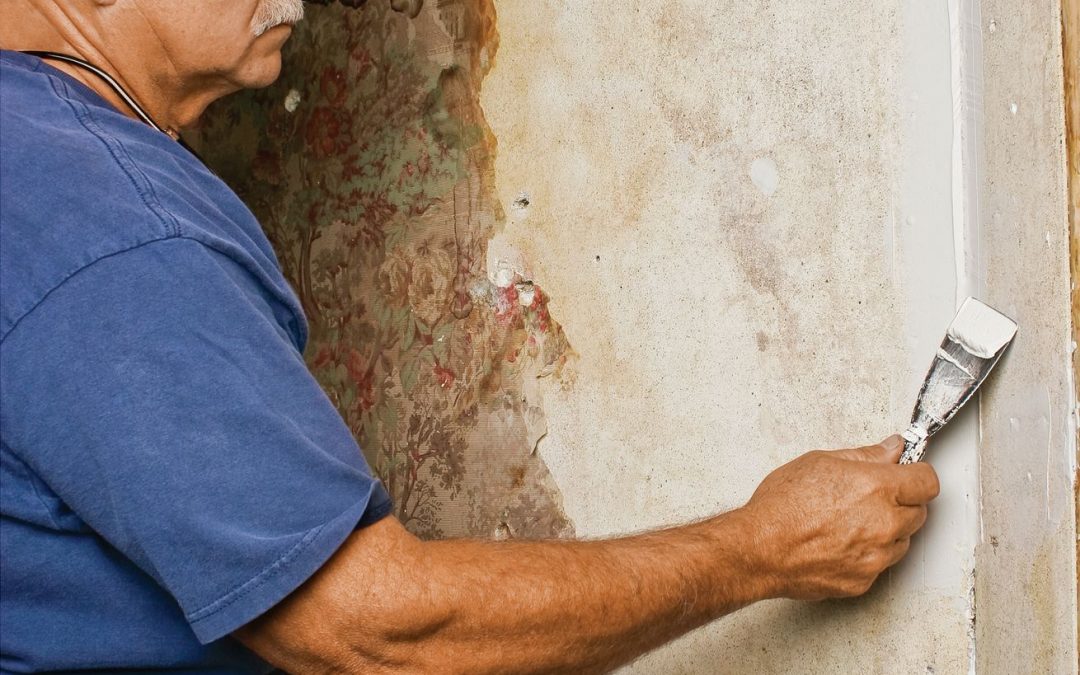
It is necessary to consider this issue more thoroughly, because every crack in the plasterboard ceiling causes significant excitement among the owners. The question arises: what to do, how to fix this problem? First of all, you should determine the cause of their appearance. nine0003
Causes of cracks
Cracks appear on a plasterboard ceiling for completely different reasons. Among the most common are the following.
The most common and common cause of cracks in the ceiling can be structural subsidence. Unfortunately, here a person is powerless, because no one can stop this process, you just need to wait for its completion and not rush to erect drywall structures in a “fresh” building.
Plasterboard plastered ceiling
Non-primed ceiling, consequences
Any professional will say that in this situation, the wrong installation of the product is to blame. Most often, the problem occurs in huge rooms, where laying is carried out sheet to sheet, without using seam offset.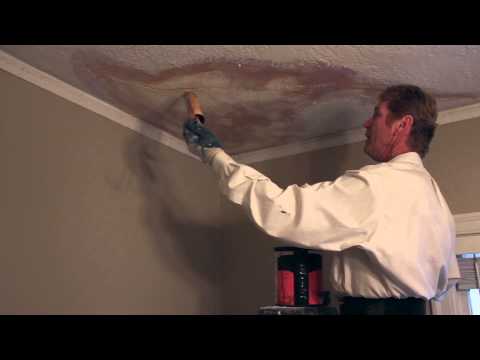 Then, even with small fluctuations in the structure, a crack may occur along the entire seam. For example, when driving along the road near the house of massive equipment.
Plug-screw kit
As a rule, installations made with dowels and the screws supplied with them cannot support a lot of weight. Gradually, the owners begin to notice that cracks appear on the plasterboard ceiling. The bottom line is that the diameter of the screw in relation to the diameter of the dowel is small and the walls of the dowel itself are very poorly attached to the hole. As a result, a sag is formed and a crack occurs. It is necessary to use, in addition to suspensions, also rigid mounts with a ceiling.
Unprimed ceiling
A no less common problem is the forgetfulness of masters or the lack of independent work. In the case when, before starting the puttying stage, a person forgot to walk with a primer. In almost ninety percent of cases, cracks will occur due to non-compliance with ventilation and humidity of the room during repair work. Leaves absorb moisture and then dry out.
The main rule is to dry each coat and then the next steps.
The main causes have been identified, it is possible to proceed to the second stage of the study of the issue - methods of correction and prevention of recurrence of cracks. nine0003
The cardinal method of violation
The main violation of technology in pursuit of material savings is that according to Knauf standards, 2 layers of drywall sheets are used on the ceiling. The fastening of the profile is carried out not with plastic dowel nails, but with metal ones or using a pneumatic gun for fastening the profile. More important tips for masters can be found in the article about the secrets of working with profile.
Removing defects on the ceiling
How to fix cracked plasterboard on the ceiling x is very responsible and requires special attention.
What is needed to repair cracks?
In order to know how to fix cracks in a plasterboard ceiling, you need to have a set of building materials and master the crack repair technique.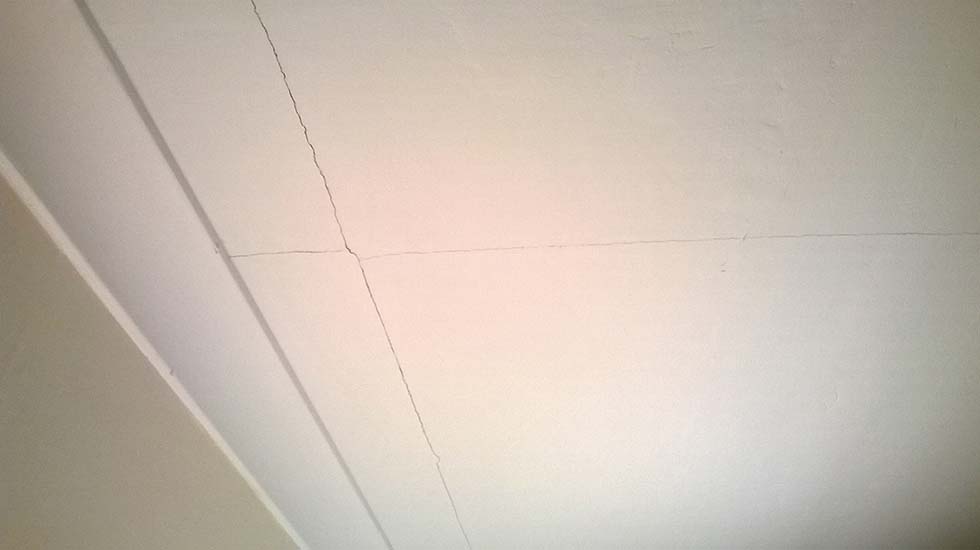
• Special hard knife,
• Crack chisel,
• Diamond special mesh,
• Uniflot mortar or Fugenfüller,
• Primer, paint and roller. nine0003
Now you can proceed directly to repairing cracks in the drywall structure.
Repair of cracks
Repair work begins with repairing the crack. It is expanded by 5-10 mm. Cleaned of putty. The painted surface is removed from each edge and covered with a mesh. A new layer of putty is applied, treated with a primer. After these works, the surface is puttied with a wide spatula, the composition is well distributed throughout the ceiling. When everything is dry, putty should be applied again in order to eliminate minor voids. Next, the plasterboard ceiling is primed and painted in the desired color. nine0003
Advice from the professionals
It is important to consider the advice of professionals who know exactly how to fix cracks in a drywall ceiling. To avoid the appearance of cracks on the ceiling, we use fiberglass.