Designing a gravel garden
How to Create a Gravel Garden
Photo: Danielle SherryMost Popular
When you conjure up an image of a gravel garden, it probably isn’t very fun or colorful. Many people picture a sea of hot, dry gravel, some harsh, craggy rocks, and a handful of plain green, sparsely growing plants. This image might be right on the money if we were talking about mountainous alpine rock gardens, but the gravel gardens that I’ve helped create here at the Olbrich Botanical Gardens are different. Why would you want to have a gravel garden? Well, for starters, you get the same beauty as a traditional perennial garden but with 80 percent less maintenance. These sustainable plant communities, once established, thrive on natural rainfall alone and require no fertilizer or other chemicals to grow. If given a little time to grow and fill in, they will look similar to traditional perennial gardens but require far less work.
The gravel garden concept is not new, and most keen gardeners might associate it with one of the greatest gardeners of our time: Beth Chatto. Beth converted a gravel parking lot into a beautiful, drought-tolerant garden more than 25 years ago.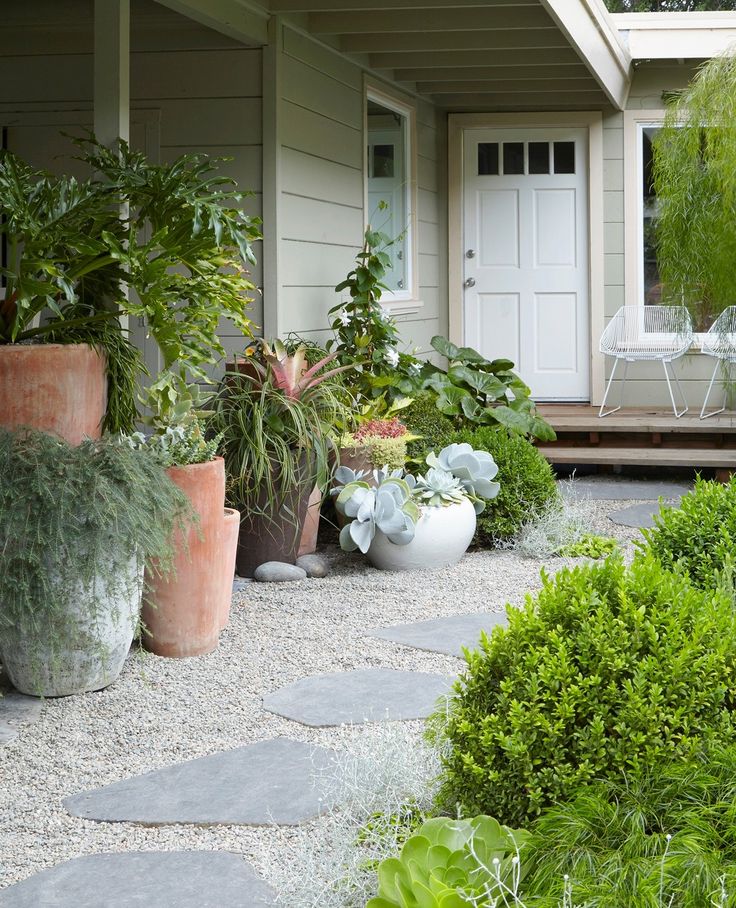 Her gardens in Essex County, England, thrive despite a meager 20 inches of rainfall each year, inspiring many gardeners over the years—including me. Much like Beth’s gardens, the Olbrich gravel gardens are chock-full of tough, lush, and colorful plants that grow harmoniously together. The only time you can see gravel is when we cut the plants back in spring before they come back to life for another season. Some of the greatest things about our gardens, beyond their beauty, are their ease of care and their inherent environmental compatibility with our climate.
The following are the steps we took when installing our gravel gardens. Though you may not want to transition your whole landscape to this concept, you can start out small and see for yourself all the advantages these types of gardens have. Once you do, you’ll be tempted to replace your entire front lawn with a gravel garden—which is exactly what I’ll be doing at home this spring!
How to create a gravel garden
With a simple plan, you too can install a landscape that virtually takes care of itself.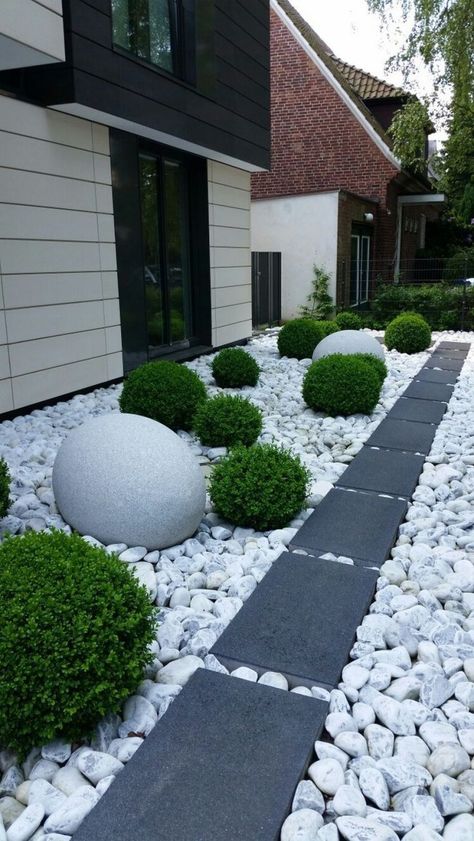
First, select a site that has decent soil drainage. Once you have that, you begin by removing any existing herbaceous vegetation, either mechanically or with the aid of a non-selective herbicide like glyphosate. If there are existing trees or shrubs, they can be left in place and incorporated into the gravel garden; just remove any loose soil, mulch, or other organic matter from around the crowns of the plants.
Step 2: Install an edge
Next, create a solid border or hard edge around the perimeter of the garden, if one doesn’t already exist. Medium size stone, large boulders, or pavers are often used to make an edge, but the foundation of a building, a driveway, an existing sidewalk, or a concrete curb all make good edgers, too. Just be sure that the permanent border is tall enough to retain the 4 to 5 inches of gravel that will be placed atop the soil. The border is critical because the gravel needs to be kept at a consistent depth throughout the garden, right up to the edges.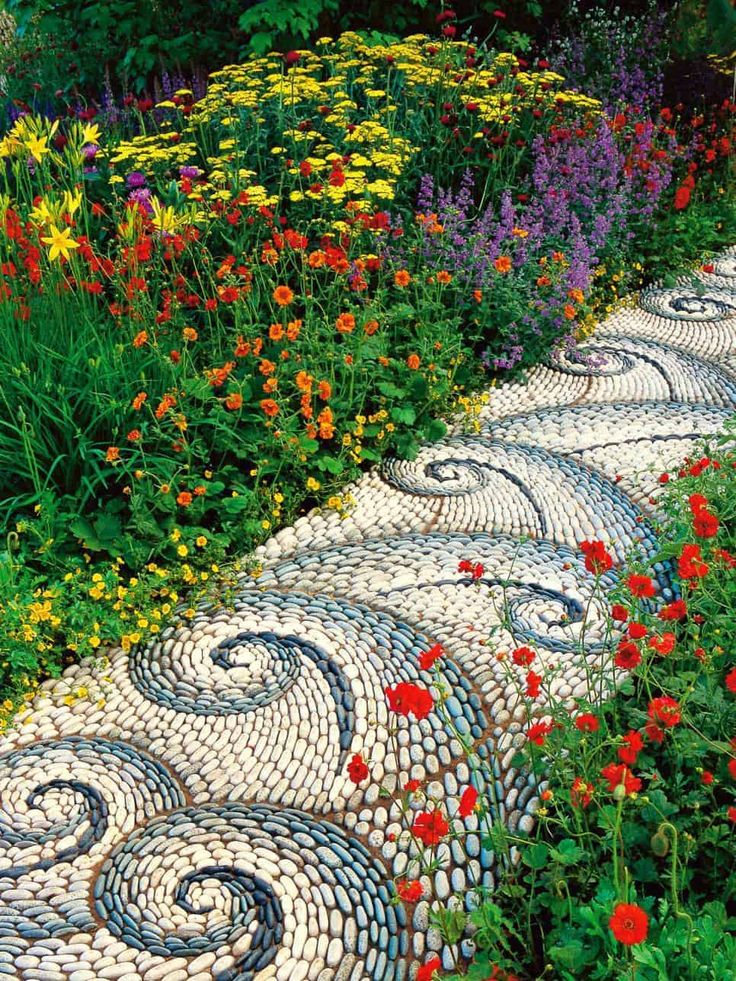 If it tapers off at the edges, weeds will find their way in.
Step 3: Spread the gravel
Now for the gravel, and not just any gravel: Washed 1/4- to 3/8-inch quartz or granite chip gravel works best. Every piece of gravel will be relatively the same size, so if you stick to these specifications, it will remain loose and never pack tight (picture marbles in a jar). We use local gray angular quartzite or rounded pea gravel, but any stone of similar size is fine.
If the planting bed is large, it’s a good idea to drive in stakes about every 4 to 5 feet. Make a mark on the stake about 5 inches above the soil line so that you can gauge the depth of the gravel as you spread it and ensure a consistent depth of 4 to 5 inches throughout the garden. This is a very important detail because the gravel acts as the barrier to weed seed germination. Too deep, and the plants perform poorly; too shallow, and the roots of weed seedlings can reach the soil below and become established in your nice, clean gravel garden.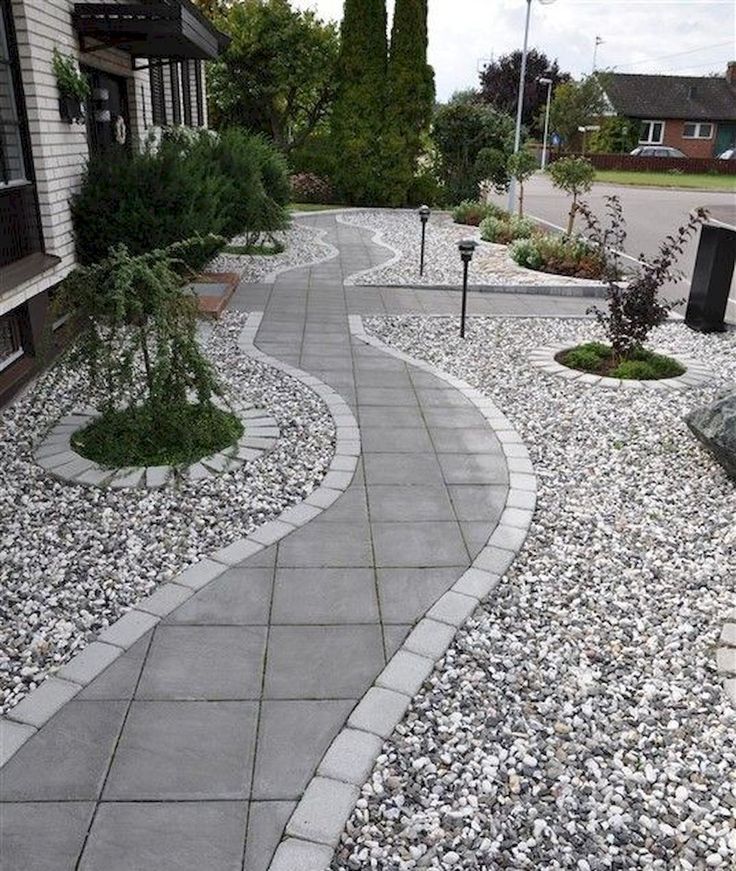
Step 4: Put the plants in
No special tools needed. Because you’re planting into loose gravel, you’ll only need your hands to dig a hole and put the plant in place.Once the gravel is in place, you are ready for the fun part—planting! Selecting drought-tolerant, deep-rooting species is essential. Perennials grown in 3-1/2- to 4-1/2-inch pots are the ideal size because they typically have a root-ball depth of 4 inches (the same depth as the gravel). Larger potted plants can be used, but the root balls have to be reduced to a 4-inch depth, so they will be more difficult and time-consuming to plant. Smaller pots or plugs can also be used, but they take longer to root into the soil, therefore making them more vulnerable to drought stress during the establishment period. Plants should be spaced anywhere from 10 to 15 inches on center, depending upon their mature sizes. The goal is to cover the gravel with vegetation and create a living, interacting community of plants, so tighter-than-usual spacing is best.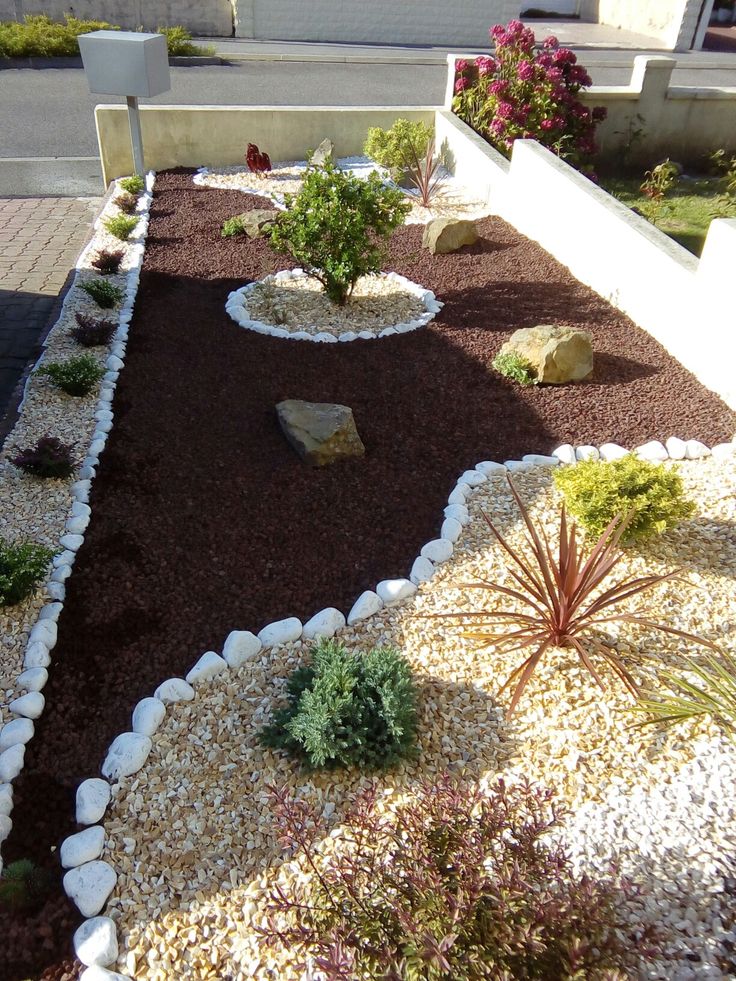
When planting, be careful not to spill any potting mix into the gravel, as this may create a potential weed seed bed in the future. Soil or organic matter build-up in the gravel is our enemy, and we always look to keep that from happening. Maintaining the air space between gravel particles makes it hard for weed seedlings to get a foothold. No special tools are needed for planting, just a good pair of gloves to dig through the gravel and put the root ball in place. When setting the plants in the gravel, their crowns should be flush or just slightly below the top of the gravel. Remove the top inch or so of soil from the root balls before planting. In the process of removing that soil, you will also remove the majority of dormant weed seeds that may germinate after planting. You will get most of the seed, but not all; however, the weeds we have pulled in the first two years (which haven’t been many) were in the perennials’ crowns, not in the gravel between plants.
Once the garden is planted, you will have what looks like a sea of gravel with a few dots of green here and there.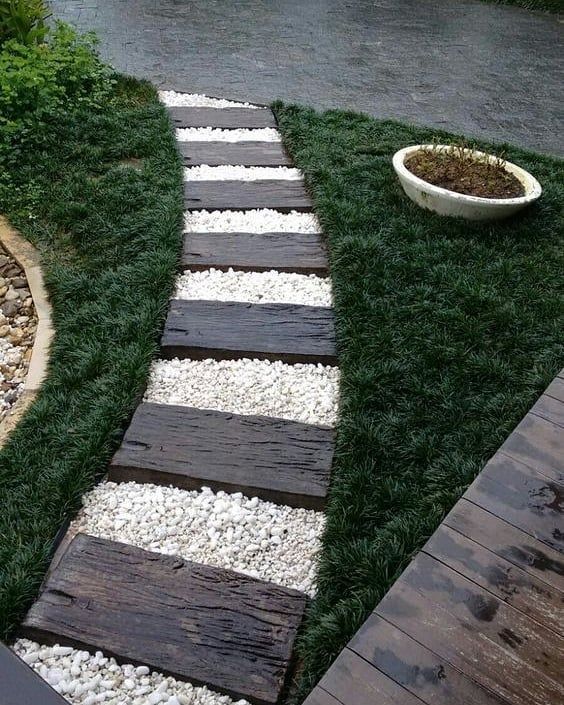 Even though you see more gravel than plants the first season or two, don’t despair; that will quickly change as the plants grow to maturity. In 2 to 3 years, you will enjoy a beautiful tapestry of lush, colorful plants, and the gravel will lie hidden below, doing its job of controlling your weeds.
Step 5: Get everything established
Establishing your plants is a bit different in a gravel bed than in a conventional perennial bed or border. Maintenance will be much easier in the long run, but getting the garden off to a good start is critical to its long-term success. The key to a good start is water, water, and more water. This seems contrary to the whole gravel garden concept, but that requirement changes as the plants root in. Once they reach maturity, they will, in turn, reach their maximum drought tolerance. Even though the plant species selected for the garden are naturally drought tolerant, they need to root deeply into the soil below the gravel to be that way.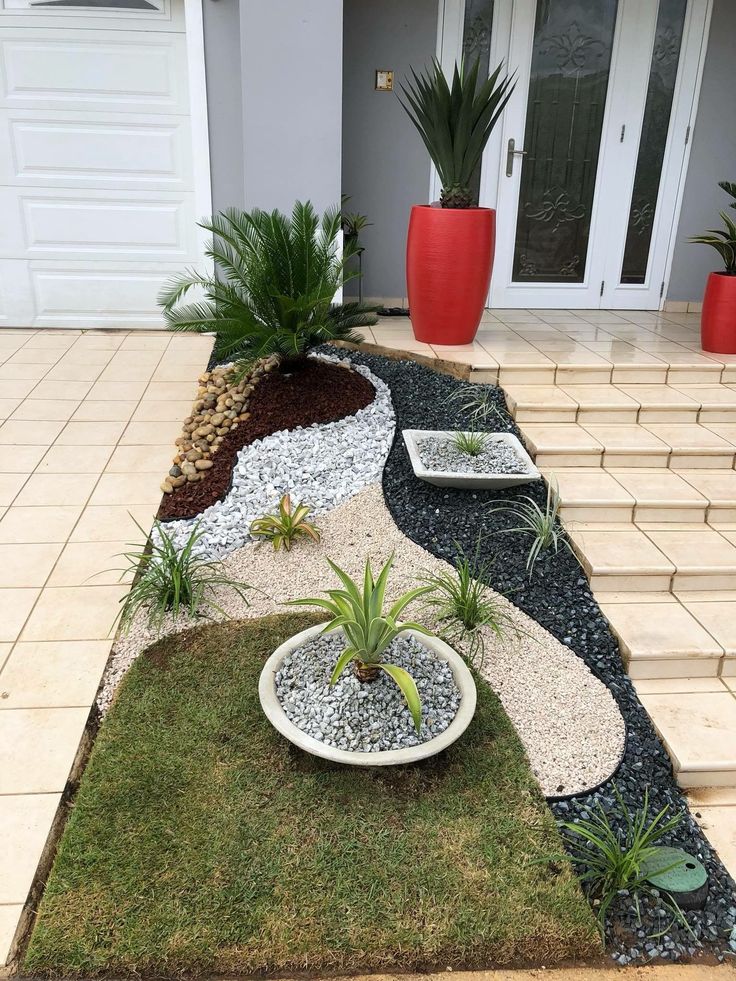
Keep in mind that the only moisture available to the plant initially is in the soil mass that it was planted with; the surrounding gravel has little to no water-holding capacity. Water the plants as if they were still in the plastic pots they were initially grown in. In the beginning, that may mean daily watering on sunny, hot, windy days. As the plants grow and root in, the watering will become less frequent.
The best way to know when it’s time to water is by monitoring the plants daily. Water when you see signs of stress—most often, off-colored and wilting foliage. A good way to make it easy on yourself and your plants is to set up a temporary irrigation system that can be left in place for the first season. Hoses and impact sprinklers are relatively inexpensive and worth the investment. We do like to water by hand whenever possible to conserve this precious resource, but when we can’t, the sprinklers do a good job of quenching our plants’ thirst.
Step 6: Make a maintenance planSpring is the only time that the garden requires work.
 Cut back the plants early in the season, and haul out the gleanings by hand. Any leftover debris can generally be pushed out of the garden with a leaf blower.
The best part of a gravel garden may be the maintenance, or should I say the lack thereof? In spring, after enjoying the dried plants, including flower and seed structures and the associated birds they attract over the winter, we cut back all of the herbaceous plants. We use shearing tools of all types to cut everything back to within a couple of inches of the gravel and remove as much organic matter as humanly possible. Two people working in tandem—one with a rake, and the other with a mechanical blower—do a fantastic job of cleaning up the garden. That’s it! Well, you’ll still pull a few weeds here and there because nothing in life is perfect and maintenance free. There’s always that occasional dandelion seed that blows in and lands in the crown of one of your beauties that has to be pulled, but in the long run, you’ll spend a fraction of your time maintaining your gravel garden compared to your traditional perennial bed or border.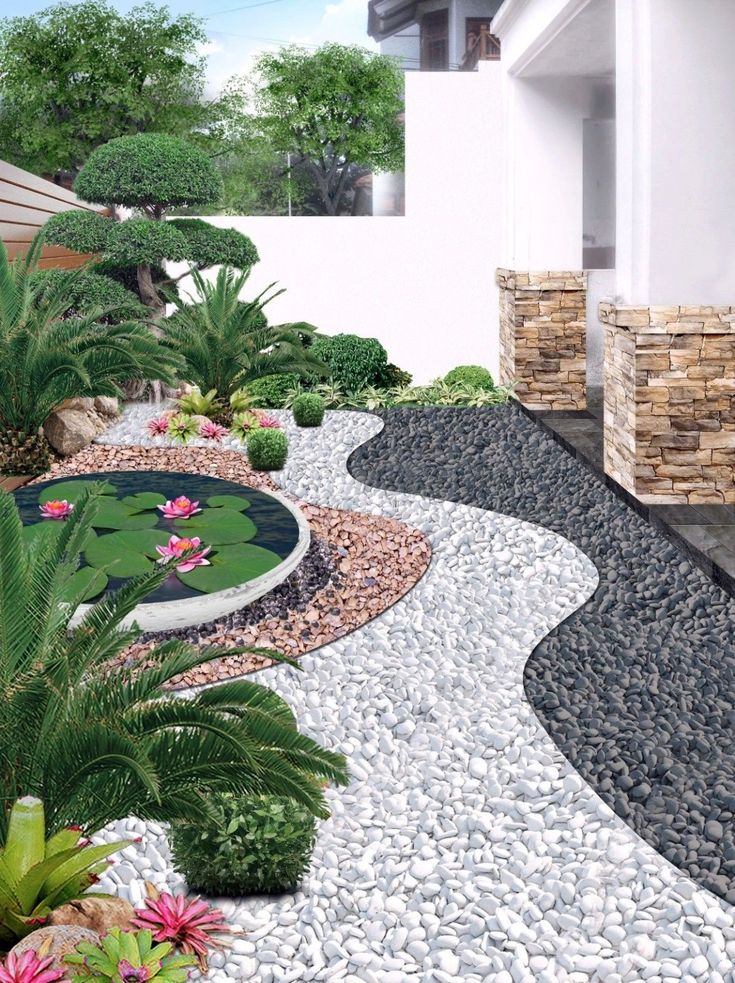
Compelling combinations are easy. ‘The Blues’ little bluestem and ‘Summer Beauty’ ornamental onion pair brilliantly with white calamint (Calamintha nepeta, Zones 5–7), yellow ‘Walter Funcke’ yarrow (Achillea millefolium ‘Walter Funcke’, Zones 3–9), and purple Tennessee coneflower (Echinacea tennesseenis, Zones 3–10). Photo: Danielle Sherry
Plants
Jeff’s top gravel-garden plants
Generally, what makes a perfect gravel garden plant is simple: low water needs, tolerance of exceptionally dry conditions, and at least three seasons of good looks.
| 1. Lead plant (Amorpha canescens) Zones: 2–9 Size: 2 to 3 feet tall and wide Conditions: Full sun; dry to medium, well-drained soil | |
| 2. Eastern bee balm (Monarda bradburiana) Zones: 5–8 Size: 18 to 24 inches tall and wide Conditions: Full sun to partial shade; well-drained soil | |
3. ‘Summer Beauty’ ornamental onion ‘Summer Beauty’ ornamental onion (Allium ‘Summer Beauty’ )Zones: 5–8 Size: 12 to 18 inches tall and 18 to 24 inches wide Conditions: Full sun; dry to medium, well-drained soil | |
| 4. Prairie dropseed (Sporobolus heterolepis) Zones: 3–9 Size: 2 to 3 feet tall and wide Conditions: Full sun; dry to medium, well-drained soil | |
| 5. Pale purple coneflower (Echinacea pallida) Zones: 3–10 Size: 2 to 3 feet tall and 12 to 18 inches wide Conditions: Full sun to partial shade; dry to medium, well-drained soil | |
| 6. ‘The Blues’ little bluestem (Schizachyrium scoparium ‘The Blues’) Zones: 3–9 Size: 2 to 4 feet tall and 18 to 36 inches wide Conditions: Full sun; dry to medium, well-drained soil | |
7. Prairie baby’s breath (Euphorbia corollata) Prairie baby’s breath (Euphorbia corollata) Zones: 3–9 Size: 18 to 30 inches tall and 18 to 24 inches wide Conditions: Full sun to partial shade; dry to medium, well-drained soil |
Care Tip
Why no fertilizer?
Typically, the drought-tolerant species we plant in gravel gardens grow in poor, dry soils that are low in fertility. If grown in fertile soils or fertilized regularly, they grow fast and tend to open up in the center (typical in rich garden soils). Then we have to divide the perennials to get them to look good. Not fertilizing lets the plants grow slow and steady, without ever having to divide—which would mess up the gravel garden’s soil-under-gravel matrix.
Jeff Epping is director of horticulture at Olbrich Botanical Gardens in Madison, Wisconsin.
Photos, except where noted: courtesy of Jeff Epping; Danielle Sherry
View Comments
Design
Plants That Bloom in Late Winter or Early Spring
After the bright lights of the holiday season have been turned off, the dark days of winter seem to drag on forever. Gardeners begin to look through the catalogs, dreaming…
How to Create a Low-Maintenance Gravel Garden
Jeff Epping, horticulture director at Olbrich Botanical Gardens in Madison, Wisconsin, quickly became a fan of gravel gardening after experimenting with the technique at work. So, when the city put in a new street and tore up his front lawn, Epping decided it was the perfect time to plant a gravel garden. He stripped his lawn, laid a heavy layer of gravel and planted about 225 plants. Now in its third year, not much of the gravel shows other than in early spring; instead, you'll see an impressive meadow of flowering perennials and grasses, plus an abundance of pollinating bees and butterflies.
Gravel garden
Epping Gravel Garden
| Credit: Jeff Epping
"The neighbors thought I was crazy at first, and now they stop by with lots of positive questions," Epping says. He's happy to oblige identifying butterflies and their favorite nectar plants, explaining how the gravel layer works as a weed barrier and listing his top plant choices for this garden style.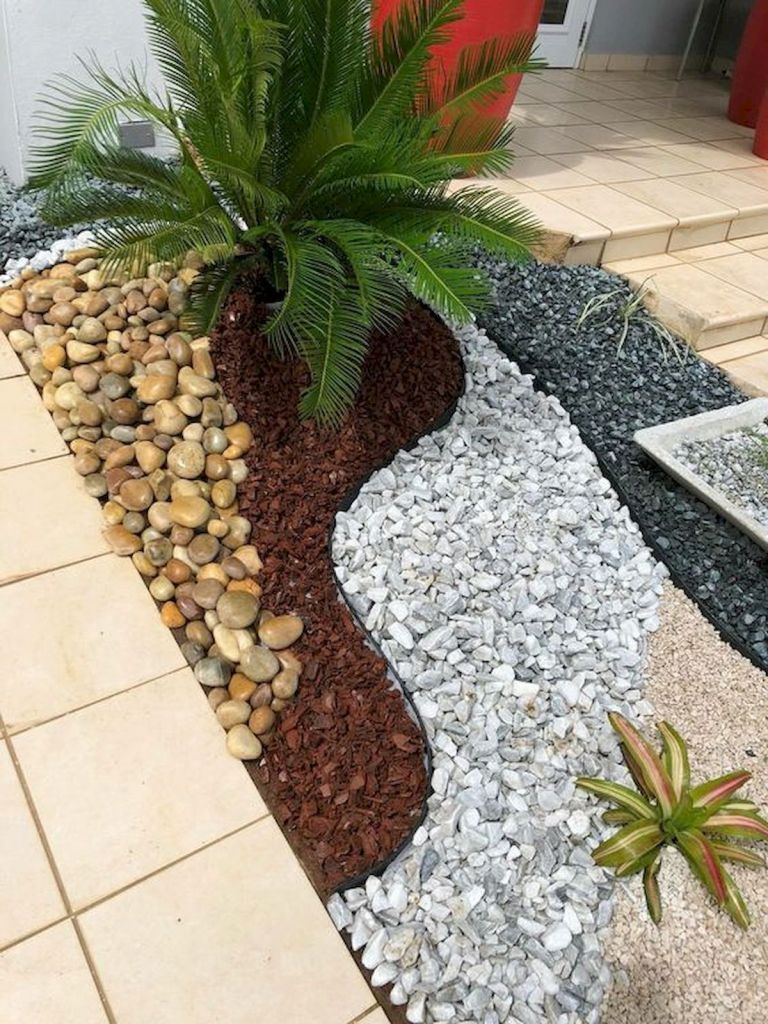
Gravel garden ideas
Gravel garden
| Credit: Jeff Epping
What's a Gravel Garden?
When Epping talks gravel gardening, he begins with a definition. "What makes gravel gardens unique is their 4- to 5-inch layer of washed gravel which makes it pretty tough for weed seeds to germinate," he says. He also preaches timing-saving virtues like no mulching, no irrigation after establishment and no mowing as well as environmental benefits like feeding pollinators, conserving water and eliminating fertilizers.
Epping saw his first gravel garden when he toured legendary garden designer Beth Chatto's garden on a trip to England. He was enamored with how she converted a gravel parking lot into a beautiful drought-tolerant garden that still looked great 25 years later.
Gravel garden ideas
Beth Chatto garden
| Credit: Jeff Epping
Epping returned to Olbrich and decided to try a gravel garden in a spot that had always been a challenge.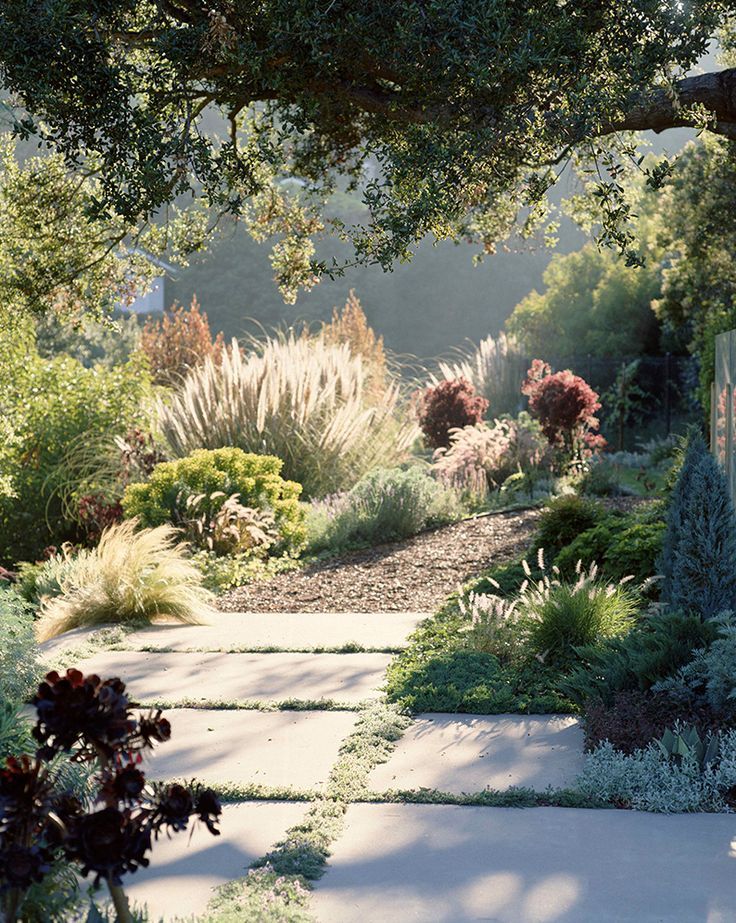
Gravel garden ideas
Gravel gardens
Left: Northwind Perennial Farm gravel garden | Credit: Jeff Epping
Right: Olbrich gravel garden | Credit: Jeff Epping
He reached out to plantsman Roy Diblik, who was experimenting with his own gravel garden (left) at Northwind Perennial Farm in Burlington, Wisconsin, and invited him to lay out one (right) together. Epping has since added three more gravel gardens at Olbrich, planted his own home gravel garden, designed a 3-acre garden atop an underground parking garage in Verona, Wisconsin, and now teaches gravel gardening to others around the country.
What Should You Plant?
Tough prairie plants are a natural choice. When selecting plants for a gravel garden, the enduring garden principle of putting the right plant in the right place clearly fits. Epping says only a select palette of plants will thrive in this "lean and mean environment. " "Many of the plants are native prairie plants known for their deep roots and drought tolerance."
Gravel garden ideas
Gravel garden ideas
Gravel garden ideas
Left: Lance-leaf coreopsis | Credit: Jeff Epping
Center: Pale purple coneflower | Credit: Jeff Epping
Right: Calamint | Credit: Jeff Epping
Among his top choices for sunny locations are lance-leaf coreopsis (Coreopsis lanceolata above left), pale purple coneflower (Echinacea pallida in center), calamint (Calamintha nepeta ssp. nepeta on right), butterfly milkweed (Asclepias tuberosa), flowering spurge (Euphorbia corollata), gayfeather (Liatris cylindracea), sea lavender (Limonium latifolium), 'Bradbury's bee balm (Monarda bradburiana) and summer beauty allium (Allium lusitanicum 'Summer Beauty').
Gravel garden ideas
Gravel garden ideas
Gravel garden ideas
Left: Prairie dropseed | Credit: Jeff Epping
Center: Autumn moor grass | Credit: Jeff Epping
Right: Little bluestem | Credit: Jeff Epping
He also likes to mix in grasses like prairie dropseed (Sporobolus heterolepis—above left), Autumn moor grass (Sesleria autumnalis—center) and little bluestem (Schizachyrium scoparium —right).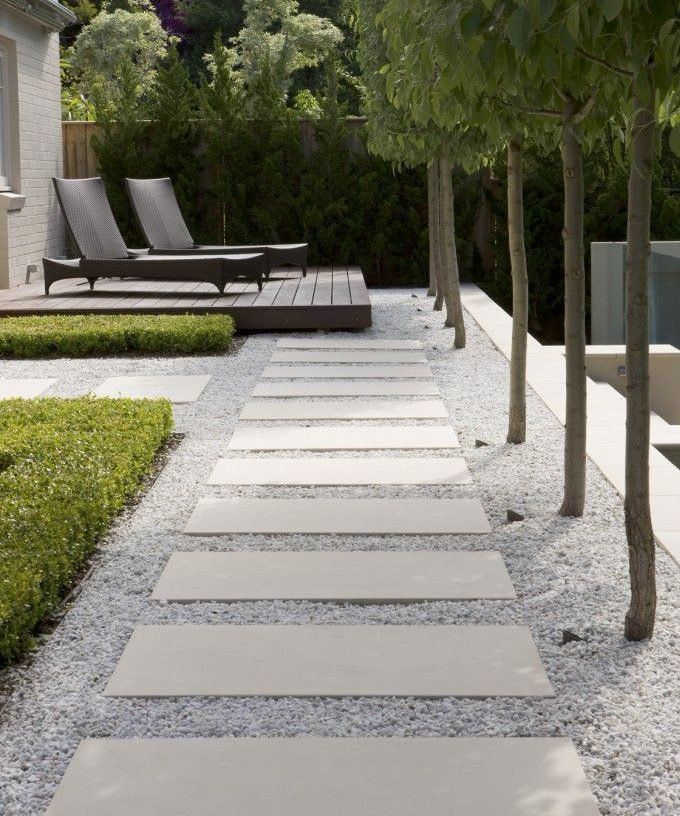 For shade areas, try Pennsylvania sedge (Carex pensylvanica), tussock sedge (Carex bromoides), barrenwort (Epimedium) and bigleaf aster (Eurybia macrophylla).
So, How Do You Get Started?
Gravel garden ideas
Gravel garden planting
| Credit: Jeff Epping
For beginners, Epping suggests starting with a gravel garden border in a dry, sunny spot along a driveway, sidewalk, south side of a home or front curb, like Epping's garden pictured here. First, remove all existing plants and grasses. Next, enclose the space with a border of stones or pavers stacked at least six inches high. Add ¼- to 3/8-inch quartzite or granite chip gravel and spread for a consistent 4- to 5-inch layer throughout. Purchase plants in 3.5- to 4-inch pots and arrange them spaced 12 to 15 inches apart.
Gravel garden ideas
Gravel garden ideas
Left: Gravel garden planting | Credit: Jeff Epping
Right: Gravel garden planting | Credit: Jeff Epping
Before inserting plants, shake off excess potting soil in a bucket. Dig a hole in the gravel, taking care not to stir up soil below the gravel. Insert the plant and cover with gravel, making sure the plant's crown is even or just below the surface of the gravel layer.
Once planted, water the new plants thoroughly, then monitor and water regularly—typically daily for the first couple of weeks—then throughout that first season as the plants need it depending upon the weather. "Initially you need to water the heck out of them until they develop roots," says Epping. In the second season, he says the plants should only need watering during drought periods. By the third year, plants should thrive without any extra watering.
"The idea is the garden will sustain itself for the long haul with whatever Mother Nature provides," says Epping.
For sources, check local garden centers, regional native plant sales and online native plant suppliers like Prairie Nursery of Westfield, Wisconsin, or Prairie Moon Nursery of Winona, Minnesota.
Gravel garden ideas
Year 2, Epping's garden
| Credit: Jeff Epping
Gravelled Plots & Gardens - Top 135 Photos, Landscaping Plot, Garden & Vegetable Garden
Private House Architectural Design
Bon Ton
Fresh Design Idea: Summer Plot and Courtyard Garden in Modern Style with Midday Shade
Life at the beach
Bayon Gardens
A fresh design idea: a sunny lot and a medium sized backyard garden in modern style with a fire pit, good lighting and gravel - great interior photo
Contra Verde
TLC Gardens
Pictured: sunny, regular modernist backyard garden with fire pit, good lighting and gravel
Paths and Steps
Russell Combs Design
Pictured: large shady, spring regular garden on a rustic slope with a garden path or gate and gravel cover withHome Farm and Garden
Fifth Season Landscape Design & Construction
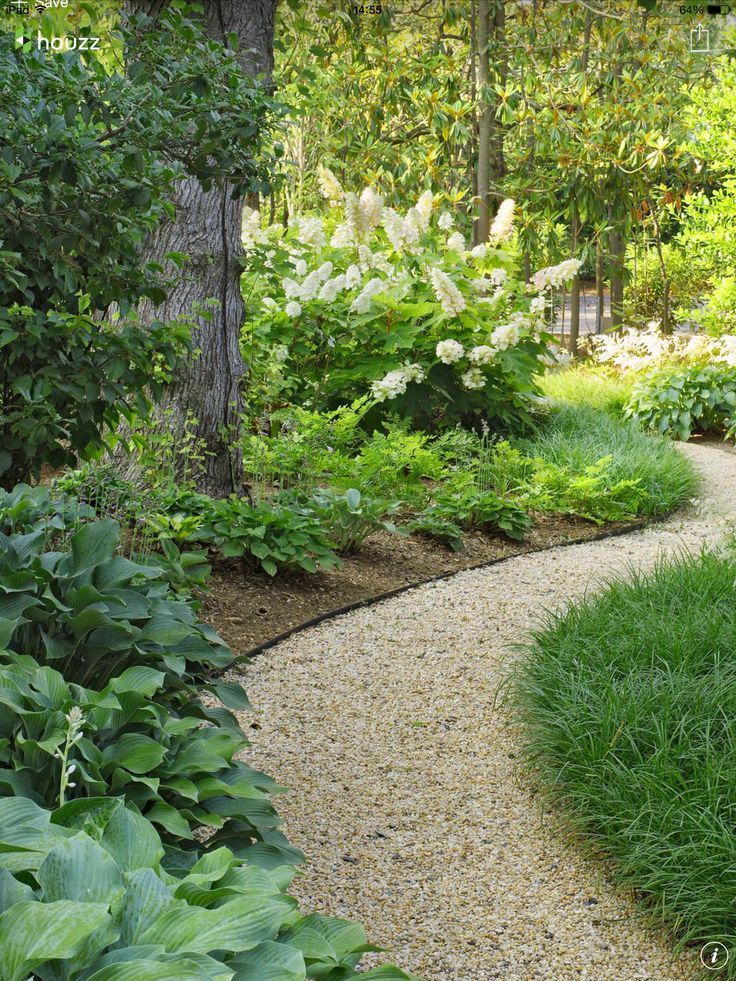
A gravel path leads the viewer around the south lawn, unfolding changing views at every turn.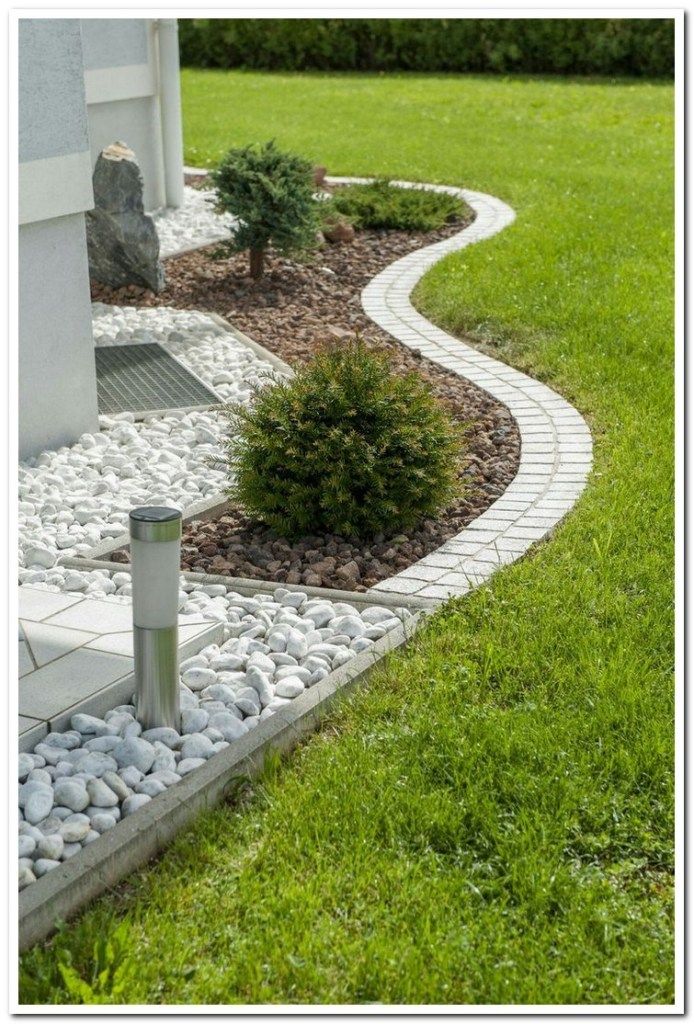 -Chauncey Freeman
Home Inspiration: Large sunny lot and classic backyard garden with gravel, garden path or gate, well lit
Mid-Century Ranch Makeover
Native Edge Landscape
Detail shot of side yard
Design ideas for a mid-sized sunny summer drought tolerant fusion side yard garden with desert plants, good light, gravel and metal fence
Southport Beach
LaurelRock
This was a creative collaboration with ROBIN KRAMER GARDEN DESIGN (their design combined with LaurelRock's plant installation and pruning). We used proper pruning techniques to square the hornbeam, green velvet, and 'Dee Runk' boxwood hedges, along with the pleaching of the linden trees.
Crow's Nest Potager - Summer Blooms
Hortulus Animae llc - Mindful Garden Design
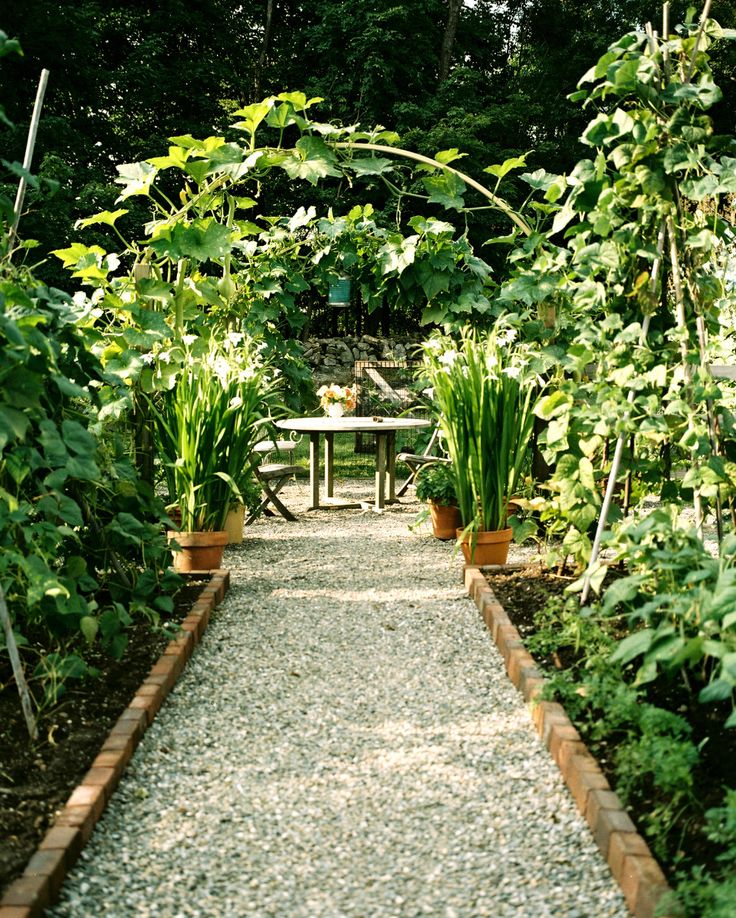
The Petronio Residency Center at Crow’s Nest is a visionary choreographer and artistic director Stephen Petronio’s latest venture.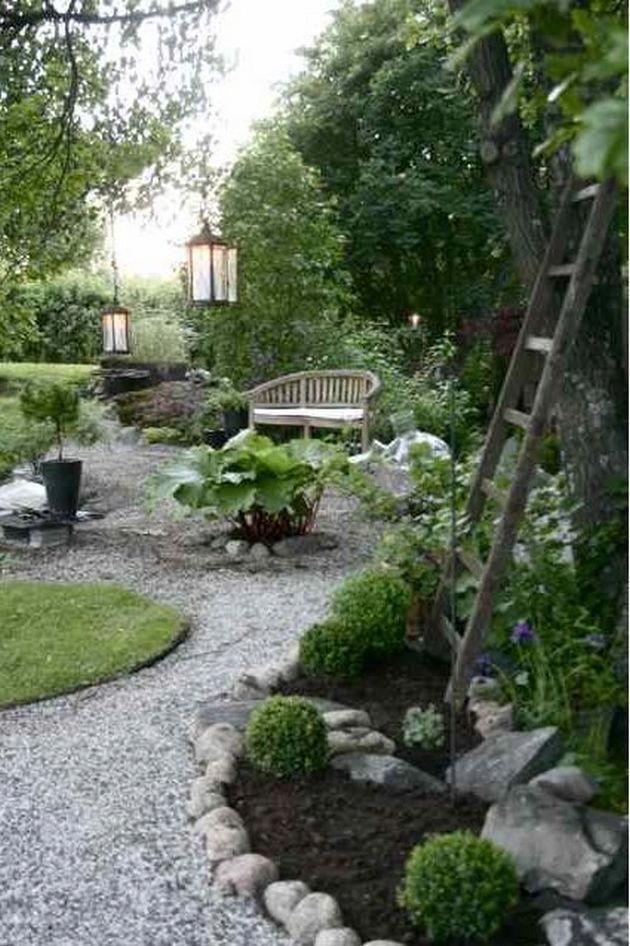 http://petron.io/prc/ The potager is conceived to feed and engage resident artists who are on site for creative research. The maze-like garden grows organic produce for the artists in an interactive setting that allows them to sit on the raised bed’s built-in benches to socialize, contemplate and commune with nature. -Rustic/Industrial design to complement the residency architecture -Centrally sited feature with access from dancer's wing residences, dance studio and main courtyard -24 Raised beds with sitting benches and trellises made of locally sourced Hemlock hardwood -Completely organic materials and growing techniques -Log Wall for mushroom cultivation
Lincoln Estate
a Blade of Grass
Design Idea: Large lot and classic front yard garden with driveway, landscaping stone and gravel
Graveling Your Garden - 10 Essentials. Photo - Botanichka
Many land owners are considering the idea of landscaping using gravel. It is one of the most versatile landscaping materials and comes in as many colors and varieties as there are stone types. Gravel is a good choice for paving paths and for "carpeting" as an alternative to lawn. Our article will tell you what you need to know about gravel. nine0003 Graveling your garden - 10 essentials
Where gravel can be used in your garden
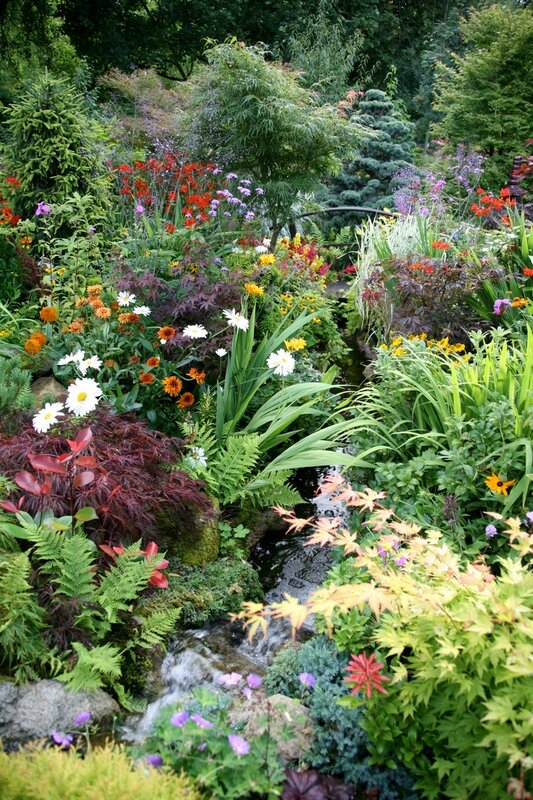
Gravel gardens make an attractive yet low-maintenance garden option. The natural low-key colors of the gravel and granite screenings will complement the landscape and contrast with the foliage to make the plants appear greener and more textured.
Many plants can be grown in a gravel garden, although hardy crops with minimal watering requirements are the most popular choice. In addition to saving water, gravel gardens are also a good choice if you want to reduce weed growth. Weeds with this variant of landscaping take root much less frequently. nine0003
If your property has drainage problems or is located on a slope where runoff is a problem, creating a dry gravel riverbed can help.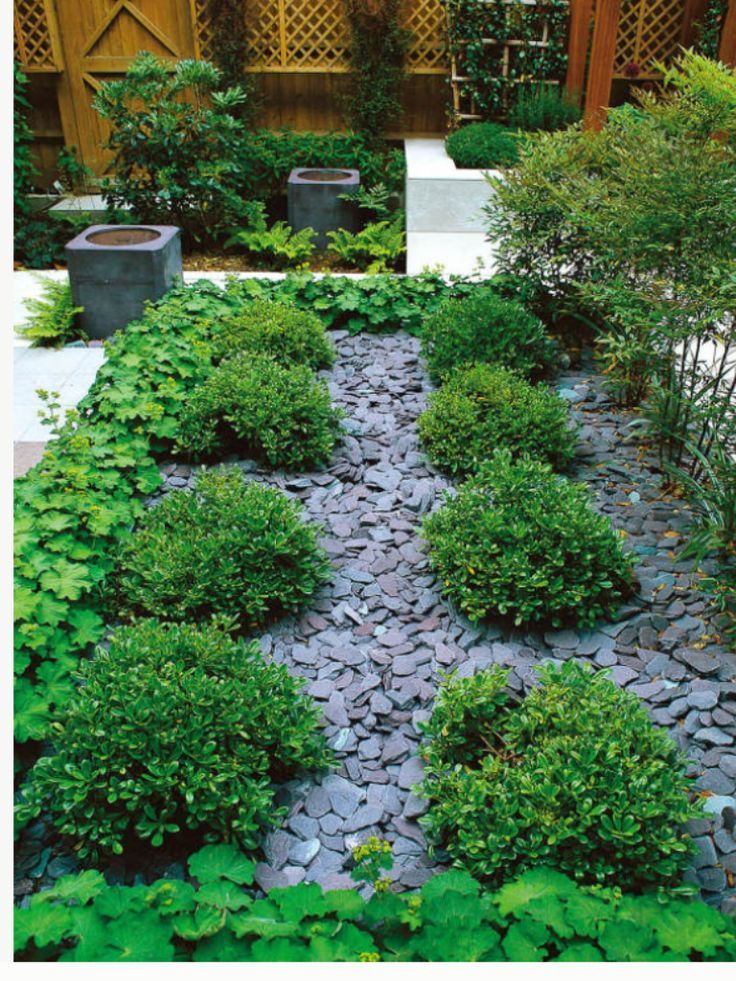 In addition, such a dry stream will be a great addition to your landscape.
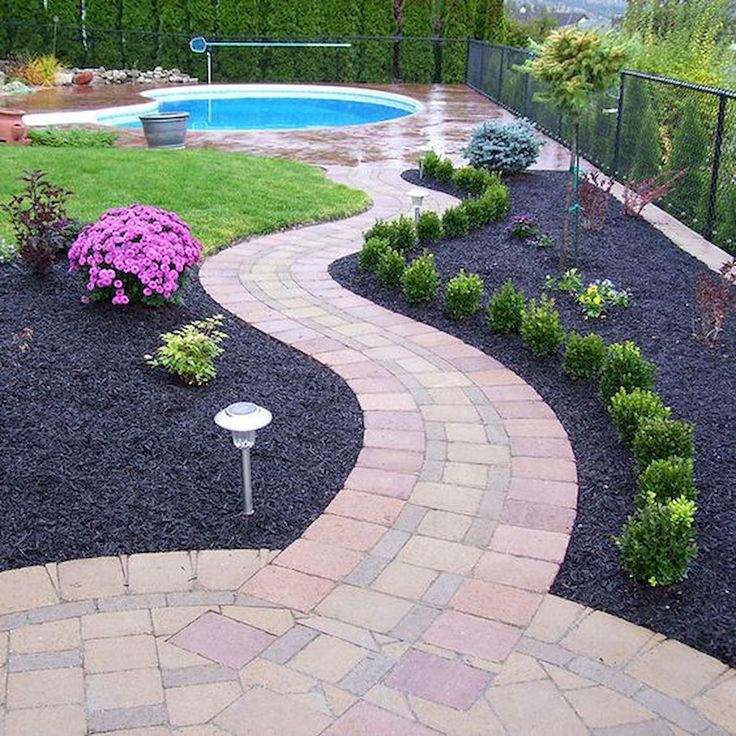
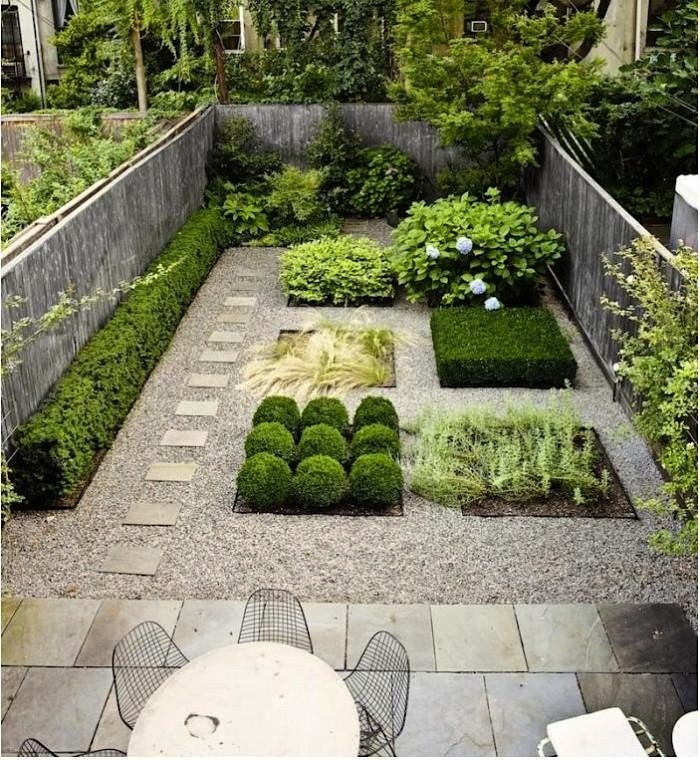
The gravel garden can also be a place for family gatherings. They can cover a large space with comfortable chairs and a fire pit, and it will be a great place for meetings in the garden. Unlike grass, which is quickly trampled down by heavy foot traffic, gravel is a good choice for areas that are frequently walked on or furniture is placed on. nine0003
Gravel is an excellent easy-to-use material for a driveway or footpath, and is more durable than asphalt, which can crack from freezing in winter. The lighter colors of the gravel also provide a different and somewhat warmer aesthetic compared to asphalt pavement and make the garden more stylish.
A simple and attractive design can be created using fine gravel, larger river stones and creeping ground cover plants. Choose ground covers that like good drainage and don't need too much water, such as creeping phlox, stonecrops, carnations, and bluebells.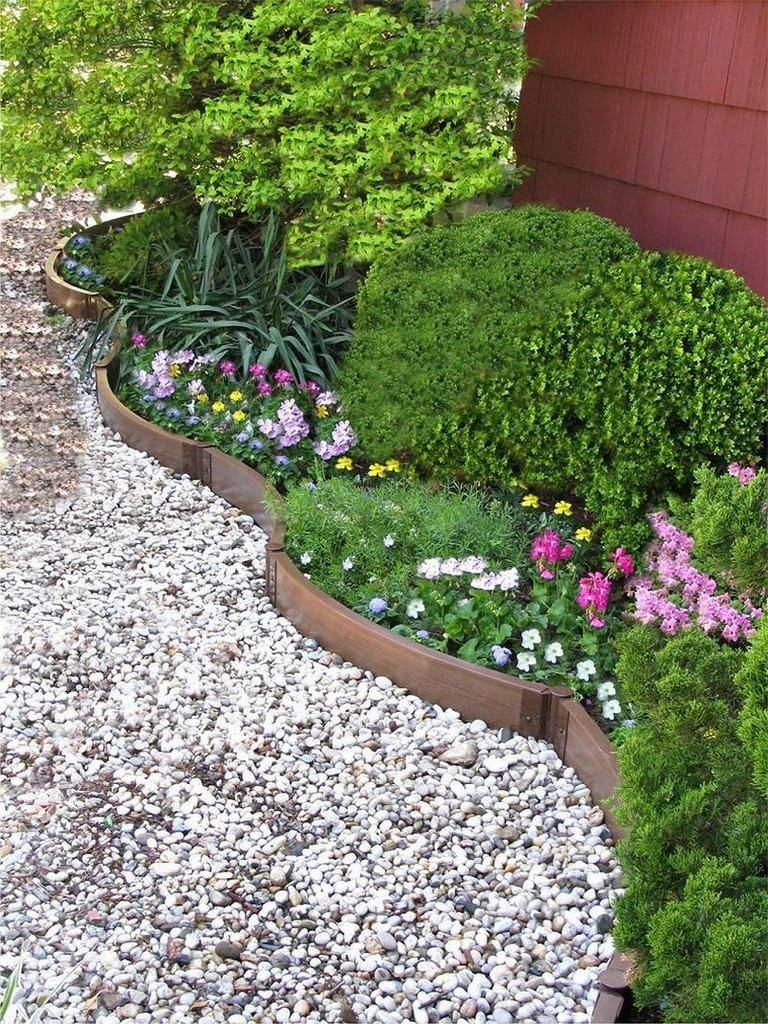 nine0003
Compared to mulch or dirt, which becomes muddy when it rains, a gravel garden will keep your shoes clean and less in the way.
Gravel is not cheap initially, but in the long run it is durable and requires little maintenance. What else do you need to know about gravel?
Many plants can be grown in a gravel garden, although hardy crops with minimal watering requirements are the most popular choice. In addition to saving water, gravel gardens are also a good choice if you want to reduce weed growth1. Not all gravel is the same
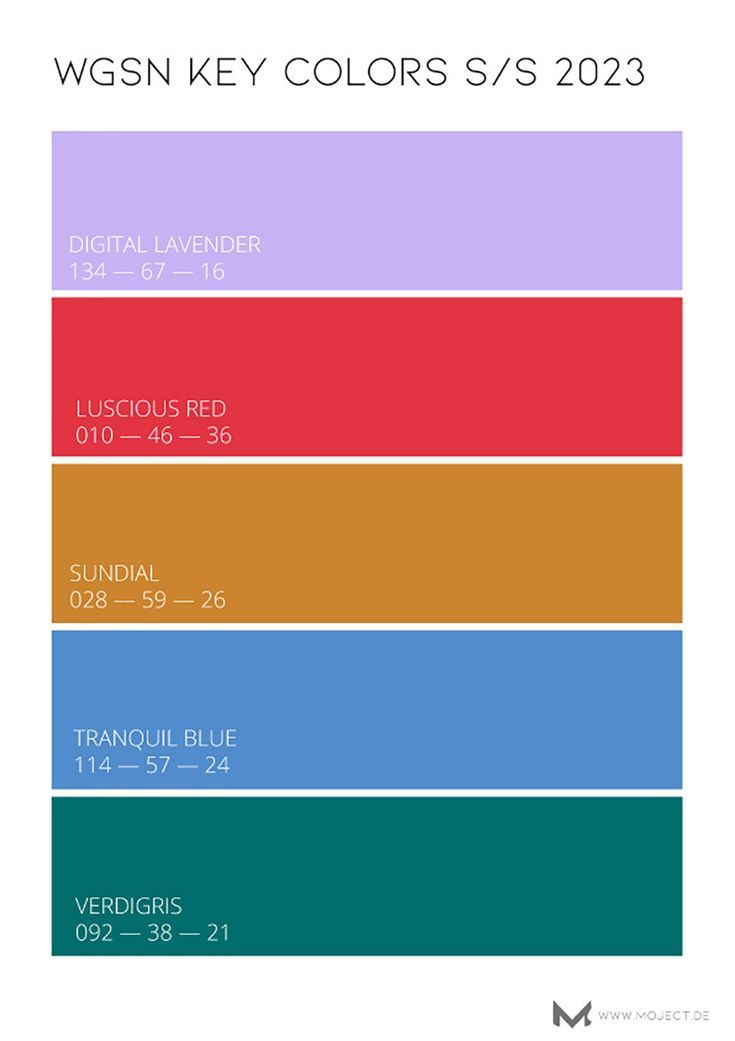
Once you decide to add gravel to your landscape, you should ask yourself the following question: what kind of gravel do I need? Each type of stone has a specific look and texture, as well as a purpose. Your choice will vary by region, so I recommend visiting outlets first to see what's available to you. You can have a wide variety of stone sizes, textures and colors, including matte or shiny pebbles, as well as colors ranging from white to black, grey, brown, blue, purple or even pinkish.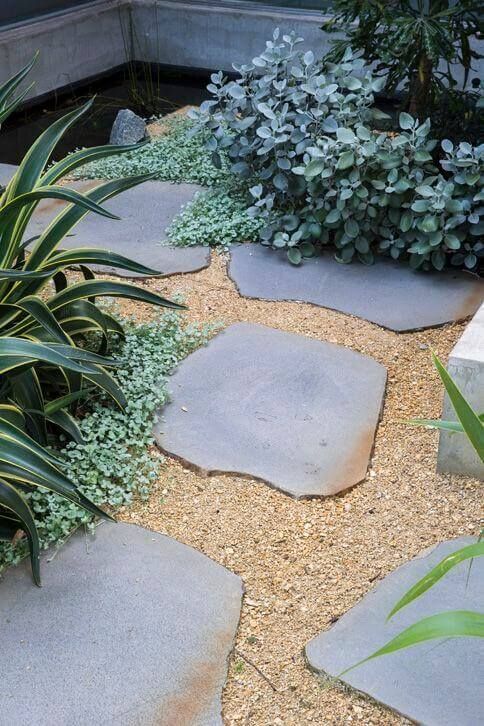 nine0003
2. Get to know the three most common gravel textures
Once you've decided on the type and color of your stone, you'll need to consider size and texture: granite sifting or fine gravel?
Granite Screenings (Crushed Stone) is powdered granite that has a fine texture and is a popular option for walkways and patios. It is usually gray or yellow-gold, fading to yellowish brown. This material is very accessible and probably comes closest to the typical idea of what a gravel driveway looks like. Also used for patios, retaining wall drainage, backfilling and leveling. Fine gravel is a small and smooth river stone of various sizes and is used for similar purposes, but looks more decorative. However, its price is much higher. nine0003 Fine gravel is a small and smooth river stone of various sizes and is used for paths and patios, but looks more decorative than sifted granite
3. Gravel can stick to shoes or pet paws
(especially when wet) get into the house, where they not only create a mess, but can also scratch the floors. It is desirable that the size of the stone be such that it will not easily get stuck in the soles of shoes and will not be carried into the house like sand. nine0003
4. Granite screenings require more maintenance than you might expect
Lay granite screenings in layers for added strength, carefully compacting each layer. Also consider adding a bonding stabilizer (water activated) to glue the tiny pieces together. While gravel can last for a considerable amount of time, it needs periodic renewal if the soil absorbs it or if it becomes covered in moss in shady areas. You should also consider laying landscape fabric under rocks to discourage weed growth and gravel from sinking into the ground. nine0003
Although gravel prevents the growth of weeds, due to its high looseness, weeds can still take root in it. You can keep weed growth to a minimum by spraying your gravel surfaces with table vinegar or salt water.
5. Gravel requires a rake
Rake paths, walkways and patios regularly to maintain a level surface with a rake.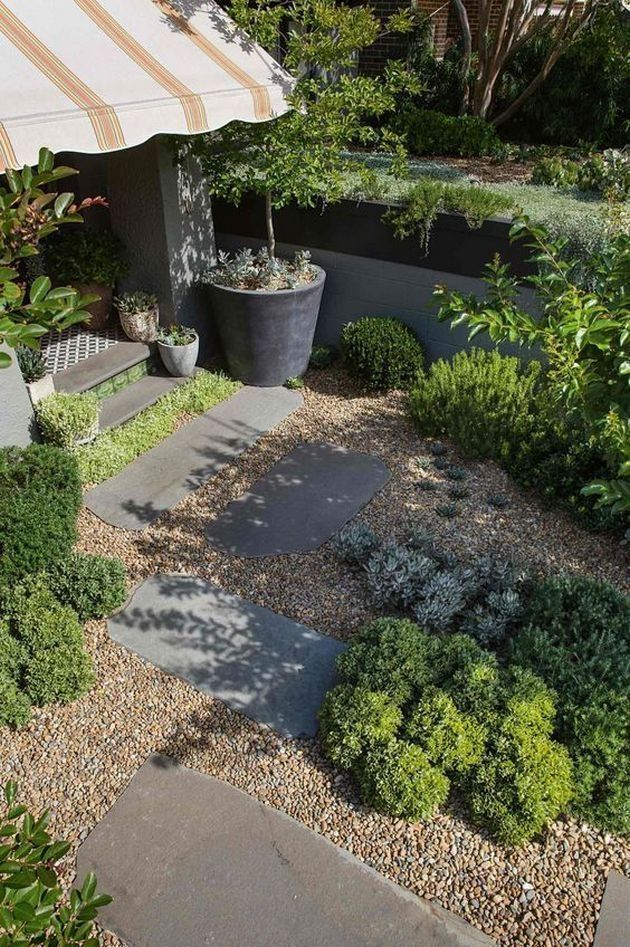 Consider installing edging material (curb tape) to hold the stones in place. nine0003
6. Consider the cost of gravel edging
Gravel edging options include metal, wood, stone, concrete, brick and plastic. And the prices for such materials range from budget to very high. The edge of the gravel path is softened by plants that fall onto the path: ferns, spurge, manzheka, catnip, etc.
7. Gravel is not convenient if you have to drag heavy objects
If you try to move something heavy, such as trash cans or a lawnmower, over gravel, it can feel like a heavy burden. Consider installing a concrete pad for container placement. nine0003
8. Do not use gravel on slopes
Gravel or rock is not the best choice for steep or sloping areas as the weight of the rock will cause it to slide down over time, which will be facilitated by rain and other factors.
Gravel or stone is not the best choice for steep or sloping areas as the weight of the stone will cause it to slide down over time.