Deep cleaning wooden floors
How to Deep Clean Hardwood Floors (5 Simple Steps)
Hardwood floors add beauty, charm, and warmth to your home but, besides their aesthetic value, one of their best attributes is that they’re easy to clean. Most of the time, a quick vacuuming is all they need.
Every once in a while, though, especially if you have kids and pets, they require a deep cleaning.
I’m not talking about vacuuming for a little longer than usual or wiping them down with your Swiffer. I’m talking about rolling up your sleeves and getting rid of the stains and grime that have built up over several months.
So how exactly do you deep clean hardwood floors?
It’s actually pretty easy; here are the basic steps:
- Step 1: Pick up loose dirt and dust with a vacuum, microfiber mop, or broom with split tips.
- Step 2: Determine whether your floors are protected with a surface or penetrating finish.
- Step 3: Pick a hardwood floor cleaner specially designed for your floor finish.
- Step 4: Spray the cleaner on the floors and mop in the direction of the floorboards.
- Step 5: Remove deep stains, grease, and scuff marks.
Although the process is quite simple, there are important details to know about each step to maximize your efforts and, more importantly, avoid damaging your floors.
To get the full story, keep reading. In this article, I explain step-by-step how to deep clean hardwood floors. Plus, I teach you how to avoid common cleaning mistakes, how often your floors need cleaning, and how to prevent stains in the first place.
Use the links below to navigate this article:
- Step 1: Pick Up Loose Dirt and Dust
- Step 2: Identify Your Floor Finish
- Step 3: Pick the Right Hardwood Floor Cleaner
- Step 4: Mop in the Direction of the Floorboards
- Step 5: Remove Deep Stains
- Frequency: How Often Should You Deep Clean Hardwood Floors?
- Preventative Measures: How to Minimize Cleaning Frequency
- Deep Cleaning Tips to Remember
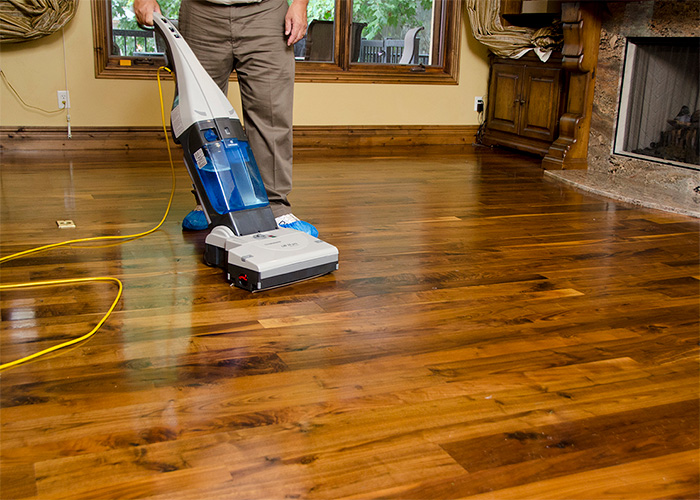
The first and easiest step in the process is to remove loose dirt and dust from your floors. The best tool for this step is a vacuum with a floor attachment that has soft bristles.
Avoid using a vacuum with an aggressive beater bar with hard bristles. A beater bar is a cylinder-shaped bar within the vacuum head that spins rapidly to lift dirt embedded deep in high-pile carpets. Large upright-style vacuums designed for carpets typically have ultra-aggressive beater bars, and most of them will scratch hardwood floors unless the vacuum head is designed specifically for hard surfaces.
If you’re thinking about investing in a new vacuum, I recently published this article comparing the top vacuums for hardwood floors and area rugs. Spoiler: I highly recommend canister-style vacuums, and the best one you can buy is the Dyson Ball Multi Floor Canister Vacuum (also helpful: my in-depth comparison of Bissell vs. Dyson vacuums). It’s super powerful and comes with plenty of attachments for hardwood floors.
Dyson Big Ball Multi-Floor Canister VacuumIf your current vacuum doesn’t have an attachment for wood floors, the next best option is to use a floor mop that has a detachable microfiber head like this one. The microfibers act as a vacuum for particles of dust while other mops and sponges with thicker fibers push dust along but don’t pick it up.
To get the best results, fill a spray bottle with water and give your floors a very light spritz before wiping them immediately with the microfiber mop. The water will attract dust and dirt particles, and the microfiber cloth will absorb the water.
If you don’t have a vacuum safe for hardwood floors or a microfiber mop, sweep up the loose dirt and dust with a broom that has fine bristles and exploded/split tips (like this). The fine bristles are small enough to pick up dust and dirt sandwiched between the floorboards. Some brooms have thicker bristles that won’t pick up dust as well and could scratch your floor.
Step 2: Identify Your Floor FinishNow that you’ve cleared out the loose dirt and dust, it’s time to determine the type of finish on your floors. This step is vital because floor cleaning products are designed for particular finishes, and using the wrong product could lead to severe, and in some cases irreversible, damage.
The good news is that you don’t have to be a home improvement guru to figure out which type of finish is on your floors. Let me explain in straightforward terms.
There are two categories of floor finishes; surface and penetrating.
Surface Finishes
Surface finishes are the most common type of residential wood floor finish. Some examples of finishes in this category are polyurethane, oil-based urethane, water-based urethane, and moisture-cured urethane. They are applied on top of stained wood floors to provide a layer of protection and give them a glossy, semi-gloss, or satin look.
Surface finishes prevent water and other liquids from absorbing into the floor, making it easy to wipe up spills. This type of finish is so popular because it makes floors super durable and easy to maintain.
Penetrating Finishes
Rather than creating a barrier on top like surface finishes do, penetrating finishes (also known as oil finishes) absorb deep into the fibers of the wood to oxidize and harden it from the inside out. Most floors with penetrating finishes are coated with a layer of floor wax, which adds some surface protection but not nearly as much as a surface finish.
Floors with penetrating finishes are very prone to water damage. Since the finish and wax coating doesn’t completely seal the surface, liquids can seep into the wood, causing it to expand and warp.
Since floors with penetrating finishes require more maintenance, they are much less common than surface finishes, especially in newer homes. However, before surface finishes came about in the 1920s, oiled and waxed wood floors were the only option. If your home was built before 1920, there’s a decent chance your floors have a penetrating finish.
Now that you understand the two types of finishes, how do you determine which finish is on your floor? There are a couple of methods; the water method and the scraping method.
- Water Method: Pour a small amount of water on your floor. If the water pools up, you have a surface finish.
 If it absorbs quickly into the wood, you have a penetrating finish.
- Scraping Method: Run the edge of a dull knife over a tiny area of the floor. If you’re able to scrape a transparent material off the floor, it’s a surface finish. If the floor smudges but no transparent materials scrape off, it’s a penetrating finish.
Now that you’ve identified your floor finish, the next step is to choose the appropriate hardwood floor cleaner.
Floors Protected By Surface Finishes
Surface finishes don’t allow water to penetrate, so it’s safe to use most water-based cleaning solutions.
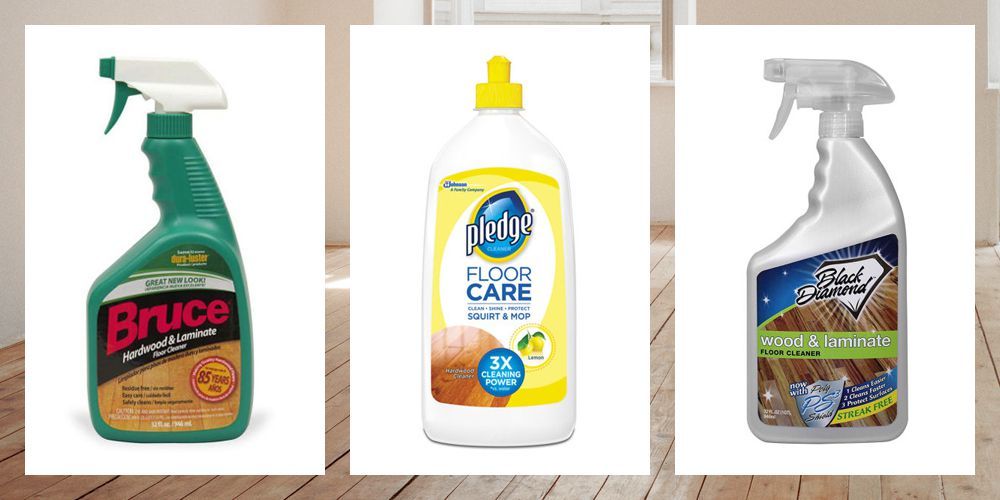
The product I recommend for floors with surface finishes is Bona Hardwood Floor Cleaner (see on Amazon). It comes in a spray bottle, making it easy to apply while keeping the amount of moisture in check. You can also buy a larger tank to refill it.
To learn more about why I recommend Bona Hardwood Floor Cleaner, check out our in-depth review that covers how to use it, what it’s made of, it’s key benefits, what customers complain about the most.
Alternatively, Bona makes a great microfiber mop that comes with their cleaner and spray functionality built-in. All you have to do is pull the trigger below the handle to wet the floor as you mop. It’s super popular and is very affordable on Amazon.
When it comes to water-based wood floor cleaners, there are so many options. You can save money buying generic brands, but I typically choose Bona products since they’re a trusted brand that has been completely dedicated to the installation, renovation, maintenance, and care of wood floors since 1919.
Bona water-based wood floor cleaners are incredibly effective and have very low VOC emissions making them not only safe for your floors but also safe for you. I’ve talked to many unaffiliated floor experts over the past several years, and 8 out of 10 of them recommend Bona products.
If you’re not a fan of Bona, Black Diamond Stoneworks Wood & Laminate Floor Cleaner is another great water-based cleaner that’s very affordable and gets excellent reviews. Like I mentioned, there are dozens of others if you browse the cleaning aisle at any home improvement store.
You can’t go wrong with either of these specially formulated cleaners, but you can go wrong by trying to develop a solution of your own. Many blogs will tell you to grab a bucket and mix water and vinegar, or water and lemon juice, water and bleach, or even water and tea bags—I’ve read it all.
What they don’t tell you is that the acid in these homemade solutions will break down the top layer of sealer, allowing moisture to absorb into the wood. When moisture gets in, the wood expands and begins to warp—not good.
The tricky part is that your floor may look great after cleaning it with water and vinegar/lemon/tea once, but experiments have shown that repeated use will degrade the finish and lead to severe damage.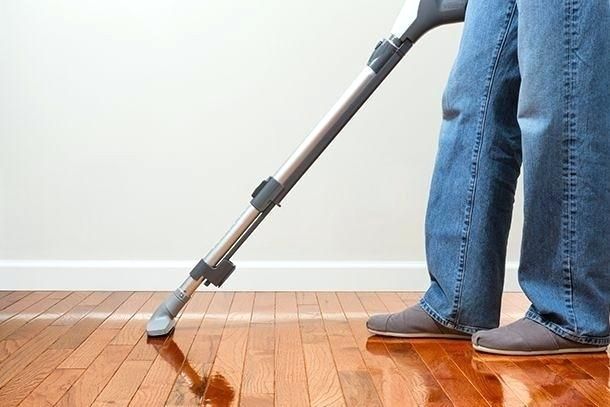
While they sound like great “hacks,” your hardwood floors are too important and frankly too valuable to risk it. Spend the $15 or so and get a cleaner that will get the job done without the risk.
Floors Protected By Penetrating Finishes
Since floors protected by a penetrating finish are even more susceptible to water damage than floors with surface finishes, use only pH-neutral cleaners specifically designed for penetrating/oil-based finishes. Avoid all water-based floor cleaners as those will quickly absorb into the wood and lead to irreversible damage.
The best product on the market is the Bona Professional Series Natural Oil Hardwood Floor Cleaner (see on Amazon). Its solvents and surfactants are specially formulated for hardwood floors treated with penetrating oil finishes. It’s not only safe for your floors, but it’s also non-toxic, non-flammable, biodegradable, and GREENGUARD Children and Schools Certified, making it safe for you and your family. For more details, check out this product’s technical datasheet.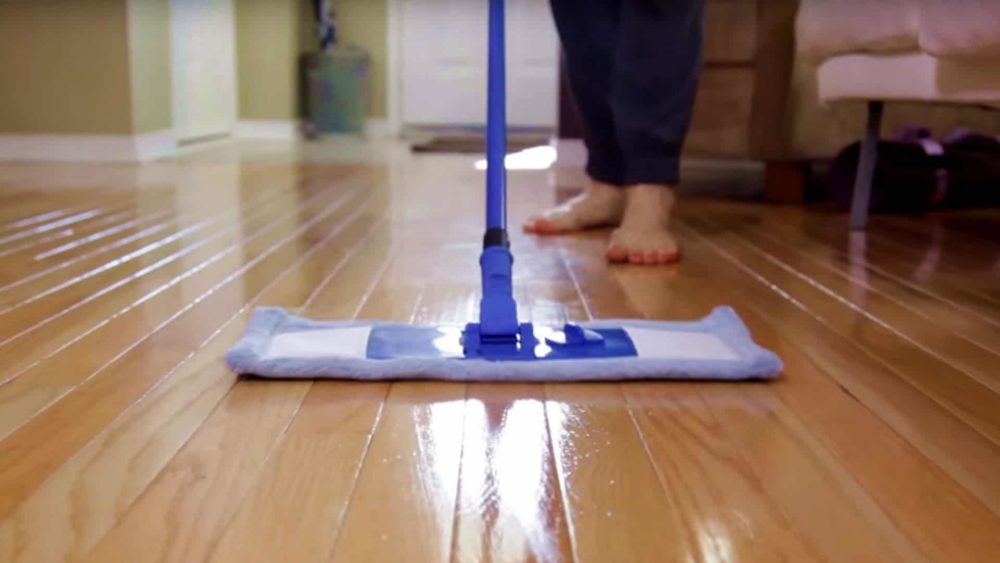
Now that you’ve removed the dust and dirt, identified the finish, and gathered the proper cleaning solutions, it’s time to get cleaning.
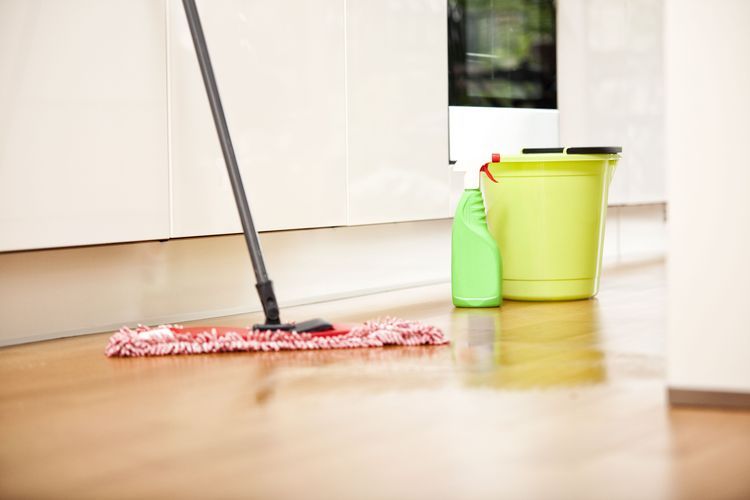
For surface-finished floors, spray the water-based hardwood floor cleaner of your choice on your floors and wipe it immediately with a microfiber cloth or floor mop with a microfiber cloth head. You do not need to mix the cleaner with water; the cleaner is designed to work on its own. Also, it comes in a spray bottle to limit the amount of moisture on your floors.
If you don’t have a mop with a microfiber head, you can buy one on Amazon (they’re very inexpensive), or you can use a regular sponge mop. I recommend microfiber because it will attract and absorb dirt and grime better than anything else.
The process is the same for penetrating surfaces, but instead of spraying a water-based cleaner, spray the cleaner specially designed for penetrating finishes.
Regardless of the type of finish, it’s important to mop in the direction of the floorboards. Doing so prevents streaking and allows the fibers of the mop to pick up dirt and grime that’s wedged between the floorboards.
If you take anything away from this article, please take this: water and wood are natural enemies.
Exposing penetrating-finished wood floors to water is a definite no-no. But, even floors protected with surface finish can become damaged when excess water leaks between the floorboards. Sure, you might get away with wet-mopping your floors a few times, but eventually, moisture will absorb into the wood.
If you forgo my advice to use a spray-and-wipe cleaning solution and instead use a mop and bucket method, I strongly urge you to ring the mop out as much as possible and make sure it’s barely damp when you wipe the floor. There’s no reason ever to soak your floor with puddles of water; it’s a recipe for disaster.
Bottom line—there’s a reason that specially formulated floor cleaners come in a spray bottle. If you use the right cleaner, your floors only need a light mist.
The fifth, and final, step is to tackle those scuffs and stains that remain on your hardwoods after mopping.
Every stain is a little bit different, and so are techniques necessary to remove them. Here’s a list of the most common stains and tips on how to get rid of them quickly and safely.
Note: The techniques I’m about to describe are for treating stains on wood floors with surface finishes (polyurethane and urethane). Since floors with penetrating finishes are so susceptible to damage from water and water-based products, the best way to treat stains on them is to use a specially formulated spot remover. The best one, by far, is the Woca Denmark Spot Remover. All you have to do is spray it on any stain (wine, coffee, water, pet mess, etc.), let it dissolve the stain for about 15 minutes, and wipe it with a slightly damp cloth. After you’ve removed the stain, you might need to apply a new coat of wax or oil for added protection.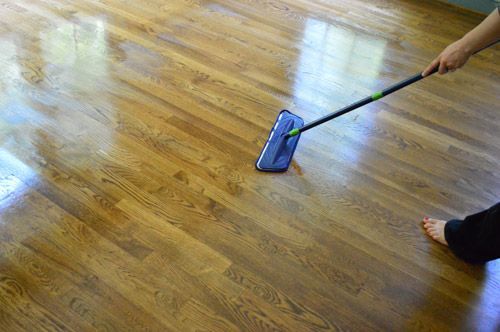
Scuff Marks
Walking with rubber-soled shoes or dragging furniture across your hardwoods will cause unsightly scuff marks. Fortunately, there are a handful of easy ways to get rid of them.
The easiest way to clean scuff marks is to erase them with an eraser (yup, a regular pencil eraser). Just rub the eraser firmly across the scuff marks and sweep away any of the remaining eraser shavings.
Another easy way to clean scuff marks is to rub them with a tennis ball. If large areas are scuffed up, cut a hole in a tennis ball and attach it to a broomstick, so you don’t have to bend over.
If neither of those two methods does the trick, mix a little baking soda in water, dab a clean towel or the Mr. Clean Magic Eraser in the mixture, and gently rub scuff marks out of the floor. Dry the area immediately after.
Oil and Grease
To get rid of grease and oil stains, mix a few dashes of dish soap with water and use a cloth to rub the stains gently in a circular motion. Surfactants in dish soap break down the molecules in grease and loosen it from the surface of your floor, just like they do on messy dishes.
For stubborn grease stains, put a clean cloth over the stain and place an iron on top of the cloth and turn the iron to medium heat. The steam from the iron will lift the grease into the cloth. Prolonged heat exposure can damage your floor finish, so only use the iron for a minute.
Paint
Even if you protect your floors while painting, a drop or two will inevitably sneak by the drop cloth. When this happens, rub the paint with a damp microfiber cloth. If that doesn’t work, rub it with a cloth dipped in rubbing alcohol. Wear gloves and avoid topical contact as the alcohol can irritate your skin.
Pet Stains
Mix a solution of 1 part white vinegar and four parts water. Never use a water/vinegar solution with more than 25% vinegar. As I mentioned earlier, prolonged exposure to the acid in vinegar can damage your floor, so ‘not enough’ is always better than ‘too much. ’
’
Dip a cloth in the water/vinegar solution and scrub the stained area for a few minutes. After you dry the area, sprinkle baking soda on it and let that sit for a couple of hours. The baking soda will absorb and deodorize the nasty smell.
Finally, clean up the baking soda with a damp cloth and dry the area again.
If that doesn’t work and you still have dark stains on your wood floors, place a few paper towels over the stains and spray them with a 3% hydrogen peroxide solution.
Let the moist paper towels sit on the stains overnight. In the morning, remove the paper towels and check the stains. If you see some improvement, but the stains are still present, repeat the process.
As you can see in this quick video, sometimes it takes several nights to remove the stains completely.
Water Stains
Water stains are common on hardwood floors, and the biggest culprits are potted plants. Most people overwater their plants and don’t realize they are leaking out the bottom until it’s too late.
If you notice water staining on your floors, first try wiping it with a slightly damp cloth. If the water hasn’t penetrated the surface of the floor, the stain should wipe right off.
If that doesn’t work, place a clean cloth over the stain. Take a hot clothes iron with the steam setting off and rub it over the cloth for several minutes, keeping the iron in constant motion. The heat from the iron should evaporate the moisture that’s embedded into the wood and lift the stain out.
If this doesn’t work, your last resort is to lightly sand the area until the stain is gone and reseal it with a surface finish. This process is a little more involved, so I’d highly recommend consulting with a flooring expert (get a free quote from one on HomeAdvisor.com), especially if the stain is more significant than a few inches
Chewing Gum
To remove chewing gum that’s stuck to your floor, put a handful of ice cubes in a plastic bag and hold it against the gum until it turns rock-hard.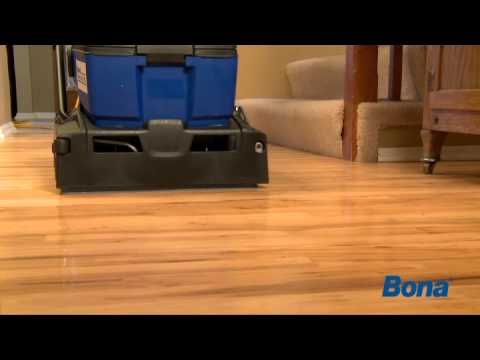 Once cold and hard, you can easily chip off the gum with a plastic knife or any other flat tool.
Sticky Residue
Tape and other adhesive materials can leave a sticky residue on your hardwood floors. When this happens, dip a microfiber cloth or Mr. Clean Magic Eraser sponge in a 4 to 1 water/vinegar solution and gently rub out the residue.
If that doesn’t do the trick, pick up some Goo Gone Pro-Power Spray Gel on Amazon. Goo Gone is specially formulated to clean up sticky messes (or Goo) while leaving the surfaces, in this case, your floor, completely unharmed. Spray it on the residue, let it sit for 5 minutes, then wipe it off with a damp cloth. Another great product to try is Goof Off. It’s a bit more potent than Goo Gone, so you need to be cautious and test it in a small area first. Learn more in this comparison of Goo Gone vs. Goof Off.
Wax
In this recent article, I cover four simple ways to clean wax off wood floors and furniture. If you have a significant wax spill or stain on your wood floors, I highly recommend reading that article in its entirety. But, if you don’t have the time, here’s a quick summary.
The simplest way to clean wax from your floors is to gently scrape it off with a plastic utensil, spatula, or credit card. This method works for minor areas, but you need to be careful not to scratch the wood.
For more substantial waxy messes, I recommend the Heat and Wipe method.
In this method, you apply heat with either a hair dryer or clothing iron (on the lowest setting) to loosen the wax.
If you use a hair dryer, wipe the wax with a clean cloth when it becomes soft.
If you use an iron, place several paper towels on the wax and a washcloth on top of the paper towels. Press the iron (no steam) on the washcloth in five-second increments. As the wax melts, it will absorb up into the paper towels. You may need to replace the paper towels throughout the process, especially if you have a major area to clean.
Keeping hardwood floors clean and beautiful isn’t a complicated process; you just need to stay on top of it. Here’s the cleaning and maintenance schedule that the National Wood Flooring Association recommends:
- Every Day: Remove dirt and dust by sweeping or dust mopping.
- Every Week: Vacuum using a wood floor attachment that won’t cause scratches.
- Every Month: Perform a deep cleaning. Mop with a floor cleaner designed for the finish on your particular floors and spot-treat stains.
- Every 3 to 5 Years: Add a fresh coat of finish. Applying a new coat of finish will restore the look and extend the life of your floors and is a much cheaper alternative to completely refinishing. Speaking of which…
- Every 30 Years: Completely sand down, re-stain, and refinish your floors. You only need to do this if your floors become extremely damaged or worn out from decades of abuse.
 The total cost will depend on where you live and the size of your home, but you can expect to pay between $1 and $5 per square foot.
Hardwood floors don’t need to be cleaned as often if you take some simple preventative measures to limit your floors’ exposure to dirt, dust, and stains. Here’s what you can do:
- Shoes Off: Take your shoes off when you enter the house. Even if your shoes are clean, the rubber or hard soles will wear on your floors over time, causing them to dull. If you’re serious about preserving your floors and want to clean as infrequently as possible, take off your shoes.
- Floor Mats: Place floor mats directly outside and inside external doors and in high traffic areas like near the kitchen sink and at the bottom of the stairs. This anti-fatigue mat is fantastic to stand on while your doing dishes. Not only will it protect your floor from spills, but it will also stick to the floor and prevent you from slipping.
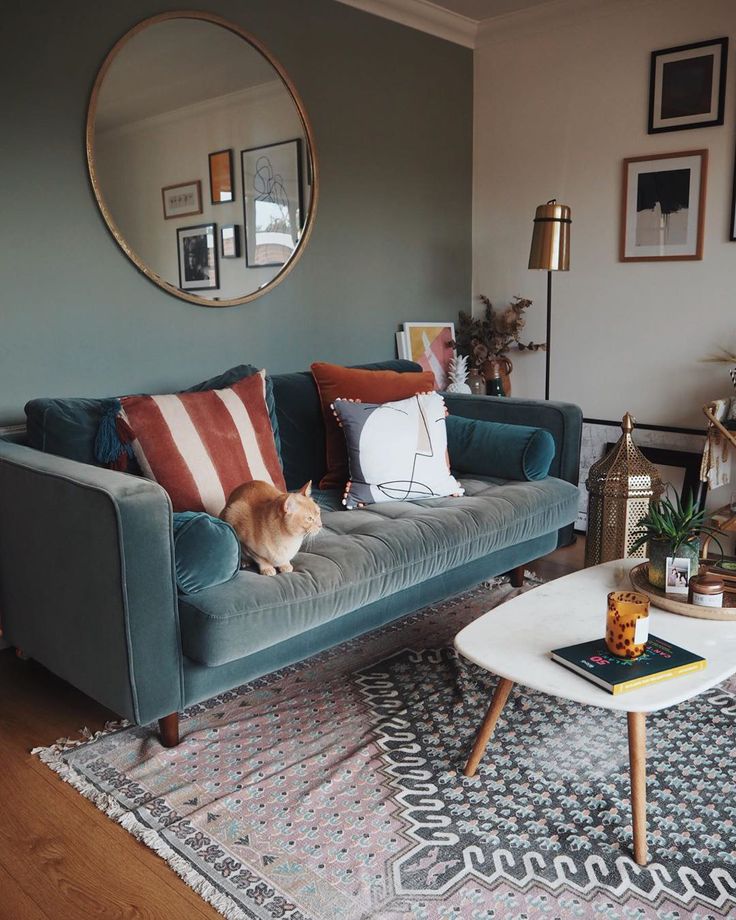
- Area Rugs: Put area rugs under furniture, especially tables and couches where you and your family have meals and snacks.
- Furniture Pads: Stick soft pads under the legs of your furniture to prevent scratches and marks on the floor.
Deep cleaning hardwood floors is a simple process, but there are a few key things to keep in mind.
- Soft Bristles: Vacuum dust and dirt with a soft bristle brush. Upright vacuums with aggressive beater bars will scratch your floors.
- Specialized Cleaning Products: Use a cleaner designed for the specific finish on your floors. Floors with surface and penetrating finished require different care. Before you apply cleaning solutions, make sure you understand what type of finish is on your floor.
- Water and Wood Don’t Mix: Stick to cleaners designed specifically for hardwood floors.
 Apply them with a spray bottle to limit the amount of moisture on your floors.
 - Avoid Homemade Cleaning Solutions: Never use a homemade solution of water and vinegar/lemon/tea. Over time, the acid levels in vinegar, lemon, and tea will break down the finish and lead to permanent damage.
- Clean in the Direction of the Floorboards: This allows the vacuum or mop head to clean dirt and grime that’s built up between the floorboards.
- Never Use a Steamer on Hardwood Floors: Steamers work great for some surfaces like tile, but the National Wood Flooring Association says to avoid them on hardwoods because they expose the wood to excessive heat and moisture. The heat and moisture cause the wood to expand and contract quickly, leading to warping, cupping, and long term damage.
Tell Us What You Think
Do you know of any better methods for deep cleaning hardwood floors? Have you tried any products that work well? Leave a comment below; we’d love to hear your feedback.
If you found this article helpful, you should also check out:
- Is It Safe to Clean Hardwood Floors With Vinegar? (Quick Guide)
- How to Deep Clean Tile Floors: 6 Simple Steps
- The Ultimate House Cleaning Checklist (Printable)
- How to Clean a Concrete Basement Floor (6 DIY Methods)
- Rejuvenate Floor Cleaner and Restorer Review: Does It Really Work?
- Bona Hardwood Floor Cleaner (The Ultimate Review)
- Did Rejuvenate Ruin Your Floors? Why It Happened & How to Fix It
- The Best Vacuums for Hardwood Floors and Area Rugs
- Goo Gone vs. Goof Off: Which Adhesive Remover Is Better?
- 4 Cheaper Alternatives to Dyson Vacuums
- Bona vs. Swiffer: Which Floor Mop Is the Best?
- Rejuvenate vs. Bona: Which Floor Cleaner and Polish Is the Best?
- The Ultimate Home Maintenance Checklist (Printable)
- What Cleaning Products Contain Ammonia? (19 Examples)
- Is a Central Vacuum System Worth It? (Pros & Cons)
The Best Way to Clean Hardwood Floors — Advice From Bob Vila
istockphoto. com
com
A: It’s true, regular cleaning is a must to maintain hardwood floors. Because different floor finishes have unique care requirements, the best way to clean hardwood floors will depend on the type of finish rather than the wood species (e.g., cherry, maple, or oak). If you use the wrong method or cleaner, you could damage the wood.
Read on to learn how to identify your floor’s finish and select supplies for dusting, deep cleaning, and removing stains. Using these recommended techniques for the best way to clean hardwood floors will keep yours looking great for years to come.
First, figure out what kind of finish your floor has.There are two main types of hardwood floor finishes: surface finishes and penetrating finishes.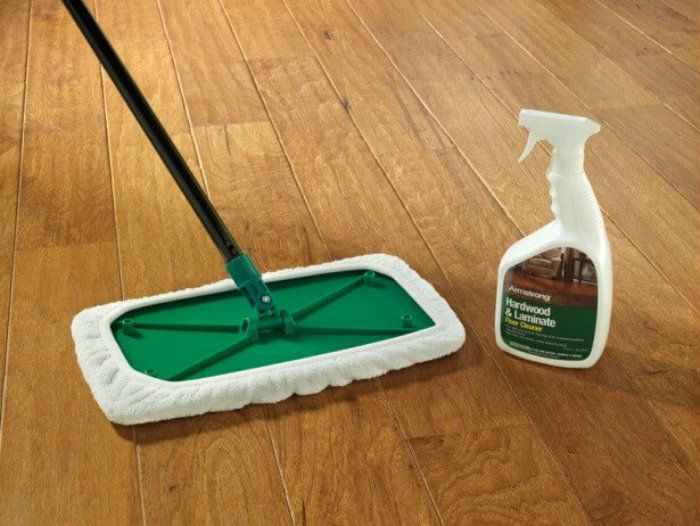
- Surface finishes such as urethane and polyurethane form a protective, waterproof barrier on the surface of the floor. When liquids come into contact with surface finishes, they pool rather than penetrate the wood. It’s safe to use water and water-based cleaning products on surface finishes.
- Penetrating finishes such as linseed or tung oil soak through the surface of hardwood floors and then are usually topped with a wax coat for added sheen. These finishes easily absorb water, and water can warp wood floors. Use only solvent-based cleaning products instead of water-based ones on floors with penetrating finishes.
The easiest way to check if a floor has a surface finish is to take a sharp knife blade to a small, hidden area of the floor and scrape off a tiny amount of finish. If the scraped material is clear, your floor probably has a surface finish. If scraping the floor finish smudges it, but no clear material comes away, the floor likely has a penetrating finish.
Advertisement
RELATED: New Floors? 5 Top Hardwood Options to Know
Bust dust by mopping, sweeping, or vacuuming regularly.Dry mopping, sweeping, and/or vacuuming on a weekly basis are the best ways to rid hardwood floors of light dust, dirt, and pet hair accumulation. This routine works on floors with either surface or penetrating finishes.
The best mop for wood floors is usually one with a large, flat head affixed with a microfiber cloth pad, such as the Swiffer Sweeper. These mops have pads with tiny synthetic fibers that reach into the grooves of wood floors to pick up and hold dust without scratching the wood.
To keep costs down and lower your environmental impact, choose pads that can be removed, machine washed, and reused. Compatible on a variety of hardwood floor mop brands, a pair of reusable pads like the Old Home Kitchen Mop Pads costs less than $15.
If you prefer to sweep rather than mop, opt for a broom with synthetic fiber ends to help trap collected dust in the broom head and prevent it from resettling on the floor.
If your preferred mode of dust busting is vacuuming, use a floor-brush attachment and avoid the beater bar—its rotating brush can dent wood floors. Move your cleaning tool from one side of the floor to the other, paying extra attention to areas where adjacent floor boards meet. These nooks are hiding spots for trapped dust.
istockphoto.com
Scrape off food stains.Remove caked-on food by carefully inserting the tip of a plastic knife under the lower edge of the debris and then gently sliding the knife upward. Rub the scraped spot with a clean cloth slightly dampened with a few drops of water, then make a second pass with a dry cloth to dab up the water.
If using this technique on a floor with a penetrating finish and a small section of the wax coat gets stripped by the knife, reapply a dollop of the hardwood floor wax to the area with a soft cloth, buffing it in to render the area shiny and spotless.
Advertisement
Fight oil stains with TSP.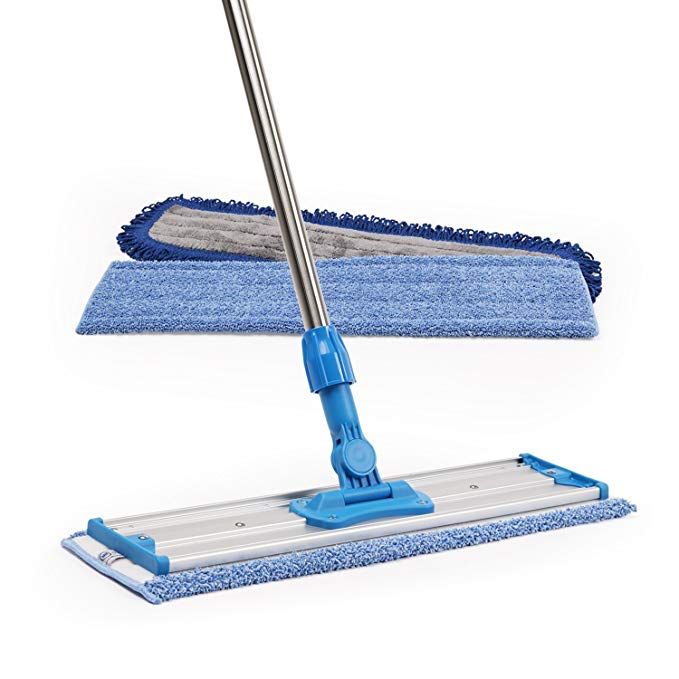
Oil and grease stains on floors with surface or penetrating finishes easily break down when exposed to trisodium phosphate (TSP). Don protective gloves and safety glasses, and dilute 2 tablespoons of TSP in 1 gallon of warm water in a large bucket. Dip the tip of a clean cloth into the solution, then use gentle circular motions to work it into the stain. Once the TSP dissolves it, run a water-dampened cloth over the area to sop up the TSP, then quickly dry the area with a clean cloth.
Ice out wax and gum.Dried candle wax, crayon marks, and chewing gum on floors with surface or penetrating finishes can easily be removed with ice. Fill a Ziploc freezer bag with a few ice cubes, place the chilled bag over the buildup until it becomes brittle, then scrape it off with the edge of a plastic spatula.
If the spatula removes the protective wax from a floor with a penetrating finish, use a soft cloth to reapply a solvent-based hardwood floor wax to the scraped area, then buff it into the repaired area with the cloth.
Spots left by water, ink, or pet urine are some of the most stubborn stains. For floors with penetrating finishes, it’s best to tackle these stains with the following steps using only an appropriate hardwood floor cleaner and a scouring pad designed for a penetrating-finished floor.
- Remove the spots from floors with penetrating finishes by lightly sanding the stain with extra-fine sandpaper.
- Gently scrub with a coarser “00” grade steel wool wet with mineral spirits.
- Wipe away the mineral spirits with a damp cloth, then use a dry cloth to remove the water.
- With a soft cloth, apply a solvent-based hardwood floor wax to the scrubbed area and buff it in to restore its shine.
istockphoto.com
Deep clean the floor with a quality hardwood floor cleaner.The type of wood floor cleaner that’ll work best for your floors depends on the floor’s finish.
If a surface-finished hardwood floor still looks dingy or dull after dusting, deep clean it with any pH-neutral, wax-free, and petroleum-free cleaner, such as Bona PowerPlus Hardwood Floor Deep Cleaner, or a homemade solution comprising ¼ cup of dish soap and 1 gallon of warm water.
Advertisement
The best way to mop wood floors with a surface finish starts with saturating a sponge mop with the cleaner, wringing out the excess liquid until the mophead is damp but not dripping, and then mopping 3-foot sections of the floor at a time using circular motions to draw out dirt and grime. Then, rinse the mop in clean water, wring out the excess, and damp mop the floor again to soak up lingering cleaner. Use a soft, clean cloth like the AIDEA Microfiber Cleaning Cloths to dry the floor.
If your floor has a penetrating finish, the best way to deep clean it is to strip away the grimy old wax coat and reapply a fresh wax coat. Rub a clean cloth saturated in mineral spirits over 2-foot sections of the floor at a time, letting the mineral spirits dwell for 5 minutes on each section before wiping away with a fresh cloth dampened slightly with water. Then, dry thoroughly with a fresh, dry cloth.
Finally, apply a solvent-based hardwood floor wax, such as Trewax Paste Wax, with a soft cloth. Use the amount the manufacturer recommends. Then use the cloth or an electric polisher (buy one or rent one at a hardware store) to buff the wax in circular motions, polishing in 2-foot sections at a time.
Perform the appropriate deep-cleaning routine on a biannual basis, whether you see grimy buildup or not. It can be hard to notice gradual changes on a floor you walk on every day, but after it’s clean you may be impressed by the difference.
RELATED: The Best Hardwood Floor Cleaner Machines of 2022
istockphoto.com
Final ThoughtsWhen looking for the best way to clean hardwood floors, first determine the type of finish on the floors. The type of finish determines the kinds of cleaners and methods that will safely help clean the floor. While a good deep cleaning can help restore the look of wood, it’s usually only necessary a few times each year. In between, regularly mopping, sweeping, and vacuuming can help maintain the finish and keep floors looking their best.
Advertisement
FAQs About Cleaning Hardwood FloorsWhether there is natural wood flooring or engineered wood flooring underneath your feet, there are bound to be questions about what’s safe and effective for cleaning wood floors. Keep reading for answers to some of the most popular questions about how to clean wood floors.
Q. Can I use vinegar on hardwood floors?Using a hardwood floor cleaner made with white vinegar can help with cleaning heavily soiled hardwood floors. It’s important to dilute the white vinegar, using ½ cup of white vinegar for every gallon of water, as it can be too harsh and damaging on its own.
Q. How do you deep clean old hardwood floors?Deep cleaning old hardwood floors is very similar to cleaning newer floors. Choose a method and cleaner that’s made to clean wood floors with the same type of finish. However, it’s important to test a small area and go slowly, as the wood may need some small repairs or have damage that’s only visible up close.
istockphoto.com
Q. Is Dr. Bronner’s safe on wood?Dr. Bronner’s is a pure castile soap that is safe on wood if it’s diluted. To make your own homemade wood floor cleaner, add just a few drops to a spray bottle filled with water.
Q. How do you get ground-in dirt out of hardwood floors?Microfiber padded mops are great for surface dirt, but ground-in dirt may require the use of a plastic knife to scrape out dirt, a vacuum attachment to pull it out, or light sanding if it’s truly trapped in the wood.
Q. Why are my wood floors still dirty after mopping?There are a lot of reasons wood floors seem dirty after mopping. Make sure to rinse the mophead thoroughly and often, as a dirty mop can’t attract new dirt it encounters on the floor. Also, swapping out mopheads can help when dealing with very dirty floors. To find out if the floor is clean, wipe a white cloth over newly mopped areas to see if the floor is still dirty.
Some jobs are better left to the pros
Get free, no-commitment estimates from licensed cleaning professionals near you.
Find Pros Now
+The best way to clean hardwood floors
Regular cleaning is a must to maintain the rugged beauty of hardwood floors. Because different floor finishes have unique care requirements, the best way to clean hardwood floors will depend on the type of finish, not the type of wood (e.g. cherry, maple, oak) - use the wrong method and you could cause damage!
Read on to find out how to determine your floor finish and then select the best equipment and supplies ideal for dust removal, deep cleaning and stain removal. nine0003
Check the finish of your floor. There are two main types of parquet floor finishes: surface finish and penetrating finish .
- surface finishes such as urethane and polyurethane form a protective waterproof barrier on the floor surface. When liquids come into contact with the surface, they accumulate rather than penetrate the wood, so it is safe to use water and water-based cleaners.
 The easiest way to check if your floor has a surface finish is to take a sharp knife blade and scrape off a tiny amount of finish on a small, hidden area of the floor. If the scraped material is clear, your floor probably has a surface finish. If scraping the flooring smudges but does not remove the clear material, your floor most likely has a penetrating finish. nine0018
 - penetrating finishes such as linseed or tung oil soak through the surface of wood floors and are usually waxed for extra shine. These coatings readily absorb water and water can warp wood floors, so use only solvent-based cleaners instead of water-based cleaners on floors with Penetrating Finish.
Start by removing the dust. Dry mopping, sweeping and/or vacuuming on a weekly basis is the best way to rid wood floors of light dust, dirt and buildup of pet hair. A mop with a large flat head attached with a microfiber cloth that can be removed, machine washed and reattached is best. Available in a variety of brands, these mops feature tiny synthetic fibers that penetrate the grooves of wood floors to collect and hold dust without scratching the wood. nine0003
If you are sweeping, choose brooms with exploded tips (synthetic fiber ends) to help trap collected dust in the broom head and prevent it from settling on the floor.
When vacuuming, use the floor nozzle and avoid the mallet - its rotating brush can dent wooden floors. Move the cleaning tool from one side of the floor to the other, paying special attention to the places where adjacent floorboards meet - this is a common hiding place for dust. nine0003
This procedure works on floors with any surface or penetrating finish.
Heavy dirt deep cleaning and dirt accumulation . If the hardwood floor surface still looks dull or dull after dusting, deep clean it with any pH-neutral, wax- and oil-free cleaner, store-bought or with a homemade solution consisting of a quarter cup of dish soap and 4 liters of warm water.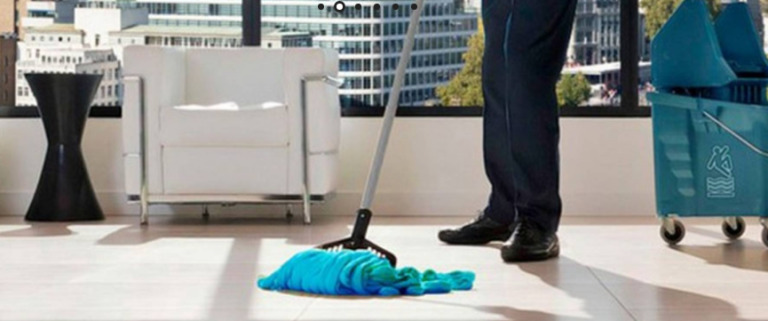 .
.
Wet a sponge mop with cleaner, squeeze out excess liquid until the mop head is damp but not dripping, then mop small areas of the floor at a time, using circular motions to draw out dirt and grime. Then rinse the mop in fresh water, wring out the excess and rinse the floor again with a damp mop to absorb any lingering cleaner. Use a soft, clean towel to dry the floor completely. nine0003
If your floor has a penetrating finish, the best way to deeply clean your floor is to remove the dirty old wax and reapply fresh wax. Wipe with a clean cloth soaked in mineral spirits over small areas of the floor at a time, allowing the mineral spirits to linger for five minutes on each area before wiping with a fresh cloth lightly dampened with water; then dry thoroughly with a fresh, dry cloth.
Finally, apply a solvent based parquet wax with a soft cloth in the amount recommended by the manufacturer. Then use a cloth or an electric polisher to polish the wax in a circular motion. nine0003
Perform an appropriate deep cleaning procedure every two years, whether you see dirty buildup or not. It can be hard to notice on the floor you walk on every day, but once it's clean, you'll probably be impressed by the difference!
Scrape food stains . Remove baked-on food from surface or penetrating floors by carefully inserting the tip of a plastic knife under the bottom edge of the debris, then gently slide the knife up. Wipe the scratched area with a clean cloth lightly dampened with a few drops of water, then make a second pass with a dry cloth to collect the water. If using this technique on a floor with a penetrating finish and a small area of the wax coating is removed with a knife, reapply a drop of solvent-based wax to the area with a soft cloth, polishing it to make the area shiny and flawless. nine0003
Fight oil stains with trisodium phosphate . Oil and grease stains on floors with surface or penetrating finishes are easily destroyed by the action of trisodium phosphate. Wearing gloves and goggles, dilute two tablespoons of trisodium phosphate in 4 liters of warm water in a large bucket. Dip the tip of a clean cloth into the solution, then apply it to the stain in gentle, circular motions. After the trisodium phosphate dissolves it, run a water-dampened cloth over the area to absorb the trisodium phosphate, then quickly dry the area with a clean cloth. nine0003
Ice for wax and gum . Dried candle wax, crayon marks and chewing gum on floors with surface or penetrating finishes are easily removed with ice. Fill the freezer with a few ice cubes, then place the chilled bag on top of the nasty buildup until it becomes brittle, then scrape it off with the edge of a plastic spatula. If the spatula removes protective wax from a penetrating floor, reapply the solvent-based wax to the scraped area with a soft cloth, then apply it to the repaired area with the cloth. nine0003
Wipe water, ink and pet stains well . Stains left by water, ink, or pet urine are the most persistent stains. Remove them from penetrating finish floors by lightly sanding the stain with extra-fine sandpaper, then gently scrub with coarser grade “00” steel wool dipped in mineral spirits. Wipe the mineral spirits with a cloth dampened with water and then with a dry cloth to remove the water.
Apply a solvent-based parquet wax to the cleaned area with a soft cloth and buff to restore shine. Sandpaper and steel wool can degrade the surface finish, so you'll want to deal with these stains using only hardwood floor cleaner and a cleaning pad designed for finished surfaces.
Can the steam mop be used on parquet floors?
Steam cleaning is not a good choice for parquet. Although it uses a minimal amount of moisture, one of the main components of parquet is the adhesive used to glue the wood pieces together. Because the pieces are very thin and so much glue is used, the heat can cause the glue to loosen.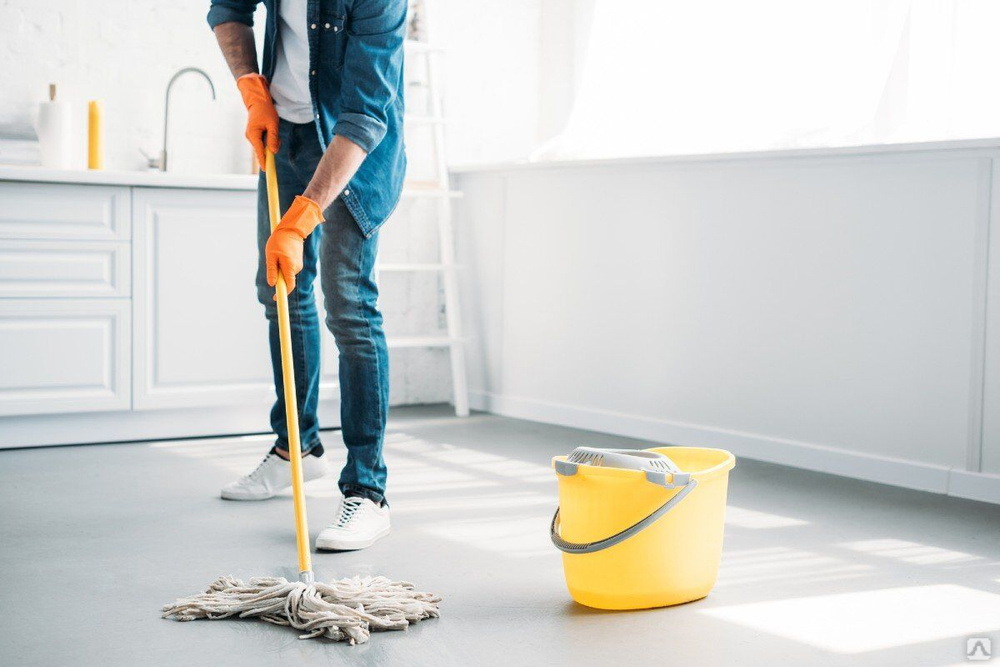 nine0003
How to restore the shine of parquet?
To make the floor as clean as possible, scrub with a soft brush and dry with an old towel. Make sure the floor is completely dry. Apply a high quality wood paste varnish. The paste polish nourishes the wood and fills in any tiny scratches you might not even see.
How to clean and maintain wood floors
Fine dirt particles scratch the wood surface and make the floor dull. Therefore, you should clean your wood floor regularly to keep it beautiful for a long time. nine0003
In the case of lacquered floors , it is sufficient to wipe the floor with a damp cloth. A few drops of cleaning agent for wood and parquet floors will do no harm: when wiped, the floor is impregnated and its shine is restored.
In the case of wooden floor , impregnated with oil, you must ensure that the cleaning and care products are suitable for the material. A wood floor and parquet installer will recommend the right product for you. Other wood protection and care products are not needed. nine0003
When using a vacuum cleaner: use a parquet brush to avoid scratching the wood floor.
The right indoor climate is also important for caring for a wooden floor, so that the wood does not “work” a lot (shrinks and expands). Relative humidity around 50 percent is ideal. A climate in which not only we humans will feel comfortable, but also your wooden floor will be comfortable.
Humidity is often too low, especially during the heating season. A humidifier can help you with this. Indoor plants also have a positive effect on the indoor climate. nine0003
Sanding and refreshing the surface of wood floors
Over the years, it is recommended that a wood floor be deep cleaned by a professional woodworker. Sanding parquet removes ugly scratches, bumps and stains and ultimately refreshes the surface.
Remember that sanding changes the original appearance.

This removes popular features such as characteristic brushing, planing or colored surfaces.
The sanding process removes about 0.7 mm of the wood surface. The frequency of sanding depends on the wear layer of the floor.
The wood floor sander knows with a parquet machine whether the finished parquet can be sanded and how often. But first, he will need to inspect your flooring.
In general, wooden floors should not be sanded by yourself. Trust this dusty and time-consuming procedure to a professional. He has not only special knowledge, but also the necessary devices, and he knows how to use them correctly. After grinding, the floor must be closed again. nine0003
Specialized companies charge for sanding and sealing per square metre. Specify in advance whether travel expenses, installation of skirting boards, intermediate and final cleaning will be paid separately or are part of the service.
Furniture with wooden floors
Whether it's parquet or solid wood floors: wood floors are simply charming.