Decks around trees
5 Things to Consider Before Building a Deck Around A Tree
When you look out to your backyard, you see the potential for a beautiful deck where you can entertain friends and family and enjoy fresh air and sunshine. However, that lovely old oak tree gives you pause. It’s right in the middle of the perfect spot to build your deck. You don’t want to cut it down, but you continue to think about how a deck might be possible.
You may wonder, “Can I build a deck around a tree?”
Yes! While this may seem like an unusual plan, it’s often done, especially at outdoor venues, such as public parks. A deck built around a tree does require some extra planning, but offers a number of benefits, including enjoying a more natural aesthetic, promoting an environmentally friendly space, and creating a more elevated design. Trees also offer lovely shade where you can relax, unwind and entertain.
Before you begin to build, however, consider these 5 important elements.
What to Consider Before Building a Deck Around a Tree
1. First consider your landscape. What size will the deck be and how will a tree affect the placement of post holes and beams, both of which are vital to a safe structure?
2. Next, look at the tree or trees to be included. Are you building around one tree or multiples, which would be much more difficult? What kind of tree is it? Some trees are more problematic than others, especially when it comes to their root systems. Will you need to be endlessly sweeping and cleaning the deck due to the tree’s produce? Make sure leaves do not accumulate on or between your deck boards, where they may trap moisture and cause wood rot.
3. Keep check on pests. Some trees are more likely than others to attract wood pests. Regularly inspect for wood wasps, boring insects, or other pests.
4. Count the costs. What design and material changes will need to be made to your deck and how might that add to the cost of the project? Will the deck need to be larger to accommodate your outdoor living needs? Consider the furnishings and utilities you need — like room for a grill, outdoor dining or a hammock — and how the tree will impact your design.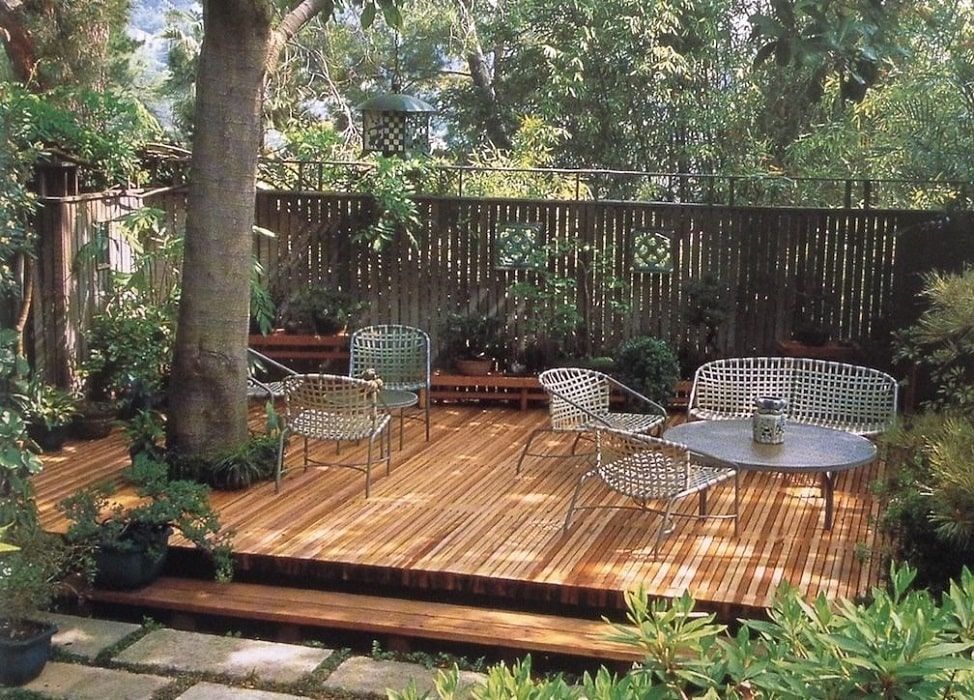
5. Finally, understand the growth trajectory of the tree. Make sure you leave space for the tree to grow. How close can a deck be to a tree? Leave at least 3 to 5 inches all around the tree. If it’s a tree that grows quickly and is likely to have limbs break, you’ll need to have a tree expert regularly check it for any pruning needs.
What to Consider
As you plan your deck build, you will need to decide whether to do it yourself (DIY) or hire a builder. To help with your decision, visit our planning section on trex.com to learn about the deck building process.
In addition to tools and fasteners, you’ll need pressure-treated boards to build the deck substructure, as well as decking boards for the surface of the deck. The decking boards and railings will be the most visible part of the deck, and also the area that will receive the most wear and tear. Consider the costs of wood versus composite decking boards. While wood may be a bit less expensive up front, count the long-term costs of maintenance required when staining the wood every two years.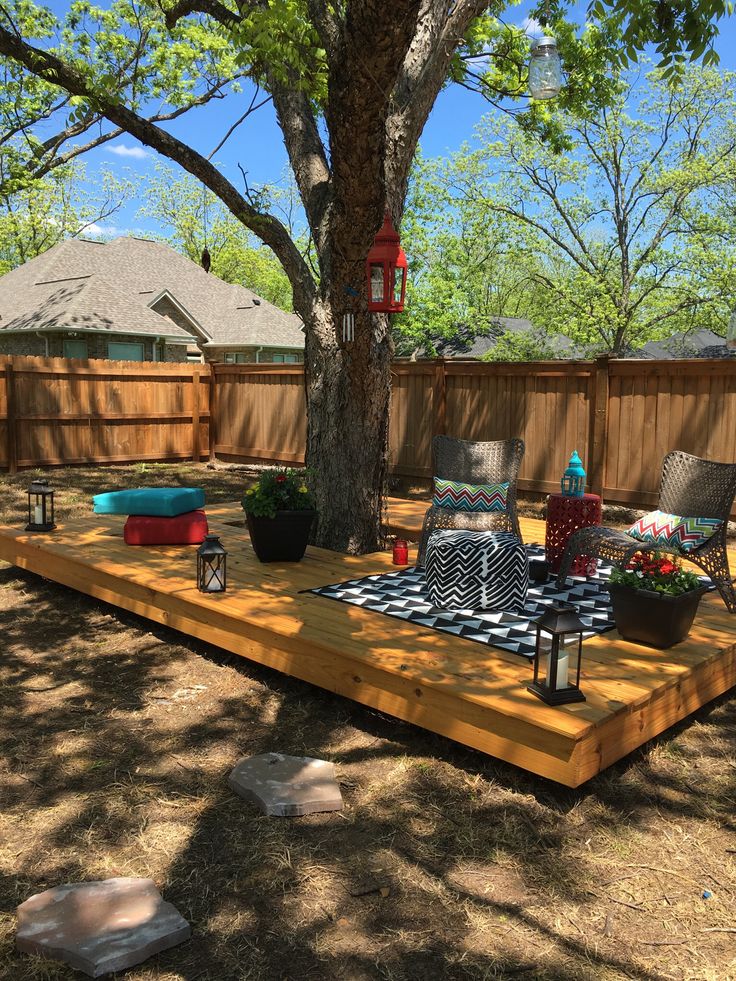 Unless you enjoy staining a deck, you might appreciate the small investment it takes to create a deck that’s low in maintenance hassle.
Before building, peruse online galleries for ideas or talk to a deck builder. When considering how a tree growing through the deck may affect the tree or the deck, you may want to even talk to a local arborist. Ask what might happen if the tree begins to die and how to best protect the tree from damage.
PERMITS
Any deck that is built 30 inches or more off the ground will need a building permit. When building a floating deck around a tree, you may not need a permit based on the height off the ground, but always check with your local permit office to be sure.
Permits range in price based on the size of your project and your locality. Talk to your local municipality’s building department for more details if you’re going to DIY a deck. If you are planning to hire a contractor, they will likely secure the permit for you.
SIZE & SHAPE OF YOUR TREES
As mentioned above, the size and shape of your tree will play an important factor in planning your deck project.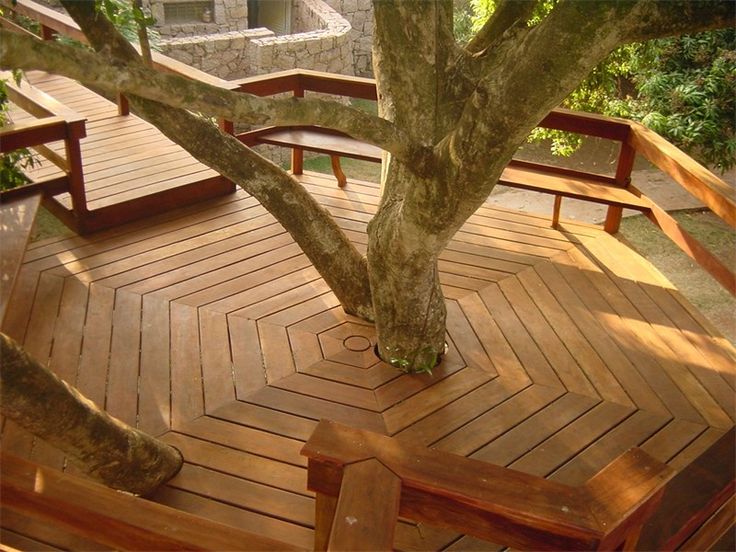 A single tree will be simpler than multiple trees. Be sure to consider the current size of the tree and its growth trajectory, its age and the propensity of its root system to sprawl.
In all deck projects, the size and shape of the deck will impact the overall cost. The larger the deck, the more materials and substructure needed. You can get an idea of what you’ll need to spend by using a cost calculator.
RAILINGS
Don’t forget the railings as you plan your new deck. Any deck over 30 inches will need to have railings and follow building code. Railings serve an important safety purpose, but can also add to the beauty of your deck.
FURNITURE AND ACCESSORIES
Finally, the furniture and accessories you choose will help create the look and feel of your outdoor living space. Hopefully, when you planned your deck, you created a design that would accommodate the ways you would use this space. Thus, once the deck is built, you can add an outdoor living set, dining table and chairs, a grill, lighting and other amenities that will make the space comfortable and lovely.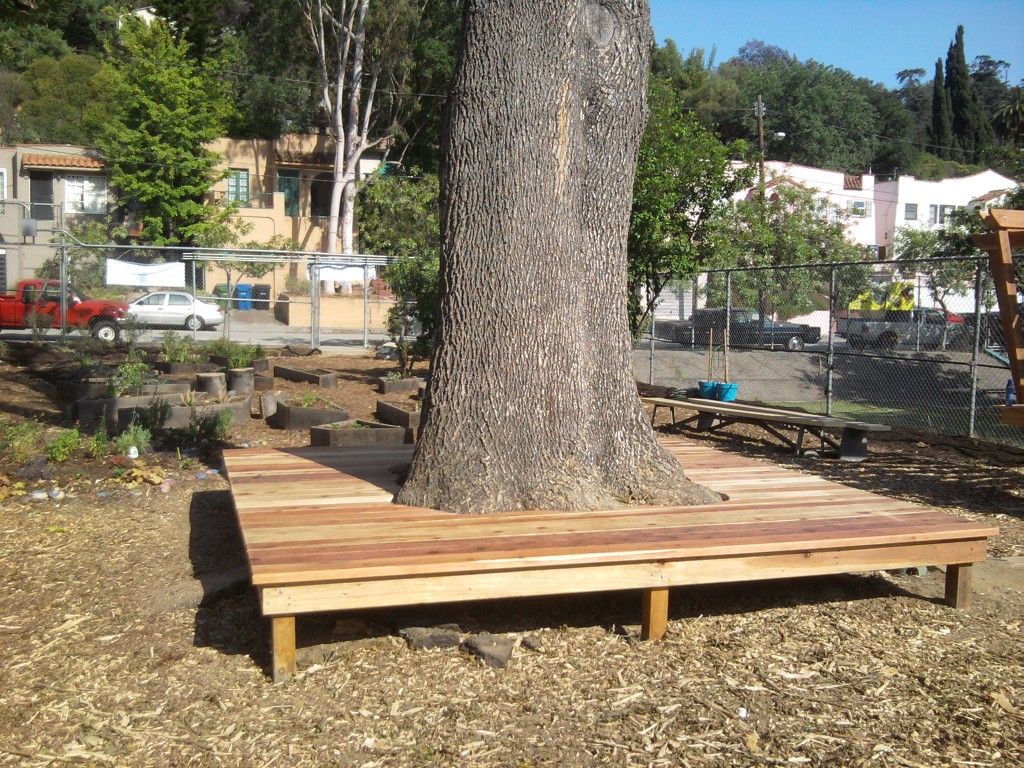 Be sure you have electrical access to add lighting and other functionality to your deck.
Now’s a great time to begin to plan for your perfect deck build. Not sure where to begin? Find a Trex retailer near you to get started.
A Professional Guide To Building A Deck Around A Tree
A wooden deck is a thing of beauty, an excellent way of adding some oomph to your outdoor living area. It expands the living space while serving as a focal point for your outdoors.
Building it around a tree might seem to complicate the project, but that is not the case. You can work with a floating deck that rests on above-ground piers or underground footings. It just depends on what your permit office wants to see. The tree’s size could influence the deck’s dimensions, the layout of the foundations, and the joist layout as well.
Contents
- Why Incorporate Surrounding Trees?
- How To Build Your Deck Around A Tree
- 1. Assess Your Trees
- 2. Plan Your Deck
- 3.
 Choose Your Timber
 - 4. Site Plan And Preparations
- 5. Setting The Posts
- 6. Installing The Ledger Board
- 7. Framing The Deck
- 8. Framing Around The Tree
- 9. Laying The Decking
- 10. Finishing touches
- Wrapping up
A mature tree or two in the spot you plan for the installation can be a blessing in disguise. The plants can serve as natural shade and at the same time, you get to feel good about helping your environment. Furthermore, a deck that encompasses a tree or two looks phenomenal, a presentation that can make people have a deeper appreciation of your outdoor setting.
How To Build Your Deck Around A TreeInstalling a deck is not something that you should brush off as easy and undertake it as a DIY project. We highly recommend that you let the professionals at TNT handle the installation, especially when you have an obstacle, such as a tree, that can impact the construction.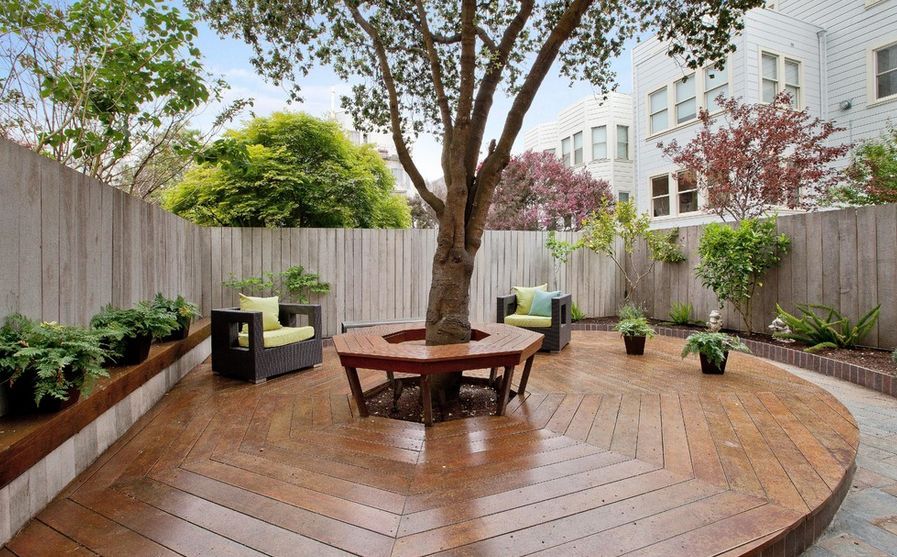 Also, this guide explains just one of many different ways to approach the same project. Basically, be careful, use common sense, and always wear safety gear and be sure to follow the manufacturer’s guidelines when using power tools.
Below is a quick guide that shows steps we follow when building a deck that will surround a tree.
1. Assess Your TreesAs we layout and plan your deck we will get an idea of where the tree is going to be in relation to the deck space and plan accordingly. This will help us to not only make it easier to frame around but also plan for how it will fit into the decking or any railing obstacles we might encounter.
Most tree species stop growing upwards when they reach a certain point but most every tree keeps growing wider adding rings every year.
On a lot of installs, we will butt the decking boards right up against the tree all the way around and then at the end we carefully take a jigsaw and run it in a circle around the tree with one side of the blade guard up against it so that when you’re done you get an even gap all the way around the tree.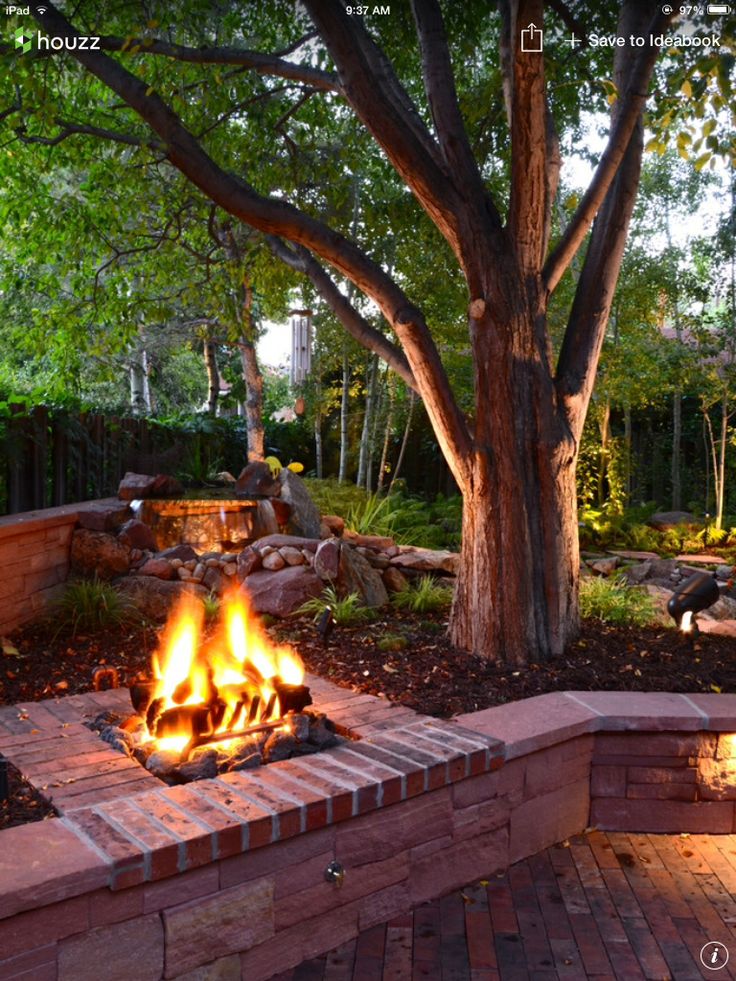
This will also help for future growth so in 10 years if the girth of the tree is grown out and is about to or is already touching the deck boards you can go ahead and use a jigsaw and cut another gap around it.
2. Plan Your DeckBe realistic and honest about how you plan to use the deck. Do you want to use it for barbecues or outdoor dining, as a casual entertainment spot for guests, or maybe somewhere to do yoga or coffee in the mornings?
If you have a lower budget, it would be best to consider installing something small with a potential second phase in the future. We believe a smaller deck can help create a more intimate space.
The size will also be determined by the space available. We will advise you accordingly while also considering the slope of your yard and the different support structures needs for the deck.
Permits will also have a huge influence on what you can and can’t do in your particular yard. We will dive into this more in step 4 but things you will have to keep in mind that the permit office will most likely be checking for are things like:
- Setbacks (this is the amount of space there needs to be in between the deck you want to build and your property line)
- Caissons (these are holes you dig in the ground with the intent of filling back up with concrete to support the deck using posts)
- Ledger (this is the attachment point at the house (if applicable).
 It could look something like a 2×12 laying flat against the house and attached using ledger locks)
The wood to use should be robust enough to serve its purpose for years to come. For the framing lumber, we recommend you go for natural pressure-treated wood with excellent load-bearing strength. You won’t have to make many decisions about the framing as we will be recommending you what’s needed based on your individual decks’ specs.
As for the decking material, it’s up to your budget and your personal choice as to whether you put down something like a natural redwood decking or something easier to maintain like a composite decking material.
4. Site Plan And PreparationsFor the installation process to proceed smoothly, you need a site plan. We shall handle this as well as ensure that you have all the required permits and that everything is done up to code. We have an engineer on staff which greatly speeds up this process and ensures quality control.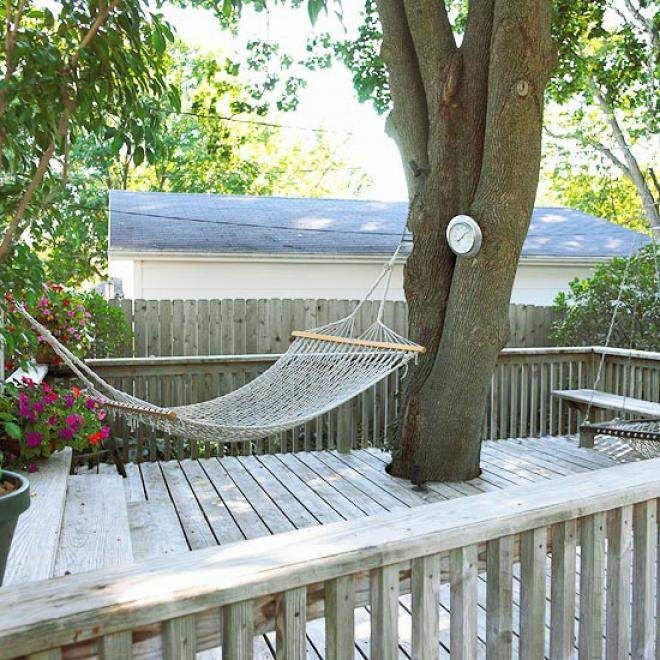 With the site plans, we will have the blueprints that will keep us on track about the materials needed, measurements for cuts, and any project-specific guidelines.
We will measure off the house, staking and tying a string along the way, marking out where to place the caissons. We will clear the area and if space provides we will use an auger to dig the holes for the footings that will serve as the piers for the deck. The depth of the holes for the footings will depend on the deck design you pick and the county or region’s building codes. After the holes are dug, an inspector will most likely have to come out and sign off at this point in the project.
Ask us about our pre-visualization services if you really want to plan out your project in great detail.5. Setting The PostsAfter the inspector signs off on the holes, we will fill them back up with concrete. We will give the concrete time to cure before putting weight on them. During this time we can still move forward by using temporary lumber nailed to the frame to hold it up until the concrete cures.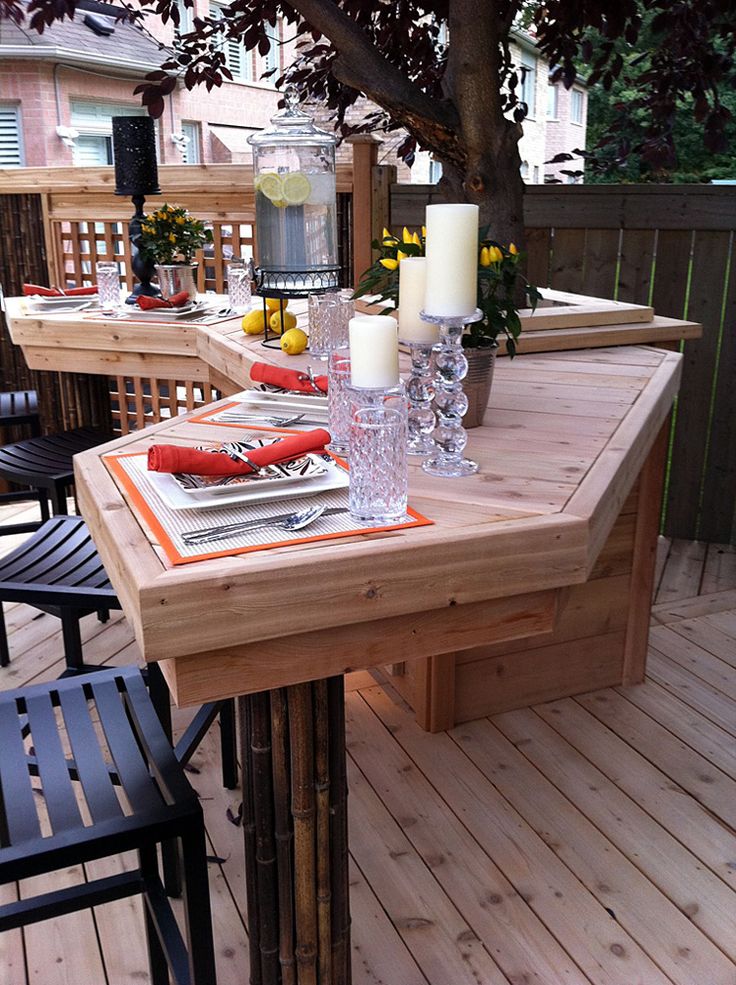 We set the post-to-caisson bracket. Then we will fix pressure-treated 4×4 wooden posts into the brackets, securing them in place with nails to create the deck piers.
The ledger board is an essential component when constructing a deck, and it attaches the deck to your house. The connection should be robust, and depending on your house, you may need to first install flashing to prevent water damage. Then attach the ledger board directly to the house’s rim joist or concrete sub-wall.
7. Framing The DeckWith the ledger installed, you can now attach a joist on either end and a rim joist on the outside of those two and now you’ve got a giant rectangle. You can then proceed to fill the interior with framing at a certain measurement you will get from your permit. A common joist layout example is sixteen inches on center. Make sure all lumber gets installed crown up.
The joists are the support boards that form the deck’s foundation.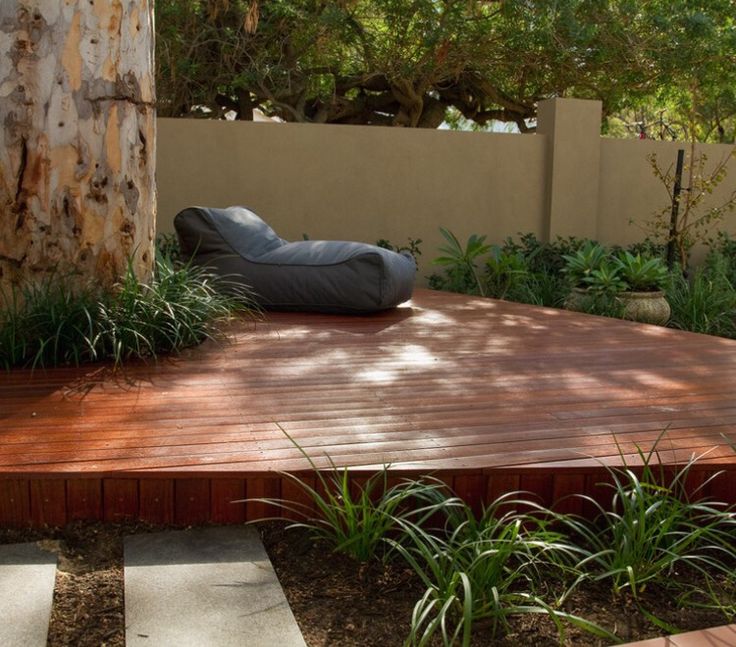 We will use 2×6, 2×8, 2×10, or 2×12 joists depending on what your deck plans call for. Depending on the building codes in your area, you may need to add extra support in between each joist across the middle of the rectangle.
Ideally, you placed the tree between two joists and now you just need to put two small two by’s in between the joists hugging the tree. If necessary you may need to add framing at a 45-degree angle in the corners of your newly created square to round the corners and finish creating the frame.
If the tree isn’t small enough to fit in between two joists then you may need to add double joists in certain areas. This will depend on your particular codes, but an example is to double joists on either side of the tree. Then add double joists spanning those first two doubles creating a rectangle of double material around the tree area. This area would almost certainly need to have posts designed into the plan holding up this heavy area.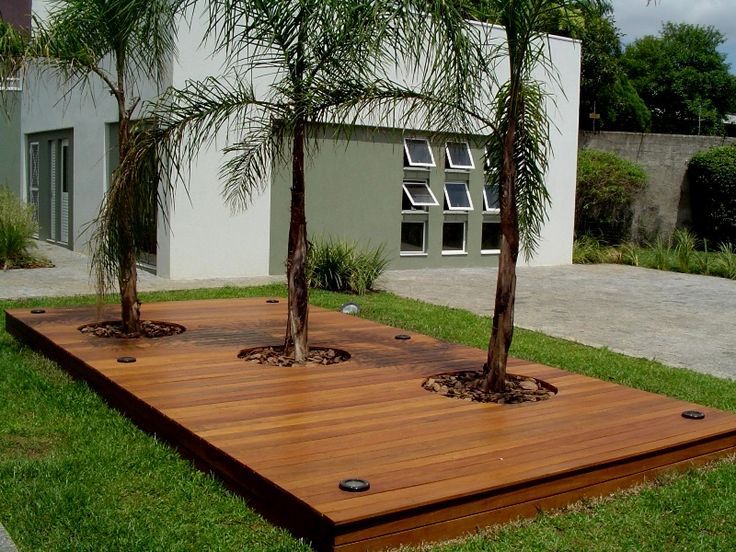 You will then end up with areas that need small joists and negative spaces around the tree that need to be filled with 45-degree mini joists.
No matter the exact process, we are just trying to create a frame that encompasses the tree and is close enough so that no one accidentally steps in a vulnerable spot.
9. Laying The DeckingInstalling the decking boards can be started from the outermost edge working towards the house or from the house working out depending on your preference. We like to start at the house and move out to get that nice clean line at the house. Based on the decking material you choose we would use a tool to make sure the boards have a tight consistent gap as we secure them down using deck screws.
If you chose to go with hidden fasteners then we let the hardware and the guns set their own gap as we hold the boards tight and snap down the fasteners. We will accurately measure the boards that terminate at the tree frame for snug fit then fasten them down to the tree frame and joists with deck screws or fasteners. We jig around the tree as described earlier to get an even organic gap. When the entire deck floor is laid, we will snap a chalk line along the edges to cut any excess overhang to achieve straight lines before attaching the outer fascia.
To finish up the deck we would want to add stairs if needed to get down into the yard (if the deck height is above a specific height [see permit]). Also, make sure to add handrail if your deck height is above a certain level as well. To do that you add 4×4’s or similar post material to the perimeter and span those with 2×4’s full of balusters. The full details of a handrail is a mix of what is required (spacing) and what is desired (material type and color).
Wrapping upTo ensure that your new deck lasts a long time, we recommend you coat a wooden deck with a wood preservative or stain to ensure the decking is adequately sealed. Sealing the boards is essential for added protection against mold, moisture, and the sun’s rays.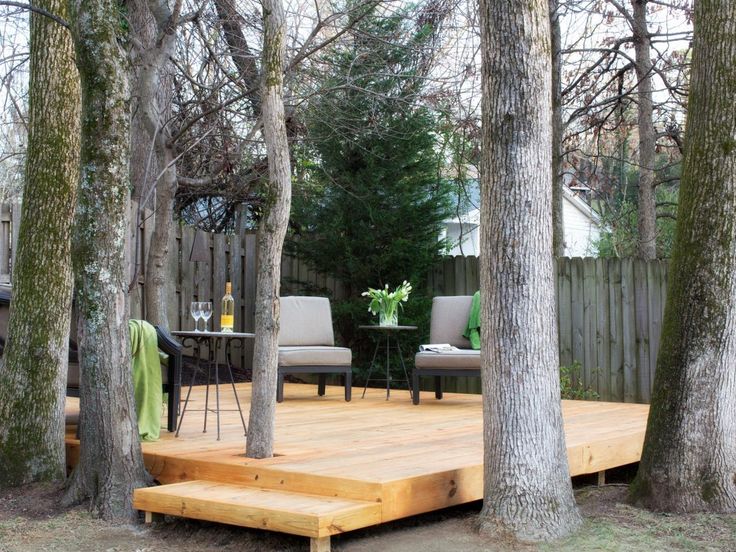
If you went for a low-maintenance composite deck board option then you can just wash it off with the hose and maybe just a very small amount of dish soap if it gets dirty.
To learn more about our deck construction services here at TNT please click here. Get in touch with us today if you want to know more about other outdoor hardscaping plans or know more about our services and how we can help transform your home. You can call us at 970-663-2868 or email us at [email protected]
Land plot design in front of the house: two projects with a terrace
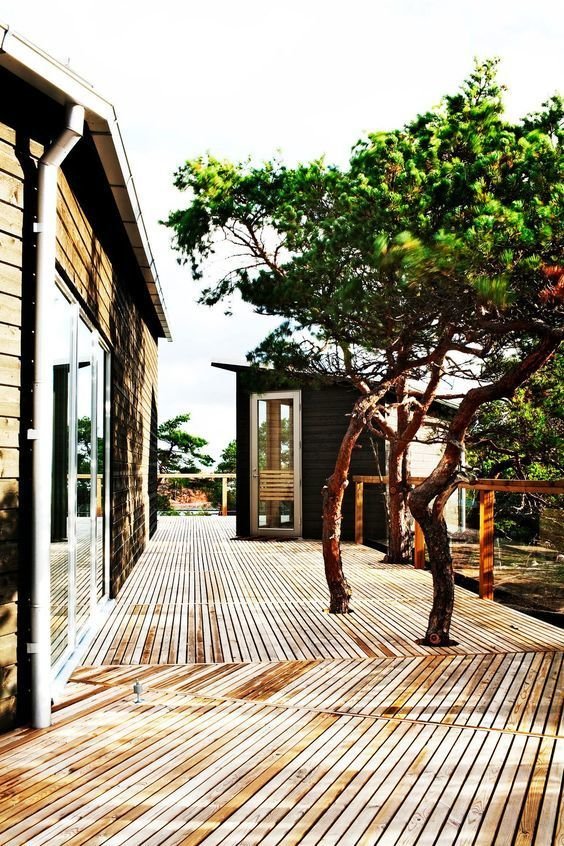
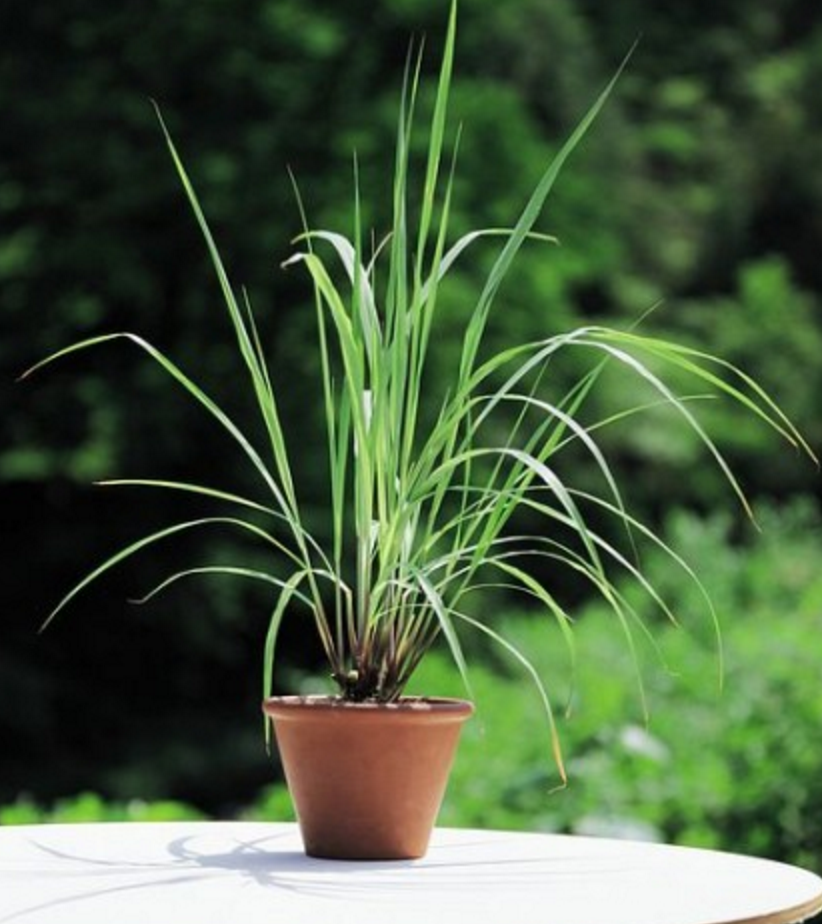
Scandinavian-style house located in the countryside. The site itself is located on a slight slope. Since the garden is adjacent to a dirt road, the family would like to hide from the eyes of passers-by. Another wish of the site owners is a cozy terrace for the whole family to enjoy and, of course, many plants .Before re-registration:
Proposal 1: Green “garden room”
measure.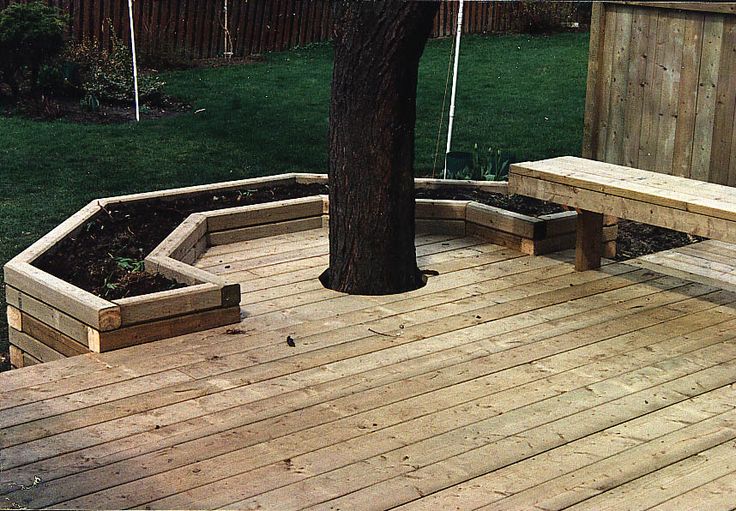 The color scheme of the design is also very well chosen: the white and green tones rest the eyes, while neat bright strokes set the necessary juicy accents, without which the palette would be too calm.
First, the territory was leveled and zoned, and a low hedge was planted along the edge of the plot of European beech ‘Purpurea’ with purple leaves: a sky-high fence would visually reduce an already small area. And so the boundaries are marked, and the perspective is preserved.
And to make people relaxing on the terrace still feel protected, near the site, on the side of the road, they planted a sprawling bush coase deren with a lush crown and an incredible amount of creamy white flowers that appear in June.
There are flower beds-islands in yellow, violet and silver-gray colors under the turf . They "wink" oak sage , spiked veronica , Fassen catnip and meadowsweet yarrow .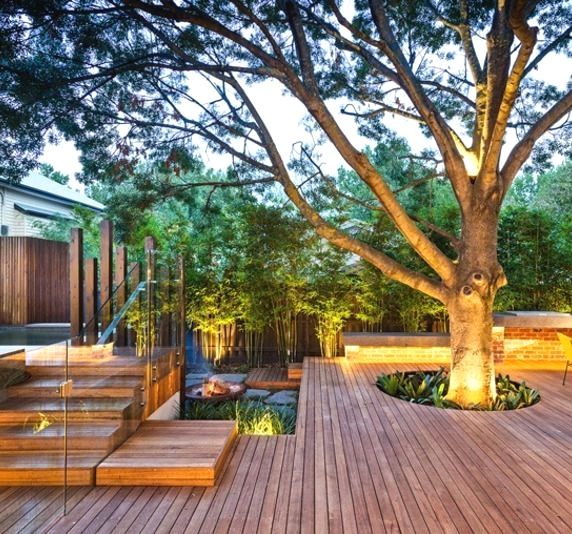 But there was one more "uninhabited" side - from the southern part of the garden. The designers decided to cover it with corner partition made of natural stone , which also levels out the slight slope of the site. Inside the garden, this structure is supported by a walking path in the lawn. Both elements look like a single ensemble, because they are made of the same material and decorated with the same plant - Harajan's tansy . This is a cushion shrub with pubescent fragrant leaves and numerous yellow flowers that bloom in July - August.
In addition to tansy, the garden blooms at the beginning of summer. ortensia , lilac and viburnum . Here, on the south side, several bushes of grapes were planted in a row - they also cover the site from prying eyes with a thick leafy canopy.
Hedge made of red-leaved wild beech, natural stone wall and trellis with vines has made a fence that looks beautiful all year round.
Veronica spiky ‘Silberteppich’ with silvery leaves and purple “candle” inflorescences that hover above the plant in June - July, has a cushion shape and is excellent for planting under trees and shrubs.
Ads by
Proposal 2: A world of adventure right outside the doorstep
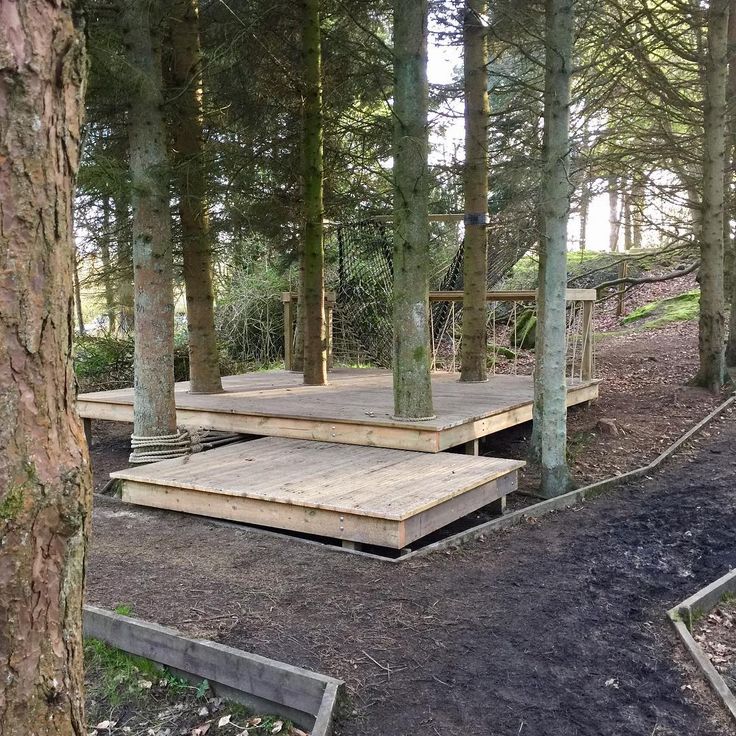
Since there are children in the family, in the second option, landscape designers decided to turn a significant part of the site into a play area. Directly from the terrace, stone steps lead to observation tower , a wooden children's house on supports. It is located in the midst of greenery, among tall ornamental and berry bushes with delicious fruits for little gourmets. Closer to the terrace grow ornamental shrubs with beautiful flowers. A narrow path from the "watch point" stretches through a "tunnel" of willow twigs and takes little travelers to the sandbox , surrounded by a palisade of multi-colored plastic "logs".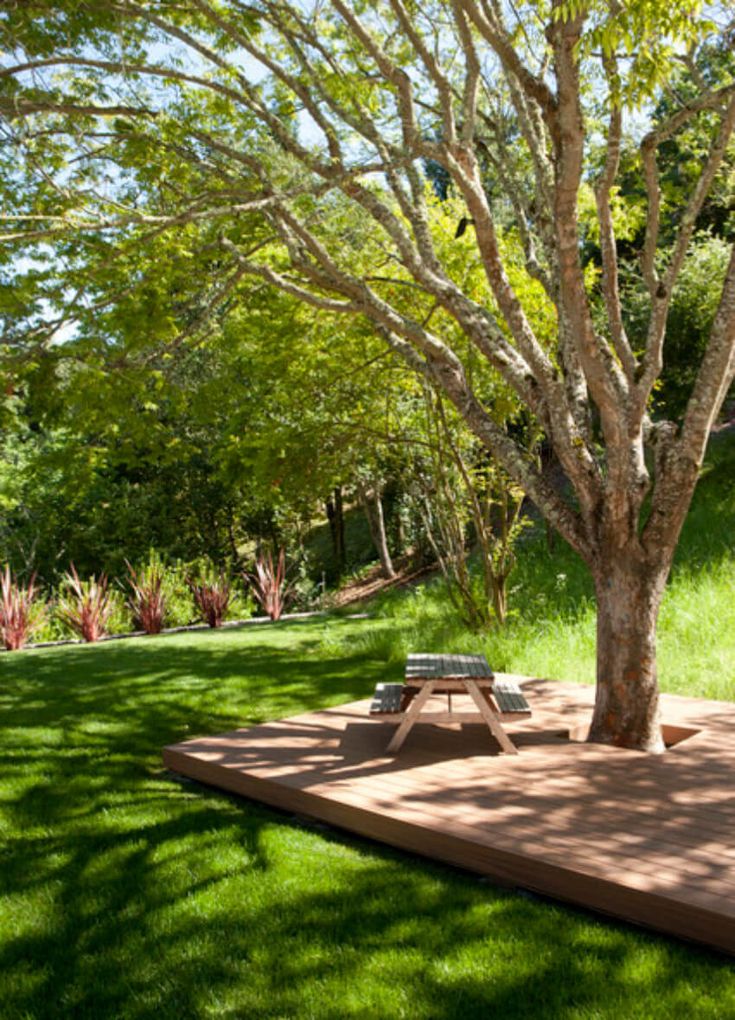 The water column will make children's play even more exciting.
And if you want to relax a little, you are welcome to on a hanging bench attached to a thick bough of an apple tree. Flower gardens amaze with a variety of plants that are not demanding in care. Along the terrace grows geraniums ‘Rozanne’ with lilac flowers, here and there white or purple balls-inflorescences ornamental onions “shoot out” from the green mass, and panicles pennisetum eastern sway in the wind. Spicy herbs spread around them like a carpet. Under the bushes, nimble weeds hold back lesser periwinkle 'Bowles' . From May the blooming forsythia lit bright lights, and from June the baton was intercepted by mock orange and spirea . Fragrant tasty fruits will pamper adults and children currants, gooseberries and apple trees .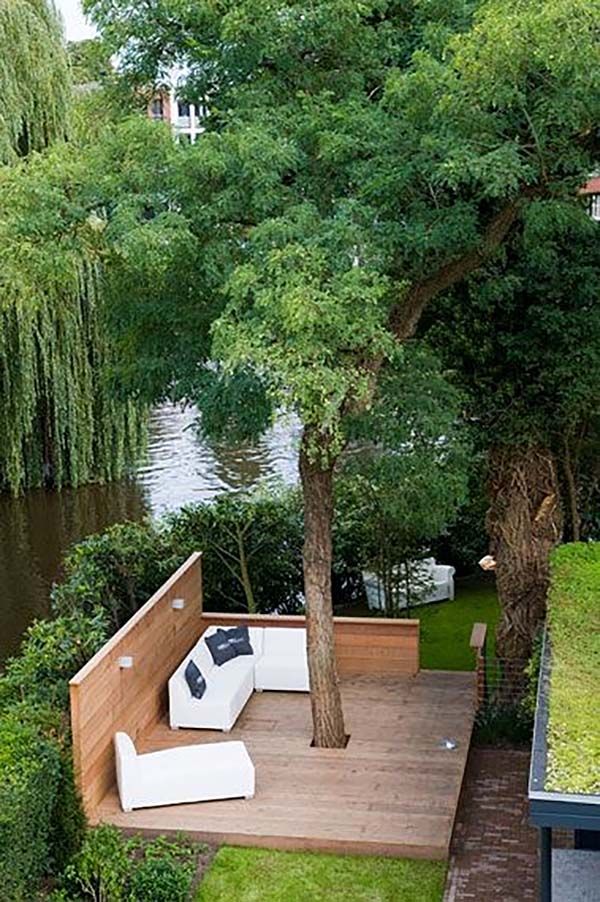
Terrace of wood - terrace decoration with soft and hard wood
Outdoor terraces and garden areas are usually finished with natural stone, concrete or ceramic slabs. A worthy alternative to such coatings is everyone's favorite wooden flooring, which is pleasant to walk barefoot on.
§ Content of the article:
- Introduction - about the species and resistance of wood to weathering.
- Soft wood terrace: pine, thermal spruce, larch, white fir.
- Hardwoods: hoist, garapa, thermo-ash, oak, bangkirai, bamboo.
- New generation decking - wood-polymer composites (WPC).
- Easy-Fix patio finish system and decking base.
- Interesting videos on the topic.
INTRODUCTION. Among the wood species traditionally used for outdoor work - decorating terraces, garden areas, flooring around pools, etc., there are soft (coniferous) and hard (deciduous) wood species.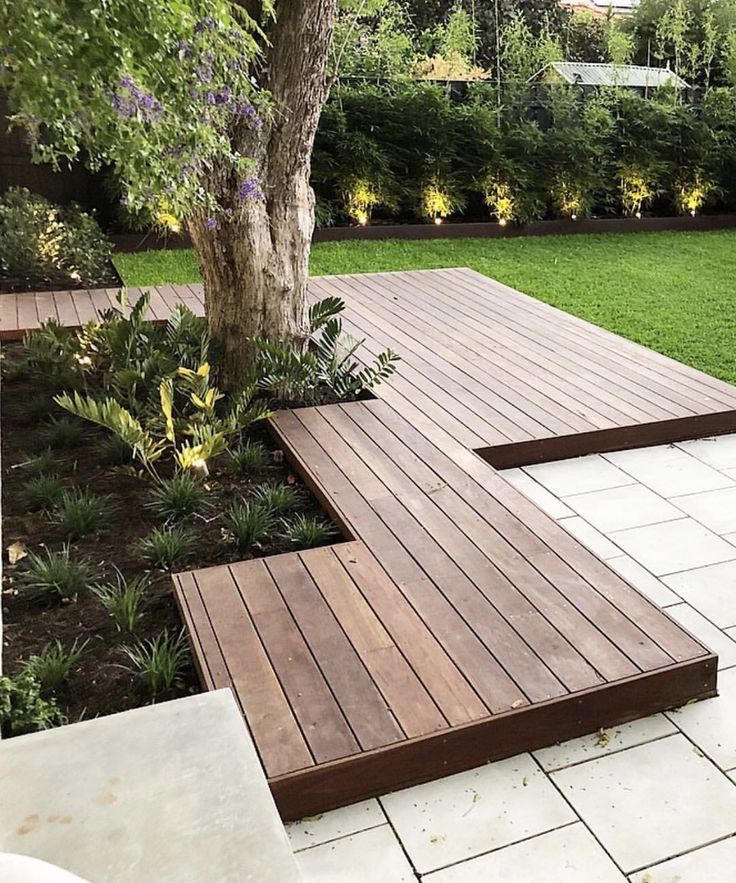 Hardwoods are classified according to their structure into scattered vascular and annular vascular. All scattered vascular species have both hardwoods and softwoods, but all annular vascular species have hardwoods.
According to weather resistance tree species are conditionally divided into classes. The lower the class, the higher the strength of the wood. The tropical bangkirai and garapu, known for their toughness, can be classified in classes 1-2. The service life of these materials is on average 25-30 years in the climatic conditions of Western Europe. When classifying, the properties of untreated wood are taken into account, since with special impregnation and appropriate care, the service life of the material is significantly increased.
A worthy alternative to tropical exotics are well-known European species: white locust (class 1-2), oak (class 2) and larch (class 3), which are widely used in the creation of garden furniture, construction of terraces and garden paths.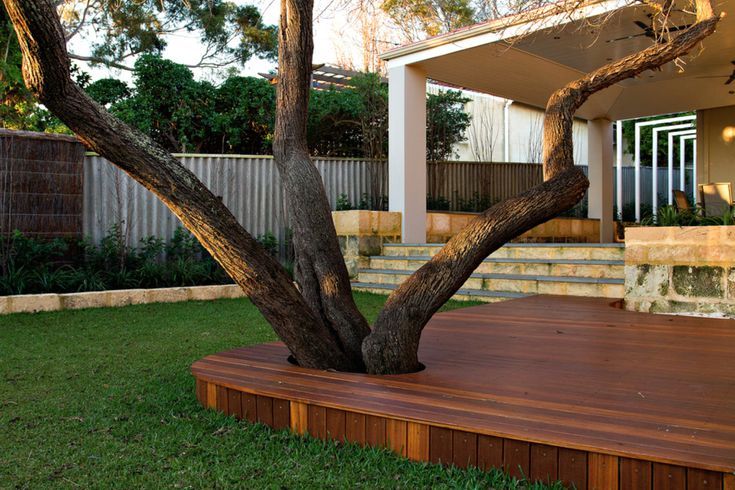 When treated with protective impregnations and oils, laid on stone or gravel (to avoid contact with the ground) and carefully maintained, a terrace made of wood of these species can last twice as long. Of the soft conifers, only pseudo-hemlock and larch do not require processing. Spruce and pine can only comply with classes 1-2 after special impregnation.
§ Finishing the terrace with soft woods: pine, thermal spruce, larch, fir.
As a rule, softwood includes evergreen coniferous trees, but not only (softwood also includes birch, aspen, alder, linden, etc.). Their wood is cheaper than hardwoods. Next, consider some types of softwood.
↑ PAINTED PINE. Spectacular pine plank flooring finished with a water-repellent brown impregnation and wax. Pine boards are impregnated with a special composition that protects against atmospheric influences. The embossed surface with grooves and traces of knots gives the coating an additional charm. Price from $12 / sq.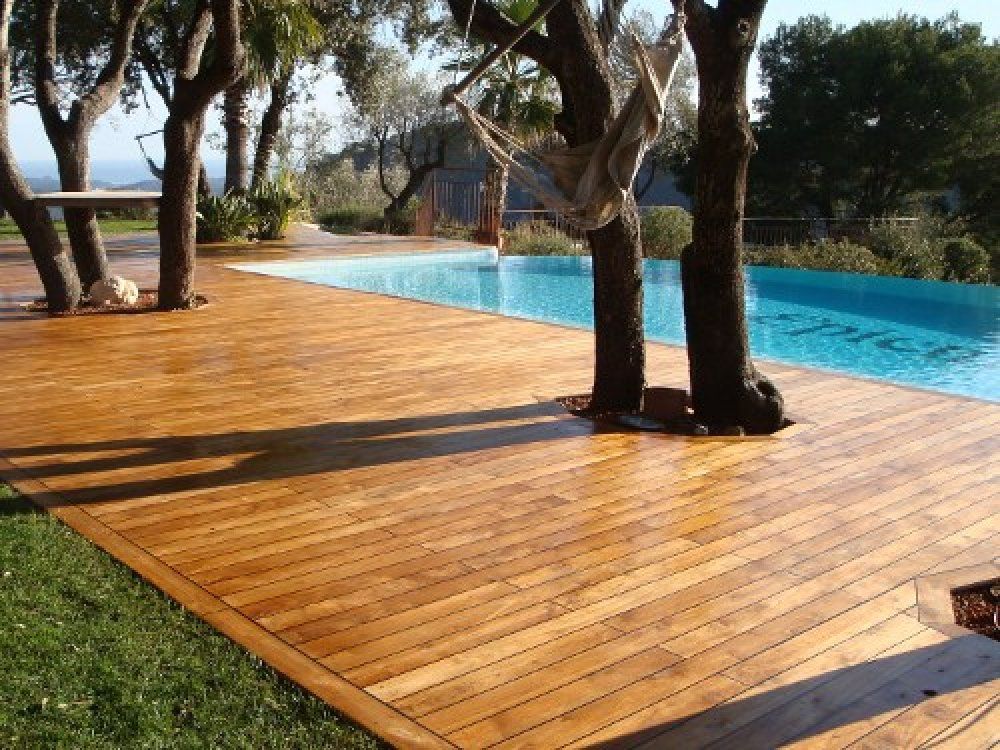 m (raw) up to $50 / sq. m, depending on the type of wood, the degree of its processing (impregnation, painting), purchase volume, etc.
↑ THERMO-spruce. As a floor covering for terraces, spruce wood is widely used, which has undergone heat treatment at temperatures up to 250 ° C for 24-48 hours. In this case, the cellulose is partially caramelized, and the wood acquires strength and water resistance. Its cost is from $28 to $60 per sq. meter.
↑ SIBERIAN LARCH. High quality and reliable material. The long growth and close location of the growth rings of Siberian larch contribute to the high density and strength of the wood, which does not require additional chemical treatment. Price from $15 to $52 per sq. m, depending on the type of wood.
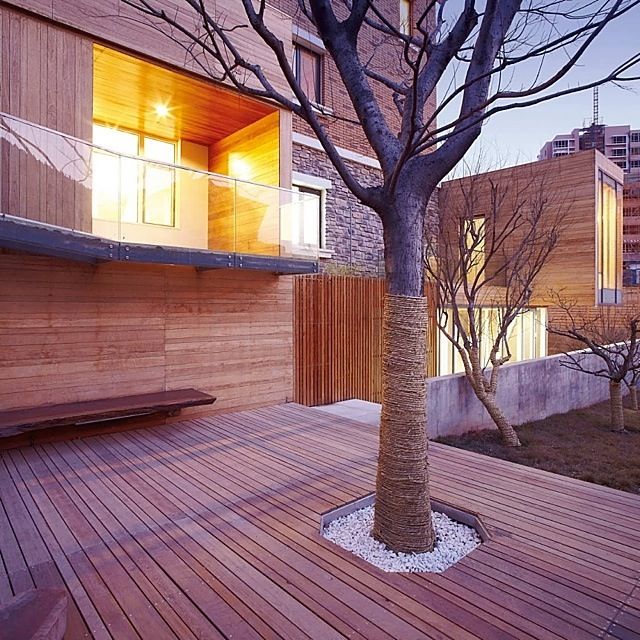
↑ WHITE FIR. Natural wood flooring is a timeless classic of the genre. A water-repellent impregnation and brown wood care oil ensured that the white fir embossed planks are moisture-resistant and look flawless.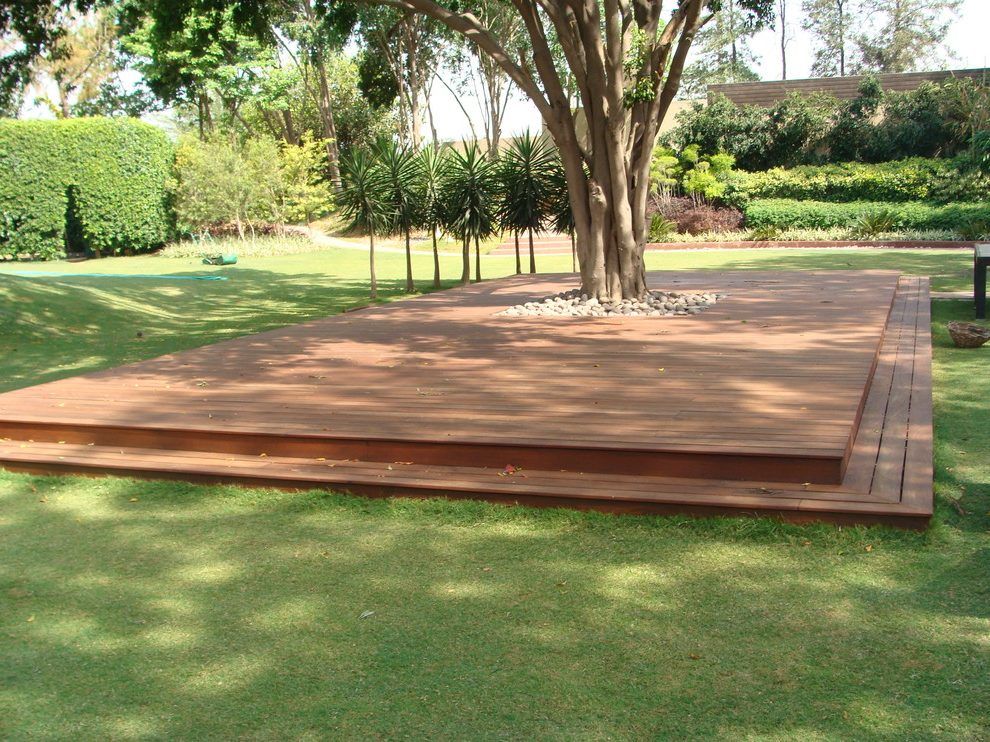 Estimated price of edged raw fir board $170-$200/cu. m.
§ Hardwood terrace: hoist, garapa, thermo-ash, oak, bangkirai, bamboo.
Wood of broad-leaved tree species, as a rule, is classified as hardwood, the wood of which is denser, products made from it are stronger and more durable. Therefore, it is valued more than soft woods. Hardwood is usually used in its original raw form.
↑ TALI. Strong and durable hoist wood, a hardwood species widely found in Africa, is the ideal material for outdoor decking. The cost of decking from this tropical tree is in the range of $85-$145/sq. m.
↑ GARAPA. The light hues distinguish the garapa from the darker representatives of the rainforest. Garapa wood is very durable, heavy (its density is higher than oak wood), resistant to termites and decay. Butt jointing of decking boards does not require tongue and groove joints. Price - $60-$125 / sq. m.
↑ THERMOASH. Beautiful, durable and weather resistant material.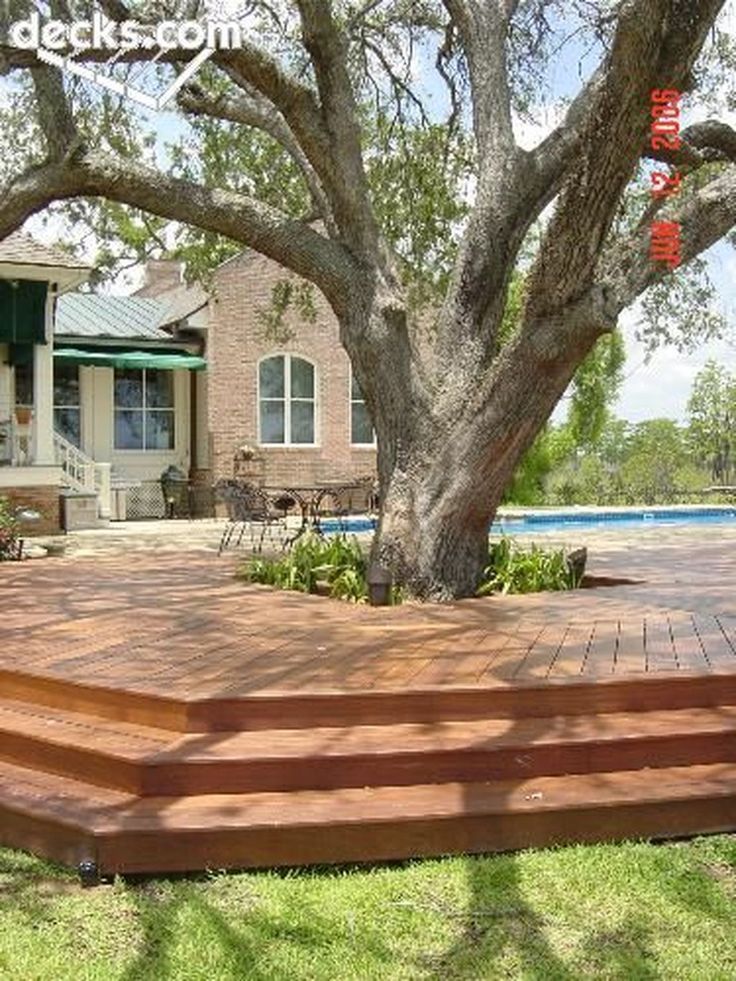 The main feature of heat-treated ash flooring is a rubber sealing tape that protects the seams between the boards from debris and moisture. Price from $85 to $200 per sq. m, depending on the grade, size of the board, processing.
↑ OAK. Solid and durable oak wood is quite suitable for both parquet floors and outdoor terraces. Somewhat inferior in terms of durability to well-known tropical species, it has the most elegant appearance and resistance to weathering even without protective impregnation. Oak is cheaper than tropical wood (the price fluctuates in the range of $55-$145/m2).
↑ BANGKIRAI. An excellent solution for outdoor areas. Durable and massive bangkirai wood is practically resistant to mechanical damage. Bangkirai is highly resistant to moisture and rot due to its high content of essential oils. Hard and durable bangkirai wood flooring is impregnated with an anti-slip oil containing hard particles that give the boards a pleasant roughness. Price from $75 to $140 per sq.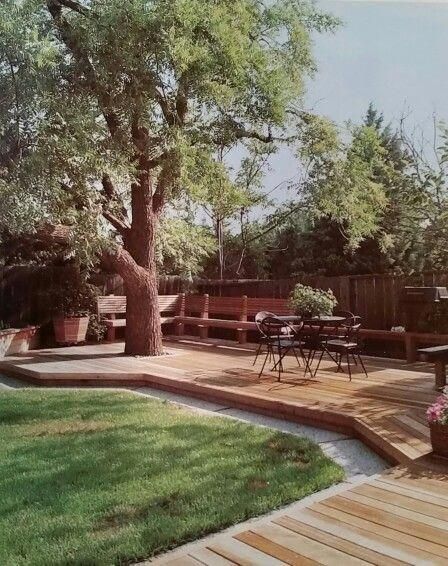 m, depending on the size and profile of the board.
↑ BAMBOO. In many physical parameters, bamboo is superior to ash, oak, maple and many other European species. Bamboo is a grass, not a tree. However, due to its strength (resistance class 2-3), it is widely used as decking / flooring and other outdoor applications. Its cost lies in the range of $40-$85/sq. m.
§ Wood-polymer (plastic) composites - WPC.
More weather resistant wood-polymer composites (resistance class 1) consisting of a mixture of wood fibers and artificial materials (polyethylene or polypropylene). They differ in their recipes (the ratio of wood to artificial material), size and partly surface structure - absolutely smooth, with a wood grain, corrugated or grooved on the outside. Profiles can vary in thickness, be hollow or solid. The choice of one or another finishing material depends on both the load and the distance to the supporting structure.
↑ Wood Plastic Composite Terrace : The weather-resistant artificial deck remains non-slip even in the rain. The choice of composite decking board is very wide. A large number of manufacturers, there are both relatively inexpensive / affordable offers ($30 - $7 0 / sqm) and more expensive (70 $ - $140 / sqm) , branded materials - complete flooring systems .
An important advantage of WPC decking is the absence of splinters, cracks and fiber twisting. In addition, they do not require such careful maintenance as natural coatings. However, under the influence of sunlight, composite materials may fade, while they do not gray, but fade. Therefore, for artificial flooring, special care products have been developed that return them to their original color.
Modern composite elements are available in a wide enough color palette, which opens up incredible possibilities for their combinations, allowing you to create original decking for terraces and outdoor areas, decorated with different inserts and appliqués.
↑ An example of creating an original WPC application.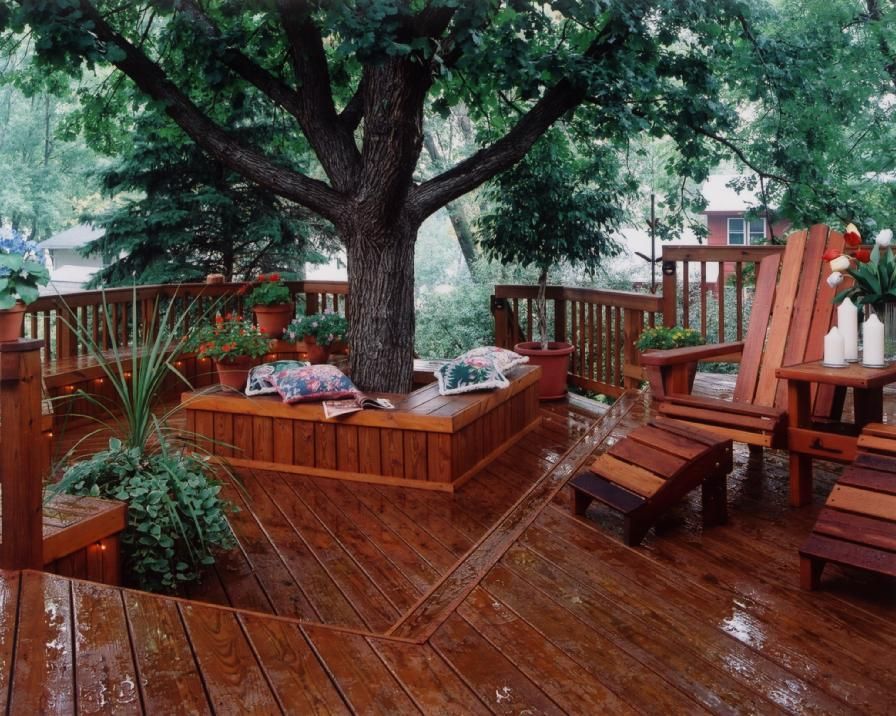
Problem ends: close or hide?
Composite board with hollow profiles are usually equipped with special end caps. But what if the flooring has an irregular or rounded shape? In this case, the uneven edge can be covered with gravel or gravel. Although coatings made of wood-plastic boards are not afraid of moisture, it is better to choose a drier place for building a terrace to the house.
↑ The ends of the composite boards look unaesthetic, so they need to be masked. Open semicircular sections can be covered with gravel.
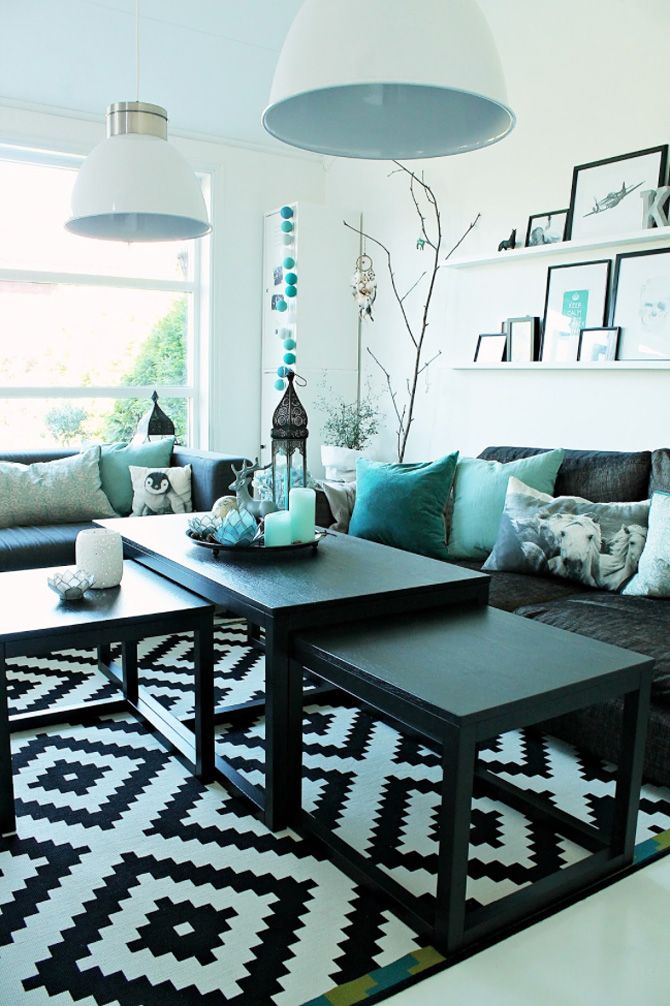
↑ Furniture and floor: color harmony. The light brown color of the WPC board is perfect for an elegant wicker sofa in a classic beige shade. Gray shades are always in fashion. The steel color of the wicker chair harmonizes well with the pearl shade of the composite board.
The variety of color palette of wood-polymer flooring makes it possible to achieve the optimal combination of furniture and floor.