Clean a keurig machine
How to Clean a Keurig—All You Need Is 30 Minutes and White Vinegar | Architectural Digest
Chances are when you think about a cup of jo, the focus is on the need for caffeine, not on how to clean a Keurig coffee maker. Perhaps, one of the reason’s you got the machine is so you don’t have to worry about cleaning a classic coffee maker, but that doesn’t mean that you can neglect the K-Cup. Yes, one of the perks of a Keurig is that it’s a quick solution to jumping into the day or avoiding a midday slump, but you still need to take care of your caffeine hero. Don’t wait until your cup of coffee tastes off or you notice buildup every time you open your Keurig machine.
Even if you think your kitchen appliance is working just fine, it still needs to be routinely cleaned and disinfected to run smoothly—no matter if it’s a Keurig K-Mini Single Serve coffee maker or a K-Elite with a five-cup water reservoir. The pod holder for the K-Cup is a damp and dark place. The water reservoir can get icky if left unattended for too long, and the drip tray beneath the coffee cup doesn’t just collect water—it’s also a bath for bacteria and sludgy grime. What’s more, hard water increases mineral deposits that can cause your Keurig mechanisms to glitch. That said, learning how to clean a Keurig doesn’t have to sap all of your energy—after all, a coffee machine shouldn’t drain you. That would just be ironic.
The good news: Your Keurig is a cinch to maintain, especially if you set a regular reminder to descale the single-serve coffee maker. Here, a step-by-step guide to a clean machine so you have a perfect cup of coffee every time.
What is the best way to clean a Keurig?
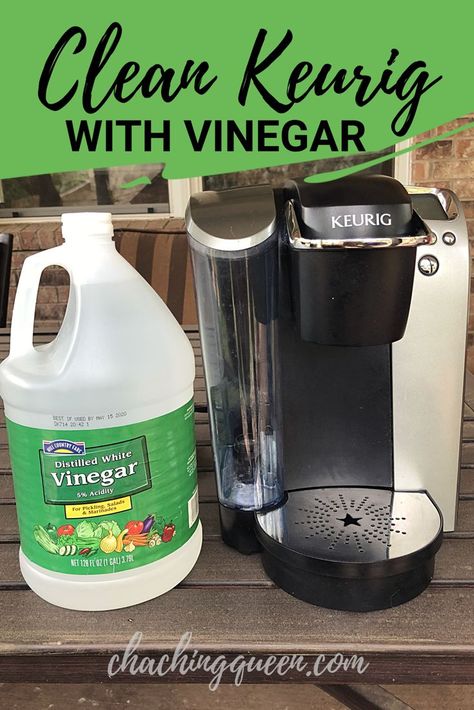
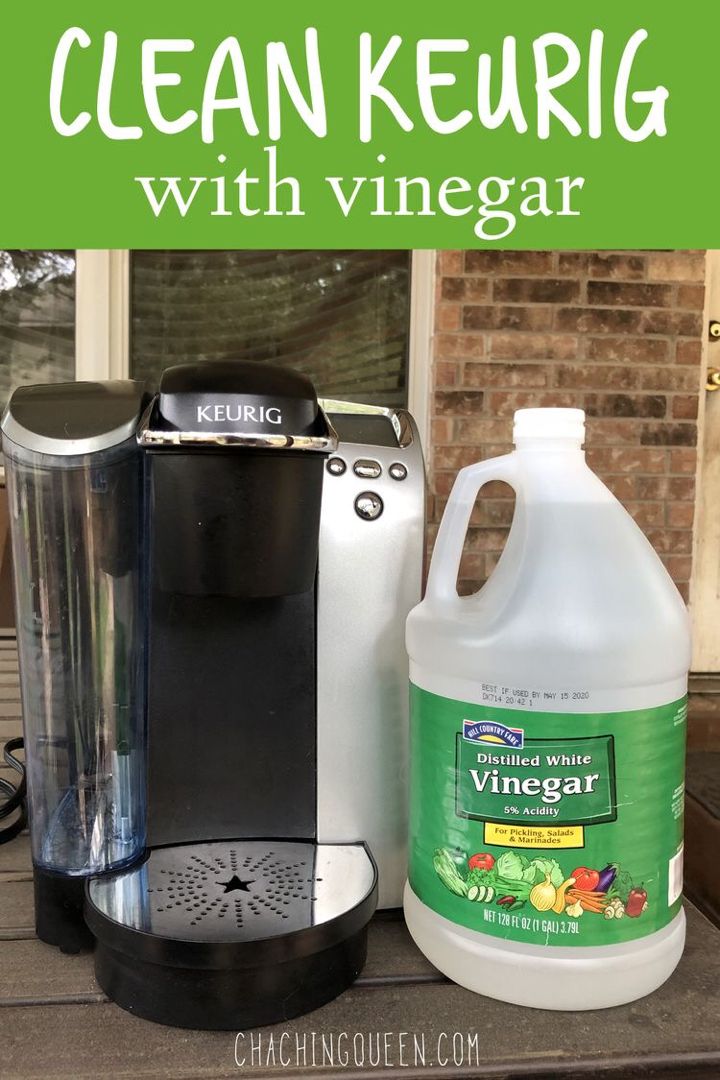
Think of cleaning a Keurig in three parts: Wiping down the exterior, rinsing out clogs and buildup, and descaling to get rid of calcium deposits. The simplest no-fuss solution is to invest in a Keurig descaling solution and maintenance kit, available on Amazon. But there are plenty of things you can do to tackle scale buildup using household products like white vinegar and distilled water.
Step 1
Water and electricity don’t mix. Unplug your Keurig machine before you start cleaning.
Step 2
Remove the water reservoir (or water tank). Pour out leftover water, preferably into a nearby plant. It’s a good idea to clean the container at least once a week with soapy water. If your Keurig has a water filter, remove and replace the water filter cartridge once every two months. Dedicate an old toothbrush to scrubbing grimy coffee residue from corners of the drip tray. It’s also a great tool to clean under the K-Cup pack holder (where the coffee comes out). Allow all the pieces to air dry.
Step 3
Clean the pod holder. Lift the handle to open the machine and gently push the K-Cup holder from beneath (yes, it comes out). This further breaks down into two pieces, one of which is the funnel with the brewer needle. With a paper clip, gently circle inside the opening to dislodge coffee grounds and release clogs stuck to the insides. A toothbrush, a damp cotton swab, or even an unused mascara applicator can do the job. Once you’re satisfied, rinse the funnel and K-Cup holder with hot water.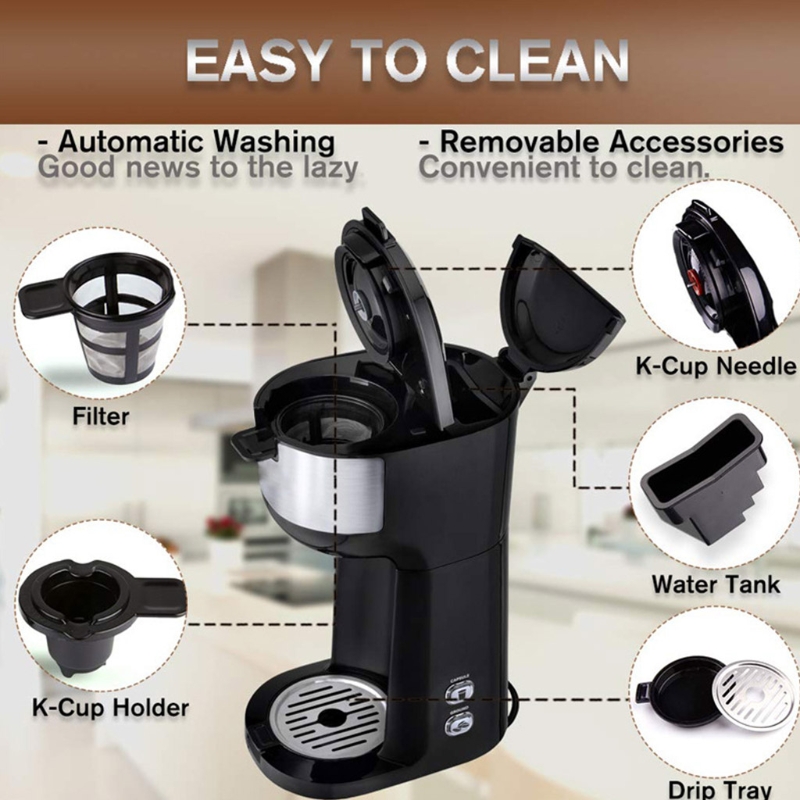 Don’t forget to clean the brewing needle—here a paper clip is also your friend.
Step 4
For a more serious clean, use white vinegar or descaling solution to remove mineral deposits from the water reservoir. You only need to do this every three to six months.
Step 5
Now, start the brew cycle using fresh water only. You’re not making a cup of coffee yet so skip the pod. Repeat this step several times to flush out the descaling chemical or vinegar.
Step 6
Wipe down the exterior surface with a microfiber cloth to minimize water spots and reinstate your Keurig’s newness factor.
How do I clean the inside of my Keurig?
Empty the entire descaling solution into the water reservoir, and then add filtered water until it reaches the brim (you can also buy distilled water, but plain water from the tap is acceptable in a pinch too). Plug the machine back in, turn it on, and place the largest mug you own under the sprout. Program the machine to brew to the highest cup setting (8 or 10 ounces). Start the brew cycle.
Repeat this process until the reservoir is empty, dumping the solution from mug to sink as you go. Once you’re finished, let the machine sit for about a 30 minutes so that the solution can soak the inner parts. Then, rinse out the reservoir once again with fresh water by starting another brew cycle sans coffee. Per the Keurig manufacturing instructions, it takes about a dozen cycles to full flush out the chemicals so they don’t end up in your cup of coffee. As the final step, leave an empty mug underneath the funnel, in case water leaks out. You Keurig should be spic-and-span for your morning coffee.
How do I clean my Keurig with white vinegar?
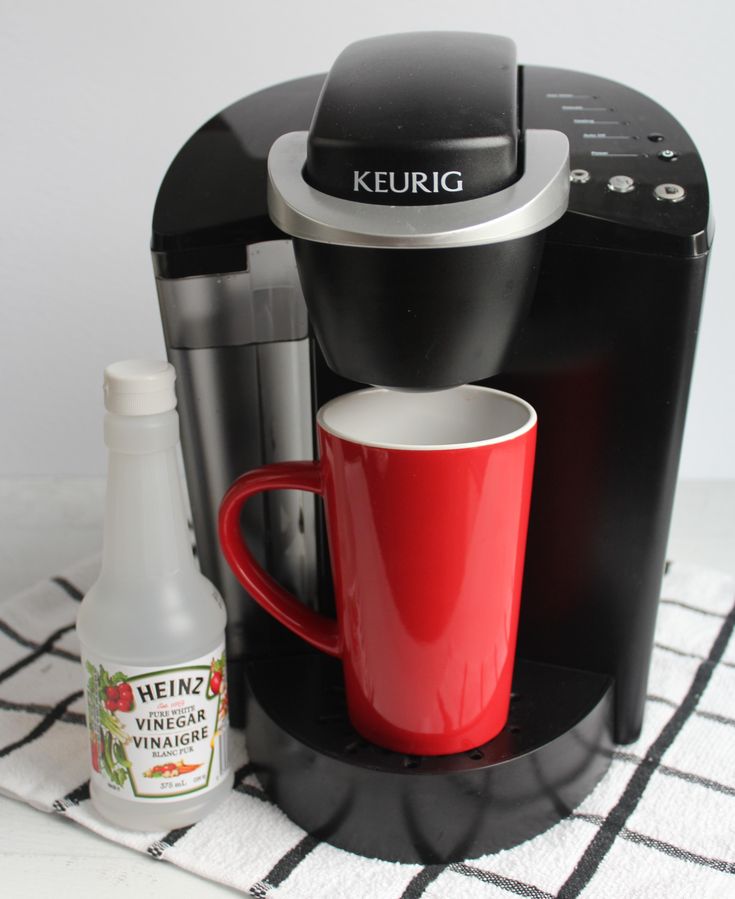
If the Keurig descaling solution isn’t on hand, white vinegar is the cleaning solution you can have on hand. You’ll want to do equal parts water and vinegar. Fill the reservoir about halfway with white vinegar, and then add water until you reach the top. Don’t fill the reservoir all the way to the top with vinegar, otherwise you might have a vinegar taste—a coffee flavoring you’ll want to skip. Lift the lid so that the solution can go into the Keurig. The vinegar solution can stay in the machine for about 30 minutes, but don’t let it sit for more than 3 hours.
Turn on the machine, place your cup in position, and run through the brew cycle until the reservoir is empty. Rise out your reservoir with clean water as you let the vinegar really tackle that mineral buildup. Just as you did with the descaling solution, run a few brew cycles with fresh water to remove every trace of vinegar. Leave an empty cup in the base just in case there is leakage.
Is vinegar enough to clean a Keurig?
You can do a mini white vinegar rinse whenever you decide to switch K-Cup flavors—like from a coffee pod to a hot chocolate pod. Alternatively, Keurig’s rinse pods will do the trick in a jiffy. Place one in the machine and run an eight-ounce cycle. Ta-da! Your new flavor of choice is the star. Even if you’re committed to one flavor, using a rinse pod once a week will make the coffee taste as if you’re moonlighting as a barista. For general Keurig maintenance, wipe down the exterior with a damp cloth and dish soap.
How to Clean a Keurig Coffee Maker, With and Without Vinegar
Single-serve coffee makers, like Keurig, have made it super easy and convenient to brew a perfect cup of joe. But it's just as easy for many folks to overlook that these machines need regular cleaning and descaling to work their best. It takes more than refilling the water reservoir and popping in a new K-cup to keep a Keurig brewing — and to keep it free of the mold and bacteria that can grow when you neglect it. When it comes to routine maintenance and cleaning, think of your Keurig as you do other home appliances like dishwashers, washing machines and traditional coffee makers. Not only will regular cleanings extend the life of your appliance and protect your health, they'll also keep your coffee tasting great every day.
We asked Carolyn Forté, Executive Director of the Good Housekeeping Institute Home Care & Cleaning Lab, for advice on how to maintain your go-to morning machine. Start by stocking up on the cleaning essentials recommended below, then follow the timeline for how often you should clean every part of your coffee maker.
How to clean a Keurig weekly
Ideally, it's best to wash the removable parts of your machine on a weekly basis, especially if you use it daily.
What you'll need:
- Dish soap
- Sponge or cloth
- Dish towel for drying
Instructions:
- Unplug the machine.
- Remove the water reservoir, lid, drip tray and K-cup holder.
- Pop out the filter, if any, from inside the reservoir and set it aside.
- Wash all parts in warm, soapy water.
- Rinse the parts thoroughly and towel dry everything except the interior of the water reservoir. Let the interior air dry to keep from depositing any lint from your towel inside.
- Wipe down the machine's exterior surface with a damp sponge or cloth.
 Dry with a clean dish towel.
 - Replace all the removable parts, re-insert the water filter and plug the machine back in.
Flavor tip: Use a Keurig rinse pod once a week or after brewing a flavored drink to keep your morning coffee from tasting like last night's hot chocolate!
How to replace your water filter every two months
Every other month, replace the water filter cartridge to keep your coffee tasting fresh.
What you'll need:
- Water filter cartridges
Instructions:
- Soak a new water filter cartridge in fresh water for five minutes, then rinse it under running water for 60 seconds.
- Wash the filter holder in warm sudsy water and rinse well.
- Insert the cartridge into the filter holder and snap the holder back together.
- Lock the filter holder back into the reservoir.

How to descale your Keurig every three to six months
Hard water minerals can build up in your machine over time, which could affect how well it works — and, if left unaddressed, could cause it to stop working altogether. So it's important to descale your Keurig at least twice a year.
Expert tip: Set a calendar reminder to descale your coffeemaker at the start of each new season and you'll always know how long it's been since you did it last.
What you'll need:
- Distilled white vinegar or Keurig Descaling Solution
Instructions:
- Begin the descaling process by filling the reservoir with either 16 ounces of white vinegar or Keurig Descaling Solution followed by 16 ounces of water.
- Place a mug on the drip tray and lift the brewer handle as if inserting a K-cup, but don't put one in.
/cdn.vox-cdn.com/uploads/chorus_asset/file/14763066/Keurig_2_0_Master.0.1408912411.jpg)
- Select the largest cup size and brew a cup as usual into the mug.
- Empty the mug and repeat this process until the ADD WATER indicator is illuminated.
- Let the coffee maker rest for 30 to 45 minutes.
- Empty the reservoir and rinse it thoroughly. Fill it to the MAX line with fresh water and perform 12 rinsing brews using the largest cup size to remove any traces of vinegar or descaling solution.
- Brew coffee as usual.
Expert tip: Simplify your Keurig coffee maker cleaning process further by scheduling your water filter cartridge replacement and descaling for the same day. Replacing the water filter cartridge immediately after de-scaling with vinegar will ensure that no vinegar taste remains for your next brew.
How to clean Keurig needles when needed
When you see grounds in your K-cup holder, remove them with a sponge or cloth to prevent them from ending up in your beverage the next morning. If you're still having trouble brewing, there may also be coffee grounds clogging the exit tube or stuck to the needles, which punch the entrance and exit holes for the water to flow through the K-cups. Here's how to clean the needles:
What you'll need:
- Paper clip
Instructions:
- Unplug the machine.
- Separate the pod holder from the funnel. Carefully unfold a section of the paper clip and use it clear away any debris lodged in the pod holder's exit tube. Wash the pod holder, including the exit needle (be careful; it's sharp) and the funnel, and rinse well.
- The entrance needle under the brewer head can also be cleaned with the paper clip. Insert the paper clip section into the two holes in the needle to clean them.
- Reassemble the pod holder and funnel and reinsert in the machine.
- Brew two cups of clear water to thoroughly rinse the needles.
If you own a Keurig 2.0 model, you can use the brewer maintenance accessory to clean the needles.
The takeaway
If you schedule regular maintenance of your Keurig, you'll likely get better-tasting coffee and a longer life for your machine.
What you'll need to clean a Keurig coffee maker
Dawn Ultra Platinum Dishwashing Liquid
$6 at Walmart$68 at Overstock
Heinz Distilled White Vinegar (32-oz Bottle)
$2 at Walmart
Keurig Descaling Solution
$13 at Amazon$123 at Wayfair
Keurig Water Filter Refill Cartridges
Now 20% Off
$8 at Amazon$7 at Walmart$9 at amazon.com
Lauren Smith McDonough
Senior Editor
Lauren is a senior editor at Hearst. She was previously the senior editor at WomansDay.com and the home editor at GoodHousekeeping.com and HouseBeautiful.com. Her book club, ramen, and jean jackets are a few of her favorite things.
Cleaning the Keurig with White Vinegar
To keep your Keurig in good working order, it is important to descale it two to four times a year to remove buildup. Although you can purchase a descaling solution sold under the Keurig brand for this, it is not necessary. Instead, you can use white vinegar, a super-cheap ingredient that you probably already have in your closet.
How to use white vinegar to clean and descale Keurig
Use very simple white acetic acid to deep clean and descale your Keurig coffee machine. All you need is white vinegar, some water, and a small appliance. Follow these instructions when cleaning your Keurig with white vinegar.
- If there is an old K-Cup in the car, remove it.
- Make sure the water tank is empty.
- Remove the filter from the tank (provided your device has one). nine0014
- Fill a large cup or mug with vinegar.
- Pour vinegar into a container.
- Place a cup or mug on the base of the machine to collect the vinegar as it comes out.

- Start the brew cycle using the large cup.
- Let it go through a full boil cycle.
- Throw away the vinegar or use it for another cleaning purpose.
- Let the device stand for 30 minutes to an hour.
- Fill a clean cup or mug with water. nine0014
- Pour water into the tank.
- Place the cup on the base to catch the water as it comes out.
- Start the brew cycle.
Once the water has passed through the reservoir, your device will be clean, descaled and ready to use.
Consider cleaning your Keurig outdoors
While you can clean your Keurig in its usual place in the kitchen, be aware that vinegar has a strong smell that becomes strong even when heated (which happens during the brew cycle). Because of this, you may want to take the device outside before cleaning it with vinegar. Cleaning outdoors will help keep the smell of vinegar out of your home during and after cleaning. nine0003
- Simply place it on an outdoor table next to an electrical outlet or power strip.
- Be sure it is not located in a place where it can be knocked over and hot vinegar spilled on people, pets or plants.
- This will help avoid burns and unintentional damage to any of your plants.
Getting rid of the smell or taste of vinegar after cleaning
Cleaning the coffee maker outdoors can help keep the smell of vinegar that seeps into your home, but the appliance itself may pick up some of the vinegar smell during the process. It is also possible that the first few times you run water through the tank after cleaning it with vinegar, the liquid will take on a vinegary taste. To prevent these problems:
- Wipe the outside of the unit with your favorite cleaning solution that does not smell like vinegar.
- Pour another mug or cup filled with plain water into the reservoir without using the K-Cup.
- Test the water after it has run through the machine.
- Continuing to repeat the process until the water no longer absorbs the vinegar as it passes through the tank.
Once the water is free of the vinegar smell, you can use your Keurig again to prepare the hot drinks of your choice. nine0003
Knowing When It's Time to Clean Your Keurig
It's a good idea to get into the habit of cleaning your Keurig with white vinegar once a quarter or at least every six months. Consider marking your calendar or adding it to your regular household to-do list. Also, keep an eye out for changes in the amount of time it takes to prepare your favorite drinks. If your car starts to slow down, it might be time to use white vinegar to deep clean and descale. nine0003
7 ways to clean the washing machine from smell, dirt and scale
Karina_Vailo | 02/14/2019 | Updated | Household appliances | 193,480 views | 5 comments
The content of the article
The life of a modern person is very rich and dynamic, it is necessary to be in time everywhere and everything. Fortunately, a lot of “smart” technology has been invented to significantly simplify household chores. Starting from multicookers and ending with robotic vacuum cleaners or robotic window cleaners. And if the last miracle of technology is not in every home, then the washing machine rightfully takes its place of honor in the bathroom in almost all apartments and houses. However, many of us may encounter such a problem as an unpleasant smell, which comes from both the machine itself and the freshly washed laundry afterwards. And the reason for this is not at all the age of technology, as many mistakenly believe, but improper care or its absence at all. In this article, we will identify factors that can cause various problems during operation, as well as consider 7 most effective ways to clean the washing machine from odor, dirt and scale without resorting to the help of specialists.
Causes of an unpleasant smell
If you are reading this article, then the topic is relevant to you, which means that one fine day you suddenly found that an unpleasant smell emanates from your washing machine, to put it mildly. At best, it will just be the smell of dampness, which is often found in basements. In a more neglected version, it will be a pronounced sewer smell. And here comes the bewilderment, especially if your machine is brand new or you did everything as always. The habitual smell of freshness can change the foreign aroma by for several reasons :
- The most common and most elementary mistake is closing the hatch immediately after removing the washed items. It is absolutely impossible to do this. The moisture in the drum dries out within a few hours. Only after this time has elapsed can the lid be closed to prevent it from sagging in the future. Otherwise, you will create more than favorable conditions for the reproduction of various microorganisms or mold - it will be warm and damp in the drum. Believe me, when in a couple of days you open the hatch, you will simply be horrified, because your device simply “suffocated”. And if you also wash things without first eliminating the smell, they will also acquire a characteristic aroma; nine0014
- Even if some housewives are not lazy and still wipe the drum dry after washing, not all of them pay attention to such a detail as rubber around the hatch contour .
 It has a rather complex shape, on which tightness depends. There are several layers, between which, in addition to water with detergent residues, threads, villi, hair and other objects can remain. In high humidity conditions, this material is a great place for mold to form, which will eventually emit a strange smell. Sometimes it is not even immediately possible to understand why there is an extraneous aroma at all if the drum is dry and clean. Therefore, it is better to leave the drum to dry naturally, but wipe the gum thoroughly with a dry soft cloth; nine0014
 - Another mistake that occurs almost everywhere is putting things to be washed in the drum. And if you also close the door at the same time ... Remember, dirty things in any case will have a characteristic smell, which will very easily and firmly be fixed inside the drum. Especially if you also block the access of air to things. After all, it’s not for nothing that they came up with linen baskets. They are even produced in different sizes, shapes, colors and designs.
 All so that you can harmoniously fit this attribute into the interior of the bathroom and use it for its intended purpose. All baskets have holes in the walls, lid and bottom, thus providing ventilation; nine0014
 - Another reason may be incorrect installation of the machine . Please note, not the connection, but the installation. If the appliance is tilted, it may prevent the water from draining completely. As a result, in the corner where there is the smallest angle of inclination, a small amount of water will remain and stagnate. When exactly the musty water will make itself felt is only a matter of time;
- If the machine is quite old, a clogged drain hose may be the cause of the bad smell. If there is a smell, it means that so much debris has already accumulated on its walls, on which soap deposits, salts, etc. have settled, that it will be much easier and more expedient to replace it than to clean it; nine0014
- If you overuse washing powder and various conditioners, this can also contribute to the appearance of characteristic odors.
 Excess funds that simply did not have time to dissolve during washing stick to the walls of the machine, the powder tray, and after a while they begin to actively “smell”. And not at all a pleasant aroma of fragrances, as you would like, but rather something rotten. In this case, the rule “more is better” does not work in any way. The lack of washing powder will simply lead to the fact that things will not be washed. Therefore, it is best to purchase a measuring spoon or cup and pour exactly as much powder as the manufacturer recommends in the instructions on the package; nine0014
 - You should also pay attention to the quality of the products used for washing. Frankly cheap powders can be poorly soluble in water. The result will be the same as above. Therefore, if possible, purchase quality products. In addition, their consumption will be much less, and the washing result will be of better quality;
- If the powder and softener tray is dirty, this can also cause odors;
- If the tray is heavily soiled, then the contamination of the channel, which is responsible for the supply of detergent, is automatically inevitable.
 Because of this, mold can form, which will smell; nine0014
 - Another problem is return filter . It is designed to hold various large items, such as buttons, pennies, so that they do not clog the sewer. Remaining on the filter, such things gradually begin to acquire a soapy coating, on which all sorts of threads-villi stick, silt up and begin to stink. It is quite easy to understand if this is the reason. If the filter is clogged, the water will drain very slowly or stop draining altogether; nine0014
- If the smell is similar to something rotten or rotten, it means that an impressive layer of dirt has formed on the heating element. If there is a layer of scale on the heating element , undissolved particles of detergent settle on it very quickly, hair, threads, pet lint or woollens stick to them. Such a “cocktail” especially makes itself felt if the most familiar washing mode for you is at a temperature of 30-40 ° C;
- Problems with the sewage system itself cannot be ruled out.
 But then, in the event of some accidents or breakdowns, an unpleasant smell will come from both the sink and the bath. And if the aroma comes only from the washing machine, it may be connected incorrectly - there is no air or hydrobarrier. nine0014
As you can see, there are many reasons. Often they are present in combination. Therefore, the very first step towards identifying the source of an unpleasant odor will be a complete inspection of all elements of the washing machine.
Why does the machine smell of burning?
Sometimes the washing machine may emit not only the smell of dampness, mustiness or rot, but also burning. This can happen in several cases:
- If the washing machine was just purchased. Usually, when you first start up, a slight smell, reminiscent of the smell of burning, is normal. But it is worth emphasizing - light and short. It can appear when plastic parts are heated. And after the second or third inclusion, it should disappear altogether; nine0014
- An old washing machine can also smell of burning, but this is normal only if you changed the powder to a new one, and it turned out to be of poor quality, or if laundry soap shavings were added directly to the drum during washing.
 This is especially often done by mothers of newborns, arguing that it is safer for the child. There is no point in arguing with this. The smell appears if the soap particles fall on the heating element and stick to it. In this case, the burning will give off not just during washing, but at the next start during the heating of soap residues. nine0014
If none of the above options is typical for you, or the smell of burning has not disappeared after running the machine at maximum idle temperature, be sure to call the master , because we are most likely talking about breakage and melting of some contacts, which can lead to to a short circuit.
How is scale formed and why is it dangerous?
Another inevitable problem in the operation of any appliance that comes into contact with water is the formation of scale. If you have a boiler with an open or “wet” heating element, then you probably know this phenomenon. nine0003
Scale is a hard deposit that forms on the surfaces of elements that come into direct contact with water and heat it up.
There are several reasons for the formation of such plaque:
- The most basic is the very poor quality of water, which contains many different impurities and components. In some regions or areas, the water may be softer, in others it may be too hard. The water contains magnesium and calcium salts, which are the most harmful for the heating element and the washing machine tank. When water is heated, the salts of these minerals precipitate and form solid deposits; nine0014
- In addition to impurities in the water itself, various chemical additives in washing powders also have a detrimental effect;
- Also, scale builds up very quickly with regular use of the machine in the "intensive wash" mode.
There are two ways to descale . And it is best to use them in combination. But first of all, you need to assess how expedient it is to do it right now. To do this, you need to try to consider what state the heating element is in through the holes of the drum.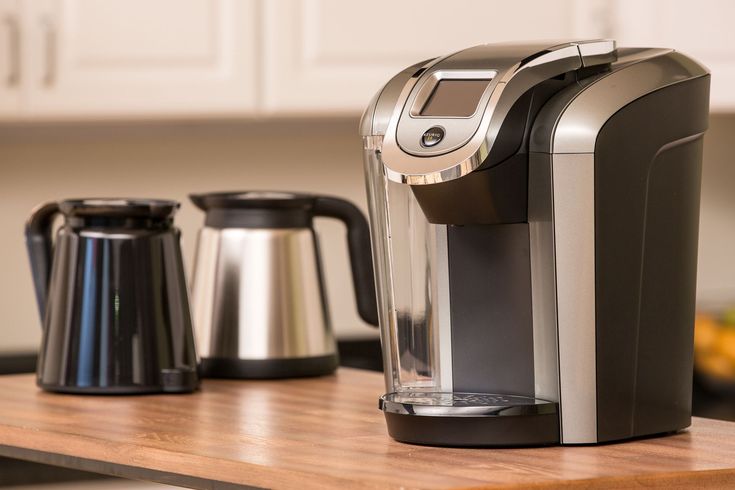 To do this, you need to shine into the holes and rotate the drum. How quickly it is better to do this, you will understand in the process. If characteristic deposits are visible on the surface, perform two types of cleaning in sequence:
- Mechanical. Is a very effective way. But for this you will need to study the device of your device well and be able to disassemble it without sad consequences. After you get to the heating element and more clearly appreciate the scale of the tragedy, you will need to remove the hard coating. It is highly not recommended to use knives, screwdrivers, files and other improvised tools that can leave scratches on the surface for these purposes. It is better to use a sponge with a hard layer, fine-grained sandpaper; nine0014
- After that, to remove the remaining scale, soak the heating element in a solution of vinegar or citric acid for several hours, then thoroughly clean with a toothbrush and rinse with clean water.
Also, with the help of these two products, you can clean the machine without dismantling it, but more on that later. I would also like to clarify what exactly the excessive accumulation of scale on the heating element is dangerous for:
 - The level of heat transfer of tubes, which are called heating elements, is noticeably reduced due to the buildup of plaque on their surface. This leads to slower heating of the water; nine0014
- As a result, to reach the set temperature, the machine needs to work much longer, which naturally entails increased energy consumption;
- A large load that falls on the heating element in such conditions will lead to its early breakdown and the need for replacement;
- And as we have already found out - the formation of scale can cause an unpleasant odor.
- An excellent way to prevent scale formation is to install a magnetic filter. This small device is attached to the water supply hose and forms a permanent magnetic field. When the machine is filled with water, passing through the formed field, it changes its structure. As a result, impurities are destroyed and do not settle on the internal surfaces.
 The cost of such a device is quite high, however, its service life reaches 50 years, which fully justifies the costs. nine0014
Method 1. Cleaning the washing machine with soda
Before resorting to various types of household chemicals, we suggest trying to eliminate the unpleasant smell associated with mold formation using ordinary baking soda.
- The first step is to find where the mold is growing. Perhaps this is the surface of the drum itself, the powder loading tray, or the surface of the rubber seal;
- Let's start with baking soda paste. To do this, mix 0.5 cups of soda and 0.5 cups of water. nine0014
- Mix thoroughly until a paste is formed;
- Be sure to wear rubber gloves;
- Apply a little paste to the sponge and rub the affected area well;
- After that, you need to wash off the paste, turn on the machine for rinsing.
A mixture of baking soda and citric acid can be used to try to remove limescale from the inside of the machine. For this:
- Mix 150 g of citric acid and 2-4 teaspoons of baking soda; nine0014
- Pour the mixture into the detergent dispenser;
- Set the machine to the highest temperature setting and then run an additional rinse cycle when finished.
- Naturally, you need to pour any cleaning agent into the pre-washed tray. Also note that the drum must be empty. If for some reason you do not like that the machine will idle, throw in a floor rag or an old towel. In general, something that will not be a pity to throw away in case of a color change. nine0014
Method 2. Rinse the machine with citric acid
Citric acid can also be used to eliminate the unpleasant smell which is associated with the formation of scale. The secret is that expensive products that are designed to remove plaque are almost 75% acid. So why pay more?
- Pour 50-100 g lemongrass into the powder tray;
- Select the longest wash at the highest temperature;
- Run an extra rinse after the end of the wash.
On various forums, I came across a large number of reviews, which said that after cleaning the machine with citric acid, the smell of not only did not go away, but also intensified. Let me explain why this happens:
- Apparently, your typewriter is more than one year old and during its operation a large amount of scale has settled on the surface of its heating element, and on top of it various contaminants; nine0014
- Plus, most likely in order to reduce washing time and save energy, you most often washed at temperatures not exceeding 40°C;
- After you ran your machine, firstly, at maximum temperature, and, secondly, with the addition of acid, which breaks down scale and other sediment, they simply could not dissolve completely;
- After you turn the machine on again a few days later, during the heating process, the remaining scale and dirt also heat up and begin to emit an unpleasant odor again. nine0014
- Therefore, you simply did not clean the machine.
 Just repeat the procedure and see how the smell disappears completely. It is necessary to use citric acid, and not lemon juice, the concentration of which is much lower.
Despite all the advantages and effectiveness of this method, it is highly recommended not to use it more than once every 6 months and use more acid. On this method of cleaning the washing machine, a lot of diametrically opposed opinions have been expressed on the network, from 100% favorable to completely negative. It is likely that such a radical divergence of readers' opinions is due to the operation of equipment from different manufacturers, produced in different time periods using different materials. nine0003
Method 3. Vinegar as a prophylaxis
Using ordinary 9% vinegar, you can get rid of such trouble as fungus or mold .
- The detergent drawer must also have a compartment for pouring liquid powder. It is there that you need to pour 2 cups of vinegar;
- Select a high temperature wash program and start the machine;
- After the machine has been running for 10-15 minutes, you need to press pause and leave it for an hour or two in this state; nine0014
- This is necessary so that the acetic solution has time to produce the proper effect on microorganisms and, possibly, to dissolve a thin layer of scale;
- After that, resume washing and let the “wash” cycle to the end;
- Finishes cleaning with an extra rinse;
- Then open the washer, take a clean cloth soaked in the vinegar solution and carefully wipe the rubber seal and inspect it for debris;
- Leave the door open to dry the drum and wipe the rubber with a dry cloth.
 nine0014
Be aware that cleaning with vinegar comes with a characteristic odor.
By the way, some housewives add vinegar directly during washing. Literally 1-2 tablespoons. It acts as a water softener, thereby preventing scale formation. And if you add apple cider vinegar, the linen itself will acquire a subtle, light and pleasant aroma.
Method 4. Chlorine for cleaning the washing machine
Also in the open spaces of boarding schools you can find a lot of conflicting reviews about whether chlorine can be used as a cleaner, does it corrode rubber elements? It is possible, if not abused. Fight mold and disinfect hard-to-reach places of the washing machine using regular white:
- Pour 100 ml of white into the drum;
- Turn on the high temperature wash;
- Approximately 30-40 minutes to kill microorganisms;
- Then switch on the extra rinse.
Cleaning with a chlorine cleaner is recommended no more than once every 6 months. Also be careful when using "Domestos" instead of white. Keep in mind that it tends to foam. nine0003
Method 5. The best ready-made products
If folk remedies do not inspire confidence in you, in any household chemical store you can purchase a ready-made product for either disinfection or descaling. The most effective of them:
- Detergent for washing machines of the German manufacturer "Magic Power". It is produced in the form of a liquid, which, according to consumers, is very effective and helps to dissolve even a layer of scale that is impressive in thickness; nine0014
- Another German liquid product Topperr 3004 is sold in 250 ml bottles for two cleanings;
- Luxus Professional is a universal product designed for cleaning not only washing machines, but also electric kettles, irons, dishwashers and other household appliances. It has a lemon scent and is sold in bottles of 500 ml. The liquid is enough for 4 full cleanings;
- A concentrated agent from the Korean manufacturer "Bork K8P1" is available in powder form.
 There are only 4 sachets in the package, respectively, for 4 cleanings. Before use, the powder is dissolved in water, the amount of which is indicated on the package; nine0014
 - The Japanese remedy "Kaneyo" is also in demand. It not only cleanses of scale, but also has an antibacterial effect. Sold in bottles and contains chlorine.
Method 6. We clean the individual elements of the washing machine
We told you exactly how to clean the washing machine, now we will tell you how to get to the most problematic places. To remove and thoroughly wash tray for powder loading you need:
- Understand how the tray is attached. It is usually held in place with side latches. Most often, it is enough to press the latches and pull the compartment towards you, slightly lifting it up. Some models have a button on the side that must be held down to release the fasteners;
- When the compartment is in your hands, first rinse it well under hot water;
- Use a toothbrush to carefully remove detergent residue from all possible grooves;
- If the plaque is very persistent and there are signs of mold, use a solution of citric acid, soda or bleach; nine0014
- Also inspect the area where the tray is inserted, there may also be powder residue.

A problematic place where all kinds of debris and mold most often accumulates is rubber seal along the contour of the hatch.
- It is best to wash it immediately after washing, when it is still damp;
- For convenience, stock up on ear sticks or cloth;
- Wrap the fabric around your finger and reach carefully into all folds; nine0014
- For cleaning, use vinegar, which not only helps to get rid of microorganisms, but also eliminates the smell. You can also use a solution of whiteness and water in a 1: 1 ratio;
After you have used one of the descaling methods, it is very likely that some of the descaling remains in the drain filter . And not only them, but also all sorts of small items that can get into the machine if you do not check the contents of the pockets before washing. To clean it you need:
- Find where the filter itself is located. Usually on the front of the body of the machine, in the lower right or left corner there is a plastic cover or plug;
- It must be carefully pried off and removed;
- Be aware that after removing the cover, residual water may leak out - lay a rag;
- If the water is no longer flowing, the plug can be removed;
- Remove all debris and rinse the filter under running water.
 Use detergent as needed. nine0014
Theoretically, when you cleaned the washing machine with a solution of soda and vinegar, the drain hose should also be cleaned, but if this was not enough, you will have to clean it separately:
- Unplug the washing machine from the mains and turn off the water supply;
- Place a small container under the hose connection, then unscrew it;
- Inspect the inside. If everything looks intimidating, try cleaning the cavity with a cable, at the end of which a soft brush is attached; nine0014
- If cleaning does not work, it is best to replace the hose with a new one.
Method 7: How do I clean my top loader?
Top-loading machines are more difficult to clean, they have more hard-to-reach places, so we will clean with different compositions:
- We need a wash cycle at the highest temperature;
- Add 2-3 cups of vinegar to the water, after a few minutes add another 0.