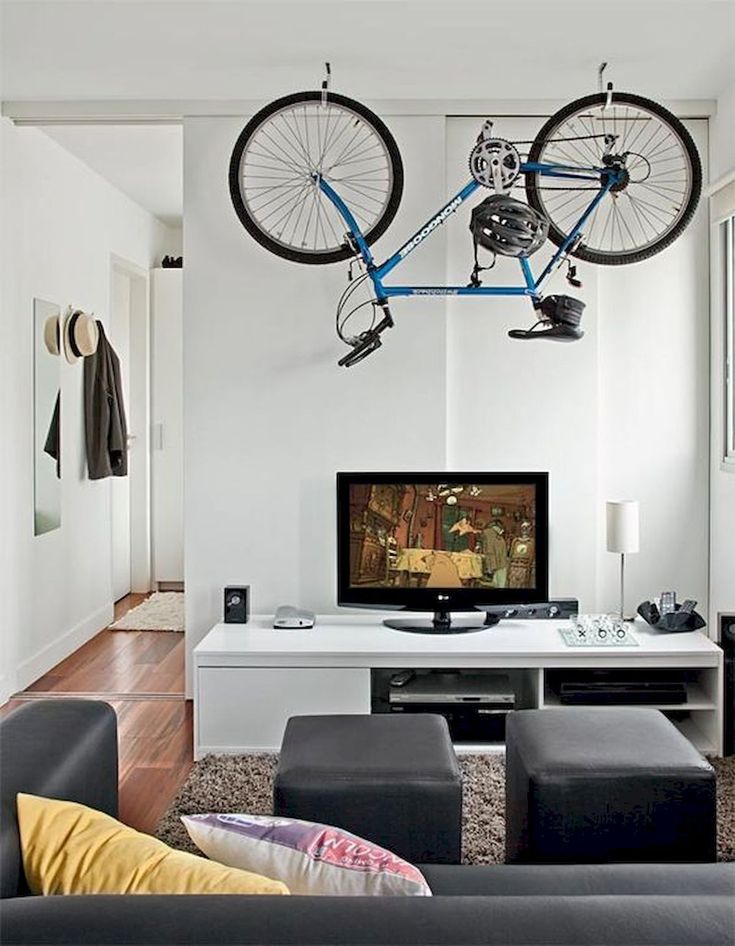
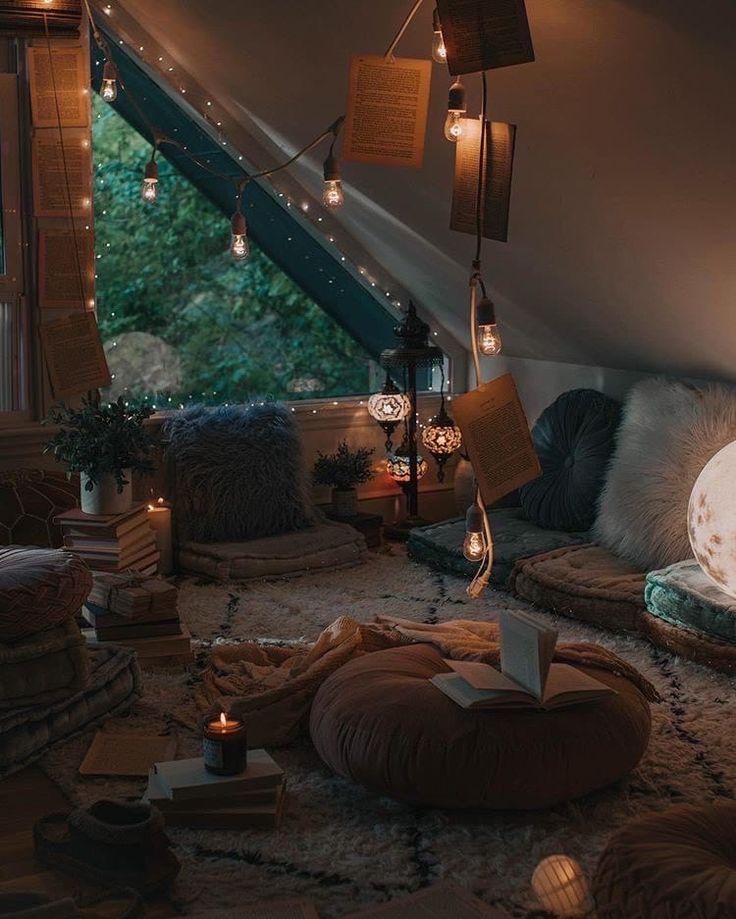
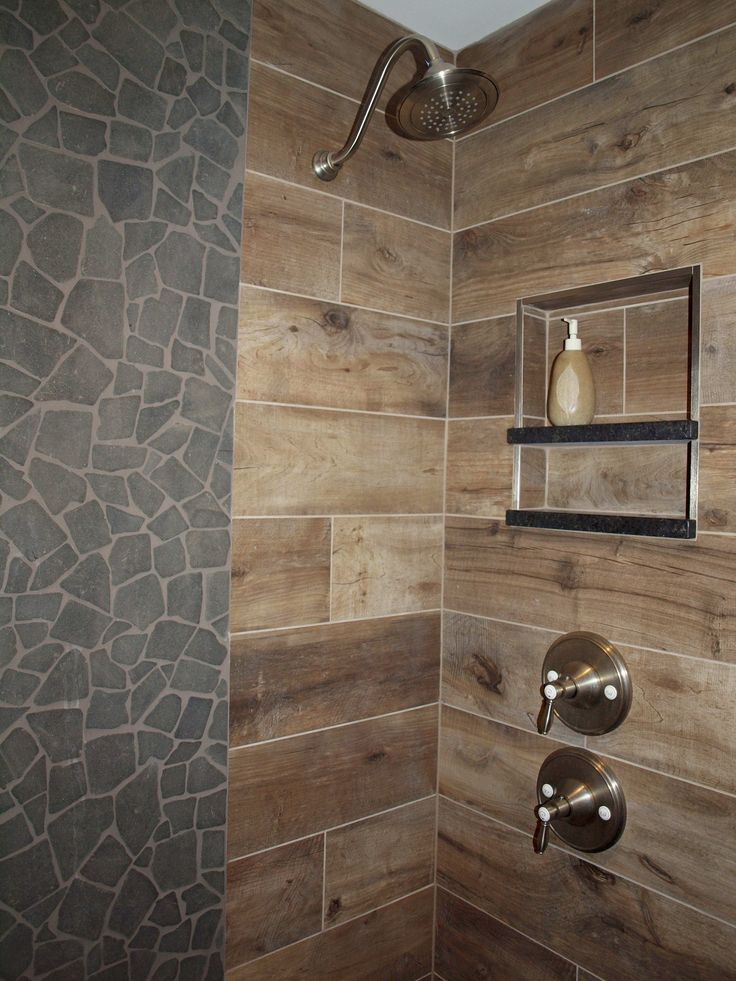
Ceramic tile on wall of bathroom
Is Ceramic Tile Good for Shower Walls?
You have chosen the vanity, the shower accessories, towel bars, and other bath fixtures for your remodeling. You only have one decision left: the tiles. You like the look of ceramic tile, but you wonder, is ceramic tile good for shower walls? Keep reading to discover the benefits of installing ceramic tile in shower walls.
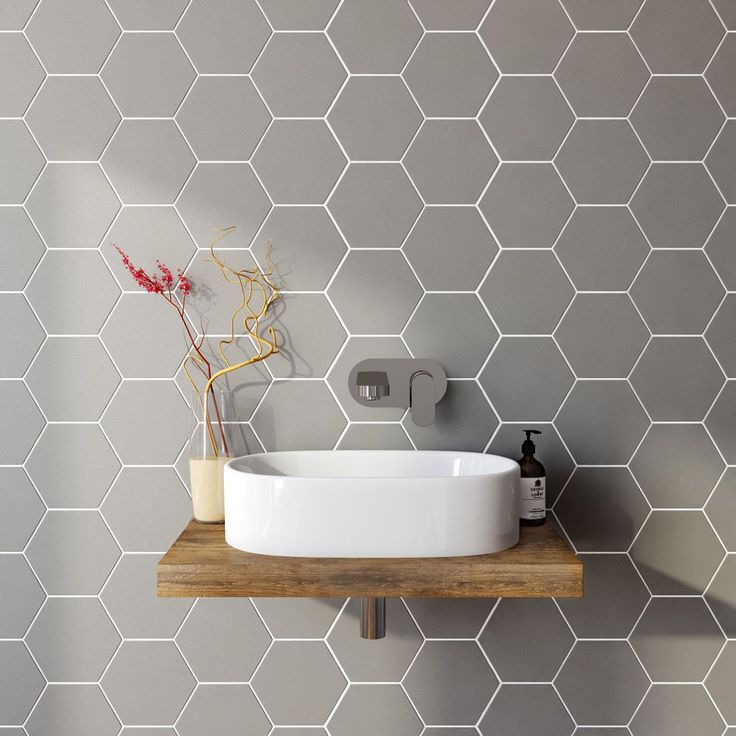
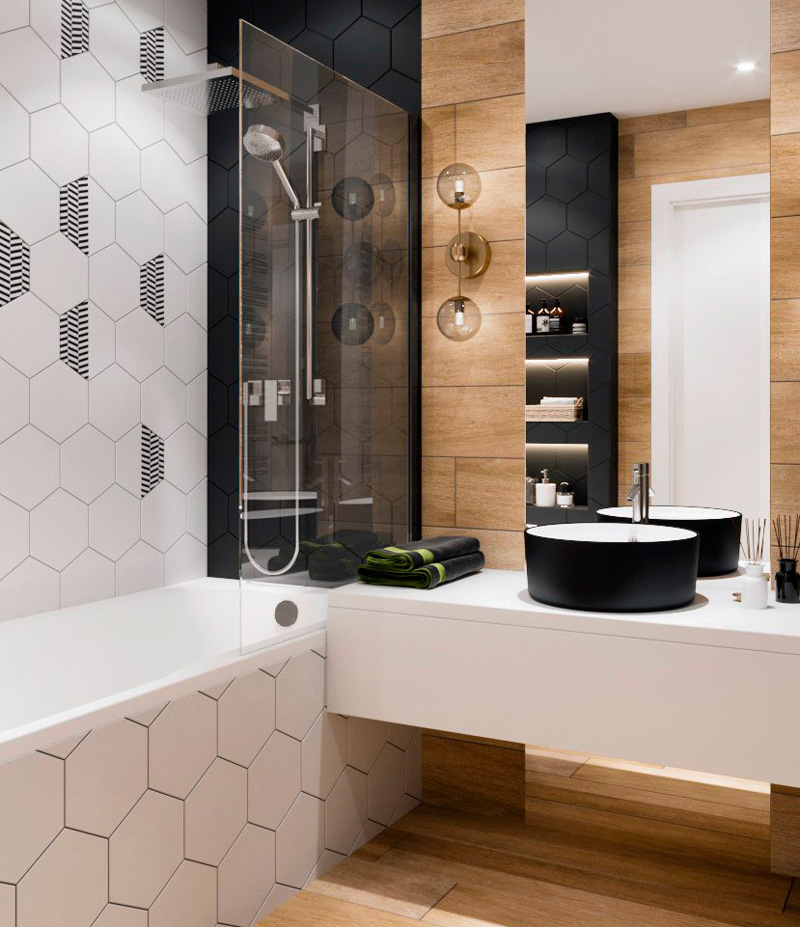
STYLE OF CERAMIC WALL TILESDoing a bathroom remodeling is the opportunity to give it a complete makeover. Nothing quite says fashion like ceramic tile. Currently there are so many ceramic tile options to choose from that allow you to create any design. You can mix patterns; you can use hexagons, like those from our Casablanca series. You can also go for subway tiles with a twist like our Ombre series. Is ceramic tile good for shower wall? Yes, since it allows you to mix tile sizes and colors to make fun designs in your shower walls. Check out our last blog post Top Summer Tile Trends for more inspiration. If you want an original design, ceramic wall tiles are your way to go.
PRICE OF CERAMIC WALL TILES
Still not sure if ceramic tiles are good for shower walls? Let us talk about affordability. Compared to other tile materials, ceramic wall tiles present an affordable option that does not compromise on style or viability. The durability of ceramic wall tiles will justify their initial cost and installation. A bathroom with a good quality ceramic wall tile can actually increase the value of the property that will allow you to see a return on your investment in ceramic wall tile. One of our star series, Color Collection, is a very affordable and durable option to try out. Contact us or stop by any of our locations to obtain more information.
DURABILITY & LOW MAINTENANCE OF CERAMIC WALL TILESWe covered prices, now let us talk about durability to see if ceramic tile is good for shower walls. Unlike other types of tile, ceramic wall tiles are highly durable and very unlikely to crack due to everyday wear and tear.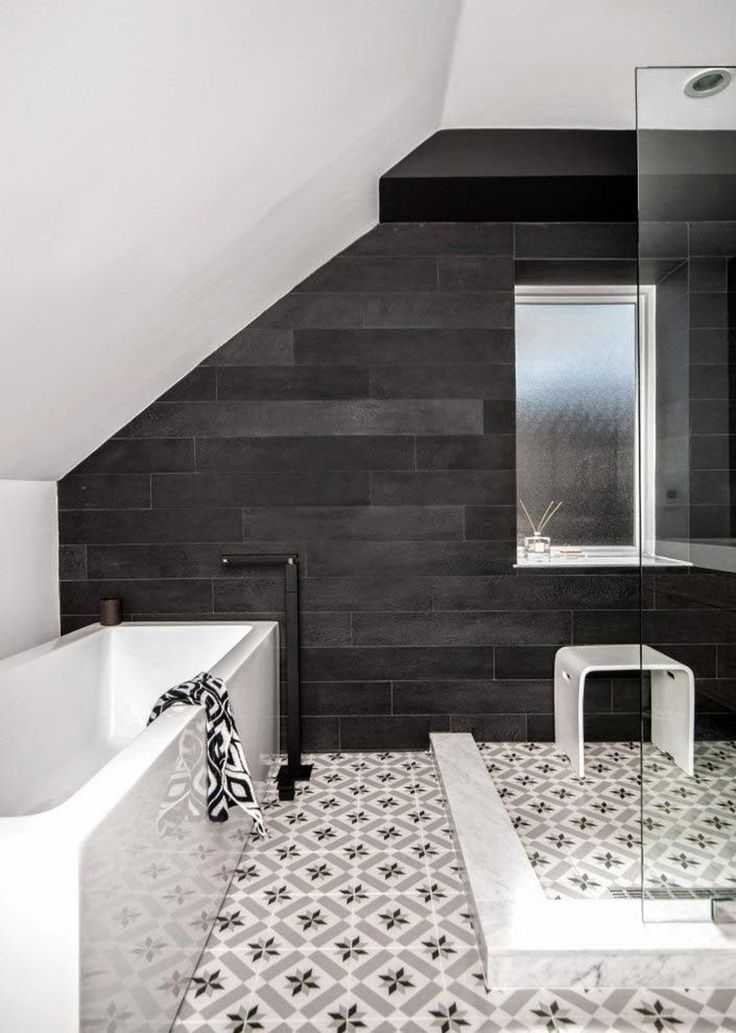 With the proper installation and maintenance, ceramic wall tiles can last up to twenty years; it is no surprise ceramic tiles are such a popular option when it comes to shower walls. Should any of your ceramic wall tiles crack for any reason, it is very easy to replace them. Moreover, ceramic wall tiles are very easy to clean; simply wipe away dirt and other stains in a matter of seconds and they will be gone. It is no secret that bathrooms, mostly shower walls, are prone to stains and spillages. Making ceramic wall tiles a top material for those looking to keep their shower walls stylish without the trouble.
Moisture and humidity resistance are also essential qualities when it comes to defining if ceramic tiles are good for shower walls. Bathrooms are damp environments; glazed ceramic wall tiles have a protective layer that prevents them from swelling or deforming when exposed to high levels of moisture. This is an amazing benefit when it comes to wet shower walls or a steamy bathroom after taking a shower.
Is ceramic tile good for shower walls? The answer is yes! Check out our Ceramic Wall series for your next project.
How to Install Ceramic Wall Tile
By
Bob Formisano
Bob Formisano
Bob Formisano is a licensed architect and builder with nearly 40 years of experience building new homes and restoring older homes. One of his specialties is repairing old systems dating back to the 1920s, including galvanized water pipes, knob-and-tube wiring, and more. His home repair articles for The Spruce span more than 10 years.
Learn more about The Spruce's Editorial Process
Updated on 04/05/22
Fact checked by
Jillian Dara
Fact checked by Jillian Dara
Jillian is a freelance journalist with 10 years of editorial experience in the lifestyle genre. She is a writer and fact checker for TripSavvy, as well as a fact-checker for The Spruce.
Learn more about The Spruce's Editorial Process
The Spruce / Liz Moskowitz
Project Overview
Thanks to its durability and resistance to moisture and stains, ceramic tile is a favorite material for floor installations, and the same qualities also make it a natural choice for walls, especially in kitchens and baths. It's not particularly hard to do, but it's easy to do poorly. Because you are attaching a relatively heavy material to vertical surfaces, it is somewhat trickier than installing floor tile, but with careful planning and patience, any DIYer can readily install ceramic wall tile with good results.
Costs for wall tile can vary dramatically, depending on the tile you choose. Ordinary ceramic tiles available in bulk at home centers can cost as little as $1 per square foot, but if you have your eye set on a fine designer tile, costs of $15 per square foot or more aren't uncommon.
Click Play to Learn How to Install Ceramic Wall Tile
Wall Tiles vs.
 Floor Tiles
 You actually have more choices when it comes to ceramic tile for walls than you do for floors, since the thicker floor tiles can also be used on walls. The opposite is not true, however: You can't use thin wall tiles on your floors. Flooring tiles need to be particularly thick and sturdy to hold up under foot traffic.
When you buy your tile, measure the area in square feet and make sure to add an extra 10 percent for waste and breakage, plus some leftover tiles for future repairs. Tile styles and colors change frequently, and unless you have extras on hand, you may find your tiles hard to match when you need to make repairs.
Before Getting Started
Our demonstration project makes use of the materials and tools that are now standard practice for just about all ceramic, porcelain, or natural stone tile jobs, whether the application is on the floor or walls. Our wall project presumes you have first installed an underlayment of cement board, the best surface on which to install ceramic tile using thin-set adhesives. While it was once common to apply ceramic wall tiles to ordinary drywall or waterproof "blue-board" drywall, virtually all professional installers now use cement board as the underlayment for both floor and wall tiles.
Tip
When installing wall tiles for shower or tub-surround walls, the installation is the same as for standard walls, but the base requires a fully waterproof underlayment. There are a number of ways this can be done, including installing a layer of sheet plastic, brushing on a waterproofing membrane over the cement board base, or using a special cement-based backer board with a build-in waterproof membrane, such as DenseShield. Whatever method is used, waterproofing is critical since moisture seeping through ceramic tile can create serious structural damage.
Our demonstration project uses a popular type of ceramic wall tile called subway tile, laid in a running bond pattern, in which the vertical joints are offset from row to row. Subway tile gets its name for the style's use in New York subway stations and other metropolitan subways in the early 20th century, and it is a very popular style for bathrooms and kitchens. The running bond pattern can be used for square tiles and other rectangular shapes; or for a simpler layout, the tiles can use straight vertical joints, called a straight grid pattern.
The layout is critical for a great-looking wall tile project. Professionals are skilled at laying out a tile job so that grout lines are perfectly level and plumb, and so the trimmed portions of tiles are symmetrical from side to side. A good layout also avoids narrow rows of cut tiles on the top, bottom, and sides of the wall. There are many ways to establish a layout, but the best way is to use the same method as with floors, which is to carefully draw perpendicular layout lines as a guide for installation.
Large jobs are made much easier if you rent or purchase the right tools for a tiling project, including a wet saw fitted with a diamond cutting blade. An entry-level saw can be purchased for around $100, and it is a good investment if you have a large job or if you do tile work regularly.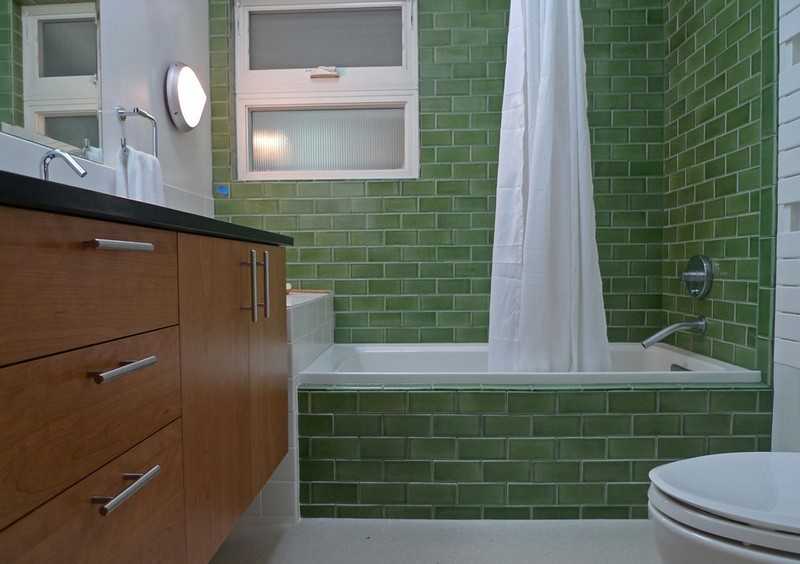 Or, you can rent the tool from a big box home improvement store or tool rental outlet. However, it is still possible to complete your tile job with a manual snap-cutter tool, which is quite suitable for small tile jobs. Snap cutters do not, however, work well on thick porcelain or natural stone tiles.
Equipment / Tools
- Tape measure
- Notched trowel
- Pencil
- Utility knife
- Carpenter's level
- Rubber mallet
- Tile snap cutter or wet saw
- Tile nippers
- Eye protection and hearing protection
- Sponge and bucket
- Small screwdriver
- Grout float
Materials
- Builder's paper
- Painter's tape
- Ceramic field tile
- Ceramic trim tile (as needed)
- Thin-set tile adhesive
- Plastic tile spacers (1/16 inch or 1/8 inch, depending on tile spacing)
- Tile grout
- Pointed stick
- Wood block
-
Gather Materials and Tools
Estimate your tile needs, based on the square footage of the wall area.
 It's best to pad the estimate by at least 10 percent to allow for waste and breakage. Home centers and tile specialty shops will stock some tile styles, but specialty styles often require special orders. When required, also buy required trim tiles, such as base tiles, edge trim, or bullnose top trim.
 Most wall tiles are best installed with a mortar-based glue known as thin-set adhesive, made of cement, fine sand, and a water-retaining agent such as cellulose. Thin-set usually has some latex additive that gives it some flexibility to prevent the tile job from cracking.
Thin-set adhesive is applied with a notched trowel. The proper size of the V-shaped notches in the trowel depends on the size and thickness of the tile and on the recommendations from the tile manufacturer. In our subway tile sample project, the recommendation is for a trowel with 3/16 x 5/32-inch notches. This size works well for most tiles that are 6 x 6 inches or smaller.
The Spruce / Liz Moskowitz
-
Protect Surfaces
Tiling can be a little messy, so it's wise to protect floors, countertop surfaces, and fixtures against spills from tile adhesive and grout.
Buy a thick rosin builder's paper, which you can find at a big-box home improvement or painting supplies store. Cover the countertop and floor surfaces with the paper and secure it in place with painter's tape. Cut slits in the paper where sink faucets and other fixtures are located. Cover the exposed surfaces of the fixtures with strips of painter's tape.
The Spruce / Liz Moskowitz
-
Plan the Layout
The goal in planning the layout is to make sure that there won't be thin slices of cut tiles at the sides or at the top and bottom. Spend time getting the layout right; you will use the layout lines to install the tiles beginning at the center and working outward in quadrants.
Start by choosing the most visible wall in the room. (In a bathroom, this is often the center of the vanity wall above the sink). Use a tape measure to establish the horizontal and vertical center point on the wall.
From this center point. use a level to extend vertical and horizontal layout lines from side to side and from ceiling to floor.
 Then, use a sample tile to mark the layout lines to show the approximate location of each tile along the lines, including the thickness of the grout lines.
 If you begin to see that there are too many areas requiring thin slices of tile, you can adjust the starting point left or right, up or down, to create the most effective layout.
The Spruce / Liz Moskowitz
-
Apply Thin-Set Adhesive
Once you are satisfied with the layout of the vertical and horizontal lines, begin applying adhesive, starting at the center point and working on one quadrant at a time.
Spread adhesive onto the wall quadrant using the flat side of the trowel, covering only as much of the wall as you can comfortably work in 20 to 30 minutes.
Immediately trowel back over the skim coat, using the notched side of the trowel to create a pattern of ridges and valleys in the wet adhesive. Hold the trowel at a 45-degree angle and "comb" the adhesive in one direction.
The wall section should be covered with thin-set adhesive, but you should be able to see the wall surface between the ridges of adhesive left by the notched trowel.
The Spruce / Liz Moskowitz
-
Lay the First Row of Tile
Position the first tile (or tile sheet, if you are using mosaic tiles) into place on the wall at the center point of the layout. Align it carefully with the horizontal and vertical layout lines. Press the tile firmly into the adhesive; as you press, the adhesive flattens out, filling the spaces between the ridges created by the trowel.
After the first tile or sheet is set in place, complete the first row along the horizontal layout line, using plastic spacers to ensure uniform spacing between tiles. Install only the full-width tiles—leave the trimming of partial tiles until the end.
When the first row is complete, check it for level using a carpenter's level, then begin the second row of tiles, taking care to offset the vertical grout joints by exactly one-half the tile width.
 Continue installing the subsequent rows, again using plastic spacers to maintain uniform joints between tiles. With the running-bond pattern we are using, it is critical that you get the offset correct so that the joints have the proper spacing from row to row.
 The Spruce / Liz Moskowitz
-
Complete the Field Tile Installation
After each small section of wall is completed, use a short block of wood and rubber mallet to very lightly rap over the surface of the tiles. This action will "set" the tiles in the adhesive and flatten the surface.Working systematically in sections, repeat this process until the entire wall is covered. Leave the tiles that need to be trimmed or cut until the end of the project. As you reach the last full tiles, scrape off any excess adhesive from the areas of the wall left exposed. This will prevent the adhesive from hardening as you trim the last tiles and prepare to finish the installation.
As the adhesive hardens, inspect the grout lines and make sure they are free of excess adhesive.
 If necessary, scrape away the excess using a pointed stick or small screwdriver. The grout lines need to be clear and open for grout to adhere when you reach the finishing stage.
 Use a damp sponge or cloth to wipe any adhesive from the face of the tile. The adhesive is very simple to clean when wet, but will be very difficult once it dries.
The Spruce / Liz Moskowitz
-
Fill the Side Gaps
After the full-sized field tiles are all installed, cut and install the partial tiles along the sides of the wall. Cutting partial tiles can be done with a manual snap cutter or a wet saw.
When using a snap tile cutter, place the tile into position in the tile cutter, then score the surface by firmly moving a tungsten carbide scoring wheel from bottom to top across the face of the tile surface. Then, place the pressure bar pad across the tile and apply firm pressure on the lever to snap the tile across its scoreline.
If you have many tiles to cut, a tile wet saw is the better option for cutting partial tiles.
It's also essential for thicker floor tiles, or for porcelain or natural stone tiles, which are very difficult to cut with a snap cutter.
The Spruce / Liz Moskowitz
-
Fill Remaining Gaps
Where tiles need to be trimmed to fit around outlets, light switches, pipes, and other obstacles, use a tile cutter or tile nipper to trim them to fit the space. If filling in around outlets, make sure the tile doesn't cover over the opening of the electrical box. Make sure to wear eye protection before trimming or cutting tile.
When installing small tile pieces, it's easier to butter the back of the tiles with adhesive. Then, score the adhesive with the notched side of the tile, and press the cut tile into place on the wall, using plastic spacers to maintain uniform grout lines.
The Spruce / Liz Moskowitz
-
Install Trim Pieces
If your layout includes border tiles or other trim pieces, install them last. Here, we are using 1 x 6-inch cap tiles.
Installation is similar to how the field tiles were installed: Butter the backs of the tiles, then press them into place on the wall.
The Spruce / Liz Moskowitz
-
Inspect Grout Joints
Make a final inspection of all grout lines. Clean out any excess adhesive between grout lines. Let the tile adhesive dry for 24 to 72 hours before grouting the tile.
The Spruce / Liz Moskowitz
Tip
Some people like to pry out the plastic spacers before grouting, but it's best to follow the grout manufacturer's recommendation on this. It's generally not necessary if the spacers have been pushed fully into the joints; you can simply apply grout over the tops of the spacers.
If you do want to remove the spacers, make sure to do it before the thin-set adhesive has fully dried.
-
Grout the Tile
Using the tile manufacturer's instructions, apply grout to the joints. Joints that are wider than 1/8-inch typically call for a sanded grout, while narrower joints use non-sanded grout.
Make sure to clean the excess grout off the tiles and to wipe away the dried haze after the grout dries.
After the grout fully hardens and cures (this can take from a few hours to a couple of days, depending on the grout), apply a sealer if the grout manufacturer recommends it.
The Spruce / Liz Moskowitz
Article Sources
The Spruce uses only high-quality sources, including peer-reviewed studies, to support the facts within our articles. Read our editorial process to learn more about how we fact-check and keep our content accurate, reliable, and trustworthy.
Rangineni, Jyothi and Tzeng, Jeremy. Comparison Study of Mold Growth Resistance of Plastic Based Material Flooring (PBM Flooring) and Ceramic Tile Flooring. 2019. Publications. 1113. doi: 10.34068/report2
How to choose wall tiles for the bathroom, which one is better: tips, ideas, photos
Focus
Bathroom tiles are chosen not only by shade, size and design, but also by performance indicators - resistance to moisture, strength, ease of cleaning. To do this, when buying, it is important to look at the marking, type of coating and other parameters. How to choose tiles for walls and not make a mistake, we understand the article.
Contents:
How to choose bathroom wall tiles
Tile size and shape
Material of tiles
Ceramic tiles
Crammary border
Glass mosaic
Clinker tiles
Interior style
Classics
Provence
Minimalism
Loft
Sea
Materials for lining the bathroom
Is it worth making a bathroom of black color?
Light colors
Colored materials
Manufacturer's choice
Which tiles NOT to choose
How to choose tiles for bathroom walls
For walls, you can choose both ceramic tiles and porcelain tiles. The latter option is now considered a trend, it is used even more than tiles. It fits easily on the walls and allows you to get fewer seams, because the format is larger. Ceramics are also easy to install and suitable for bathrooms due to their moisture resistance.
It is worth choosing a material based on the quality characteristics that are placed on the package, as well as on the size, shade and other parameters suitable for your room.
Size and shape of tiles
Avenue
Manufacturers offer products in different shapes and sizes. Squares and rectangles are considered the standard configuration. Triangles, rhombuses and polyhedrons are a little less common. When choosing a form, there are no restrictions - it is worth choosing it taking into account the style of the room and the preferences of the owners. But you need to take into account that plates of non-standard shape should not draw all attention to themselves and violate the integrity of the design.
You should be careful with the size, choosing it for the features of a particular room. Now there is a tendency to increase formats, as large canvases are mounted faster. There are more worries with small things, but this option is more desirable for rooms of small footage.
| The main condition is the commensurability of scales. The smaller the room, the smaller the tiles should be. If large canvases are chosen, and you don’t want to refuse them even because of the footage of the bathroom, it is recommended to lay them with a minimum seam and grout to match. This will create the feeling of a solid canvas. |
|---|
Tile material
Porcelain stoneware, ceramic, glass or clinker tiles are used to finish the walls of the bathroom.
Ceramic tiles
More than 80% of the total tile volume is ceramic. It is durable, inexpensive, moisture resistant and undemanding material in care. An equally important advantage is the variety of colors, design solutions and textures.
Sharp
Ceramic bathroom tiles are available in several variations:
-
Clinker. The most durable and moisture resistant type of ceramic. It has a matte texture and is presented in a range from chocolate to beige.
Taking into account the abrasion class, clinker is used for walls and flooring or only walls;
-
Glazed. It is a glossy canvas with baked glass on the surface. It includes different rich shades, which you can choose for any style, and such ceramics are also durable. Due to the low resistance to impacts and loads, the variety is used only for walls;
-
Cotto. Material with a characteristic reddish tinge. It has a porous structure, therefore, before laying in rooms with high humidity, the coating is pre-treated with compounds that are not wetted by water. The material is quite durable, so it is suitable for both flooring and wall cladding.
-
Monocottura. Enamelled tiles with increased durability. It withstands exposure to aggressive chemicals, is frost-resistant and is not prone to rapid wear. Due to these qualities, it is often used for both walls and floors;
-
Bicottura.
Double-fired enamelled tiles for wall mounting only. It is lightweight and inexpensive, and the characteristics of the tile are quite enough to resist household chemicals.
Porcelain stoneware
Nembus Green
More expensive type of tile due to increased strength and low moisture resistance. Because of this and its enormous resistance to abrasion, it is more common in bathrooms than others. An important plus for rooms with high humidity - porcelain stoneware is resistant to mold, dirt and is quickly cleaned.
Tiles are represented by a wide variety of design solutions. Most often, manufacturers offer imitations of wood texture, stone and brick.Glass mosaic
White quartz sand base for small square elements. Mosaic can be transparent or matte. The material is moisture resistant, durable, not susceptible to mold.
If necessary, canvases can be tinted, decorated with engraving, decorated with artistic painting or formed into patterns from individual slabs.Mosaic is more often used for wall cladding; due to the low wear resistance class, this option is not suitable for the floor.
Clinker tiles
An ocher-brown coating with an original texture and a glossy surface is considered a universal building material. It belongs to the class of durable and undemanding in care. In many cases, standard clinker is only suitable for walls. But some manufacturers offer a more wear-resistant material that is acceptable on the floor.
Interior style
It is preferable to choose the style of the bathroom based on the style of the rest of the rooms in the house.
Classic
Versatile design that looks especially good in large areas. For a classic style, porcelain stoneware or glazed tiles are used. White, milk and chocolate are preferred for walls. Choose a herringbone or checkerboard pattern. The coating is perfectly framed by taps made in a bronze palette. It is easy to combine bronze-coated canvases with them.
Savia
Traditionally, the lower part of the walls is faced in darker colors, while the upper part is made lighter. But bright contrasts are inappropriate here, it is better to choose plates with a difference of 2-3 tones, and decorate the place of their joining with a border. In the classics, they are usually decorated with ornaments.Provence
Romantic French style implies the presence of plant and flower motifs, images of nature. Beige, milky, olive, pink and lavender shades are preferred. White and milky usually become the background, which is decorated with patterns or drawings.
It is important to observe the canons of style in every detail: use a bronze faucet instead of a conventional one, hide modern appliances in niches and choose the right accessories.Minimalism
The style is characterized by the predominance of restrained shades. Among the colors are often white, beige, milky, hazelnut, chocolate, gray. For the bathroom choose matte tiles.
| Minimalism is not distinguished by the variety of shapes and colors in the environment, but is considered very practical and saves time on cleaning. |
|---|
Due to its austerity and versatility, this design is a good option for a small room. Everything should be simple and understandable, and you should not spend a lot of time choosing cladding and furniture - the most concise monochromatic tiles and the same interior items will do.
Loft
Ferry
For a loft, tiles imitating concrete, brickwork, metal or wood are ideal. When choosing a concrete or wooden surface, it is desirable to use large canvases with a matte or semi-matte texture.
In terms of colors and geometry, a loft-style bathroom is quite strict: natural colors (chocolate, gray, milky) and regular shapes are preferred.
Marine
A common solution for the bathroom, it offers a wide range of design possibilities. White, blue, sky blue, sky and other similar colors predominate. It is desirable to dilute them with sand, white and greenish.
For wall cladding, they often buy tiles with a 3D pattern (with the image of fish, dolphins and other marine themes). The solution is quite expensive, but it looks spectacular and creates a stylish interior.
Color of materials for bathroom cladding
Kopengagen
When choosing a color, they start from the style, the size of the room, the presence of natural and artificial light, as well as the presence of mirrors.
The most acceptable shades for any conditions are milky, white, all pastel colors. Bright and dark colors require space. It is recommended to use them only with a large footage or the presence of a window and sufficient natural light.
Is it worth making a black bathroom?
Some find black tiles easier to maintain. But in reality, due to dust and dirt settling on the surface, such tiles will have to be washed more often than light ones. It is undesirable to use dark canvases in areas where water drops directly fall. When dry, they will turn into ugly streaks.
Also, the dark color can have a depressing effect and visually reduce the space, so it should be chosen only for large bathrooms with an abundance of light. In other cases, you can buy products with black splashes.
Light colors
Plazma
For the bathroom, light shades are predominantly chosen, which visually enlarge the space. It is snow-white, milky, sandy, creamy. If desired, they are combined with darker colors. A good combination of black and white. But due to the fact that dust and stains from any liquids are noticeable on a dark color, it is better to place it away from water sources.
The advantage of light materials is that dust, water stains, traces of cleaning agents are not so visible on them.
Colored materials
If you want to choose a cladding in bright colors, it is advisable to focus on one wall or make rich inserts. You can choose a more muted color or, conversely, pay more attention to dark colors.
Blue is considered a classic. It can be a plain tile or a canvas with drawings with a marine theme. Any colors are acceptable: from turquoise to indigo or ultramarine.
Green colors are popular for bathroom cladding. Milky and sandy shades are best combined with them.
Often used pink, lilac, yellow shades, combining them with calm tones.
Designer and decorator Marina Makieva: In a small bathroom, you should not avoid color, but it is desirable to choose cold, muted tones. The bright color in a miniature bathroom and toilet is ideal for the floor; on the walls, with such a neighborhood, light, monochromatic ceramics look better.
Manufacturer's choice
Milos white
Manufacturers from Spain, Italy, Poland, Russia and other countries are considered leaders in the quality of tiles. Laparet tile is one such brand. Production sites of porcelain stoneware and tiles are located in India, Ukraine, Poland, Russia and Belarus, and the quality of output and the environmental friendliness of products are carefully monitored at each production site.
Among the variety of textures, coatings, shades and patterns, it is possible to choose floor and wall cladding for any room. For bathroom walls, series with imitation of natural stone, marble, as well as concrete and metal are especially popular.
Which tile to NOT choose
There are hundreds of types of tiles on the market, but not all of them should be used for decorating your home. There are several types that designers do not recommend choosing:
-
Small square tiles on the walls. This coating looks outdated and boring. Variants with a pattern look better, but if the canvases are too small, such a choice will still be controversial. Any large tile with the same pattern will become a more harmonious design solution, and for any area.
Organic -
Mediocre imitation of natural materials. It is undesirable to choose canvases that do not look natural. If you are trying to save money, you can buy products with unrealistic wood or stone textures that will spoil the look of the room.
-
It is desirable to forego the gloss in favor of a satin or matt finish. Wall cladding in the bathroom needs perfect cleanliness, otherwise any dust, dried spots and stains will be noticeable on it.
Considering tips on choosing tiles and looking at photos of finished designs, it is possible to create a truly stylish interior. It is worth giving preference to collections that are practical and not attracting too much attention, since the walls in the bathroom are considered the backdrop for sanitary ware and beautiful furniture.
Sources
designwiki.ru/vanna/vybor-plitki.html#i-7
83806609
profile.ru/news/society/kakuju-plitku-vybrat-dlya-vannoj-sovety-dizajnerov-931928/
Design Idea: Ceramic Bathroom Wall Tiles
Ceramic tiles are a truly magical way to add charm to a bathroom, they are incredibly aesthetic and easy to use every day. Ceramics can be used everywhere: cover the walls completely or be used only as a bathtub lining. It enhances the mood in the bathroom.
Here are some ideas that will inspire you on use ceramic tiles .
Ceramic or tile?
Ceramic tiles , which is mainly used for elegant bathroom and kitchen tiling, is valued for its white noble and sophisticated finish or for its bright patterned pattern. But what is called "ceramic tile"? This is a type of ceramic with a fine porous structure, less dense than that of porcelain or porcelain stoneware.
It is also famous for its high fragility of enamel, so it is better not to use it for flooring, but to use it for finishing bathroom walls.
Tiles, on the other hand, can be used anywhere, because he is very durable. It is practical, presented in a variety of colors, patterns and sizes. The variety of tile styles gives it huge advantages in the bathroom.
Tiles, ceramic tiles or porcelain stoneware: how to choose the right cladding?
A little bit or to the fullest: where to use tiles?
Ceramic tiles can be used everywhere on walls, on large surfaces or in fragments to set the rhythm of the room.
A harmonious combination of paint and tiles on the walls in the bathroom - shower ÉCRIN
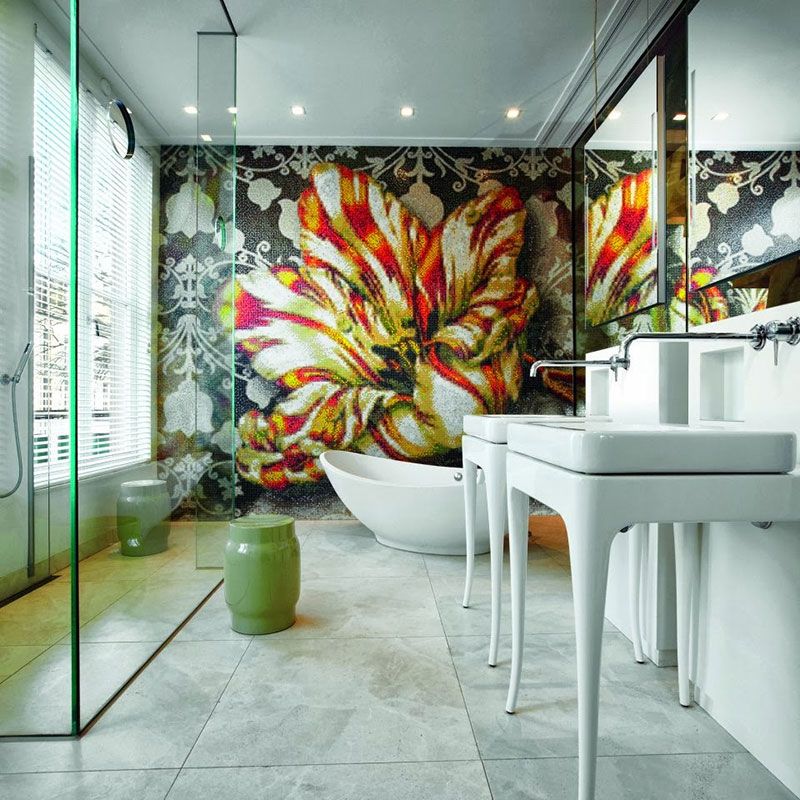
- Ceramics on the walls: Ceramics is the queen of design and brings an original note to the design with its patterned elements and shiny finishes.
- Ceramic backsplash: Ceramic tiles on the walls around the sink will protect against water splashes and decorate the bathroom.
- Ceramic tiles in the bathtub, around the bathtub or around the shower: Ceramic tiles in the backsplash or around the shower area allow you to focus on the hygienic area of the bathroom.
The simplicity of plain ceramics
With white, Mediterranean hot blue, Scandinavian pastel blue, emerald green, mint or pale pink shades wall tiles give the wall a radiant sheen that will brighten up the entire bathroom
Bring color to the bathroom
This solution is perfect for any bathroom, regardless of its size. But still, you should not decorate the entire room with ceramics, so as not to create a cold atmosphere in the operating room. Two walls of four is a perfect compromise. Or you can simply tile areas where water gets in a lot: around the shower or bath and around the sink.
Ornamented tiles set the pace
Traditionally, ceramic tiles are decorated with designs on enamel . Thanks to drawings and story scenes, ceramics turn the wall into a work of art. You can enliven the wall - add a few nice bright accents on ceramics to the plain tile or make a frieze . For a more modern style, limit to two or three shades
Patterned wall tiles bring any design to life. Whirlpool bathtub
If you like, you can also opt for more graphic motifs that will give your bathroom a modern look . Now very fashionable art deco ornaments , for example, palm trees.
Ceramic frieze
Ceramic tiles also fit linear design design: floor mat, horizontal or vertical frieze. Ceramic friezes attach originality without overloading the space, thanks to ornaments or simply tiles in different colors . Friezes also allow you to beat the perspective and correct the shortcomings of the room.
Ceramic frieze will decorate the bathroom - OSCAR Collection
Indeed, in elongated rooms it is better to emphasize the horizontal lines on the short wall of the room in order to visually expand the space.
Custom-finished ceramic tiles
Ceramic creates many different effects with its glossy, matt, glossy or metallised surface. Ceramic matches perfectly with the style of the bathroom and is available in a variety of finishes to create a unique space that is custom designed for you.
If you love, for example, art deco style , you will love to play with gold shades, while industrial style pairs beautifully with grey, black or matte blue .
Ceramic tiles for light masonry
Ceramic doesn't have to be monotonous and boring. Small and large tiles, rectangular tiles… With the different formats and sizes available on the market you can create your own style based on the initial shape and size of the tiles.
You can also creatively use the different shapes of to create combinations that look like patterned parquet, or lay herringbone or square tiles. Such a solution is already valuable because it will give your bathroom an original design without color abuse.
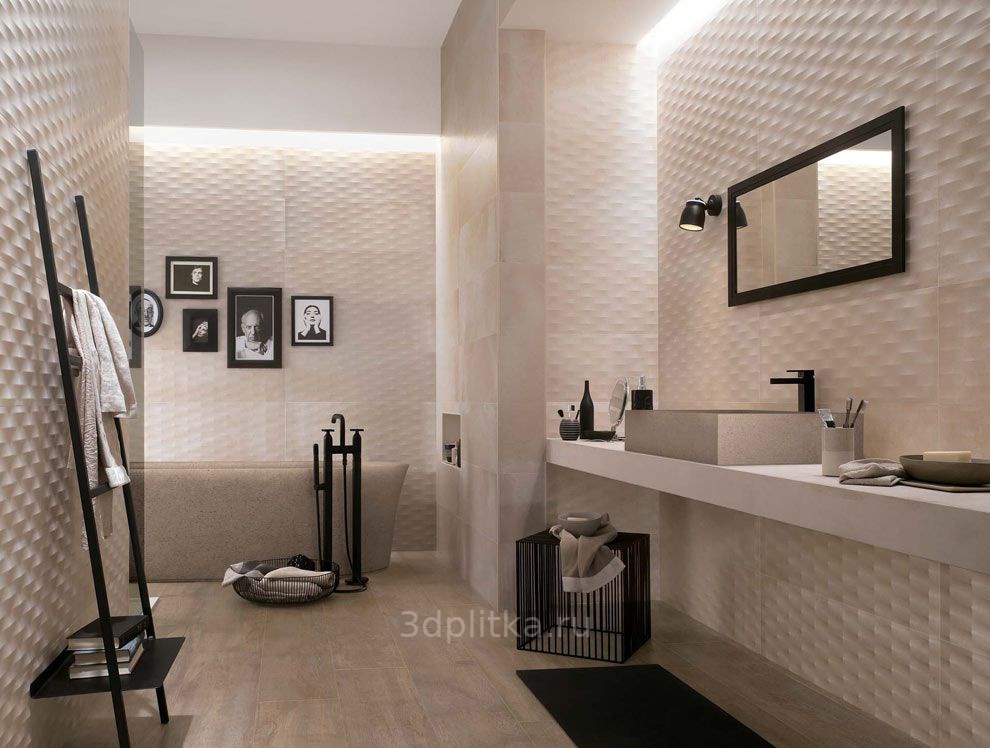
Relief ceramics
Relief ceramics give your bathroom another stylistic touch with its convex shapes. Wavy shapes, colored bubbles or optical effects… three-dimensional shapes of some types of ceramic tiles guarantee an exclusive design and give the wall a special texture.
ODÉON UP shower enclosure with embossed earthenware tiles
Depending on the selected relief pattern, you can create a romantic bathroom ambience (stucco, floral ornaments, arabesques) or vice versa ultra-modern style (bubbles, geometric patterns, waves, etc.).
Several types of tiles for the most daring
Are you in the mood to create and want your bathroom to be different? Take a bold step and combine different ceramic tiles.