Can you winter over begonias
How To Overwinter Begonias - Storing The Tubers Or Keeping Live Plants
As an Amazon Associate I earn from qualifying purchases. Read full disclosure here.
Overwintering begonias is easy, and a great way to save your favorite varieties every year. In this post, I’ll talk about three different ways to do it. Then I’ll show you how to dig and store the tubers, leave them in the ground, or keep them in their pots.
Though they are most commonly sold as annuals, you can keep begonias over winter and enjoy them year after year.
This is great news, because they’re so pretty, and I hate to watch them die in the fall. Plus it saves you money, since you won’t have to buy new ones every spring.
It’s easy to overwinter begonias, and there are a few ways to do it. In this detailed guide, I will share everything you need to know in order to be successful.
I’ll explain three different methods you can try, and show you exactly how to save begonias over winter. Including leaving them in the ground, digging up and storing the tubers, or keeping them as indoor plants.
Table of Contents
Will Begonias Survive The Winter?
Yes, with the proper care, begonias will survive the winter. Though they are most commonly used as annuals, they’re actually tender perennials that can live for many years.
In the right climate, they can even stay in the ground through winter. But if yours in not hardy to the area that you live in, then you’ll have to bring them indoors in the fall.
Related Post: How To Overwinter Plants: The Complete Guide
Methods Of Overwintering Begonias
The method you choose for overwintering begonias will depend on a few things. Where you planted them, where you live, and what type you have. Here are your three options…
- Leaving begonias in the ground over winter
- Overwintering begonias in pots
- Digging up and storing begonias for winter
How To Overwinter Begonias
Before I go into the details of the different methods you can use for overwintering begonias, it’s important to understand that there are two distinct types.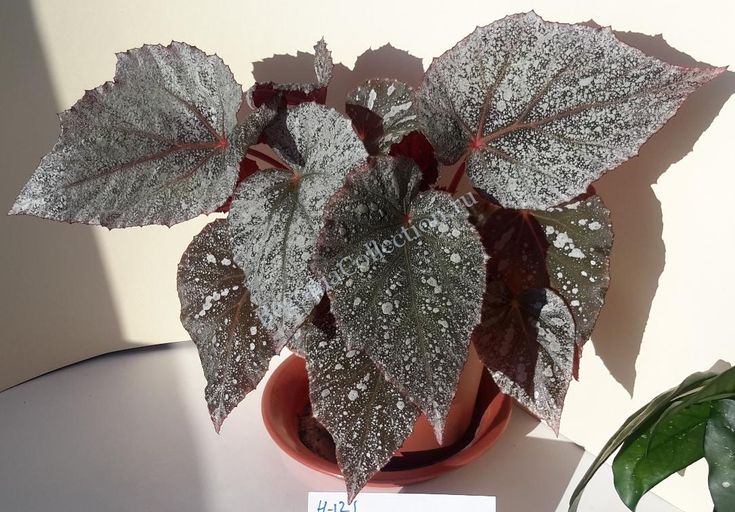
One type has tubers (also called bulbs), and the other does not (referred to as “fibrous”). So, before you can decide how to keep them over winter, check the tag to see if yours is tuberous or fibrous.
1. Leaving Begonias In The Ground
As long as the type of begonia you have is hardy in your climate, then you can overwinter them right in the ground. If they have tubers, then they’ll survive as long it stays above 50°F.
During the winter, the foliage on tuberous varieties may die back if the bulb goes dormant. In that case, cut it down to the ground.
2. Overwintering Begonias In Pots
If your begonias are in a container, you can overwinter them right in the pot. Just make sure to bring them indoors before the temperature drops below 60°F.
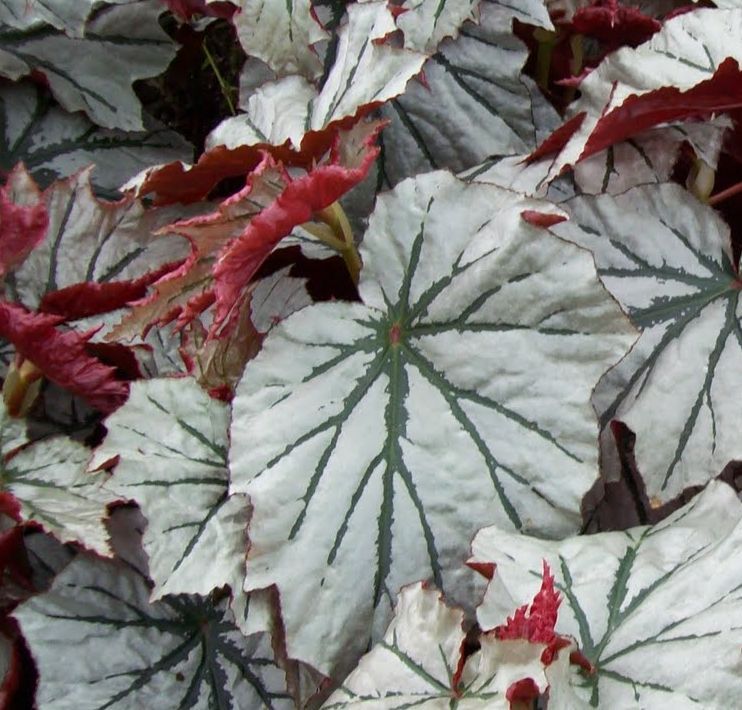
Fibrous varieties like rex, angel wing, and wax, can be kept alive as a houseplant through the winter. But it’s much easier to allow the ones that have bulbs, like rieger, to naturally go dormant.
3. Digging & Storing Begonias For Winter
If your tuberous begonias are planted in your garden, you can dig them up and store them over winter.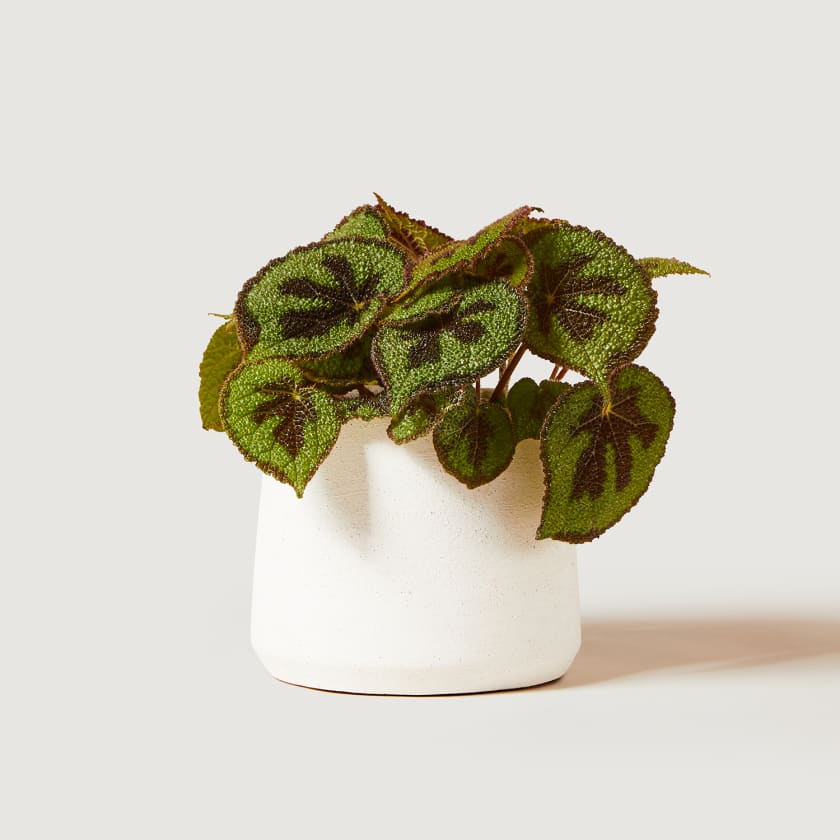 But in order for that to be successful, you must lift them before the first frost.
Leaving them in the ground too long will result in frost damage, which means they probably won’t survive in storage.
Overwintering a begonia in a potPreparing Begonias For Winter Storage
In this section I am going to give you all the details about how to dig up begonia tubers, and what you need to do in order to successfully store them for winter.
If you discover that yours doesn’t have tubers, you can skip the next few sections, and learn about how to keep them as a houseplant below instead.
When To Lift Begonia Tubers
Since they are not frost hardy, you’ll need to dig up your begonia tubers before it gets too cold outside. Ideally, you should lift them before it gets below 50°F.
Don’t worry if the foliage is still alive, that’s normal. It will naturally die back as the bulbs start to go dormant.
How To Dig Up Begonias
I find it easiest to dig up my begonias using a garden fork, but a spade shovel would also work. It’s important to dig at least one foot away from the main stem, or you could wind up cutting or damaging the tubers.
Once you pop them out of the ground, gently shake or brush off the excess dirt. Don’t rinse it off though, it’s better to leave a little extra soil on them than risk having the bulbs be too wet.
Curing Begonia Tubers Before Overwintering
For best results, you should cure (dry) begonia tubers before overwintering them. That way, there’s less risk of them rotting or molding.
First check to make sure none of them were damaged when you dug them up, and also look for signs of rot. Rotting or damaged bulbs should be discarded, as they won’t survive the winter.
Allow them to cure for a week or so before storing. To do that, simply spread them out on a shelf or the ground in an above freezing and dry location.
Red flowers on a begonia outsideHow To Store Begonia Tubers Over Winter
Storing begonias in the right place over winter is important for the best success. If yours are in pots, then you can skip the section about packing them up, because you can just store them right in the container.
Packing Begonia Tubers For Storage
Once they have had time to cure, I store my begonia tubers in a cardboard box filled with a dry packing material.
You could use a paper bag to store them instead, or something similar. But don’t use anything made out of plastic because it holds too much moisture.
I usually use peat moss, pet bedding, or coco coir as my packing medium. But, you could use saw dust, wood chips, or a mix of perlite and vermiculite.
Place each tuber into the box so they aren’t touching each other, then fill the empty spaces with your packing material. As long as they aren’t touching, you can layer several bulbs into each box.
Where To Store Begonias In Winter
Whether you packed your begonia tubers in a box, or kept them in their pots, where you store them for winter is the same.
Keep them in a cool, dry, dark location, where the temperature stays between 50-60°F.
Some examples of good places to store them are an unfinished basement, a heated garage, or even a root cellar if you have one. Learn all about storing bulbs for winter here.
Tuberous begonia in full bloom before winterBegonia Winter Care Tips
The specific details of caring for begonias in the winter depends on whether yours is tuberous or fibrous. Below are some quick tips for both. You can learn all about how to grow begonias here.
Winter Care Of Tuberous Begonias
If you’re overwintering tuberous begonias in pots, then water sparingly (or not at all) until spring. Take great care not overwater them, or the bulbs will rot.
They may continue to send out new growth during the winter, but this will be spindly and weak. If that happens, cut off the weak sprouts as they appear, and stop watering it all together.
For those packed in boxes, just peek at them every now and then to make sure none of them are rotting or molding. If you find any that are, toss them out before it can spread to the others.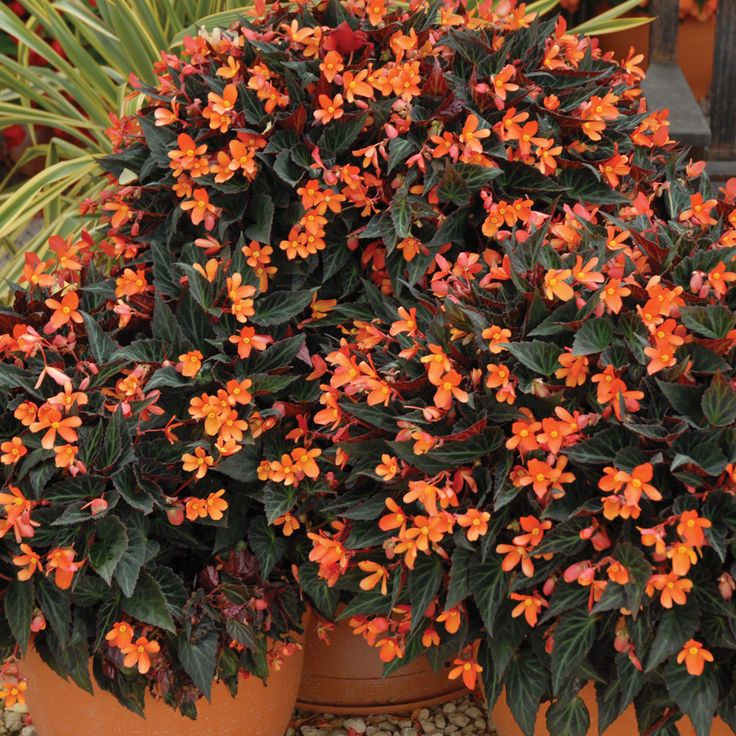
Fibrous Begonia Winter Care
Caring for fibrous begonias over winter is very similar to your other houseplants. Put them in a place where they get bright, indirect sunlight.
Keep the soil consistently moist, but take care not to overwater them or the roots will rot. Make sure they stay away from any heat sources, as they prefer indoor temps between 65-75 °F.
Moving Begonias Back Outside In The Spring
After overwintering begonias indoors, you might be very antsy to move them back outside in the spring. But, in order for all of your efforts to pay off, you must move them back out at the right time.
When Move Begonias Back Outside
Once all chance of frost has passed in the spring, it’s safe to move your begonias back outside. If you kept them alive all winter, then you’ll need to slowly acclimate them back to living outdoors.
Start by placing them in a full shade spot where they’re protected from strong wind and weather. Then slowly move them to their permanent location outside over the course of a couple of weeks.
When To Plant Begonia Tubers
On the other hand, if you overwintered begonia tubers, then you should wait to replant them in your garden until the soil has warmed to 60°F. Use a handy soil thermometer to check it.
You can start them indoors 6-8 weeks before you want to plant them outside. Soaking them in warm water or a compost tea solution can help to break their dormancy faster.
For potted bulbs, move the container to a bright location 6-8 weeks before you want to move it outside, and begin watering it.
Allow any excess water to drain from the pot, and add bottom heat to help wake it up faster.
My weeping orange begonia that I overwinter every yearFAQs About Overwintering Begonias
In this section, I’ll answer some of the most frequently asked questions about overwintering begonias. If you can’t find the answer to yours here, ask it in the comments below.
Can begonias grow indoors over winter?
Yes, begonias can grow indoors over winter.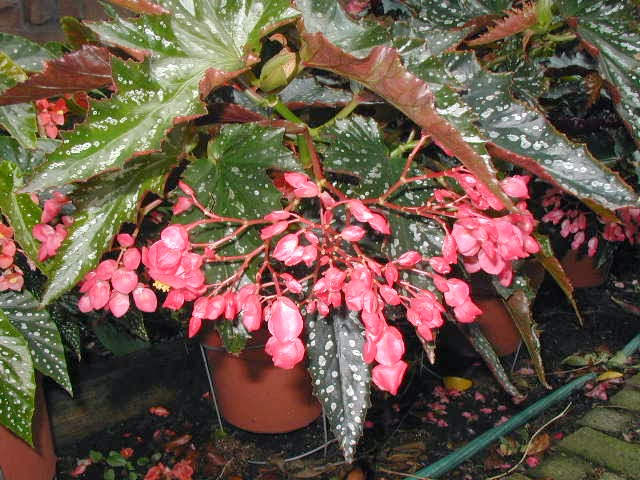 Non-tuberous (aka: fibrous) varieties can easily be kept as houseplants.
However, the ones that have bulbs will naturally go dormant during the winter. So all of the leaves and flowers will drop off.
Can you leave begonias in the garden over winter?
You can leave begonias in the garden over winter if the type you have is hardy in your zone, or it never gets below 50°F outside. Otherwise they must be brought indoors.
How long can you store begonia tubers?
You can store begonia tubers for several months. However, don’t try to keep them in storage for too long, or they will eventually dry out and die. It’s best to plant them every year, even if you don’t get to it until later in the summer.
Can you overwinter begonias in pots?
Yes, you can overwinter begonias in pots. Fibrous types can be kept as a houseplant, while tuberous varieties should be stored dormant in a cool, dark location.
Overwintering begonias is easy, and it’s a great way to save your favorite varieties every year.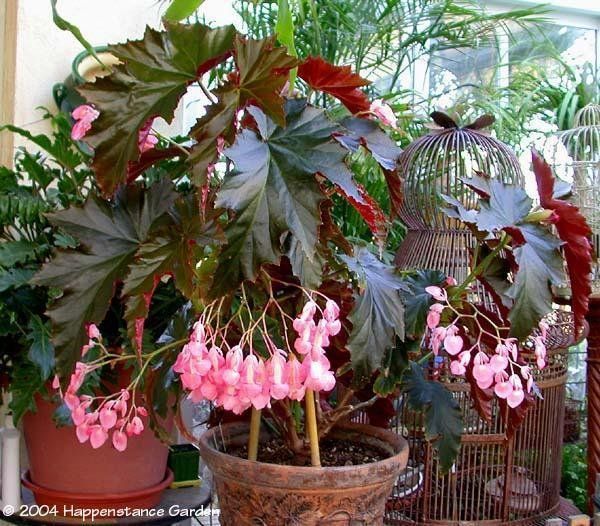 And now that you know how to store tuberous begonias, you can start a collection!
If you struggle to keep indoor plants alive over winter, then you need my Winter Houseplant Care eBook. It will show you all you need to get them to thrive all year round. Download your copy today!
More Posts About Overwintering Plants
- How To Overwinter Coleus Plants Indoors
- How To Overwinter Brugmansia Plants Indoors
- How To Overwinter Sweet Potato Vines Indoors
- Overwintering Dahlias: How To Dig & Store The Tubers
- How To Overwinter Caladium Bulbs
Share your tips for overwintering begonias, or for how to store begonia tubers in the comments below.
Overwintering Coleus Indoors - Winter Care Tips For Your Coleus Plants
As an Amazon Associate I earn from qualifying purchases. Read full disclosure here.
Overwintering coleus is easy, and it’s a great way to save your favorite varieties year after year. In this post, I’ll show you how to keep the plants alive indoors over the winter, and give you tons of care tips too.
Coleus is one of the most colorful plants for the garden or summer containers, and they add a wonderful tropical feel. They come in all kinds of color combinations too.
One of the things I love the most is that they can survive inside over the winter. So you can save that beautiful foliage for years to come!
Another benefit of overwintering coleus is that you can keep your favorite varieties without spending a dime new plants in spring.
It might sound like a lot of work, but don’t worry. Overwintering coleus indoors is pretty easy, and I will show you exactly how to do it.
Table of Contents
Coleus Cold Tolerance
Even though they’re usually sold as annuals in most areas, they’re actually tender perennials that can survive for many years in the right climate.
Coleus temperature tolerance isn’t very high, and they can’t handle the cold.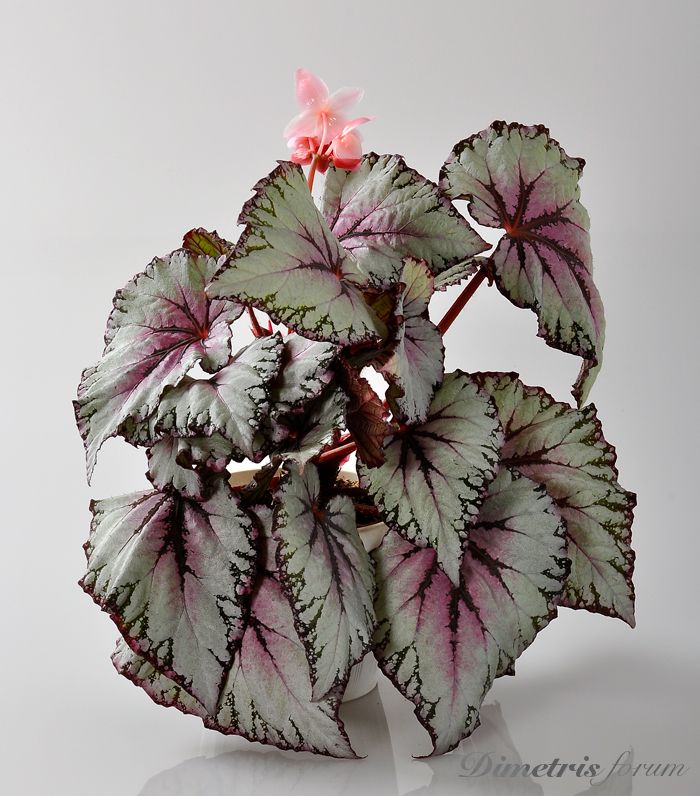 They’re only hardy in zones 10 or warmer, and will start to suffer when it is consistently below 50°F.
Though they can handle brief periods of freezing temps, they will quickly start to die after the first touches of frost in the fall.
Related Post: How To Overwinter Plants: The Complete Guide
Different types of coleus in an outdoor containerMethods For Overwintering Coleus
There are two ways you can overwinter coleus indoors. You can use these same methods for any variety you have…
- Potted coleus plants can be brought inside and kept as a houseplant.
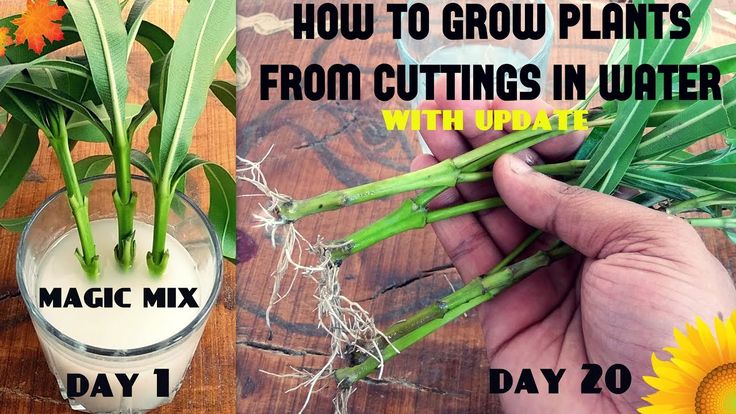
- You can take cuttings, and bring those indoors for the winter.
How To Overwinter Coleus Indoors
Below I will describe both of these methods in detail. If you’ve never tried overwintering coleus before, experiment with both to see which one works best for you.
1. Keeping Coleus As A Houseplant
If your coleus is in a pot, you can overwinter it as a houseplant by bringing the whole container inside the house.
Trim it back to a more manageable size before moving it indoors if it’s too big for your space. If you do, be sure to keep the cuttings so you can try the second method too.
Keep in mind that it is used to being outside all summer. So the plant may droop or even drop a few leaves after bringing it indoors. That’s completely normal, and it should pop back in a few days.
Coleus plant indoors for winter2. Overwintering Coleus Cuttings Indoors
As an alternative to bringing the whole plant indoors, you can take cuttings. This is a great option if you have limited space, or yours is planted in the garden rather than a pot.
They root easily in water, and can be kept there, or you can pot them up using a general purpose soil.
If you want to try leaving them in water, check on it periodically, and refresh it if it’s cloudy or as it evaporates. Never let it get below the roots, or they could dry out.
Stinky or mucky water is a sign of rot, so check if the stems are mushy.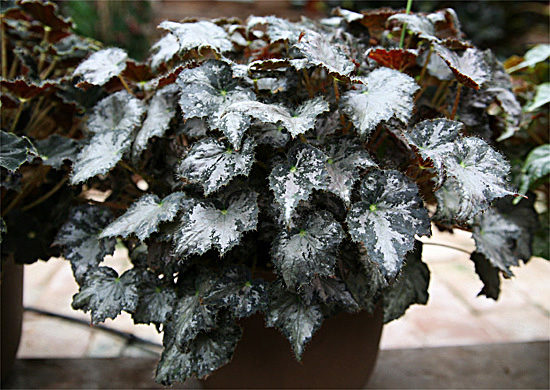 If you’re struggling with keeping them in water, then it’s best to put them in potting soil instead.
Learn exactly how to propagate coleus plants here, in my step by step guide.
Coleus cuttings in water to overwinter indoorsBringing Coleus Indoors For The Winter
No matter which method you want to use for overwintering coleus, it’s very important that you bring them indoors at the right time. If it gets too cold, they likely won’t survive, so follow the tips below.
When To Bring Coleus Plants Inside
The foliage declines very quickly when the weather gets chilly in the fall. So if you want to keep your coleus through winter, then bring it indoors before it gets below 60°F outside.
If you forget, and it’s in the 50s°F, you might still be able to save it if the foliage is in good shape. But you’ll definitely need to move it in before frost damages the plant.
Once they start to die back from the cold, it’s difficult to revive them.
How To Bring Coleus In For Winter
However you decide to try overwintering coleus, it’s important to debug the plants before bringing them indoors.
You can debug cuttings using the same method, or you can do it on a smaller scale inside. Simply soak them in the sink for about 10 minutes to drown any insects.
Add a squirt of mild liquid soap to the water to help kill the bugs faster. Then rinse the leaves, and place the cuttings into a vase of water to root them.
Once you have them inside, put them in a sunny window where you can leave them until spring.
Soaking coleus cuttings in water to kill bugsTips For Coleus Plant Care In Winter
Coleus care indoors in winter is a bit different than it is outdoors during the summer. They are pretty easy to grow indoors, but do require a bit of extra care to get them through the winter.
The three things you’ll have to worry about the most are lighting, water, and bugs. Here are some winter care tips to help you out…
Light Requirements
Though they prefer the shade outside, coleus plants will grow their best indoors with lots of light. Place the pot in a sunny window where it will get plenty of bright, but indirect sunlight.
If you don’t have much natural light in your home, then you can add a grow light to keep them from getting leggy and reaching for the window.
Plug it into an outlet timer to give it plenty of light, even when you’re not home.
Watering In Winter
Proper watering is one of the biggest challenges that people have. The goal is to keep the soil evenly moist through the winter, and never dry or soggy.
The way to achieve this is to allow the soil to dry out a bit on top before watering it again. To avoid overwatering, always check it first.
Stick your finger one inch into the soil to make sure it’s not wet. If feels dry, then water it. You can get an inexpensive soil moisture gauge to help you get it perfect every time.
Controlling Bugs
One of the biggest challenges of overwintering coleus indoors is controlling houseplant pests. If you find bugs, you should act fast to get rid of them.
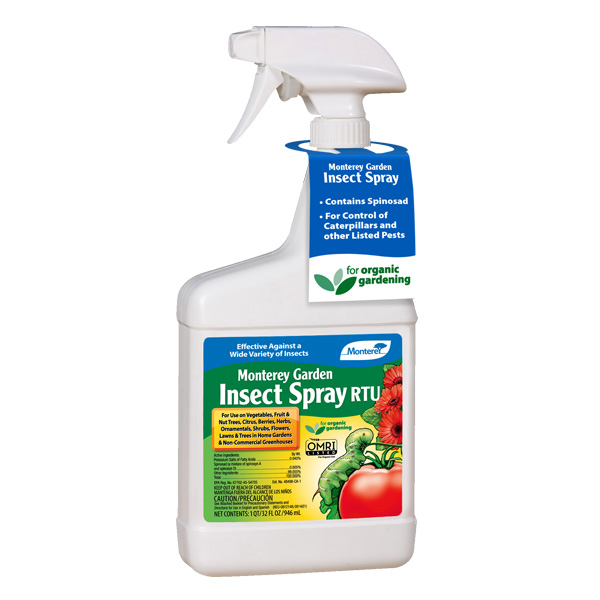
Wash the leaves with a mix of 1 teaspoon of mild liquid soap per 1 liter of water.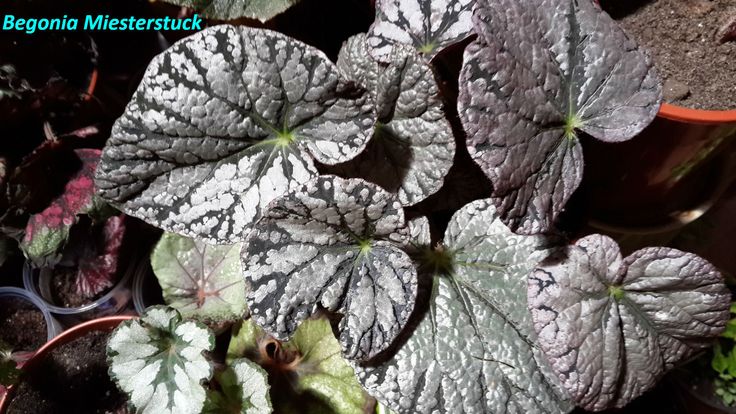 If you don’t want to make your own, you can buy organic insecticidal soap instead.
You could also try using neem oil as a longer term solution to kill the bugs, and prevent future infestations.
Moving Coleus Plants Back Outside In Spring
When spring arrives, you’ll be excited that your coleus made it through the winter indoors, and ready to move it back outside.
But don’t get too anxious. It’s very important to do it at the right time, and take the proper steps to ensure it will survive the transition.
When To Move Coleus Back Outside
Wait to move your coleus back outside until all chance of frost is gone, and the nighttime temps are consistently above 60°F.
This is usually a couple of weeks after your average last frost date in the spring. But always keep an eye on the forecast to make sure it’s safe.
If frost is predicted, then move it inside or into the garage to protect it. Don’t try covering it, because it may not be strong enough to survive.
How To Move Coleus Back Outside
After being indoors all winter, it can take some time for coleus to adjust to life outside again. They aren’t used to wind and intense light yet.
So, when you move it back outside, place it in a well protected shady area. After a few weeks, you can slowly start moving it closer to the designated spot each day.
Coleus plant indoors for the winterFAQs About Overwintering Coleus
In this section, I’ll answer some of the most frequently asked questions about how to overwinter coleus. If you can’t find yours here, then ask it in the comments below.
How cold is too cold for coleus?
The lowest temperature coleus can tolerate is 33°F, but only for very brief periods of time. And that is really too cold for them. Though they can handle a light frost, if it dips below freezing for long, they will die. They prefer temps above 60°F – the hotter the better.
Does coleus come back after winter?
Coleus does come back after winter if you live in a warm enough climate (zones 10+) where it stays above freezing. However it will not survive outside in colder areas.
Can coleus survive winter outdoors?
Coleus can survive the winter outdoors in zones 10 and higher. Some people may even be lucky enough to see them survive in warm microclimates of zone 9b, if you really want to push their zone.
Overwintering coleus indoors takes a bit of work, but it’s worth the effort to keep your favorite varieties year after year. Now that you see how easy it is to bring them indoors as cuttings or houseplants, you won’t have to pay for new ones next spring.
If you like the idea of overwintering plants indoors, then you will love my Winter Houseplant Care eBook. It will teach all you need to know to keep your plants thriving indoors during the coldest and darkest months of the year. Download your copy today.
Recommended Books
- Hot Plants for Cool Climates
- Winter Houseplant Care eBook
- Houseplant Pest Control eBook
More Posts About Overwintering Plants
- How To Overwinter Sweet Potato Vines Indoors
- How To Overwinter Tropical Hibiscus Plants Indoors
- How To Overwinter Pepper Plants Indoors
- How To Overwinter Brugmansia Plants Indoors
- Winter Care Of Caladium Bulbs
Share your tips for overwintering coleus plants or cuttings in the comments below.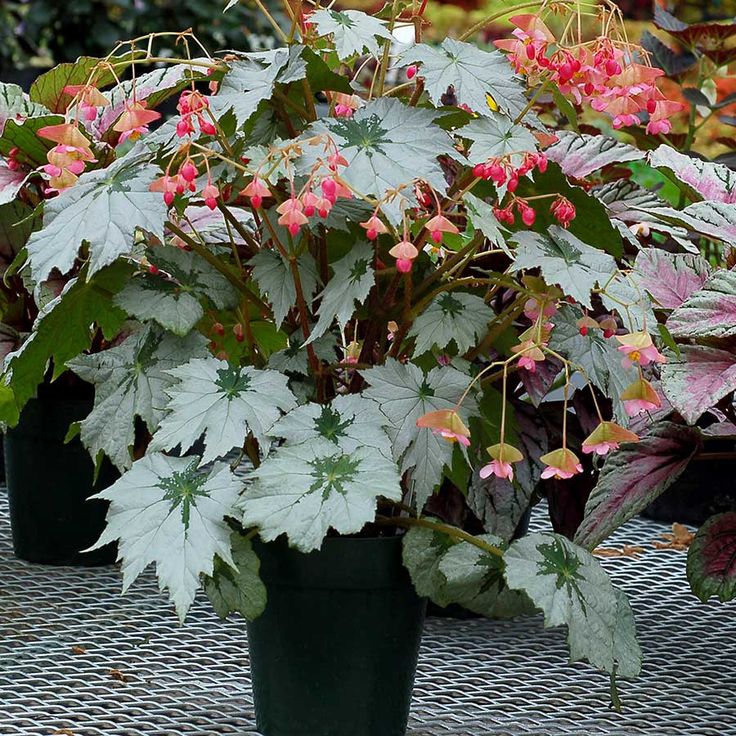
How to organize the correct wintering of begonias
Tuberous begonia needs proper wintering. Without proper care in the cold season, she will die. We will tell you how to save begonia so that next season it will give you a lush bloom again.
Begonia is a thermophilic flower. Therefore, it is not capable of safely overwintering in open ground. During the cold season, the tubers of the plant must be dug up and stored, since this flower has a dormant period throughout the winter. nine0003
Preparing begonias for wintering
In September, all buds are removed from the plant so that it does not waste energy on the formation of flowers, but begins to store nutrients in the tubers.
When and how to dig up tuberous begonia for the winter?
The flower is dug out of the ground with the onset of cold weather. There is no need to rush with this matter: the plant safely survives short-term autumn frosts. By the time of digging, the begonia leaves should have time to turn yellow and fall off. The death of the above-ground part of the plant means that all the nutrients are already concentrated in the tubers. nine0003
Plants are dug up with a sharp shovel or pitchfork, together with a clod of earth, taking care not to damage the roots and tubers. Begonias growing in containers are removed along with the substrate by turning the pot over and tapping on its bottom.
The stems are then cut with a sharp pruner, leaving a stump 2-3 cm high, and the tubers are cleaned from the ground. After that, they are placed in a single layer in a wooden or cardboard box and sent for drying in a warm and dry place for 2 weeks.
Storage of begonia tubers in winter
After drying (usually in November), the remaining soil is shaken off the tubers, then the begonias are placed in boxes so that they do not touch each other, sprinkled with dry sand, sawdust or peat and taken to a room with a temperature of 8-10 ° C and, if possible, with high humidity level (not less than 60%).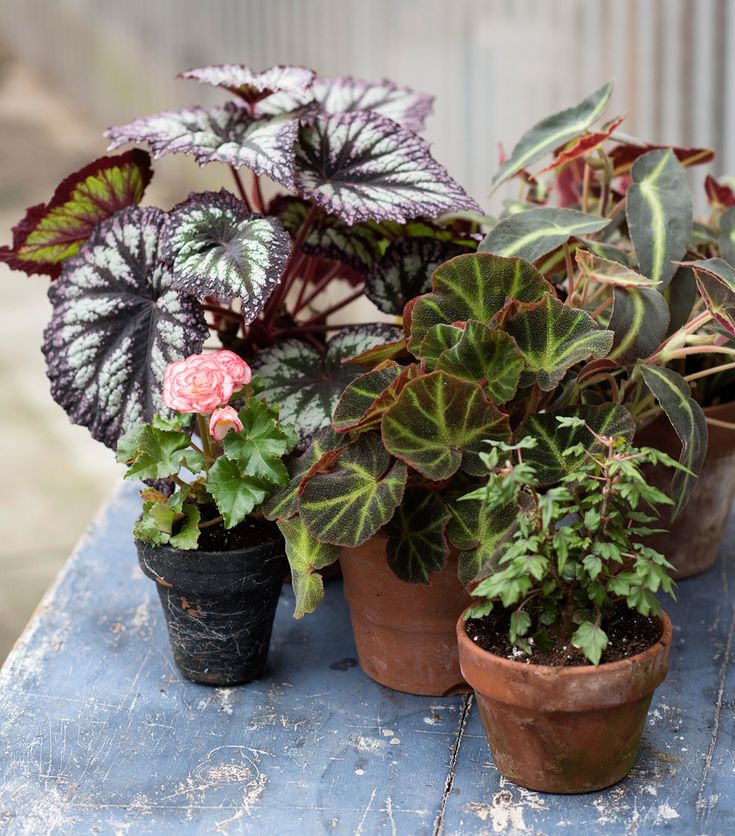 The tubers will be stored there until the beginning of March.
Sand, sawdust and peat help maintain proper moisture levels
Once a month the tubers are inspected for signs of disease and lightly sprayed with a spray bottle to keep them from drying out. This is especially true if you store tuberous begonias in an apartment where heaters dry the air. However, it is important not to overdo it in this matter, since abundant hydration of the tubers can awaken the kidneys ahead of time. nine0003
Tuberous begonias can also be sent to the refrigerator for wintering. Peeled and dried tubers are placed in plastic bags with dry peat and stored in the refrigerator in the vegetable section.
In order to wake up the tubers, in the spring they are transferred to a warmer room, placed in moist soil and watered regularly. From mid-September, the flowers gradually cease to be watered, and after the green mass dies off, containers with tubers are placed in a cool place in an apartment or basement. In the spring, watering is resumed, and after the first shoots of begonias appear, they are transplanted into a new nutrient soil. nine0003
***
If you really like this bright flower, try not only to preserve it, but also to propagate it. How to do it right, read our article Begonia from seeds and tubers: is it easy to grow?
Tuberous begonia - wintering plants from A to Z, photo and video Selo.Guru - Internet portal about agriculture
Winter storage tips
Proper storage of tuberous begonias in winter - prerequisite . If they are not respected, the tubers will set a small number of buds and flowering will be poor
First of all, it is necessary to observe the terms for extraction from the soil . If you are late, waiting for the first frost, he may suffer. The tubers of this flower do not tolerate even short-term freezing. But you can't dig them out before. As soon as the foliage begins to dry out, the flower begins to actively gain mass of the tuber and lay the buds for the next flowering. nine0049 Therefore, early removal from the ground will reduce the number of flowers during the growing season.
When you notice the first signs of wilting, stop watering. In open ground conditions, it is recommended to cover the bush in case of rainy weather.
Pay close attention to the condition of the above-ground part. As soon as all the leaves turn yellow and fall off, it's time to act. Do not use a large shovel, you can damage the tender roots with it. Carefully cut off the stems that have not fallen off with garden shears or secateurs. nine0003
Do not cut the foliage to the base - you may damage the bulb. Leave stumps 2-3 cm long.
After digging out of the ground, thoroughly clean the tubers. Dry them in a room with warm, dry air. If there is high humidity in the room, rotting processes may begin in the tubers. In the period of preparation for winter, the tubers ripen, this process lasts 15-20 days .
Sometimes unexpected autumn frosts occur, and the leaves of the plant immediately freeze. It is a mistake to assume that the root part is also frozen. Most often, with short-term frosts, the underground part remains unharmed. Dig up such specimens and try to save them.
How to keep tuberous begonia at home in winter?
The temperature in the wintering area should not exceed 9-10 degrees. This is a necessary condition for laying flower buds. Humidity at the same time needs increased (70-80%) . There are several ways to ensure this, depending on the conditions you have:
Basement or cellar
For this method, it is necessary to prepare a container in which the tubers will be placed. It can be a cardboard box or a wooden box. It is recommended to fill the bottom with a layer of sand, peat or sawdust.
Experienced flower growers respond well to the use of modern vermiculite material for these purposes.
Vermiculite is a mineral powder widely used in horticulture and indoor floriculture. It does not rot or decompose under the influence of the atmosphere, so insects and bacteria do not multiply in it. The tubers placed in it will be in a certain temperature regime with sufficient air access. In addition, they are not subject to infection by diseases and pests. To store tubers, vermiculite is mixed with peat or sawdust. nine0003
The tubers are laid out on the prepared pillow in one layer, so that they do not touch each other. From above, the laid plants are covered with a layer of mixture for storage. She should also cover the distances between the tubers. Each copy should be literally surrounded by a pillow of backfill mix.
Refrigerator
If there is no basement or cellar, the tubers can be stored in the refrigerator. The finished, dried material is placed in a bag, sprinkled with peat and vermiculite, or a mixture of sand and vermiculite. The package requires make holes for air access. The bag is then placed in the refrigerator.
If you have enough space in your refrigerator, you can put the tubers in the lower vegetable storage drawer, filling them with peat mixture as in the previous option. It is also convenient to use food containers. Tubers are placed in them and covered with a mixture of peat and vermiculite, or sawdust and peat, just like in boxes. Make sure that the backfill mixture is completely dry, otherwise the begonias will rot or be affected by the fungus. nine0003
How to keep tuberous begonia in a pot in the apartment in winter?
The previous storage methods are used for large, mature tubers. Young specimens are small, and with such storage they will dry out. It is recommended to store them by placing them in pots with earth. Deepen the tubers into the ground, you can have several in one pot, and put in a dry, cool room. Once or twice, depending on ambient humidity. The soil with stored tubers needs to be moistened. nine0003
Overwintering of first-year begonias
The storage of first-year begonias obtained from seeds is different, because their dormancy period is relative. The aerial part of them does not die off in autumn, and they must winter in pots.
Since the leaves of the small tubers remain, they need light. But the temperature of the content should not exceed 15 degrees . Water the first year sparingly to avoid rotting.
Inexperienced flower growers mistakenly treat young nodules in the same way as with large, mature ones. But this cannot be done, because the first years grown from seeds continue to grow in the winter. nine0049 If stored incorrectly, they will dry out.
Peculiarities of the dormant period of room begonia
A plant grown at home also needs winter storage. The difference is that the plant does not have to be removed from the soil.
In autumn, , as soon as the stems begin to wither and dry out, they sharply reduce the frequency of watering and the amount of water.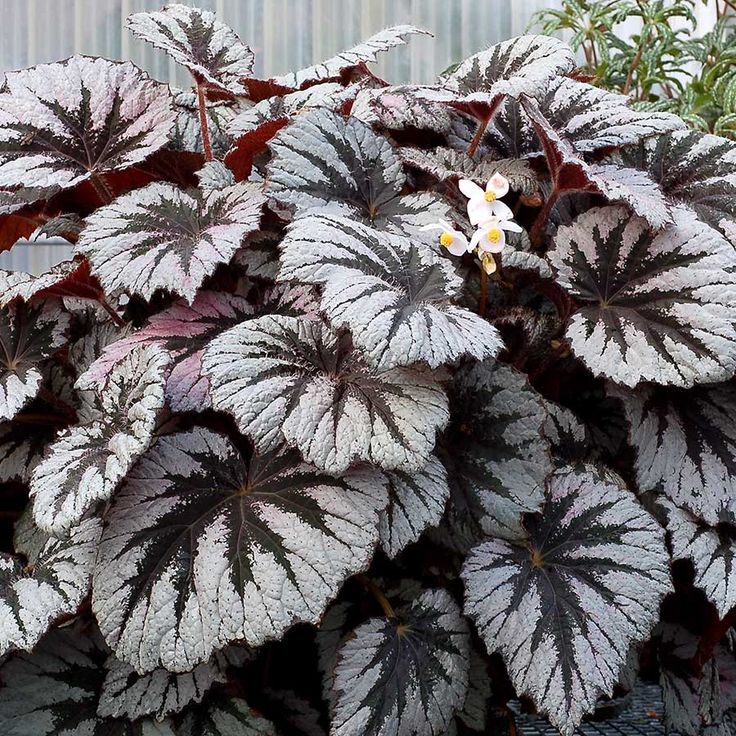 The finally wilted leaves are carefully cut off and the pot is removed in a dark, cool place. Such conditions are necessary in order for the plant to rest and gain strength for flowering in the next season. nine0037
No need to disturb the resting shrub: move it from place to place, replant it. Check the status of the root system. It is only necessary to ensure that the earth does not dry out and slightly moisten it periodically. This is especially important during heating, as the air in the apartments is dry, and the tubers can dry out.
Plants keep well on insulated balconies or under a balcony door. Just like the garden begonia, indoor begonia can be stored in basements. They put it there right in the pot in which they grew it. To limit light, cover the pots with newspaper or a thick cloth. nine0003
Do not transplant tubers into new soil before wintering - they will start growing, and this is highly undesirable.
It is very important that the plant pot is not exposed to too much light, and even more so to direct sunlight. The plant will wake up ahead of time and sprout, not having time to lay a sufficient number of flower buds.
Tuber awakening
Wintering period ends at begonia in March-April. Remove the tubers from the wintering place and heat them in the room. You can also germinate them in wet peat or sand before planting in open ground. Before that, dip them for a while in a solution of potassium permanganate. nine0003
When there are many buds on one large tuber. Before planting, you can cut it into pieces. Treat cut areas with ashes, sulfur or charcoal.
Young plants have elongated shoots by spring, they need to be cut and rooted in separate containers.
Compliance with these simple rules of storage will help you to admire lush and abundant flowering of the beautiful begonia in summer.
All the details about the care of tuberous begonia, including such varieties as Elatior and Ampelnaya, you can find on the pages of our website.