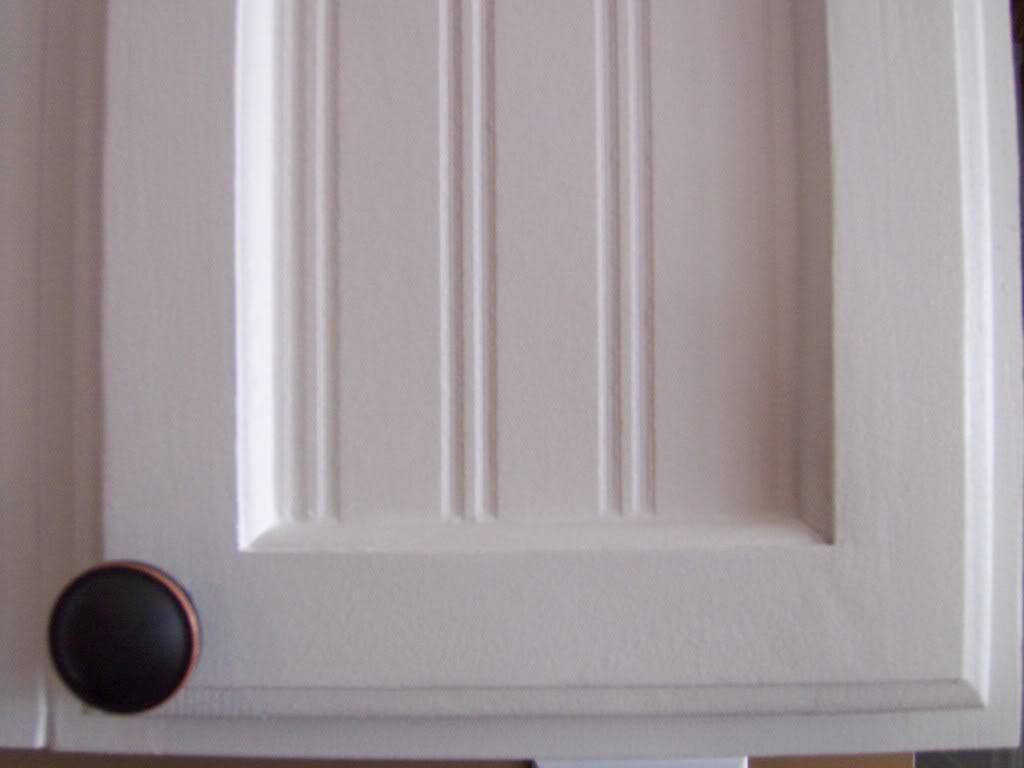
Cabinet prep for painting
How to Paint Kitchen Cabinets in 9 Steps
Project details
Skill
1 out of 5 Easy A smooth finish requires careful, patient sanding between coats.
Cost
Less than $100, depending on the number of cabinets
Estimated Time
A weekend, depending on the number of cabinets
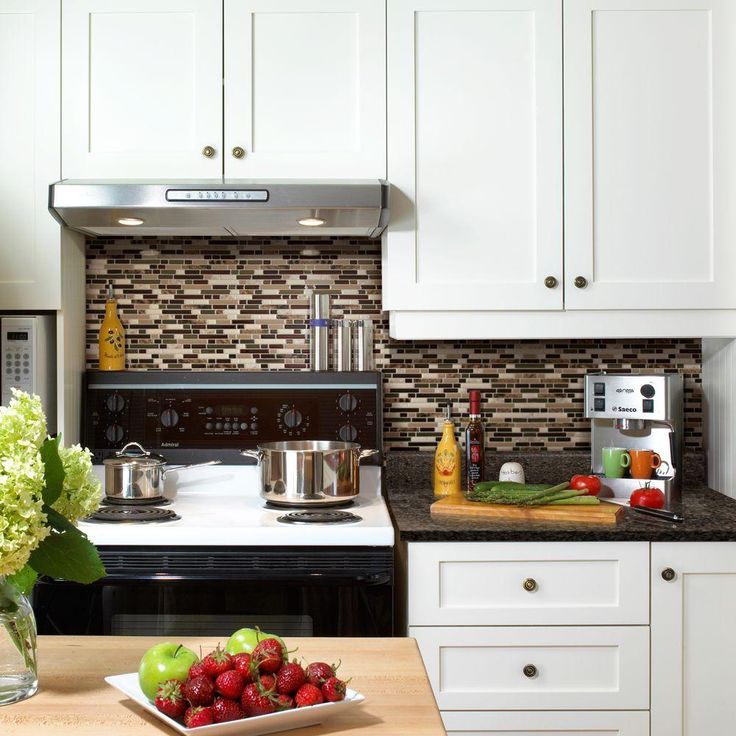
If you’ve noticed the cost of new appliances, countertops, and cabinets, it’s no surprise that renovating a kitchen is one of the most expensive remodeling projects. While few homeowners find ways to boost the look of a dated refrigerator or tired granite, transforming a kitchen by freshening the cabinets that make up most of the room’s visual space is entirely within reach. But there’s more to the job than buying a gallon of your favorite color.
Read our step-by-step instructions and watch expert painter Mauro Henrique demonstrate how to get the job done right.
How Much Does it Cost to Paint Kitchen Cabinets?
Renovating a kitchen is one of the most expensive remodeling projects that you can take on, and replacing the cabinets can account for nearly 40 percent of that cost.
Cabinets for a 10-by 12-foot kitchen can easily top $5,000—and your new cabinets may actually be of lower quality than the ones you're replacing. On the other hand, a few fresh coats of paint can go a long way toward transforming your existing cabinets for a fraction of that price. In fact, the cost of painting should be no more than about $200, plus a weekend or two of your time.
Should I Paint My Cabinets?
Before you head out to the paint store, however, examine your cabinets to see if they can be resuscitated in the first place. Even the highest-quality paint job can't revive cheap cabinets that have grown frail with age. Thin veneers peel or delaminate, particleboard cabinet bottoms or shelves sag or break, and hanging rails come loose. If these are the issues you’re dealing with, you’d actually be better off replacing your kitchen cabinets.
Assuming that everything is still in fine shape and good working order, let’s examine some of the questions you’ll need to address before you start repainting your kitchen cabinets.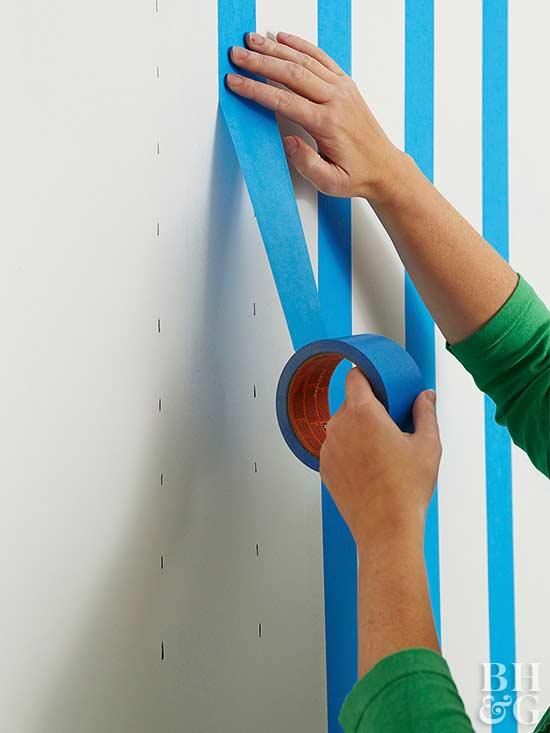
What Type of Paint Do I Need for Cabinets?
Oil or latex?
Latex paints have been improving steadily, leading some pros to give up oil-based paints entirely. Because they dry quickly and clean up with water, latex paints are more user-friendly than oil-based paints. But many pros still favor oil-based topcoats, arguing that they form a harder, more durable paint film and level out to a smoother finished surface. Latex paints also take longer (up to three weeks) than oil-based paints to fully cure. In the meantime, they’re susceptible to damage.
Bottom line: Either oil or latex will provide a good finish. If you do use a latex paint, make sure it’s a 100 percent acrylic formulation, which offers greater durability and adhesion than vinyl acrylic paints.
Brush or Spray Paint?
A sprayed-on finish is the smoothest option, but there’s a learning curve for doing it properly. You’ll also likely need to rent the spray equipment, which drives up your costs, and you’ll have to mask off all the areas in the kitchen that could accidentally get sprayed, including countertops, cabinet interiors, and appliances, which is a time-consuming process.
For these reasons, we recommend you opt for using high-quality brushes instead. Invest in a good, 3- to 4-inch-wide square brush, whose straight ends will make short work of large, flat panels, as well as an angled brush in the 2½- or 3-inch-wide range, which will help you get paint into the corners of doors with molding and can coat door frames in one pass. Latex paint should be applied with a synthetic bristle brush, which doesn’t absorb water; oil-based paint should be applied with a natural-bristle brush.
Can you just paint over cabinets or should you strip them?
When the existing finish is a clear coat, the best course of action is to strip the finish down to the bare wood before painting. This eliminates a potential adhesion problem between the old finish and the new paint.
But while stripping may be the ideal for purists, it’s not always practical or absolutely necessary. A thorough cleaning followed by light sanding should be enough to prepare the surface for new paint.
Related
How to Paint Kitchen Cabinets Without Stripping
Regular or faux finish?
If you’re open to spicing up your kitchen’s look, incorporating a faux finish can transform its style into shabby chic, rustic, provincial, or modern. Crackling glaze, which is available at paint stores, can, with very little effort, give your cabinets a weathered look. Just apply the glaze over a dry base coat, brushing in only one direction (thick for large cracks, thin for fine cracks), and let it dry. Finish with a flat topcoat of the base color brushed on perpendicular to the glaze. The paint will start to form cracks as it dries, a process that takes about an hour.
Another rustic style is the distressed look, which doesn’t require a special paint. This finish is made up of layered colors and spattered dark paint. When the paint is dry, to reveal the colors underneath, distress the finish by hitting it with a chain and lightly sanding in the spots where the cabinets get the most use.
Similarly, the antiqued, slowly aged look can be achieved with some paint magic. Simply dip the tip of a paintbrush in a color lighter than the cabinets and dab the excess onto a cloth until the brush is almost dry, then lightly graze the surface of the detail trim, corners, and seams.
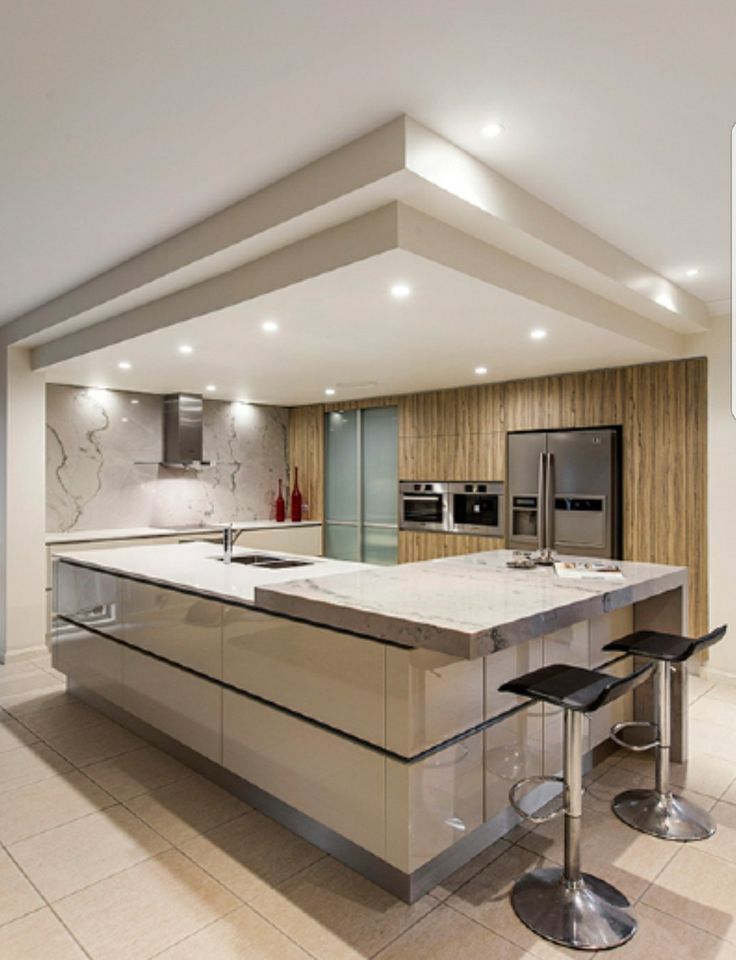
On the other end of the spectrum is a high-gloss finish, which will transform your kitchen into a polished, modern space. To shine up your cabinets, paint a high-gloss clear acrylic varnish over your final coat. This technique will add depth to the color and cover the surface of your kitchen with a glassy sheen.
Steps for Painting Cabinets
1. Prep the room
A successful paint job lies in diligent prep work, and the first few steps are focused on prepping the room and cabinets for painting.
- Start by emptying the cabinets, clearing off the counters, and removing any freestanding appliances.
- Relocate tables and other furniture to another room.
- Tape rosin paper over the countertops and flooring, and, to protect the rest of the house from dust and fumes, tape plastic sheeting over the backsplash, windows, fixed appliances, and interior doorways.

- Mask off the wall around the cabinets.
- Set up a worktable for painting doors, drawers, and shelves.
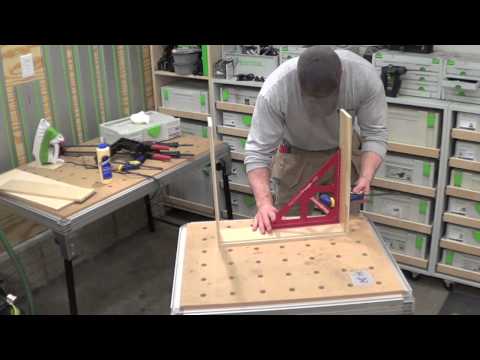
TIP: Set Up a DIY Paint Station
Brown Bird DesignThis makeshift jig provides access to all sides of a cabinet door to reduce downtime during drying. Here’s how to set it up:
- Span a pair of 2x4s at eye level between two ladders.
- Screw eye hooks into one end of a 2x4, where doors will be painted, and at the other end, screw hooks into both 2x4s to hang painted doors from.
- Add corresponding hooks to the top edges of upper cabinet doors and the bottoms of lower doors and drawers, where the holes left behind won’t be visible.
2. Remove the doors, drawers, and shelves
Gregory Nemec- Be sure to mark each drawer front and door with a marker to prevent mixing up the doors. The best place for this mark is behind the hinge location.
- Back out the hinge screws from the cabinet frame and remove the doors.
- Working from left to right, top to bottom, label each one with a numbered piece of tape. Also, number the edges of cabinet shelves and the bottoms of drawers.
- Set aside the shelf-hanging hardware.
- At your worktable, remove the pulls and hinges and save what's being reused.
- On the doors, transfer the number from the tape to the exposed wood under one hinge.
- Cover it with fresh tape.
3. Clean all the surfaces
- Clean the cabinet by spraying it with a degreaser solution and wiping it down with a rag. This removes all the oils and grease that could prevent a perfect finish. If ordinary cleaners aren’t effective, consider using a stronger cleaner like trisodium phosphate (TSP), which is sold at hardware and paint stores. Just make sure you follow the safety precautions on the container.
- Once all the cabinet pieces are clean, rinse them thoroughly with water and let them dry.
4. Prep the boxes
- Open the windows for ventilation and put on safety gear.
 Using an abrasive pad dipped in a liquid deglosser, scrub down all of the surfaces.
 - Hold a rag underneath to catch drips. Before the deglosser evaporates, quickly wipe away the residue with another clean, deglosser-dampened rag.
- If you're relocating the hardware, fill the old screw holes with a two-part polyester wood or autobody filler.
- It sets in about 5 minutes, so mix only small batches. The filler shrinks a bit, so overfill the holes slightly.
- As soon as it sets, remove the excess with a sharp paint scraper. If it hardens completely, sand it smooth.
- Use a foam sanding block to scuff the surfaces of the cabinet, drawers, and doors. This is a light sanding meant to give the primer something to adhere to, so don’t sand to the bare wood. Use a tack cloth to remove the sanding dust before moving on.
- Vacuum the cabinets inside and out to make sure no bits of dust mar the finish, then rub them down with a tack cloth for extra measure.
5. Prime the cabinet boxes
Kolin SmithNow it’s time for the primer. If the cabinets are heavily stained, use a stain-blocking primer, which dries quickly and seals knots and other surface defects that might bleed through the topcoats. In most situations, however, stain-blockers shouldn’t be necessary, and an oil-based or 100 percent acrylic latex primer will work just fine.
- Pour some primer into the paint tray and load the roller and brush. Using the brush along the edges and tight spots, and the roller on the large, flat surfaces, coat the cabinet, doors, and drawer fronts with a coat of primer.
- Starting at the top of the cabinet, brush on the primer across the grain, then "tip-off"—pass the brush lightly over the wet finish in the direction of the grain. Always tip-off in a single stroke from one end to the other.
- Make sure to follow the underlying structure of the cabinet or door with the brush. Where a rail butts into a stile, for instance, paint the rail first, overlapping slightly onto the stile, then paint the stile before the overlap dries.

- While you’re allowing the primer to dry, wash your brush and roller sleeve, and pour the excess primer back into the can before washing the paint tray.
6. Sand, caulk, and fill
Kolin Smith- After the primer is dry, sand the flat surfaces with 220-grit paper.
- Sand any profiled surfaces with a medium-grit sanding sponge. The wood should end up feeling glass-smooth.
- Squeeze a thin bead of latex caulk into any open seams. (The hole in a caulk tube's tip should be no bigger than the tip of a sharp pencil.)
- Pull the tip as you go, then smooth the caulk with a damp finger. Fill any small dents, scratches, or dings with vinyl spackle, smoothed flat with a putty knife.
- Once the spackle is dry (about 60 minutes), sand again with 220-grit paper, vacuum, and wipe with a tack cloth.
- With a spray can of fast-drying oil-based primer, spot-prime the spackle and any spots where the sandpaper has “burned through” the primer.
- Wait an hour, then sand the primer lightly with 280-grit paper.
- Vacuum all the surfaces, and wipe them with a tack cloth.
7. Paint the cabinet boxes
Kolin SmithYou’re finally ready to paint! If you’re using roughly the same shade as the existing color, two coats ought to do the job. You might even get away with one. Painting over a dark finish with a light color is tougher and could require three coats. Break out a new brush for each coat.
- Pour some trim and cabinet enamel paint into the paint tray and load the brush and roller with paint. Use the brush to cut in along the edges, push the paint into the corners, and leave out roller strokes. Use the roller to apply enamel paint to the large flat surface where possible.
- For the cabinet interior, apply the paint with a smooth-surface mini roller, which leaves a slightly bumpy, orange-peel texture.
- Cover the brush and roller with plastic bags to prevent them from hardening while you wait for the first coat to dry.

- Between coats, sand the surfaces lightly, making sure to clean up the debris afterward.
- Apply a second coat to the cabinet. This coat should provide a perfect, consistent finish without any thin or light areas where wood might show through.
8. Prep, prime, and paint the doors, drawers, and shelves
The strategy for prepping, priming, and painting doors, drawers, and shelves is the same as for the cabinets, except that all the work is done on a table to reduce the chance of drips, runs, and sags.
- When painting paneled doors, start with the area around the panel.
- Then, do the main field of the panel, and finish with the stiles and rails around the edges.
- As you go along, wipe up any paint that ends up on adjacent dry surfaces to eliminate the chance of lap marks.
Tip: To speed up the drying time for doors, you can twist two screw hooks into holes drilled in an inconspicuous door edge (the lower edge for bottom cabinets, the upper edge for top cabinets). Paint the door's outside face and let it dry for an hour while resting flat, then tilt the door up onto its hooks and put a drywall screw into an existing hardware hole. Hold the tilted door up by the screw and paint the door's back side.
- When you're done painting, pick up the door by the screw and one hook and hang both hooks on a sturdy clothes hanger.
- Suspend the door from a shower curtain rod or clothes rod until it dries.
9. Put back all the pieces
Kolin Smith- Once the second coat dries, reattach the door and drawer fronts. Enjoy the fact that you’ve given your kitchen cabinets a fresh new look without investing a lot of time or money.
- Remove the tape over each door's number, install the hinges and knob, and hang them in their original opening.
- Replace the drawer pulls (or add new ones) and reinstall each drawer.
Shopping list
- Degreaser spray
- Latex primer
- Water-based trim and cabinet enamel paint
- Roller sleeves
Tools
Tools & Materials
-
Screwdriver/screw gun
-
Permanent marker
-
Rags
-
Foam sanding block
-
Tack cloth
-
Paint tray
-
Paintbrush
-
Mini paint roller
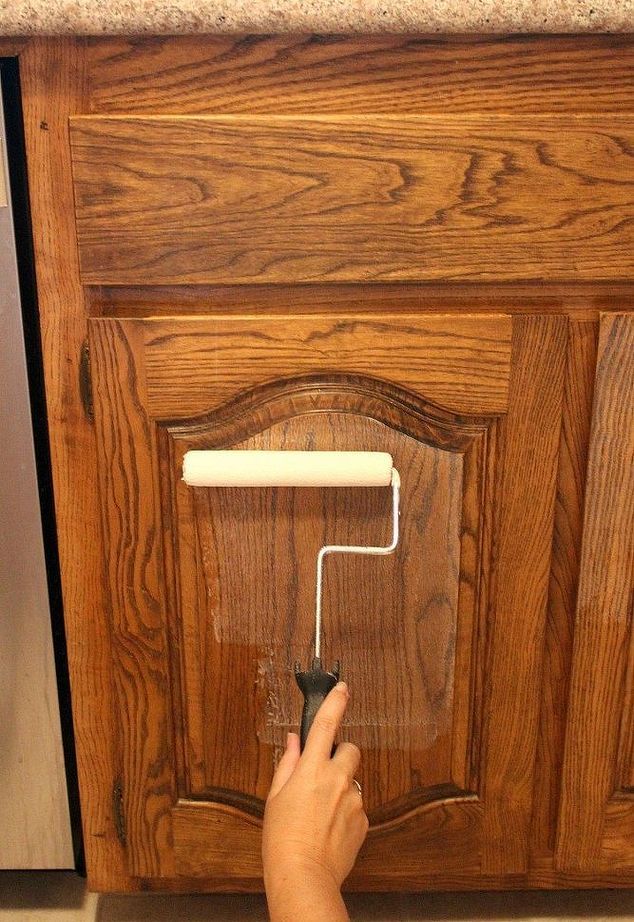
How To Prep Cabinets For Painting
One of the first steps when painting your kitchen cabinets is prepping your cabinets for painting.
This post is for those of you who are specifically looking for the exact process of how to prep kitchen cabinets for painting but aren’t necessarily looking for details on the entire kitchen cabinet painting process.
If you do want more info on how to paint your kitchen cabinets, I wrote a huge post detailing every little aspect of kitchen cabinet painting here called How To Paint Kitchen Cabinets Like A Pro. Check it out!
How To Prep Kitchen Cabinets For Painting
Clean The Room
The first step of any painting project is to get the room clean. You cannot efficiently work in a dirty or cluttered room. Also, dirty floors and countertops will surely lead to dust and debris in the finish of your paint.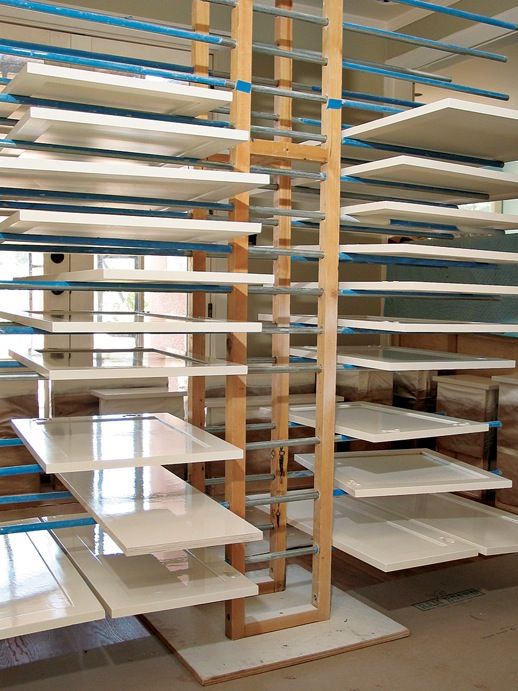
Remove everything form the room you possibly can. The countertops and floors should be free and clear. If possible, roll your fridge out to another room to make even more room for painting. Microwaves and stoves are typically not removable and will need to be prepped off for painting.
Sweep and shop vac all the floors. If they are really filthy, go ahead and wash them. This will ensure that your tape will stick when covering the floors.
Cover The Floors & Countertops
Once you have the room cleared, the next step is to get the floors covered.
Start by taking a roll of 1.5″ tape (I prefer Frog Tape for this project) and taping off the edges of the floor next to the walls and cabinet bases. Make sure to press the edges of the tape down firmly so that no paint leaks under the tape and onto your floor.
Frog Tape is great for this because it has a super absorbent polymer (just like Orbeez!) in the tape which makes it expand and seal out paint when the paint touches the tape and gets it wet.
Next, take a roll of 3-foot brown rosin paper and roll it out one strip at a time over the floor. Once you have one strip rolled out, tape down all of the edges. Repeat until you have the entire floor covered.
Remove All Handles and Pulls
The next step to prepping your kitchen cabinets for paint is to remove every handle and pull from your cabinets.
There is really no explanation needed here. Just remove them!
Remove Doors, Hinges, and Drawers
After all the pulls and handles are removed you’ll want to remove the doors and hinges from the cabinets.
At this point, a little pre-planning can save you hours of work later. You want to label the doors to the exact location they were removed from as you take each door off.
Label Your Doors!
What I like to do is take a pen/pencil and write the number 1 on the first door under where the hinge was. Then, I put a small piece of tape over the number I just wrote on the door.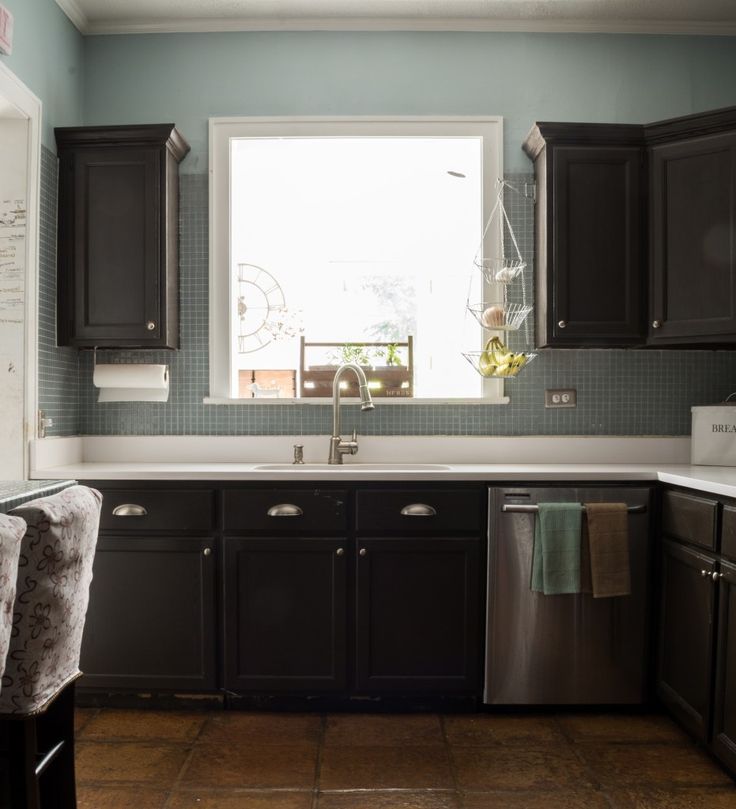 I also write the number 1 on a small piece of tape and place this somewhere inside the cabinet that the door just came off of.
Since I write the number on the door where the hinge was and tape over it when I am done painting the door, I can remove the tape and see the number I wrote and its in a place that won’t show when I re-install the door.
When you go to put all of your doors back onto your cabinets, you will be thankful that you can simply match up your numbers and place the right cabinet door in the right spot.
I personally don’t label my hinges. I expect to have to re-adjust all the hinges when I go to re-install the cabinet doors. On most modern hinges, adjustment is easy and should take you only a half an hour to adjust all your doors when you are done.
Remove and Label Your Drawers
Most drawers should slide right out without any issues. Some have a latch on the bottom that allows you to remove the drawer.
For labeling the drawers, I simply write a number on the back of the drawer (which won’t get paint) and place a piece of tape labeled with the number inside where the drawer went.
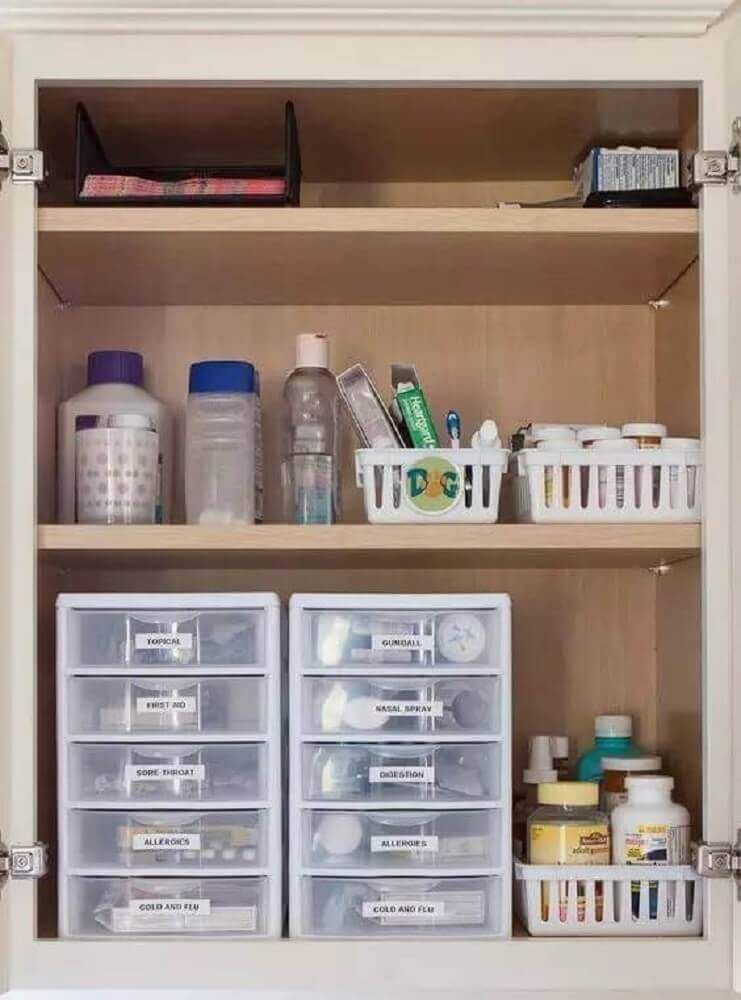
Plastic and/or Tape Off The Insides Of Your Cabinets
Cabinets with insides prepped off.I have seen some homeowners who want to have the insides of their cabinets painted, but most don’t want this. Personally, I prefer when the insides of cabinets are not painted. I think it looks better, is easier to maintain, and adds unnecessary cost to the project.
If you plan on spraying your cabinets, you will want to plastic off the entirety of the insides of your cabinets to prevent over-spray from getting into the cabinet boxes.
However, if you are brushing your cabinets (or even just the boxes), then a strip of tape around the inside edge of your cabinet boxes will be sufficient.
The Best Painter’s Tape For Every Surface
Enameled Cabinets After (but before putting door back on)PRO TIP: To plastic off the insides of your cabinet boxes, use a 3M Hand Masker Dispenser.
Take your Hand Masker Dispenser and run a stip of plastic and tape along the top inside edge of the cabinet box.
Next, take your Frog Tape and run a strip of tape around the inside edge of the 3 remaining sides of the cabinet box.
Now carefully pull out the plastic and tuck it along the edge of the frog tape that you just applied.
This method takes a few tries to get the hang of, so don’t get upset if you have to re-try on a couple of cabinets to get it right.
Paper / Plastic Off Your Drawers
When I paint kitchen cabinets, I don’t paint the insides of the drawers. There is no point to it and I don’t think it looks nice. Similar to how I don’t like painting the insides of the cabinet boxes.
To prep off the drawers, I take my 3M masking machine and wrap a piece of paper around the entire drawer. I like to use 18″ wide rolls of paper for this. 18″ should be long enough for most drawers, but if it is not, just switch your machine over to some 24″ masking plastic or longer.
Getting Ready For Paint – Cleaning and Sanding
Now that your floors are covered, doors and drawers are removed, and the insides of your cabinet boxes and drawers are prepped off, the next step in getting your cabinet ready for painting is cleaning and sanding.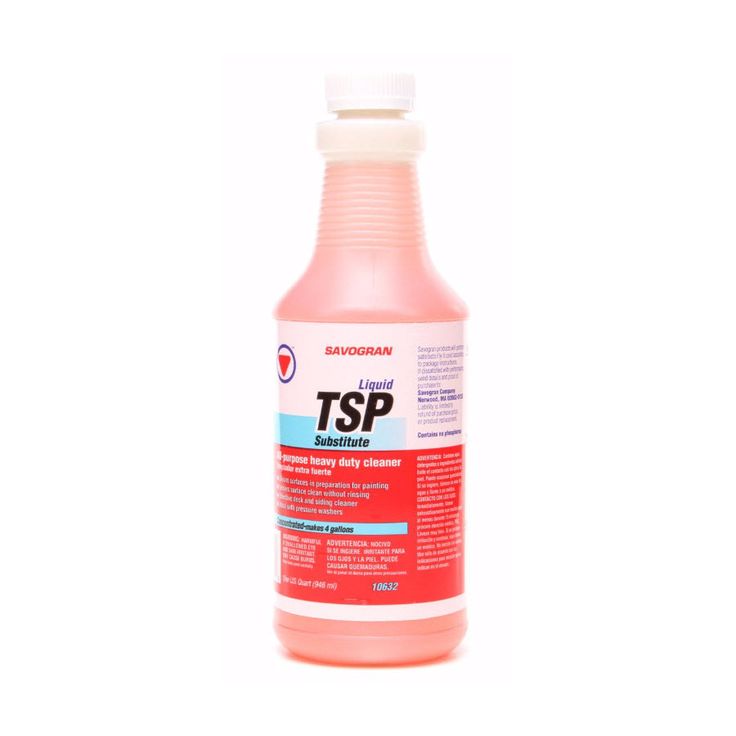
Cleaning usually only involves washing all the surfaces with a rag and warm water. However, you may find that some cabinets are a bit greasy and grimey, especially above stoves. I’ve found that a couple of drops of Dawn dish soap and warm water can clean this grease off really quickly.
Once everything is clean and dry, you’ll want to sand all of the surfaces that are to be painted.
This sanding is really to scuff the surface and make it so that your primer can properly bind to all the surfaces.
If there are any old runs in the paint or clear coat on your cabinets, now is the time to smooth them out and get the runs out with a little extra sanding.
There is no need to oversand though. A thorough, but light sanding is all that is required.
Once your sanding is complete, you’ll want to shop vac up any dust created from this step. Lingering dust can easily end up in your finish making your painted cabinet rough.
Different cabinet painting projects may require additional steps before painting.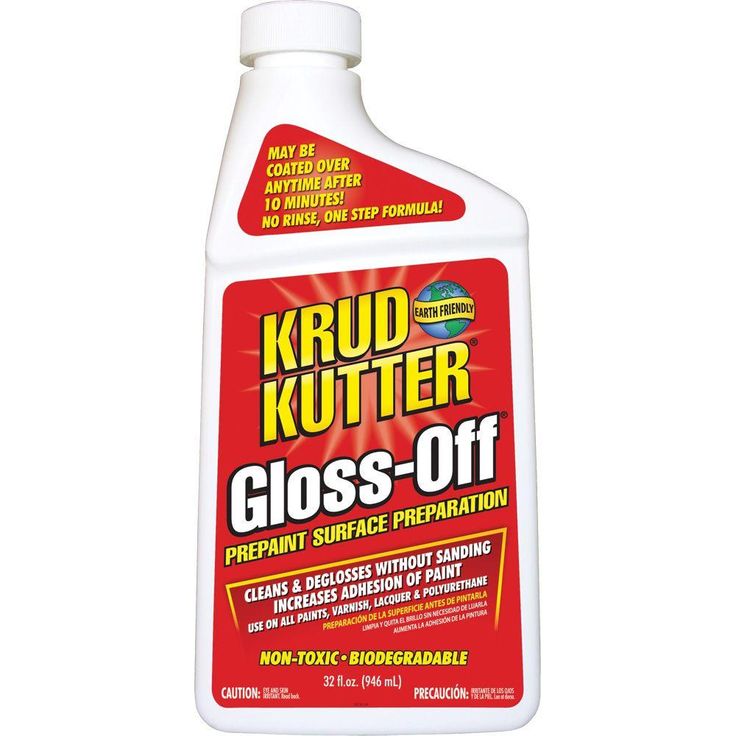
For example, if you plan on painting oak cabinets and want to have them be as smooth as possible when you are finished. For this project, you will have to apply a grain filler. I cover How To Fill Wood Grain On Kitchen Cabinets in this post.
Now that we’ve covered how to prep cabinets for painting, you should be all ready to start painting your kitchen cabinets.
If you have any questions while working on your project, please feel free to ask me anything in the comments below. I always answer every question as soon as I can!
Ready To Learn More?
Check out our Painting Kitchen Cabinets hub page for everything you could want to know about cabinet painting including costs, how-tos, reviews, and more.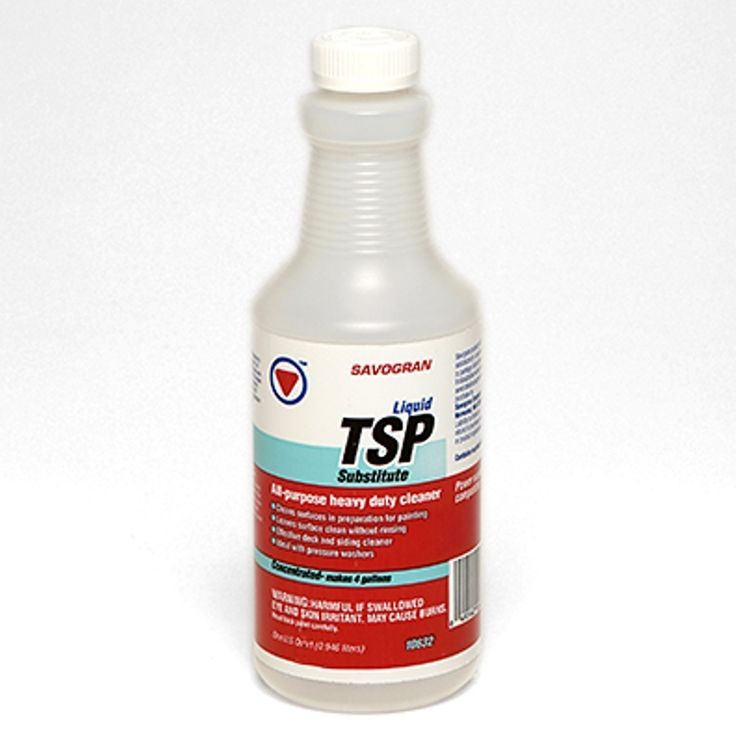
How to paint an old cabinet with your own hands
Furniture belongs to those interior items that are purchased with the expectation of a long service life. It is not at all necessary to throw out used furnishings if, after repairing the case, drawers and facades, they no longer fit the interior or simply require updating. If the design is strong and functionally satisfactory, it is enough to know how to paint the old cabinet with your own hands so that it serves again and pleases with its appearance.
Contents
- Can an old wardrobe be painted?
- What you need for painting
- Coloring details
Can an old cabinet be painted?
It all depends on the material from which it is made and what condition it is in. Smooth lacquered surfaces require a special approach. For example, removing polish from the facades of Soviet furniture made in the 80s, if it has obvious traces of time in the form of chips and cracks, is laborious and pointless. It is unlikely that this will be done neatly and evenly.
If the cabinet itself is in good condition and does not require restoration, then it can be painted with chalk paint. Chalk paint adheres well to veneer, wood, plywood, chipboard and MDF surfaces. Unlike acrylic, which requires:
- Complete removal of the varnish layer (for better adhesion of the coating to the surface). To do this, you will have to arm yourself with a whole arsenal of tools for sanding and sanding an old cabinet.
- Washing and dedusting the surface, followed by degreasing.
- Application of primer and special contact agents before painting.
Chalk paint makes painting easier:
- Glossy varnish and a smooth surface are no problem. It is not necessary to sand the top layer of the old polished cabinet.
- Before painting, the surface of the old cabinet must also be cleaned, dedusted and degreased.
- If the furniture has been painted with oil paints or varnished in the past, or the type of coating could not be determined, it is recommended to use blocking primers before painting.
 This will eliminate the possibility of incomprehensible stains.
 - In all other cases, the first coat of chalk paint will act as a primer. It needs to be allowed to dry for a few hours.
What you need for painting
The most time and money consuming process of preparing an old cabinet for painting. You may need:
- Sandpaper of different grit to sand the top coat for better adhesion (adhesion) to the paint, sponge and brush to remove dust.
- Metal brushes for brushing if the cabinet is made of solid wood and the goal is to make the texture of the wood more expressive before painting.
- Sander for the automation of sanding and brushing. By the way, for this you can use a screwdriver or a drill with special nozzles.
- Heat gun and scraper/trowel if the old cabinet has been painted in the past.
- Wood putty for patching holes and irregularities, spatula.
- Thinner, primer, paint tray, masking tape, gloves and other protective items (apron, goggles, respirator, etc.
 ).
). - Narrow and wide brushes for coloring, foam rubber or velor rollers. Ideally - a spray gun.
Prior to the advent of chalk paints, acrylic-based formulations were most in demand. Acrylic paints have a lot of advantages: they are diluted with water and mix easily, dry quickly, do not have a strong smell and are resistant to abrasion. Ideal for painting cabinets in children's rooms, bedrooms and kitchens.
For safety reasons, painting should be done outdoors or in a well-ventilated area, away from flammable objects and potential ignition sources.
Painting details
- If the goal is to paint the cabinet white or any other light shade, the surface must be carefully primed. It is also better to choose a primer for furniture on an acrylic basis, to match the paint.
- Priming is also necessary for chipboard, since this material absorbs moisture strongly (and, accordingly, paint consumption will be large).
 Laminated chipboard, on the contrary, absorbs very poorly and it is better to use a more viscous alkyd enamel for staining.
 - The visual effect of staining also depends on how many layers of paint were applied.
- Semi-transparency is appropriate to emphasize the texture of wood - one or two coats, preferably with a roller, will be appropriate here. More dense staining with a brush involves applying in several layers.
- When combining several colors, lighter shades are applied first, then dark ones. Borders are marked with masking tape. For a smooth gradient, the “light to dark” principle is also used, gradually introducing color pigment.
The top coat after painting the old cabinet can be wax or varnish.
Wax gives depth to the selected shade and a pleasant velvety. However, over time, it wears out, is washed out and needs to be updated. Therefore, it is not suitable as a finishing coat for cabinets in kitchens, bathrooms and hallways.
Water based lacquers give a more durable finish. Such a noble dullness, like wax, should not be expected from them. Even formulations marked "matte" give a slight gloss to the painted surface.
Polyurethane lacquers are ideal for finishing painted cabinets in kitchens and bathrooms, as they form a protective layer on the surface that is more resistant to abrasion and mechanical stress. But apply them only in a well-ventilated area.
Also, for additional patination effects, artificial aging of furniture, you can use additional compositions - varnishes and topcoats of various brands.
Painting is not always a panacea for furniture renovation. It is quite possible that it will be appropriate for the cabinet body, and the facades will need to be replaced. We recommend that you familiarize yourself with the types of furniture facades in order to choose the best option.
How to paint an old cabinet with your own hands?
In any living room we can find a lot of furniture, which is the most important component of any interior.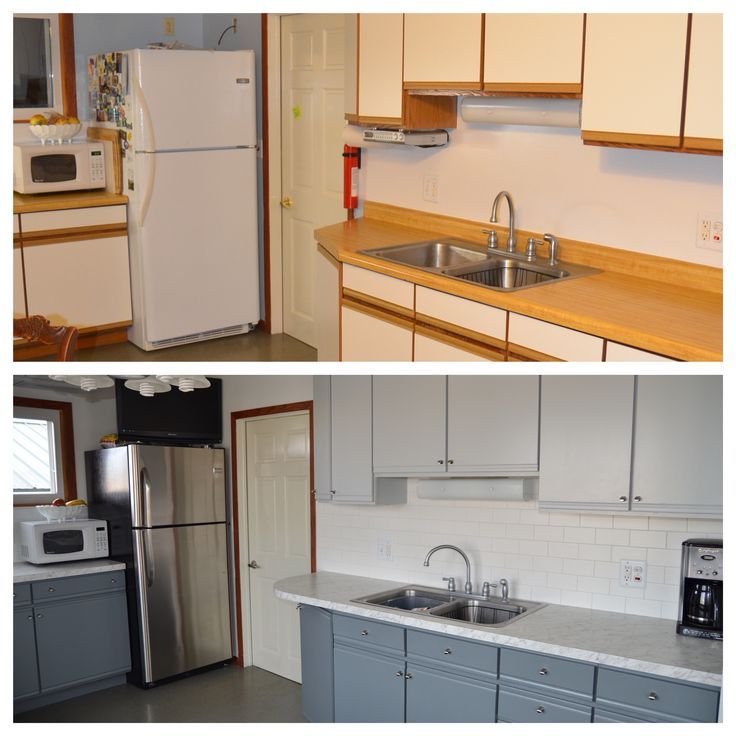 Depending on the purpose of the room, here we can find a variety of chairs, tables, sofas, armchairs and cabinets. This furniture is always in sight and therefore, in addition to its main functions, it must also have an attractive appearance that will decorate the interior of your room. Any thing wears out over time, which is why it is necessary to constantly repair and update your furniture. To update the appearance of furniture, sometimes it is enough to paint it. This option is the most cost-effective and simple. At the same time, everyone who thought about painting the same cabinet made of chipboard with their own hands had a reasonable question: how to paint the cabinet?
3
Contents:
- Preparing the cabinet for painting
- What kind of paint to use
- Priming process
- Tools for painting
- Painting the cabinet
back to contents ↑
Preparing the cabinet for painting
We assure you, any old and shabby chipboard cabinet can shine again. Therefore, you do not need to immediately throw it away, it just needs to be repainted. This is due to the fact that, as a rule, old furniture is of higher quality. It uses natural materials, and therefore such a cabinet has high reliability and durability. The same can be said about another element of the interior, like a chest of drawers or a cabinet.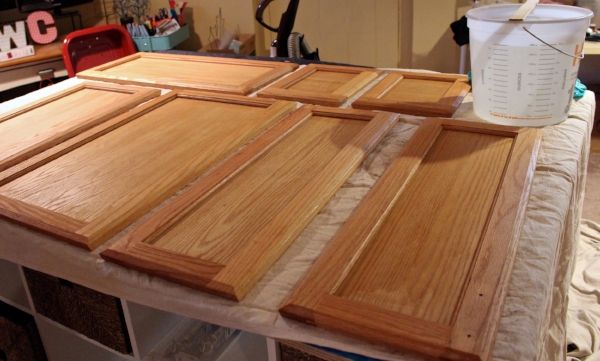 The painting of these elements is carried out following the example of a cabinet, and is also separately described in the article on how to repaint furniture.
It should be noted that the material from which the cabinet is made does not really matter. Of course, here we will find some features, but you can upgrade both a wooden cabinet and a chipboard cabinet. If we talk about the differences, then a chipboard cabinet absorbs less moisture than a wooden cabinet. That is why chipboard will dry longer. On chipboard it is much easier to bring out the color you need, you also need to use a smaller layer of primer than for wooden products.
When preparing the cabinet for painting, we need to remove all removable elements, which are presented in the form of handles, hinges, drawers and doors. We need to get a clean cabinet frame.
All preparation and painting work should be carried out in a well ventilated area, preferably outdoors.
For pre-painting, you will need the following:
- sandpaper with different grits;
- flat brush;
- sponge or cloth.

First of all, we take a sponge or cloth and remove all dust and dirt from the surface of the cabinet. Then we proceed to remove the remnants of old paint and varnish. We remove the old layer of paint using sandpaper. This is done with sweeping circular movements. Cleaning is done first with coarse sandpaper. It is necessary to completely clean the cabinet from all irregularities of varnishes and paints. This will allow the new paint to lie on it in a smooth and even layer.
Coarse-grained sandpaper is excellent for stripping old layers of paint.It is important that you do not remove the veneer layer while you are sanding the surface. Otherwise, you will have to more, and wipe the surface from bumps and holes. Therefore, do not overdo it with the grout.
After the surface of the cabinet has been sanded with coarse sandpaper, you should brush off the dust using a flat brush. In no case do not clean the cabinet or chest of drawers from dust with a rag.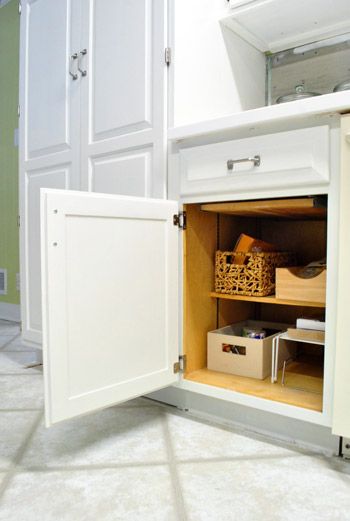 So, you will not be able to get rid of all the dust, and you also run the risk of hammering its remnants into the surface, which will further affect the quality of the cabinet painting.
Then, those places that were not processed with coarse sanding paper, we begin to process using paper with finer grains. After that, we brush the cabinet or chest of drawers again with a brush to remove dust.
After the cleaning of the cabinet is completed, you should definitely thoroughly wash the room in which you work, so that at the time of painting, the room is clean and dust-free. A dusty environment can adversely affect the quality of the painting.
back to contents ↑
What kind of paint to use
If we talk about the type of paint, it is best to give preference to acrylic paints. Such a paint has a bright color, it is practically odorless and it is quite simple to dilute it with water to get the desired color. Plus, this paint is quite easy to wash off, which allows you to correct errors in painting. After the paint dries, the water evaporates and the paint becomes stronger. This point should be considered during the application of several layers.
It is not necessary to paint your wardrobe or chest of drawers the same color. Here you can experiment a little. Take, for example, two colors. For example, take a beige color for the base and a brighter color for the details. If you cannot find the color or shade you need, you can also buy regular white acrylic paint, and then add color to it. So, you can get the desired color and shade. When choosing a shade, you can check how it looks by applying it to a small area of the closet. So, you will determine which color suits you best, and determine its saturation.
Acrylic paint is best suited for painting the cabinetto the content ↑
Priming process
prime the surface. This is due to the fact that the primer will not allow the surface of the cabinet to absorb moisture. This will promote better drying. Also, with a primer, you will not lose the color you need, since when applying paint to an unprimed surface, it does not matter whether it is chipboard or ordinary wood. During drying, the color changes slightly, as part of it will be absorbed into the material.
When it comes to the most suitable primer, it is best to use an acrylic based primer. This is due to the fact that the components of such a primer will interact remarkably with the acrylic paint of your choice.
Surface treatment with acrylic primer is quite simple. You should first read the instructions for using this material. An important point is to take into account the drying time of the soil. Allow the primer to dry completely before painting a dresser or cabinet. It is also important to make clear calculations of the surface that you decide to process. So, you can purchase the amount of material you need.
Prime chest of drawers or cupboard with a roller, in a relatively thin layer. Then leave our chest of drawers or wardrobe for a while to dry completely.
back to contents ↑
Tools for painting
Tools - this is another important question that arises for everyone who decides to paint a dresser or cabinet with their own hands. What is better to paint the cabinet, brush or roller? Of course, here you should take into account your preferences and skills, but we still recommend using a brush. This tool is more reliable and practical. With a brush, you can apply the paint in an even, even layer over the entire surface. Plus, the brush will be a great helper in painting hard-to-reach places.
Walking into a hardware store, you can find a huge selection of different brushes and rollers. The choice of tools is as important as the selection of paint. You should buy only high-quality brushes and rollers. Otherwise, fluff may remain on the surface to be painted, which will fall out of the brush with poor quality.
We recommend that you stock up on brushes with different sizes to make your work easier.
to content ↑
Painting cabinet
We need to carry out the painting process in a well-ventilated, clean room or on the street.
We should apply the first layer of paint, the color of which is lighter than the selected tone. The paint should be liquid, if it starts to harden, dilute it with water.
Surface color may vary depending on how many coats have been applied. When applying one thin layer, we will get a gap in the structure of the tree, which is very suitable for the Provence style.
Learn more about how to paint furniture in the Provence style.
To get a thicker layer, paint should be applied several times. Each layer must be applied after the previous one is completely dry.