Best time to transplant a hydrangea
Planting & Transplanting Hydrangeas | Plant Addicts
Planting hydrangeas in the right location is extremely important. Location can make the difference between growing a lush, lavishly blooming shrub and one that struggles and produces scrawny blooms.
For information on choosing the right hydrangea for your climate (planting zone), see Choosing the Right Hydrangea.
Where To Plant Hydrangeas
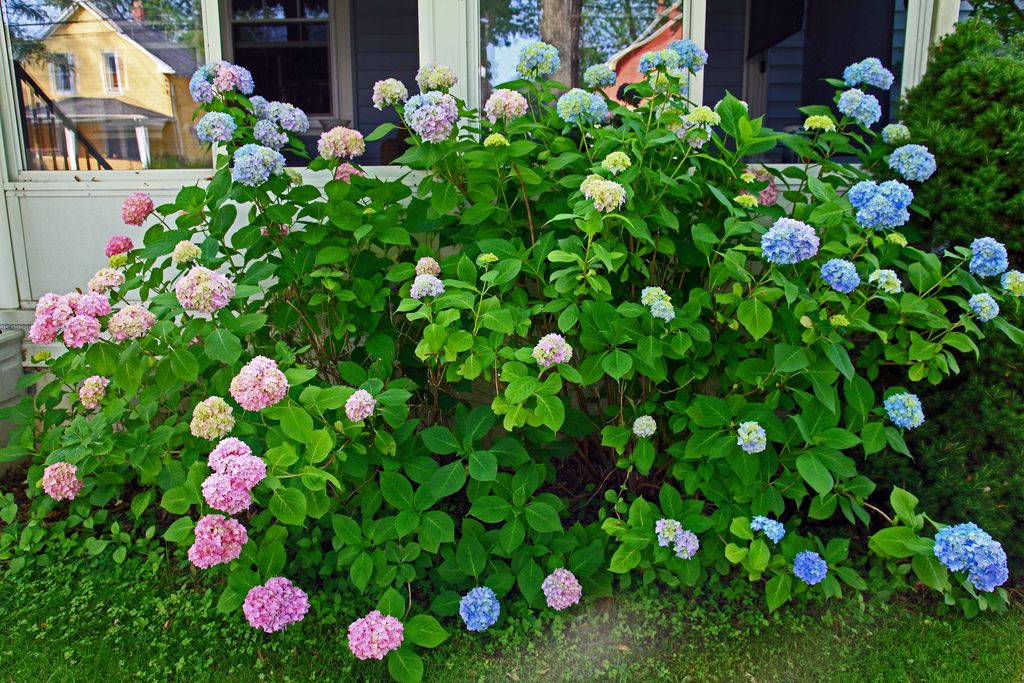
All hydrangeas will bloom and grow well in morning sun and afternoon shade. This is especially true of the commonly grown Hydrangea macrophylla. Macrophylla hydrangeas are the blue and pink mopheads and lacecaps.
The further north one lives the more sun hydrangeas need and can withstand. While mophead hydrangeas can grow well in all-day sun in Chicago, they would struggle to survive in afternoon sun in Atlanta. Some visitors to this site who live in cooler climates such as the northeast or northwest report that their hydrangeas do beautifully in full sun all day.
No hydrangea will do well in HEAVY shade, such as under a shade tree. The blooms will be sparse and will not develop fully.
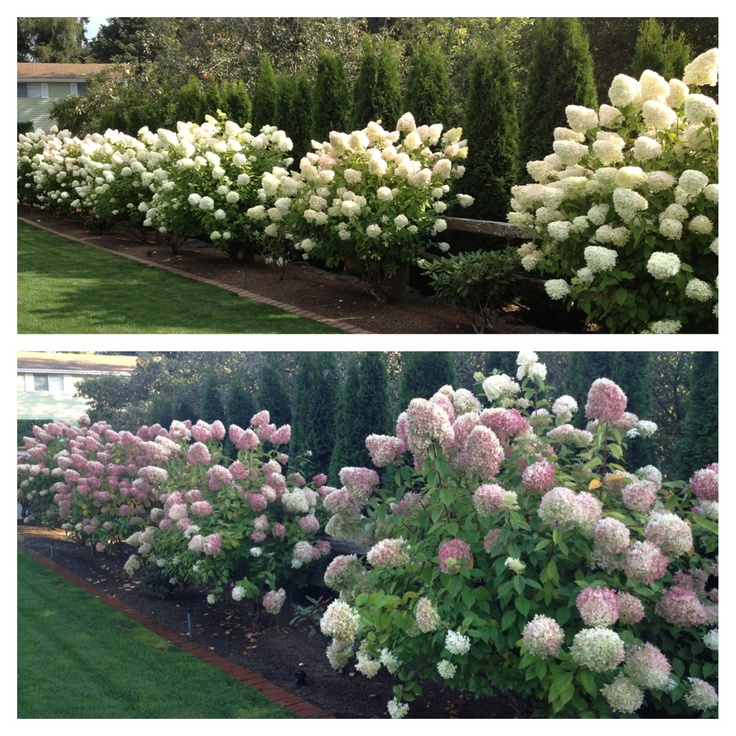
If your landscape is mostly sunny (and hot), you may wish to grow the PeeGee (paniculata) hydrangea, which thrives in all day sun as long as it receives adequate moisture. PeeGee hydrangeas actually need at least 5 hours of sun per day to bloom well.
The Oakleaf hydrangeas will also grow in sun or shade, but the blooms last longer if they get a little afternoon shade in hot climates. The leaves on the Oakleaf hydrangeas will "color up" best in the fall if they receive some sun.
How To Plant Hydrangeas
VERY IMPORTANT: Choose a location where your hydrangea can reach its full size without pruning. For normal sized hydrangeas, expect the plant to reach at least 4 ft. X 4 ft. Hydrangeas are almost impossible to keep pruned to a smaller size than they ultimately wish to grow.
Plant in well-drained soil! If soil is heavy, add roughage such as pine bark mulch (Make sure it's ground BARK not ground WOOD).
Do not over water, esp. in clay soil. This can lead to root rot.
Do not plant too deeply. Plant at the same depth the hydrangea was planted in the pot.
Plant in early summer or fall.
Transplant a hydrangea when it has become dormant and has lost all of its leaves (late fall or winter).
More Tips For Planting Hydrangeas
Place the hydrangea in an area where it can get plenty of moisture. Supplemental moisture is especially important the first year or two and during droughts.
Hydrangeas planted under a tree often fail to thrive. This is because trees roots are very aggressive and are drawn to the rich, moist soil usually provided for hydrangeas.
No matter how many of the tree roots you remove to make room for the hydrangeas (and be careful not to remove too many), the roots will all be back within a year (unless you remove too many and kill the tree!).
Also, as mentioned above, under large hardwood trees the light is often insufficient for growing hydrangeas. If grass won't grow in the area, hydrangeas probably won't either.
The Oakleaf hydrangea is more temperamental about "wet feet" than the other types. Make sure that the Oakleaf will get perfect drainage in the area in which it is planted or the roots may rot. This is especially true when it is first planted. After the Oakleaf becomes established, it is very easy to grow.
Best Time To Plant Hydrangeas
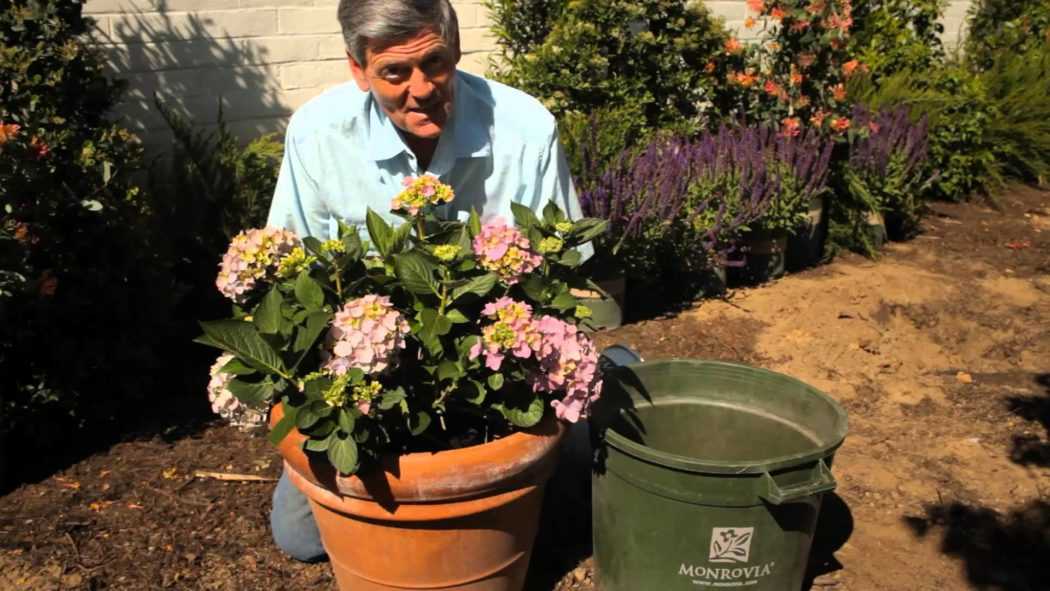
Hydrangeas purchased from a garden center have been growing outdoors in a pot. They can be planted at any time of the year. However, to get good results, keep these considerations in mind:
Whenever possible, plant in early summer or fall. Don't plant in early spring when frosts are still possible. I've lost two leafed-out plants that were killed when a late frost hit them.
Don't plant a hydrangea during the hottest part of the summer unless it can't be helped.
After planting a hydrangea, DO NOT LEAVE IT ALONE. Too often we rush to get our shrubs planted before we leave on vacation.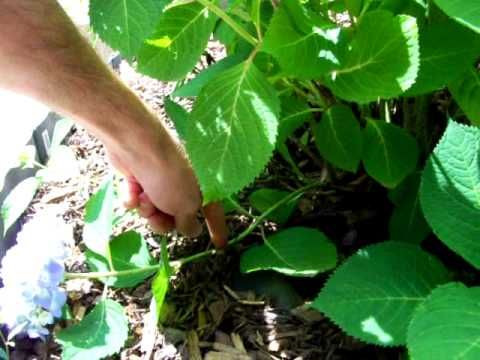 Be on hand to give it some TLC and to keep it well watered.
Transplanting Hydrangeas
Most people know that "transplanting" means digging a plant up from one location and planting it in another.
Authorities agree that the BEST TIME to transplant hydrangeas is when they are dormant, i.e. after most of the leaves have fallen off the hydrangeas. When I lived in SC we transplanted hydrangeas in late November to late December, but if your ground isn't frozen, January and February are fine, too.
Transplanting Hydrangea Tips
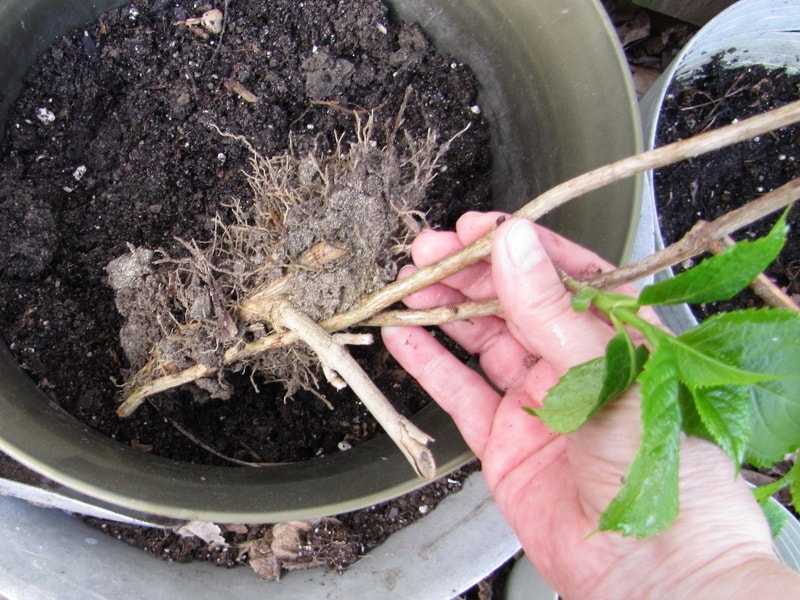
When digging a hydrangea to transplant, dig up as much of the rootball as possible. Since the roots are fibrous and form a ball filled with soil, the plant may be VERY heavy, so you might want to get some help with this.
Replant the hydrangea in an area that is shaded during the afternoon. This will not only help the plant to survive, but it is the preferred location for hydrangeas, especially in the South.
If you transplant while your hydrangeas are dormant (the best time), water them deeply one time. They may need no more water until spring when warmer weather arrives.
Hydrangeas must be kept watered very well the first and second summer after they are transplanted.
The best way to water is deeply. Use a hose to water rather than a sprinkler system. However do not over-water. Watering every day can be just as destructive as allowing the plants to dry out.
If the leaves wilt and the soil is moist enough, mist the leaves each day until they recover.
If your soil does not drain well, do not allow it to remain soggy around the hydrangeas. This is especially true for oakleaf hydrangeas which will rot in a heartbeat if they stand in soil that is wet when first planted.
This page contains affiliate links to products on Amazon. We may receive a commission for purchases made through these links.
Shop Popular Hydrangeas
When can you transplant hydrangeas? Tips for moving them safely |
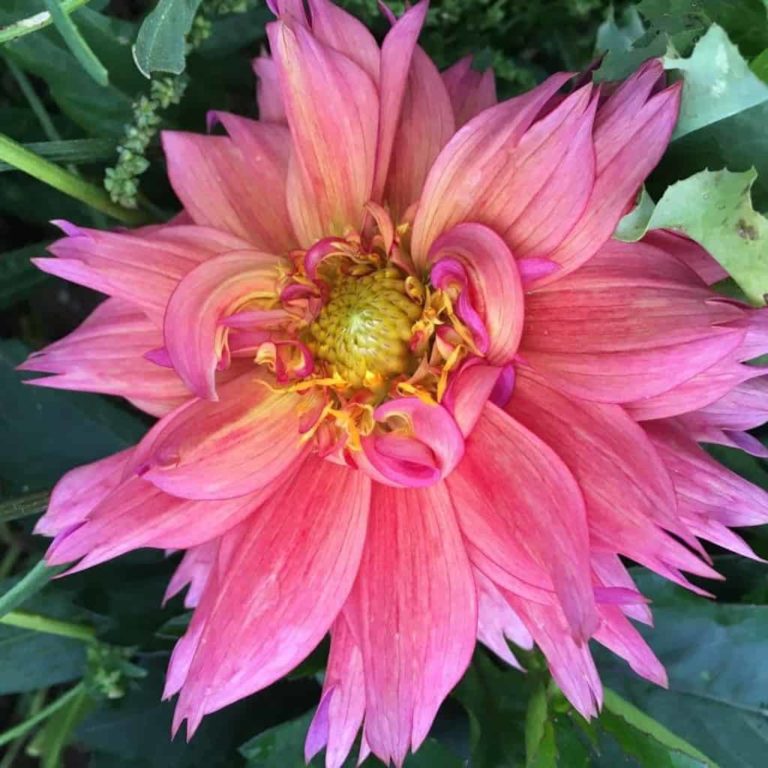
(Image credit: Getty Images)
When can you transplant hydrangeas? It's an important question, as if you do it at the wrong time of year you’ll risk losing these prized plants, which take a number of years to reach maturity.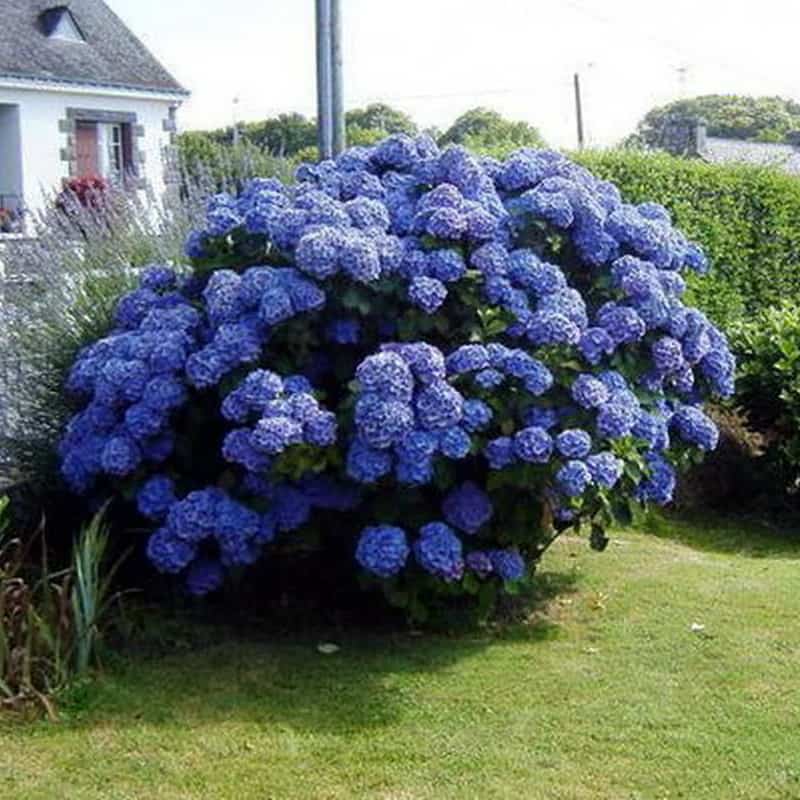
It’s not difficult to learn how to grow hydrangeas. These resilient plants cope well with most soil types, can be grown in full sun or partial shade, and require little maintenance.
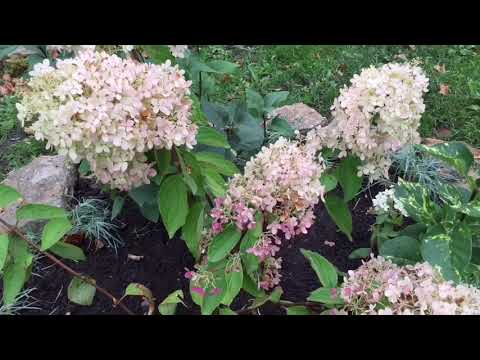
‘No longer seen as old-fashioned, hydrangeas are again championed and valued for their use in our gardens, and are a clear favourite for their sheer variety, reliability and blowsy blooms,’ says Period Living’s gardening expert Leigh Clapp.
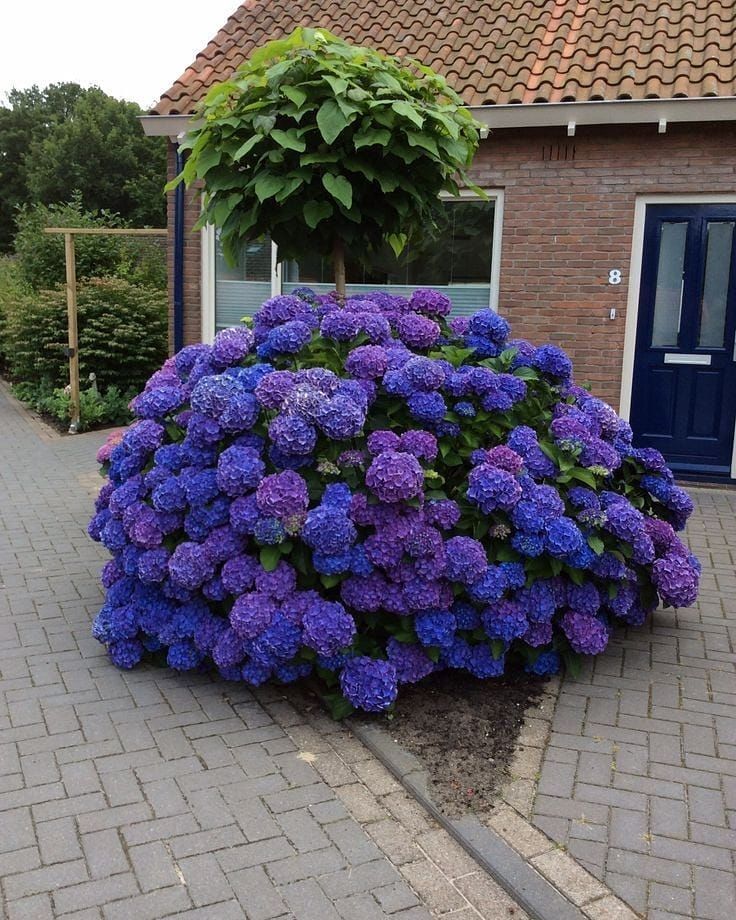
‘Grown in sun or semi-shade, either on their own, in the border or as an informal hedge, their voluptuous, long-lasting blooms provide loads of color in shades of pink, blue, purple and white, as well as creamy white and astringent greens.’
If you feel your hydrangea isn’t thriving in its current spot, or you would like to move it to a more prominent area of the garden, then transplanting it is the best option.
Always think about what to plant with hydrangeas to get the best results – there are many beautiful varieties that will make striking companion plants.
When can you transplant hydrangeas?
'As long as you move your hydrangeas at the right time of year, you should find they cope well with being transplanted,’ says Lucy Searle, Editor in Chief of Homes & Gardens.
‘However, moving any plant always presents a risk of over-stressing the plant and losing it, so make sure that the new spot is suitable.’
Much like the issue of when to plant hydrangeas, transplanting them is best when they are dormant. In a cooler climate, this is most commonly during the fall, but in warmer areas, you can often transplant them over winter, as long as the ground isn’t frozen.
Wait until the flowers have died and the leaves have fallen before moving your plant.
As the weather gets colder, learn how to winterize hydrangeas to protect them from the elements.
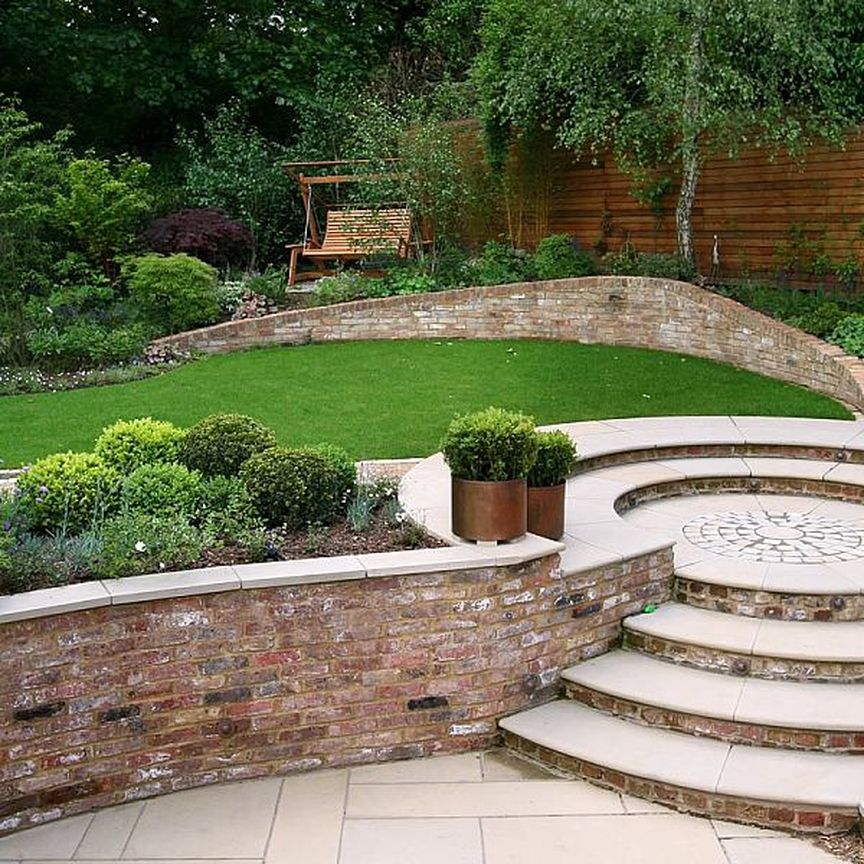
(Image credit: Leigh Clapp)
Transplanting hydrangeas in spring
Hydrangeas can also be successfully transplanted in spring, before the first flush of growth. In fact, this can be a great time to move the plants, as they will soon come out of hibernation and settle in for the new season.
‘Your USDA plant hardiness zone will influence the best time to transplant hydrangeas during the spring,’ says Searle.
‘For warmer zones 7-9, it’s best to move it in early spring, during March to April, but in cooler zones 4-6, mid to late spring is a good time – ideally by mid-May.’
Transplanting hydrangeas in summer
In general, it’s not advisable to transplant hydrangeas in the warmest months of the year – although if it cannot be avoided, then it is possible.
However, do not move your hydrangea during a heat wave or period of drought. ‘The high heat and lack of moisture will make it difficult for the plant to settle into its new spot, and it may also suffer from transplant shock,’ says Searle.
Can you transplant hydrangeas in July?
If necessary you can transplant hydrangeas in July, but it is not the best time of year to do it, and you risk losing the plant.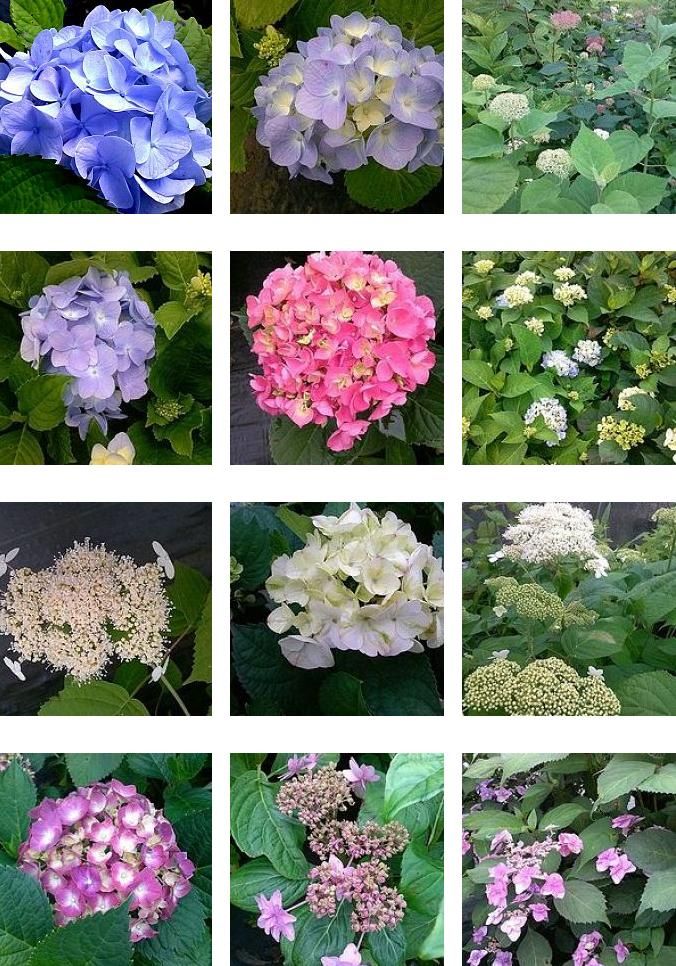
If you must move your hydrangea in July, then make sure it’s not during a particularly hot spell.
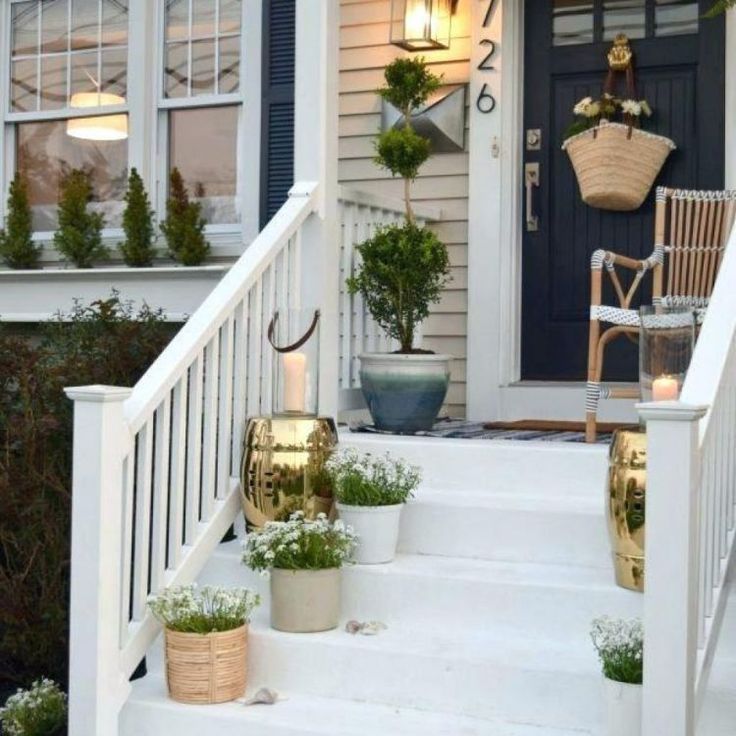
(Image credit: Proven Winners )
How can I avoid hydrangea transplant shock?
Transplant shock is a common side effect of moving plants. The telltale signs are wilting and falling leaves, and hydrangeas not blooming. In severe cases, your plant may not recover.
‘You can minimize the risk of hydrangea transplant shock by digging up as much of the root ball and surrounding soil as possible. Too much damage to the roots can prove fatal,’ says Searle.
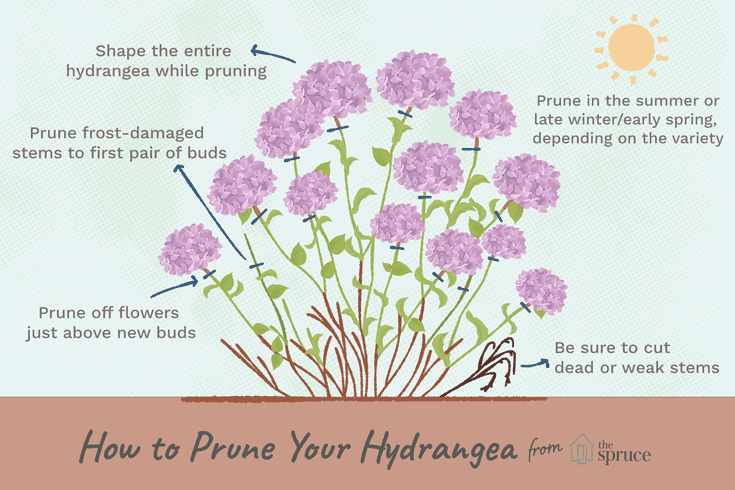
‘Although knowing how to prune hydrangeas is vital, you must avoid pruning it at this stage as it could place too much stress on the plant.’
Make sure you keep your hydrangea well watered until it settles into its new spot. Once it starts to flower, you can be confident that the hydrangea has transplanted well.
How do you move and replant hydrangeas?
When moving and replanting hydrangeas, the first thing you need to consider is whether the new spot offers the right conditions for your plant.
‘Hydrangeas like reliable moisture in the summer, so don’t plant them in a dry position,’ says Matthew Pottage, curator at RHS Wisley .
Avoid a south-facing spot, and ensure there is some protection from frosts and shade from the blazing afternoon sun.
Some species of hydrangea tolerate full sun, but if yours is more sensitive, it will become stressed by drought in the summer.
Once you have chosen a good new spot, it’s important to get the ground ready before digging up the plant.
‘In light soil, add in some organic matter at planting to help with moisture,’ says Clapp. Remove any large stones from the hole, and consider adding a sprinkling of mycorrhizal fungi – available from Amazon – to help the roots to establish.
If the plant is large, you may need to gently tie around its branches to make it more manageable to handle. Make sure you dig up as much of the root ball as possible.
Carefully relocate to its new spot, using a helper if the plant is large.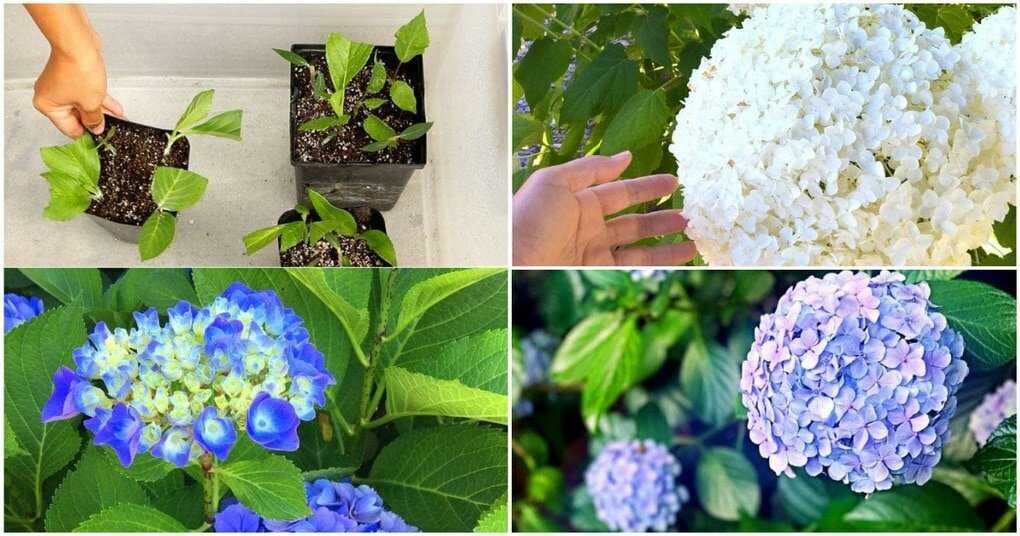 Place in the hole – avoiding planting the hydrangea deeper than its previous location – and backfill with soil.
Water in well and mulch to add extra nutrients, keep in moisture and help suppress weeds.
If you are moving the hydrangea during cooler, wetter weather, then you won't need to water often. However, in warmer weather, do not let the soil dry out, and water regularly until established.
As editor of Period Living, Britain's best-selling period homes magazine, Melanie loves the charm of older properties. I live in a rural village just outside the Cotswolds in England, so am lucky to be surrounded by beautiful homes and countryside, where I enjoy exploring. Having worked in the industry for almost two decades, Melanie is interested in all aspects of homes and gardens. Her previous roles include working on Real Homes and Homebuilding & Renovating, and she has also contributed to Gardening Etc. She has an English degree and has also studied interior design. Melanie frequently writes for Homes & Gardens about property restoration and gardening.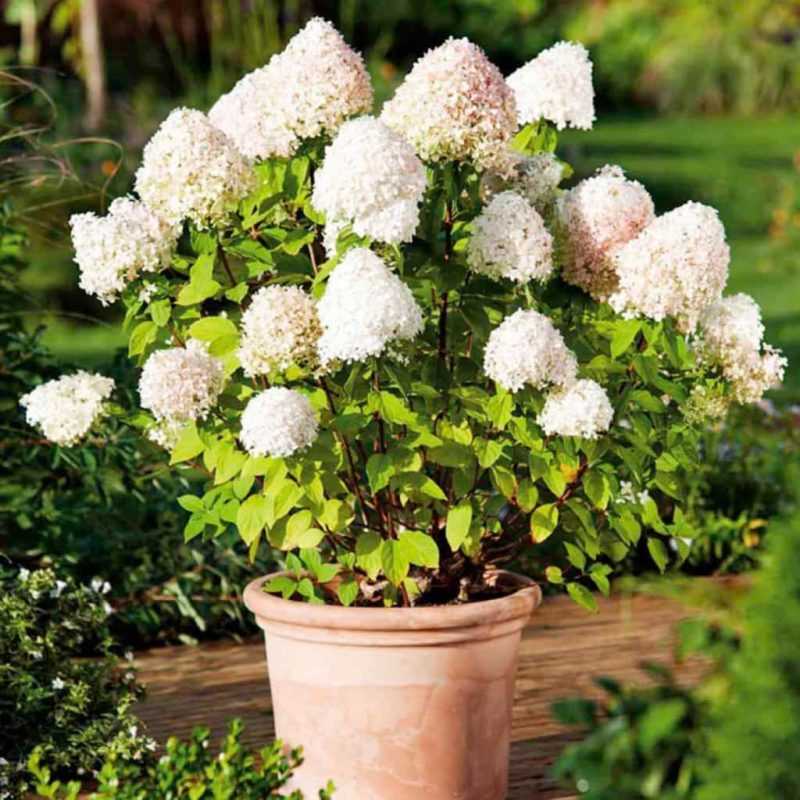
terms, schemes, care after the procedure
Any horticultural crops need to be replanted periodically for one reason or another. As for the hydrangea, it is advisable to transplant an adult plant to another place every 5-10 years. The need for transplantation is due to the fact that the bush grows over time, depletes the soil, due to crowding and lack of nutrition, flowering becomes small and inconspicuous. However, the reason may be initially incorrectly selected place with unsuitable conditions for growing. In order for the shrub to take root well in a new place, let's take a closer look at how to properly transplant hydrangea (panicle, tree-like and large-leaved). 9Ol000 simple transplantation and division of the bush
- 3.1 Transplantation scheme with a whole earthen ball
- 3.2 Instructions for transplanting hydrangeas with reproduction (dividing the bush)
When to transplant hydrangeas to a new place: choosing the timing
Choosing the right time is very important for the successful survival of plants.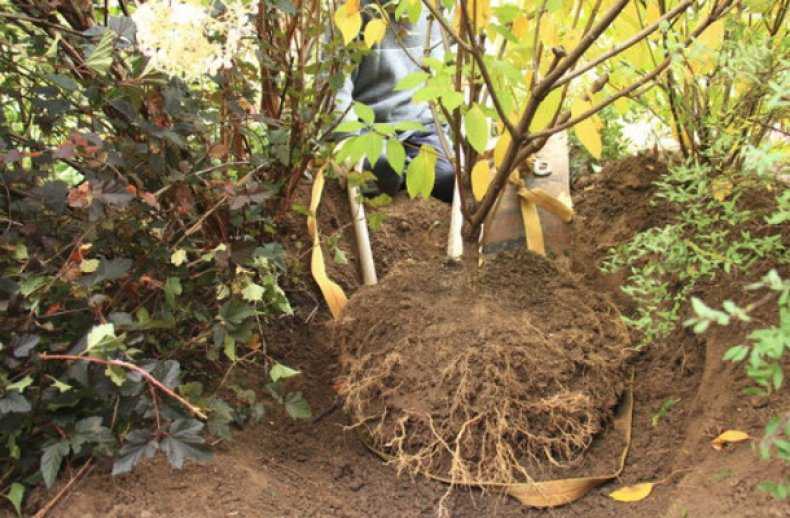 It is believed that it is better to transplant hydrangea in the open field in spring (after snowmelt and before the buds swell), it is during this period that it is easier for the plant to take root and adapt to a new place. However, there is also nothing unnatural in transplanting hydrangeas in the fall, if you perform the procedure at the right time, you can achieve a good result without harming the plant!
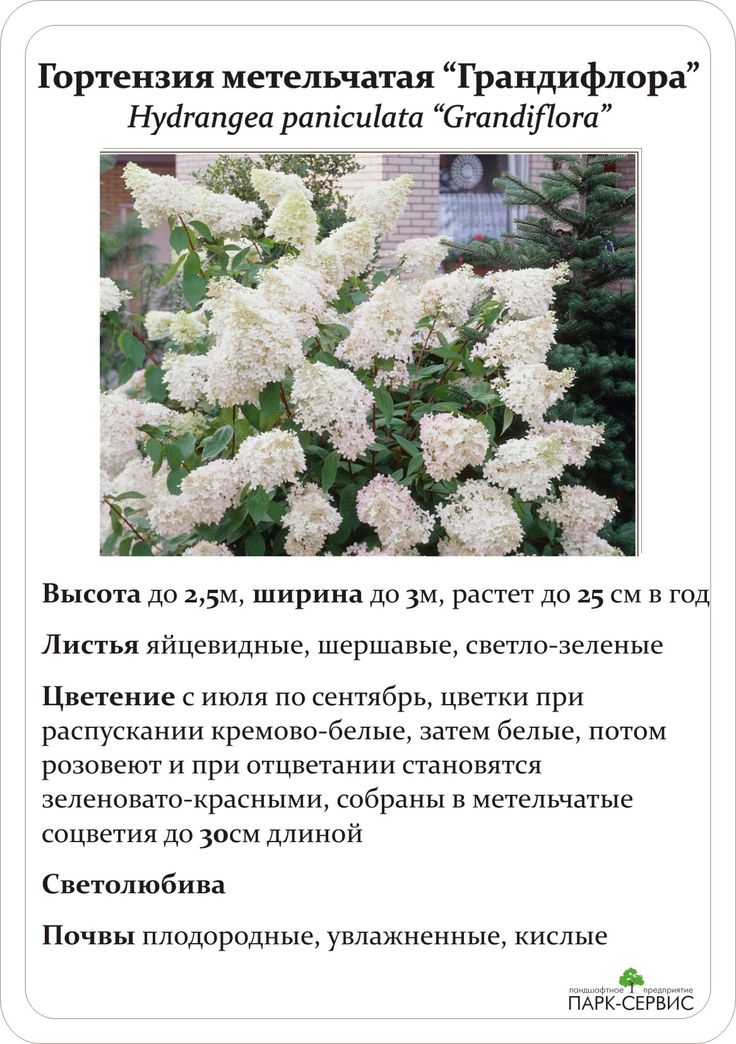
Important! Paniculata and tree hydrangea can be transplanted both in spring and autumn. But the large-leaved (the most capricious species) is highly recommended to be transplanted only in the spring, otherwise it is likely that it will freeze out (however, if you live in a region with a southern, mild climate, then you can certainly do this in the fall).
So, the optimal time for transplanting hydrangeas is early autumn:
- in the Middle lane (Moscow region) - it is optimal to transplant a bush in early September;
- in Siberia, in the Urals, in the North-West (in the Leningrad region) - the procedure is performed at the end of August or at the beginning of September.
- in the Southern regions (Krasnodar Territory) - approximately in the first half of October.
Important note! Only adult hydrangeas with a well-developed root system can be transplanted in the fall (so it has time to take root before frost).
If you have a young hydrangea, then it is better to wait until spring, so you will definitely be sure of a successful development of events.
Preparing for the autumn transplantation of hydrangeas to another place
Preparatory work for transplanting shrubs consists in choosing a site with suitable conditions and digging, filling the planting hole.
Choosing a new place
Choosing a new place is a key stage of the autumn event, because the survival of the plant, future well-being and beautiful flowering depend on it. After all, hydrangea is often transplanted to another place for one simple reason - it was previously planted on a site with unsuitable conditions.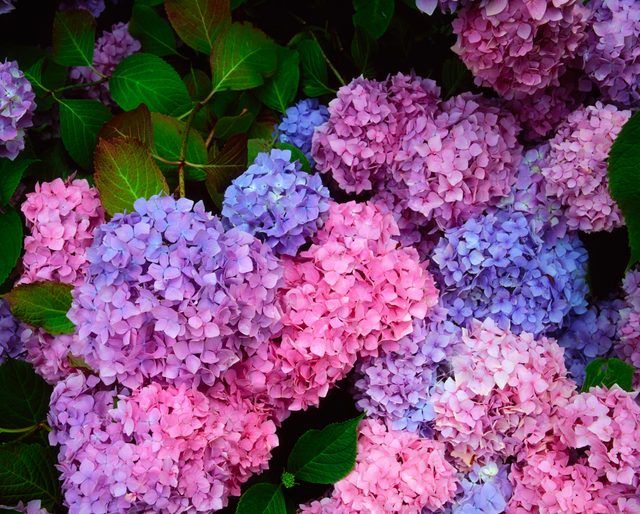
Basic rules for choosing a new hydrangea transplant site:
- Lighting is one of the most important factors. Sunlight must be soft, diffused. The most suitable location, which is illuminated by the sun in the morning and evening, and shaded in the afternoon.
- The soil for growing hydrangeas must be loose, moisture-intensive, nutritious, slightly acidic.
- The place should not be swampy, located in lowlands where water accumulates.
- It is also desirable that the new location be protected from the wind.
- Not suitable place under fruit and ornamental trees, next to shrubs with a superficial root system.
When choosing another location, remember that the hydrangea often leans during flowering due to its heavy flowers. Therefore, it should not be transplanted too close to paths, beds or other garden objects.
Planting hole preparation
After you have chosen the most suitable place in the country house or private house, you should start preparing the planting pit. At the same time, it is recommended to prepare it 4 or at least 1-2 weeks before the event.
As mentioned above, suitable soil for hydrangeas must necessarily have a slightly acidic reaction (ie pH 5-6.2). On land with neutral or alkaline soil, the shrub will grow and bloom poorly. Therefore, it is very important to fill the planting hole with suitable soil!
First of all, of course, you need to dig a planting hole: the optimal depth and width of the hole is about 50-60 cm . The top fertile soil of the soil (the first 20 cm) is recommended to be added to the soil mixture for filling the pit.
Tip! If you want to transplant several hydrangea bushes, be sure to keep a gap between them. The recommended distance between bushes is about 100-150 cm. It is optimal to put the following components in the pit:
- It is useful to put coniferous litter on the bottom (it will additionally acidify the ground).
The thickness of the layer is about 3 cm. After the litter, ordinary earth should be laid in a layer of about 10 cm. Instead of peat, you can use purchased acidic soil, for example, for blueberries.
- It is very useful to add mineral fertilizers to the prepared soil. When transplanting in the autumn, it is recommended to add potash and phosphorus fertilizers, for example, superphosphate (about 30-40 g per pit) and potassium sulfate (20-30 g per pit). Mix everything well.
- Fill the planting hole 2/3 full. Be sure to leave soil to fill the hole after transplanting.
Tip! After filling the planting hole, be sure to water the planting hole with normal water to settle the soil.
How to transplant hydrangeas in autumn: simple transplanting and dividing a bush
Transplanting shrubs in open ground is a rather traumatic process for a plant that, if unfortunate circumstances, will endure the procedure unfavorably.
In order for the event to take place with minimal losses, it is important to do everything right. In general, we can say that transplanting a hydrangea bush is quite simple. However, the scheme of the procedure may differ depending on whether you want to simply transplant the whole bush, or first propagate by dividing the bush.
Important! Dig up hydrangea immediately before transplanting, otherwise the roots will dry out quickly. If you need to transport the bush to some other site, then wrap the earth ball with a damp cloth or newspaper, place it in a bag and transplant it as soon as possible.
Transplantation scheme with a whole earthen clod
If you are interested in transplanting a whole bush without propagation by dividing the bush, then the event is carried out as simply as possible. The following instruction will help to transplant hydrangea (paniculata, tree-like, large-leaved) to another place:
- The day before (or a few hours before) the bush should be watered abundantly so that the soil is moist and does not fall apart.
- Carefully dig around the hydrangea bush in a circle (i.e. around the perimeter of the crown), while leaving a distance of 25 cm from the center of the bush.
- Move the whole earthen ball to a new location, place it in the center of the planting hole.
- Fill the earthen ball with prepared soil.
Important! The root collar must be at ground level! You can not deepen the neck, otherwise it may rot.
- Carefully compact the seat.
- Water generously (about 3 buckets per bush). In this case, it is desirable to pour water in portions (about half a bucket) and pour in a new portion after the water is absorbed. After a couple of hours, it is recommended to shed the earth again. Such watering will help to avoid voids in the ground after transplantation.
Instructions for transplanting hydrangea with reproduction (bush division)
paragraph above.
After digging, the root system must be cleared of soil. If you can't do it by hand, try rinsing with water. Now move on to dividing the hydrangea bush. Next, the bush is divided (by hand or cut with a knife, an ax) into several parts, while each part must have renewal buds. The instrument for dividing must be clean and disinfected. It is desirable to treat the places of cuts with crushed activated carbon or charcoal, or with ordinary brilliant green. Now you need to plant each hydrangea bush in a planting hole. Since seedlings are obtained with an open root system, it is necessary to make a mound in the center of the planting hole. Simply place the cutting roots on the mound. The roots should be even, not bent. Then fill each bush in the hole with potting soil and then gently tamp down the soil. After that, abundant watering is carried out, as in a normal transplant without dividing the bush.
Caring for hydrangeas after transplantation in the fall
High-quality care in the fall after transplantation will help hydrangeas adapt faster and better in the open field, take root in a new place, and prepare for winter.
So, here's how to take care of the shrub in the autumn after the procedure:
- Immediately after the procedure, it is very useful to shed the plant with a solution of a growth and root formation stimulator, for example, Kornevin, Heteroauxin, Epin, Zircon.
- It is also necessary to prune the bush immediately after the event. Thus, the root system and the aerial part are leveled, due to which rooting will occur faster.
- A few days after transplanting to another place, be sure to inspect each hydrangea bush. If the earth in the near-trunk circle has settled, then be sure to fill it up to the previous level.
- After a few days, when you are sure that the earth has not settled (or you have filled it up to the previous level), you should mulch the circle around the hydrangea. The recommended layer thickness is about 5-8 cm, the optimal mulching material is high-moor sour peat, coniferous litter, conifer bark. The listed materials will favorably affect the acidity of the soil in open ground.
Mulch will not only protect the root system from the cold, but will also retain moisture in the soil needed for rooting.
- If warm, sunny weather is expected, it is recommended to shade the bush for the first 10-14 days after transplanting. For example, it is possible to build a temporary frame on the south side and stretch non-woven material (lutrasil) or gauze.
- If the autumn turned out to be dry and hot, it is necessary to periodically repeat watering after transplantation.
By the way! Autumn is a time rich in gardening, during this period it is necessary to devote time to almost any perennial plant in order to prepare it well for winter. What to do with hydrangeas in the fall is described in this material.
While repotting is often recommended in the spring, there are significant benefits to doing it in the fall! Firstly, the shrub does not need to increase its green mass, which means that it can easily direct resources to rooting in a new place, secondly, you can enjoy beautiful flowering next year, and thirdly, it is much easier to prepare (the earth is warm and malleable, mild weather conditions).

when is it better (terms) and how to transplant correctly
For most summer residents, for various reasons, but with a certain frequency, it becomes necessary to transplant various plants. This time, if you are already reading this article, you most likely need to seat or transplant the hydrangea to another place. Correctly?
Well, then we will carefully and in detail understand why, when and how to transplant hydrangeas in spring and autumn, namely, we will get acquainted with the terms and rules for planting flowering shrubs.
Contents
- 1 Why transplant hydrangeas: why do you need to do it
- 2 When is it better to transplant hydrangeas: in spring or autumn, is it possible in summer
- 3 How to transplant hydrangeas to another place: rules for choosing and preparing a planting pit
- 3.1 Location in the garden
- 3.2 Planting hole
- 4 Transplanting hydrangeas to a new location: step-by-step instructions
- 4.
1 Digging and transplanting together with an earthen clod
- 4.2 Transplanting with dividing bushes
- 5 Hydrangea Care after a transplant
- 5.1 Why does hydrangea do not bloom
Why transplant hydrangeas: why you need to do this
(5-10 years), Hydension grows, it ceases to grab it, it ceases to grab it places (light) and nutrition, the flowers become smaller, the shrub ceases to please the eye. What to do, how to return it to its former charm?
Of course, there are other reasons for transplanting hydrangeas. For example, you urgently need to free up space for some kind of building, or you decide to create a beautiful composition in another place.
And even more often, hydrangeas have to be replanted because they simply do not grow and bloom in this place, because. it turned out to be inappropriate or you initially made the wrong fit.
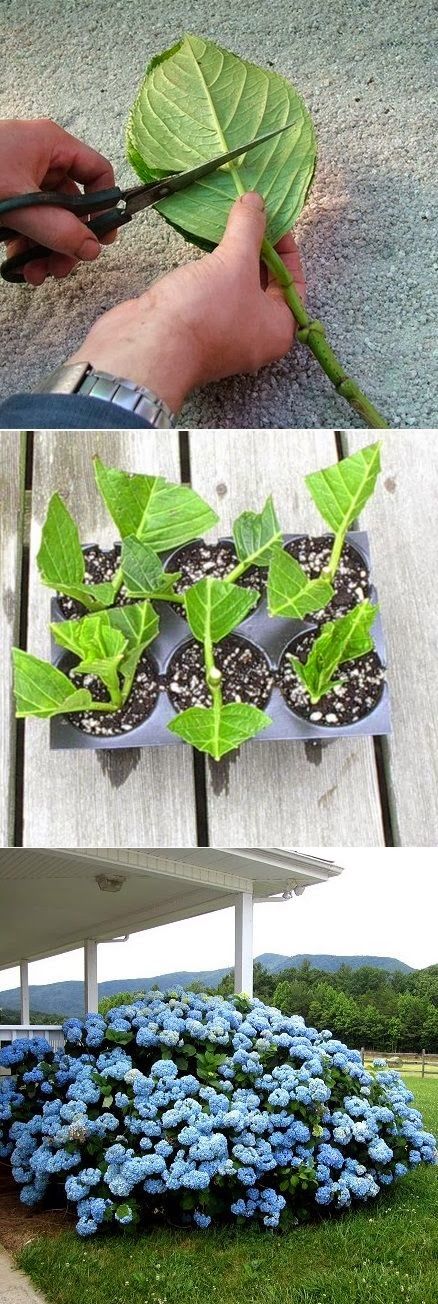
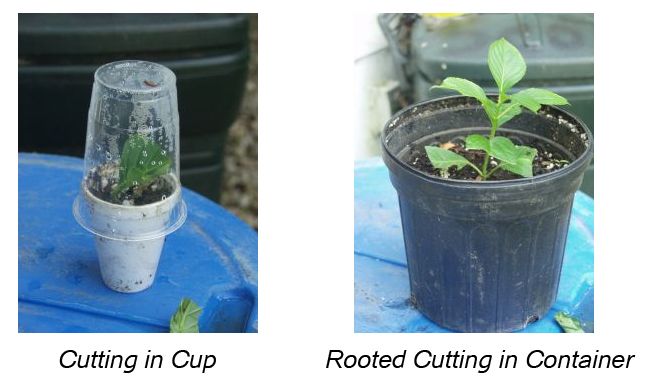
Alternatively, you can propagate Hydrangea using one of the vegetative methods, for example, cuttings .
Video: hydrangea propagation by cuttings0029 propagate hydrangea by layering .
However, there is another, easier way to kind of rejuvenate your flowering shrub, namely its division and / or transplantation (together with a clod of earth, if you do not divide) to another place where all conditions will be created for hydrangeas for luxuriant flowering. Actually, in the case of propagation by layering, you will also have to plant (replant) a bush.
Important! Almost all perennial plants (flowers) and especially shrubs (including berries) need to be replanted periodically to new places.
The site also has several detailed materials:
- peony transplant ;
- lily transplant ;
- raspberry transplant ;
- currant transplant ;
- strawberry transplant .
When is it better to repot hydrangeas: in spring or autumn, is it possible in summer
Some gardeners find that hydrangeas tolerate transplanting perfectly at any time.
However, it is believed that it is desirable to transplant and even more so divide shrubs in spring, and not in autumn, because it is always difficult to predict when winter (frosts) will come, and during the summer and autumn the shrub will definitely take root.
Important! Moreover, it is not recommended to replant large-leaved hydrangea in autumn, because. it may simply not have time to take root before frost, because this shrub is the most frost-resistant and necessarily requires a thorough shelter for the winter.
Of course, if you are a resident of warm southern regions, then this does not apply to you.
As for when to transplant hydrangeas in the spring , it is better to do it, while the bush is sleeping (the buds are not swollen) , in other words, in the early spring, but already at positive temperatures and , naturally, after , how the snow will melt and melt .
So, in the Middle lane (Moscow region) it is possible to carry out the procedure already in April - early May.
It is highly undesirable to replant a shrub that has budded, or even more so when it is already in bloom (ie in summer). This will necessarily negatively affect the duration and quality of survival.
On the other hand, it is in autumn, as a rule, that most flower growers are engaged in transplanting hydrangeas to another place.
As for the approximate dates, in the Middle lane (Moscow region) hydrangeas are transplanted at the end of summer (August) - early autumn (September), in the South of Russia transplantation can be carried out even in October.
Video: transplanting hydrangeas in autumn
How to transplant hydrangeas to another place: the rules for choosing and preparing a planting hole
a good place to plant and choose the right soil mixture so that the shrub quickly and well takes root in a new place.
Place in the garden
Finding a site for growing hydrangeas is not easy. It is optimal to find a place where in the morning or in the evening the flower rejoiced at the sun , and most of the time rested in light shade (especially at lunchtime).
By the way! Despite the fact that it is believed that hydrangea is a shade plant, it will bloom profusely only in a relatively bright place (especially paniculate).
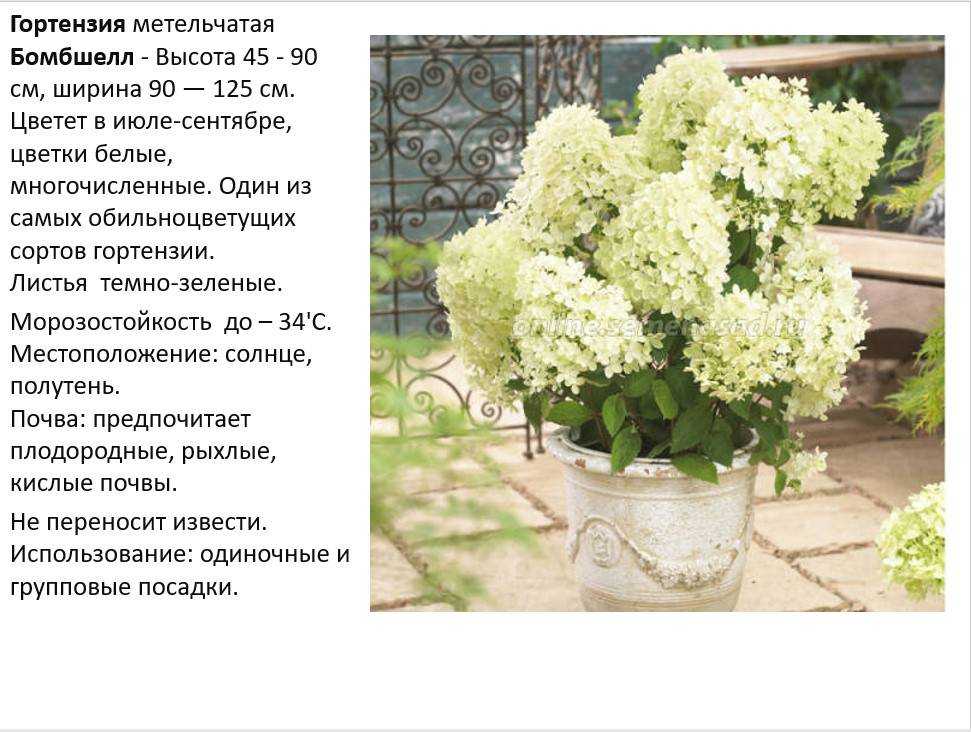
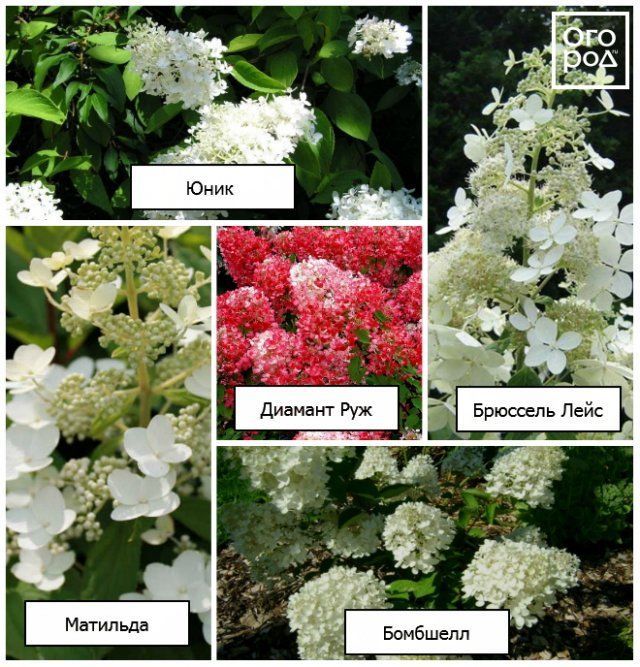
However, varieties of hydrangeas have their own preferences.
So, panicled hydrangea is better to plant in light shading , in too sunny place it will fade faster. In addition, the plant is very demanding on watering, and in the bright sun it will be difficult to maintain constant humidity (you will have to water it quite often).
Important! If you have a very hot climate with a burning sun, then, of course, you cannot plant hydrangeas in an open place, it is better to find a place at least in partial shade.
But large-leaved hydrangea - real shade plant , it can be planted in partial shade.
It is also very important to choose a place that is well protected from the winds, otherwise east or north hurricanes will simply break all your flowers.
It is optimal to find a place near the fence or plant in the background of the alpine slide .
When choosing a specific place in a summer cottage, you should take into account that you need to plant shrubs near garden paths at some distance (preferably about 1 meter from them), otherwise the sprawling branches of the shrub during their abundant flowering will block your path and you will have to tie up.
Planting under the trees is also not worth , otherwise the plants will not have enough nutrient moisture and they will begin to compete for it among themselves.
If you do not want the hydrangea to grow alone, then it will be beautiful to plant it nearby or next to with garden jasmine (mock orange), spirea or lilac .
Planting hole
The soil for planting hydrangeas requires loose and fertile soil.
And most importantly, hydrangea will grow well only on slightly acidic soils (5-6.2 pH).
The planting pit itself, of course, should be done in advance, at least a couple of weeks before the X day (or better, a month or a season in advance).
To make a suitable slightly acidic substrate, you need to prepare a potting mix based on acidic high-moor (brown) peat. coniferous sawdust , coniferous litter (forest ground) or pine bark (but it is better to use it as mulch) will also work well. In addition, compost or humus can be added to the mixture from organic fertilizers, from mineral fertilizers - superphosphate (30-40 grams) and potassium sulfate (20-30 gr), from nitrogen - ideally ammonium sulfate (15-20 gr) or 15-20 grams (but only during spring planting!).
Do not forget to mix everything thoroughly with the ground.
Top garden soil (20 cm) that you have left after digging the hole is also good for adding to the hole. So the hydrangea adapts more easily (familiar soil).
Important! Dolomite powder , lime or wood ash, , must not be added to the substrate under any circumstances. are deoxidizers , and we need, on the contrary, acidifiers.
The size of the planting hole depends on the size of the seedlings themselves, as a rule, it is 50-60 cm deep and 50-60 cm wide.
If you plan to plant several plants, then plant at a distance of at least 1-1.5 meters, because. bushes, as you already understood, grow quite strongly.
In principle, transplanting hydrangeas, namely preparing a planting hole, differs little from ordinary planting hydrangeas, except that in this case you have a seedling with a closed root system.
By the way! The site has articles about spring and autumn planting .
Transplanting hydrangeas to a new location: step by step instructions
Please note! When transplanting almost all shrubs, they should be at least slightly trimmed (trimmed) to equalize the aboveground and underground parts. The plant must be shortened, since the injured root system may simply not be able to cope with the direction of nutrition to the remaining branches, especially during the hot summer period.
Digging and transplanting together with an earthen clod
Step-by-step instructions for transplanting hydrangeas to another place:
Important! Given on the example of panicled hydrangea, but there are no special differences in the planting of tree-like or large-leaved.
- Choose a new (suitable) place in the garden.
- Dig a planting hole in advance and introduce the necessary nutrient and acidic substrate into it.
Important! No mounds need to be made, they will only be required if you plant a seedling with an open root system (to spread the roots comfortably). In your case, you are transplanting with a clod of earth, i.e. with a closed root system.
- Before digging up hydrangeas, it is recommended to shed the bushes well with water so that the earthen ball holds tightly and does not fall apart during transplantation.
- Next, you need to carefully dig it (the bush) from all sides (along the perimeter), stepping back from the center by 20-25 centimeters.
- If possible, keep the earthen bed intact as much as possible.
- Place the seedling with the clod of earth in the center of the planting hole.

- Cover with soil up to the root collar so that it is at the level of the soil (if you deepen it too much, it may begin to rot) and lightly tamp (press with your hands).
- Water generously again.
- If the earth settles, then it will definitely need to be filled up.
In general, it is better to perform the procedure of watering and adding soil at least a couple of times. This will help get rid of the air between the roots and the ground.
- Finally, it is necessary to mulch (with high-moor peat, conifer bark or coniferous litter) a layer of 5-8 centimeters.
Hydrangea loves moisture, mulch is a great way to keep moisture. This is all the more necessary if you planted it in a fairly sunny area.
- Shade a little (for example, by placing the frame on the sunny side and pulling on gauze or spunbond) for a couple of weeks.
Transplantation with dividing bushes
In general, everything is the same except for a few nuances and the direct division procedure:
- After digging, you must clear the root system of the shrub from excess soil so that it can be conveniently divided.

- Next, the bush is divided (cut with a knife or an ax) into several parts, while each should have renewal buds.
- Now each bush-cutting, like seedlings with an open root system, must be planted on mounds, on which it will be convenient to spread their roots.
- Cover with nutrient soil and water - everything is the same as a regular transplant.
Caring for hydrangeas after transplanting
In the first year after transplanting (especially in the case of division), it is very important to monitor soil moisture. Watering should be regular, preferably in the first month with the addition of growth and root stimulants , such as Epin or Heteroauxin.
Tip! In the year after the spring transplant, do not let the hydrangeas bloom (cut off the flower stalks). Let her spend all her energy on growing roots, and not on flowering.
Indeed, hydrangea loves well-moistened soil. This is the flower that drinks a lot of water and drinks always.
But everything should be in moderation, the bush also does not like overflow.
Also do not forget to periodically loosen and weed the near-stem circle from weeds.
Hydrangeas won't need any feeding any time soon, but only if you put in enough fertilizer when preparing the nutrient soil to fill the planting hole.
By the way! The site already has a detailed article about how and with what to fertilize hydrangeas in spring and summer .
If in the future you are if you want to change the color of your hydrangeas - make them blue from pink or vice versa, then you will need to adjust the acidity of the soil. This can be done with the help of special fertilizers and chemical compositions, which are described in detail in this material .

Hydrangea can be cut both in autumn and spring. At the same time, even if you carried out autumn pruning (it is considered the main and most desirable), then in spring or summer (just before flowering), all thin shoots (less than 1 cm thick) should be additionally cut.
Please note! For complete information on spring pruning of hydrangea you will find here , and autumn pruning here .
Depending on the type of shrub, its preparation for winter is also different. So, large-leaved hydrangea is not a frost-resistant shrub at all, therefore shelter just needs for it.
Important! Learn more about autumn care and preparing hydrangeas for winter read in this article .
Why hydrangea does not bloom
Tip! The site has a detailed article that talks about the main reasons why hydrangea may not bloom .