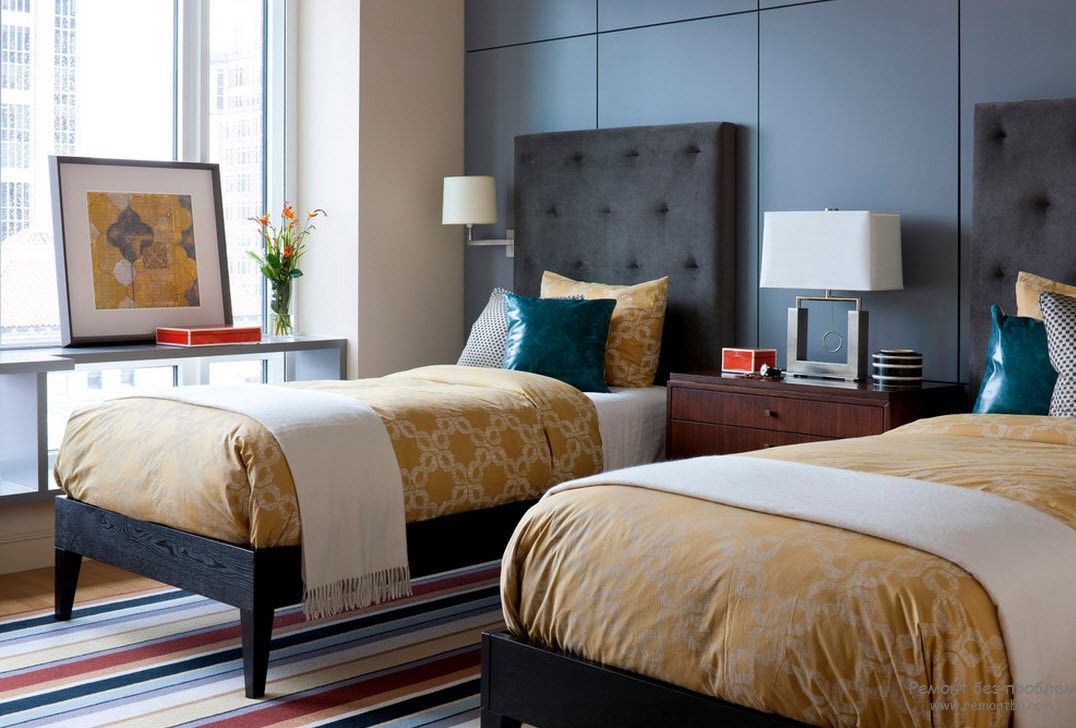
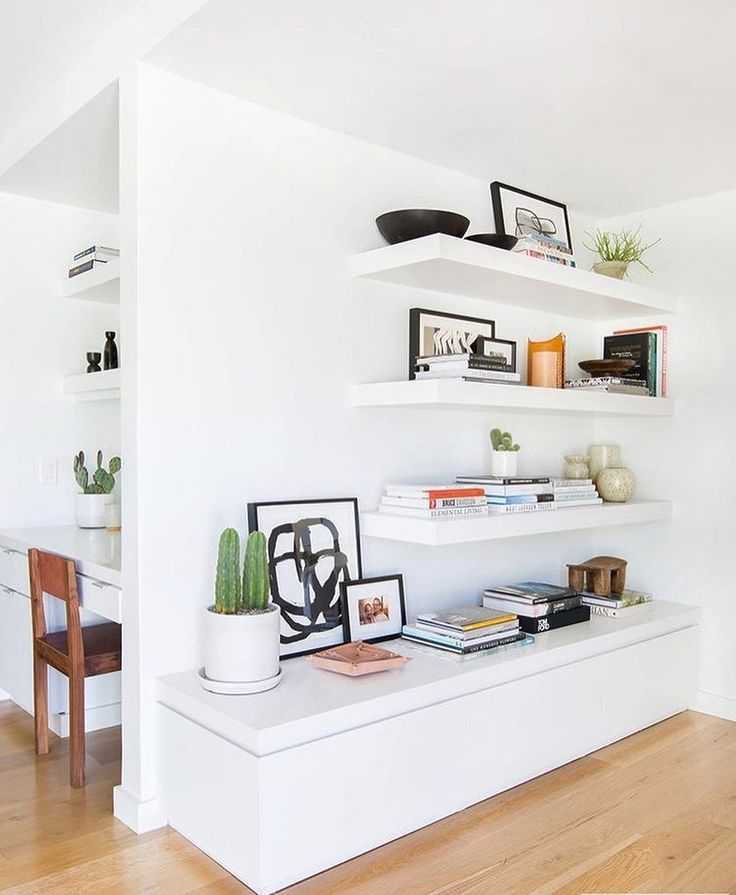
Bed frame paint ideas
Bedroom paint ideas – 17 ways with paint to make your boudoir bespoke
Ideal Home Newsletter
The Home Of Great Ideas For More Than 100 Years
Thank you for signing up to . You will receive a verification email shortly.
There was a problem. Please refresh the page and try again.
By submitting your information you agree to the Terms & Conditions and Privacy Policy and are aged 16 or over.Choosing the best paint colour to refresh your sleeping space instantly, or trying out a clever paint that won't cost you a fortune, using paint in the bedroom really can make for a quick and easy room update. Whether you go for a split colour wall in calming blues or a painted stripe in soothing greens, we show you bedroom paint ideas to suit every style and taste.
Go for calming colours and natural materials, think soothing and soft rather than bright and stimulating - choosing a sage green over a grass green and an ochre yellow over a buttercup yellow. Get your space just right with bedroom ideas that suit your personal style.
Bedroom paint ideas
Try painting the whole room in one colour, walls, skirting, ceiling, cupboards, radiators and even window frames, to create a cocooning effect. Introduce rich textures in upholstery, quilted throws and comfy knits, layering these elements throughout the room for a warm and welcoming feel.
1. Repeat tones of the same colour
(Image credit: Crown)
'The repetition of a central colour will help enhance the mood you are trying to convey,' says Justyna Korczynska, Colour Consultant at Crown. 'Paint several walls the same colour of varying tones, or connect the colour through the room with matching accessories. Get creative with DIY by painting a plant holder or a chair in a similar shade to emphasise the tone of the bedroom. The theme can be further enhanced by the use of textiles in the room, for instance in the choose of bedding, or a colour matched rug or blanket.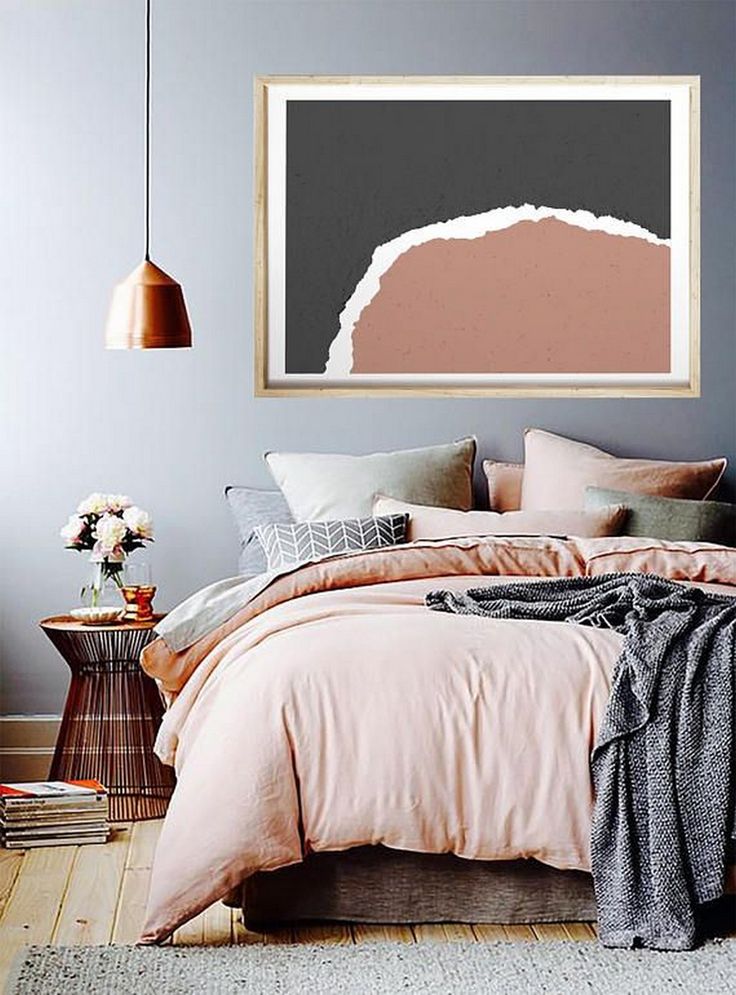 '
'
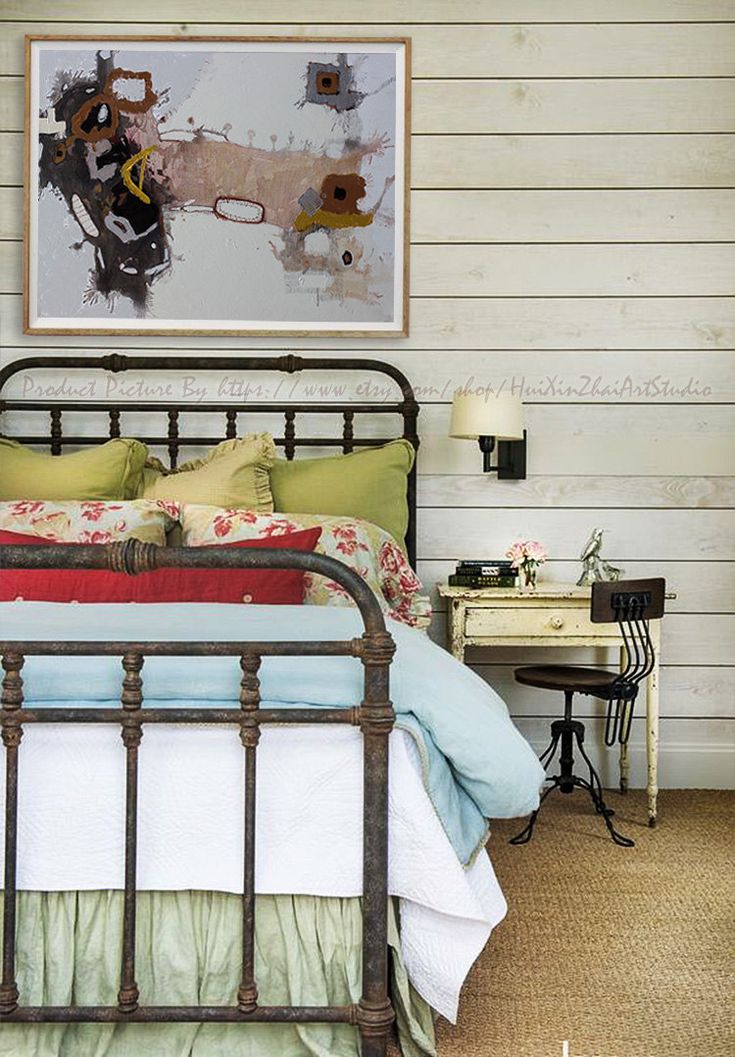
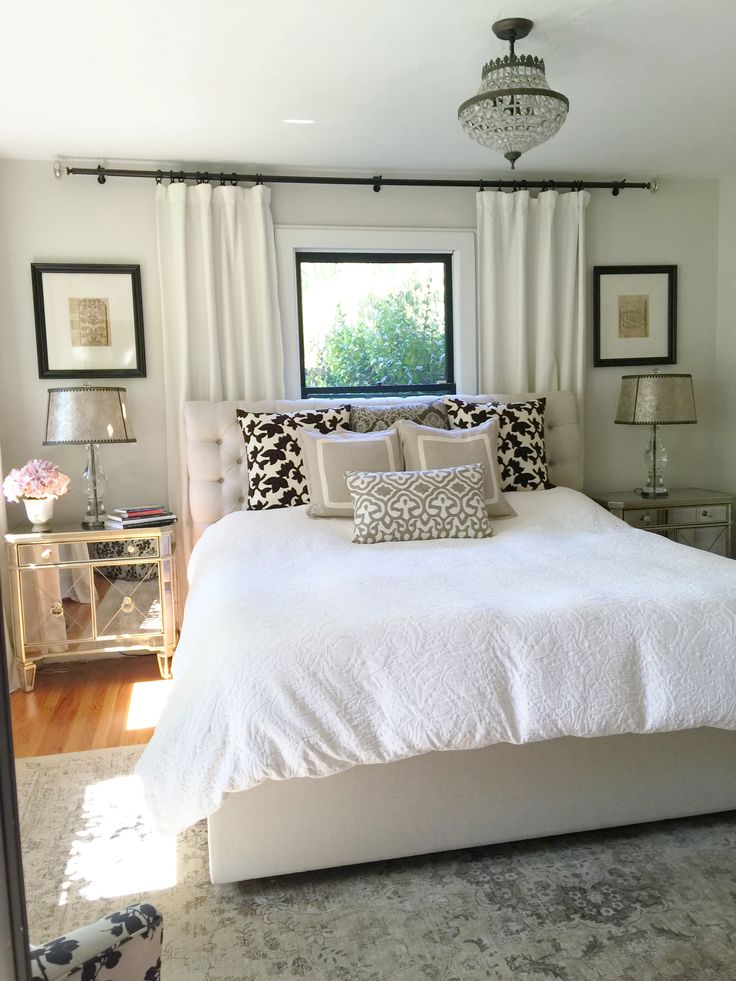
2. Create a striking headboard
(Image credit: Future PLC/Joanna Henderson)
If you’re tight on space (or budget), creating a hand painted headboard is a super affordable, easy way to transform a bedroom wall. Keep things simple with a panel of colour for your chosen bedroom colour scheme that can be easily changed, moved or erased. It's a cheaper and less bulky alternative to an upholstered headboard. Choose any paint colour that you fancy, so you can really make it work with your style and scheme. For added interest position a wall light as if it were attached to a real headboard
3. Go for a painterly effect
(Image credit: Future PLC/Simon Whitmore)
This is a great paint ideas trick that makes your ceilings seem higher. Choose a colour on the base but then bleed into white and continue the white onto the ceiling, so that your eye doesn't know where the wall ends and the ceiling begins. Paint the bottom in a colour also gives a more cocooning feel when you’re in bed, but the room will remain light and fresh, thanks to the white. Use a roller to paint the bottom half of the walls in the darker colour, finishing the top edge with rough upward strokes of a paintbrush.
Make more of a favourite painting or print by colouring a border around the frame. Use masking tape to mark out a square 8-10cm bigger than your frame and colour it in with leftover paint. Remove the tape and, when the paint’s dry, rehang the picture.
4. Try two-tones of the same colour
(Image credit: Secret Linen Store)
A 'half wall' or a 'split wall' is the description given to painting a wall two colours and dividing them with a crisp line. Painting your wall with two colours is an easy way to give the illusion of a higher or a lower ceiling. To add height to a room, use a darker shade on the bottom half where the heavier colour grounds the room and the lighter colour draws the eye up. Or vice -versa, with the darker colour giving the appearance of a lower ceiling and therefore a cosier, more cocooning room. Worried about how to paint a two tone wall? Don't worry, we promise it's easy!
This trick has the benefit of allowing you to use bold colour without overwhelming your space. It also adds an on-trend graphic edge. Don’t feel you must place the horizontal line in the exact centre, it can be split into thirds, or anywhere you feel the split sits comfortably within your eyeline.
5. Evoke the feeling of a night sky
(Image credit: Future PLC/Joanna Henderson)
Pale rooms can seem chilly and unwelcoming, especially in artificial light. By painting the ceiling in a deep colour you can really cosy up a bedroom with high ceilings. The paint colour helps bring the ceiling down, fooling the eye into thinking the room is smaller and more intimate. Medium to dark, rich and deep colours such as navy blue and chocolate brown on ceilings warm up the space and make it feel cosy.
So, let's look at how to paint a ceiling. If you have a picture rail, bring the colour down from the ceiling onto the top part of the wall above the rail, this will bring the ceiling down further for a more cocooning feel. Painting a ceiling, or the fifth wall as its sometimes referred to, can add another dimension and character to any room. Here it provides impact to an otherwise plain room.
6. Go for a geometric feature wall
(Image credit: Future PLC/ Dominic Blackmore)
Let the colours from a patterned textile or a piece of art inspire your design. This simple Scandi-style scheme is all about sugary pastel shades. When choosing colours that will sit directly adjacent to each other make sure they are from the same 'tonal family' - so all the colours have the same amount of white and black in them. This means they'll sit together flawlessly. Keep furniture simple like with this grey marl upholstered bed and painted side table. That way, the feature wall remains the hero in the room.
7. Give a wall its stripes
(Image credit: Future PLC/Tim Young)
Inject a dose of understated elegance and sophistication into your bedroom by painting bold stripes in blush pink and white. A pink bedroom idea that earns serious style point, stripes on walls and fabrics bring a classic feel to any room and transform a bland bedroom into one with a boutique hotel vibe. Choose from tailored pinstripes or bold broad lines, in either horizontal or vertical stripes to bring order and structure to a space.
In a bedroom stripes work best in soft, pretty shades such as pale pinks, blues and greens. Pair them with white for a crisp, smart feel. Incorporate the woodwork into your stripes by painting the bottom stripe white, so that skirtings can be integrated into the white stripe with ease. Finish by layering silk and satin bedlinen for a sophisticated and glamorous space.
8. Create a cocooning canopy
(Image credit: Future PLC/Dominic Blackmore)
Paint an area from behind the bed, over and onto the ceiling - creating a canopy of colour. Paint behind the total width of the headboard, adding 3 or 4 inches to either side, so the paint line is visible. Try a shallow canopy onto the ceiling for ease, or continue over the whole length of the bed for added impact. Use tones of chocolate, coffee and caramel in the bedroom to create a warm and restful scheme, mixing velvets, slub linens and textural cottons to add create a wonderfully welcoming scheme.
9. Fake a headboard with paint
(Image credit: Crown)
A great way to get the look on a budget is by using paint in place of buying a colourful headboard. This fine example of a DIY headboard idea by the team at Crown shows how a little imagination can transform your bedroom scheme. Carefully pencil out your chosen shape onto the wall ready to create a defining line using masking tape.
10. Be bold with block colour
(Image credit: Dulux)
Using a statement accent shade to create blocks of colour has become a popular way to inject a touch of vibrancy to a bedroom. Using a thick masking tape section off a block shape you wish to paint in your chosen colour. Allow it to dry throughly before very carefully peeling the tape off to reveal an impactful injection of colour to your bedroom paint scheme. A bust of sunshine yellow is ideal to awake the senses and create a happy vibe. It looks great in this white bedroom, but would work equally as well in a grey bedroom idea.
11. Add accent colour as a border
(Image credit: Future PLC /Douglas Gibb)
'Use natural breaks such as corners, alcoves, shelving, dado or picture rails to start and stop the different colour choices' advises Judy. Using a deep dusky pink in the middle scetion alone allows this bedroom to feature a dominate colour, without it feeling overwhelming. The contrast is balanced with the help of crisp white bedding to echo the white ceiling and wood panelling featured on the lower half of the wall.
12. Create interest using a variety of coordinating colours
(Image credit: Dulux)
Why go for one bedroom paint colour when you can create a canopy of colours, that all serve a different purpose with the scheme. Use your first choice of colour to paint the majority of the walls. If choosing how to paint skirting boards we suggest using this same shade here, too. Using a darker gradient of the shade block out a painted section in place of a headboard.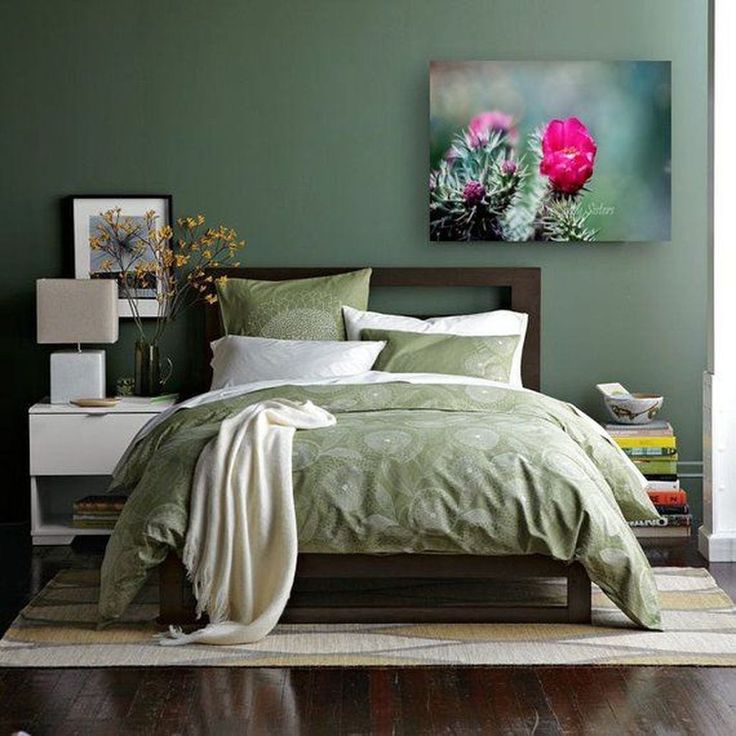 Work with a lighter variation of the wall colour to pick out the wood work, such as window surrounds and shutters. Then to add further interest use a completely different colour, but one with the same warmth, to paint a picture rail-like panel at the top of the wall to frame the space.
13. Use different tones to divide the room
(Image credit: FuturePLC/Joanna Henderson)
Create elements of architectural interest such as a dado rail by combining two different colour choices, to form a clearly defined line. Paint up to a half way level in the more dominate of the two colours, mask with tape and then paint above in the alternative shade. This paint idea helps to create the illusion of the walls being more generous in height, which can prove masterful when decorating smaller rooms.
14. Add texture with thoughtful paint effects
(Image credit: Future Publishing PLC /Dominic Blackmore)
If you're looking to really make an impact with your paint choice try using bold paint effects, which can add depth to any colour scheme, even neutral bedroom ideas. By carefully mixing two colours, in this case neutrals, from the same colour strip you can create a textured effect for your walls. This skilful painting method is a great way to make a statement without having to use pattern or shouty saturated colours.
This textured paint effect on the walls is painted in Stone III and Stone V pure flat emulsion, both by Paint & Paper Library. The muted tones are offset against the strong contrast of the black wall lights and side table, while hints of orange and blue-grey on soft furnishings inject a warming, softer quality.
15. Make a feature of a picture rail
(Image credit: Future Publishing PLC/ Dan Duchars)
Create the illusion of ceiling height by painting above a picture rail. This simple, yet clever splash of colour helps to draw the eye up, stretching the walls up. It works best with bare walls, rather than decorated with bedroom wallpaper ideas and pictures. Choose a bright colour to make even more of a statement.
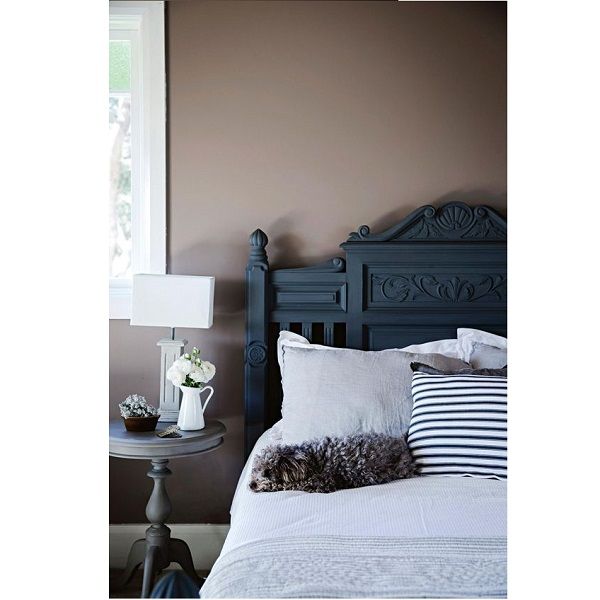
16. Go deep blue for a cosy, moody look
(Image credit: Future PLC/Simon Whitmore)
Struggling to sleep? Get yourself a couple of pots of deep blue paint pronto. Dark inky shades like this will help you switch off after a long day in front of a computer screen – just make sure you banish your devices, too.
When using such a deep blue it's important to break it up with pale wooden furniture and lighter linens so that the room appears cosy and cocooning – rather than bleak and oppressive.
17. Try balancing a look with on-trend pink and grey
(Image credit: Future PLC/Colin Poole)
Children's bedrooms are the ideal canvas on which to experiment with paint effects. All you need is a decent masking tape to help you achieve those crisp lines – we rate Frog Tape every time. You could create 'mountain peaks' across the wall, or something simpler. If the room is being shared like this one, you could even use paint to demarcate whose bit of the room is whose. Keep the kids happy with our children's room ideas
18. Add just a dash of yellow for a sunny bedroom
(Image credit: Future PLC /Colin Poole)
Channel positivity with this dynamic colour accent. Yellow isn't always the best colour in a bedroom as we associate it with danger – especially in conjunction with black – which is hardly a good ingredient for a proper night's sleep. But used sparingly against a calming neutral, it's a veritable dose of sunshine. Together, the two tones bring life to a neutral base and brighten a light-starved space.
19. Paint the coving to match the walls
(Image credit: Future PLC /Olly Gordon)
Carrying a colour up the wall and onto the architrave makes the ceiling feel higher and a room feel grander. It's a clever trick, particularly if you live in a house built in the 1980s or 1990s, where ceilings could be particularly low.
If you're looking for a colour that will work with dark wooden bedroom furniture, a deep blue or green is ideal.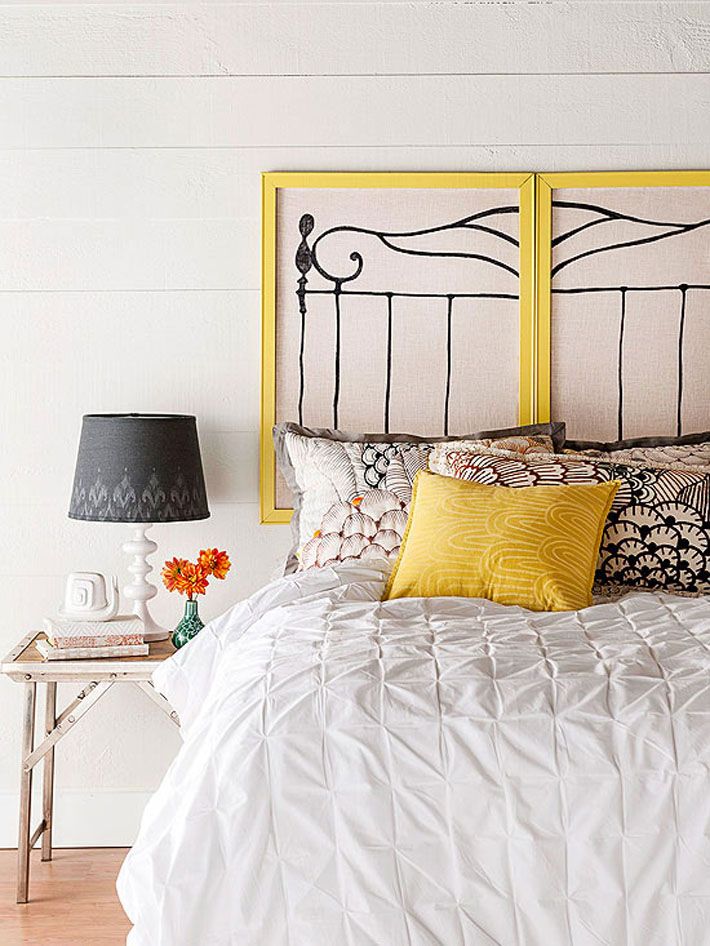 Teal bedroom ideas have the effect of making the wood seem less 'heavy' and old-fashioned, which it might against a lighter grey or white, but still allows the furniture to pop.
20. Match curtains and walls in refreshing green
(Image credit: Future Publishing PLC /Simon Whitmore)
According to research, green is the best colour to paint a bedroom (a good plan if aiming to avoid the colour not to paint a bedroom). A green shade along the lines of this soothing mint is perfect. Enhance the impact as a backdrop by choosing curtains in exactly the same colour. That way, you'll have less of a headache when picking bedlinen as you'll only have one colour that blankets and cushions will need to coordinate with, and a freedom to experiment with pattern. Green bedroom ideas are sure to make for a serene sleep space.
21. Apply a geometric wall mural
(Image credit: Future Publishing PLC/ Georgia Burns)
Work out the highest point of the mural, aiming for it to be off-centre from the headboard. Using a long, straight edge, draw the first mountain shape in pencil, adding more either side. Use Frog Tape to cover your pencil outlines and to criss cross random shapes within the mountain peak.
Next, pick three tonal colours of matt emulsion, starting with the darkest at the bottom and working up to the lightest. When the paint is dry (apply two coats if needs be) peel the tape away to reveal your mural.
22. Create a pink plaster effect
(Image credit: Future PLC /Dominic Blackmore)
Back in the 1990s, paint effects were the height of sophistication when it came to how to paint a wall. They featured in pretty much every episode of the original Changing Rooms, with plenty of us attempting to recreate the looks (not always so successfully) at home.
Then the Noughties arrived and our sponges and Fleur de Lis stencils were relegated to the loft. but could they be making a comeback? Maybe not the stencilling just yet, but a sponge is just what you need to create on-trend plaster effect or Ombre. Start with a base of pinkish white, then slowly build patches of blush pink and coral, going dark to light across the wall. Or you could cheat and use a wallpaper mural!
23. Paint a mellow feature wall
(Image credit: Future Publishing PLC/ David Giles)
Change the mood of a white bedroom idea by painting just one wall in an accent colour. Choose your wall well, and make sure the surface of the wall you opt for is in a good enough condition to have attention drawn to it. Sage green is a great colour for when you want to unwind, so using it in the bedroom will create a soothing vibe.
A feature wall is easy to repaint when you fancy a change, so you can be as experimental as you like with your colour choice. Just be aware, on-trend darker shades like navy or charcoal grey might require an extra coat to cover – worth considering when perusing the paint chart.
(Image credit: Future PLC/ Simon Bevan)
We love a feature wallpaper here at Ideal Home. But we appreciate that they can be expensive. If you're looking to cut the cost but don't want to be restricted to a single feature wall, try this neat trick instead. Choose your print, then find a paint that either matches the backdrop or coordinates with the pattern – the teal used here falls into the latter category. Then paint the bottom third of the wall in that colour and paper the top two thirds. You should save one or two rolls' worth!
25. Use paint to zone your bedroom
(Image credit: Publishing PLC/ David Giles)
Paint is also a great way to create zones or section off an area of a room. Here, olive green demarcates a dressing and study area, whereas the area behind the bed has been decorated with a paler wallpaper. This attic room is flooded with light from floor-to-celiling windows, so it can take such a dark colour.
Which paint finish is best for a bedroom?
Matt paint is perfect for the bedroom. A flat matt paint is often chosen for bedrooms, over areas like hallways or living rooms, as a bedroom wall rarely needs to be heavily cleaned. Flat paint finishes such a matt emulsion are less reflective than those with a sheen, such as silk or eggshell, and so the colour will look stronger and truer and it's also great at hiding any imperfections or textures on wall surfaces. Due to a flat paint colour reflecting less light, it will also have a more calming and soothing effect within the room.
What are the best colours to paint a bedroom?
According to Justyna Korczynska, Colour Consultant at Crown,"there are many well-known theories surrounding colour psychology and how colours can evoke physical and psychological responses. When decorating the bedroom, it's important to choose a colour that resonates with you. Consider how a colour makes you feel, if it would help you unwind, or alternatively help you wake-up in the morning. Cool colours from nature such as blue and green tend to be restful, whereas warmer colours like yellow and orange tend to be more stimulating"
So it's important to choose colours that appeal to your taste but also create a scheme that will be conducive to sleep. Colours that have been proven to reduce stress and soothe the nervous system are blues, greens, yellow, orange and pink. Try to stick with neutral or pastel shades for a calm, welcoming atmosphere.
How do I create a painted arch in a bedroom?
Here's what the experts at Dulux suggest:
- Apply your background colour first, using a roller to cover a large surface area. Once the paint is completely dry (this can take from 2-4 hours), you’re ready to start your arch.
- First, cut a long length of string and attach keys to one end.
- Use masking tape, stick the string to the wall at the right height for the side of your arch. Cover the string with chalk and ping against the wall to make a chalk-line guide. Mask along this line with tape.
- Decide on the width of your arch and, using a spirit level, make a mark for the top of the other side at the same height. Repeat the process above.
- Measure the gap between the two sides and mark the mid-point.
- Attach a pencil to the end of a length of string. Pin the string at the mid-point between the two sides so that the pencil reaches the top of both side lines.
- Draw a semi-circle to form the top of your arch, then carefully paint the outline using a paintbrush. Fill in the rest of the arch using a roller.
- Gently remove the masking tape while the paint is still slightly wet.
Additional words by Tamara Kelly
How to Paint a Bed Frame – 6 Steps
A painted bed frame, including the headboard, can transform the look and feel of your entire bedroom. Refresh this important piece of furniture with this how-to-paint guide.
Working Time2 days | Difficulty LevelBeginner | Skills InvolvedSanding, priming, painting |
Working Time
2 days
Difficulty Level
Beginner
Skills Involved
Sanding, priming, painting
Step #1: Pick Your Products
When painting a bed frame, or any piece of furniture, achieving lasting results starts with choosing high-quality products.
- Prime wood or laminate bed frames with STIX® Waterborne Bonding Primer, which offers powerful adhesion that sticks to any surface.
- For the best paint for a wooden bed frame, homeowners love ADVANCE® Interior paint, which provides a premium, furniture-like finish.
- Wondering what paint to use on a metal bed frame? For ferrous (steel, iron) and non-ferrous (aluminum) metal, we recommend Ultra Spec® HP D.T.M. Acrylic paint or Super Spec® HP D.T.M. Alkyd paint, depending on whether you want an acrylic or alkyd (oil-based) coating.
- Only prime a metal frame if there is excessive rust or corrosion present.
- Consider sheen when choosing bed frame paint colors. Lower gloss sheens hide imperfections and offer a smooth, elegant look, while high-gloss sheens aren’t as forgiving, but do provide a sleek, modern look.
Helpful Tip
Acrylic Paint vs. Alkyd Paint
• Looking for a faster dry time? Go acrylic.
• If durability is your goal, choose alkyd.
Step #2: Dismantle and Clean the Bed Frame
- If you’re painting the bed frame by hand, start by dismantling the frame.
- If you’re planning to spray paint the bed frame, disassembly is not necessary, but you should move the frame to the garage or outside ahead of painting.
- Place a drop cloth under your bed frame to catch any dust, debris or errant paint product.
- Use warm, soapy water and damp rags to clean the bed frame. Allow it to dry completely.
Helpful Tip
Keep any screws or other small parts of the bed frame in a safe location, and consider labeling them for easy reassembly.
Step #3: Sand and Clean Again
- When the bed frame is clean and dry, it’s time to sand it. Sanding is especially important if the frame has any kind of glossy finish.
- We recommend using medium 180- to 220-grit sandpaper and a sanding sponge for a wood or laminate frame to dull the surface.
- Wondering how to remove paint from a metal bed frame? Use medium 180- to 220-grit sandpaper for non-ferrous metal, or coarse 80-grit sandpaper for a ferrous metal frame.
- A few passes should be enough—you don’t need to completely remove the existing coating if there is one.
- It’s not always necessary to fully remove paint from metal that you want to repaint. If the metal is not rusted, you can simply paint over the existing coating—just be sure the metal is clean, dull and dry before you start painting.
- Vacuum up any dust or sanding debris and wipe the frame down with damp rags or a microfiber cloth.
Helpful Tip
Wondering how to paint a bed frame without sanding?
If you’re working with wood, laminate or metal that has not been previously painted, you don’t need to sand it. If your previously painted metal frame is in good condition, sanding is also not necessary.
Step #4: Prime the Bed Frame
- To prime and paint a bed frame, we recommend using a 4- to 6-inch fine-finish roller for any large flat surfaces like the headboard or footboard.
 Switch to a paintbrush for the legs and any detail that is difficult to paint with the roller.
 - For a wood or laminate frame, you can apply an even coat of STIX® Waterborne Bonding Primer.
- Most previously painted bed frames, if they are in good condition (no patching necessary), do NOT need to be primed, especially if you’re using a premium quality interior paint.
- To prime a metal frame with excessive rust or corrosion, apply an even coat of Ultra Spec® HP Acrylic Metal Primer or Super Spec® HP Alkyd Metal Primer.
- Let the primer dry completely
Helpful Tip
If a metal bed frame is clean and free of loose rust, you don’t need to prime it.
Step #5: Paint the Bed Frame
- With a roller, apply an even coat of ADVANCE® Interior paint to the headboard, footboard, and any other flat surface. ADVANCE provides a furniture-like finish that easily withstands wear and tear and is available in all Benjamin Moore colors.
- Switch to a paintbrush and apply an even coat of paint to the rest of the frame, including the legs and any detail that is hard to reach with the roller.
- Wondering how to spray paint a bed frame? You can spray paint using a sprayer available to rent or buy at your local Benjamin Moore retailer. While sprayers help you get your job done faster, keep in mind that they are powerful machines, and must be used responsibly.
Helpful Tip
If you don’t own a paint sprayer, you can rent one. Visit your local Benjamin Moore retailer for advice on rental equipment.
Step #6: Let Dry and Apply a Second Coat
- After you have waited for the paint’s maximum recoat time (found on the back of the can), apply an even second coat of paint to the frame the same way you did the first.
- Cure time is the amount of time you should wait before reassembling your frame. If you chose to spray paint a wooden bed frame, or one made of metal or laminate, you won’t need to reassemble the frame.
 Just remember to wait for the paint to cure before putting the bed back to everyday use.
Pro Tip Spotlight
Save time and save paint!
Since the bottom of the bed frame won’t show once you put a mattress and bedding on it, you might want to only apply one coat of paint to this area—or not paint it at all.
Pro Tip Spotlight
Save time and save paint!
Since the bottom of the bed frame won’t show once you put a mattress and bedding on it, you might want to only apply one coat of paint to this area—or not paint it at all.
Explore More Interior DIY Ideas and Products
ADVANCE® Interior Paint
Get a high-end, furniture-like finish that delivers long-lasting results.
Learn More
How to Paint Indoor Furniture
From dressers to coffee tables, see our guide to painting all types of indoor furniture.
See the Guide
How-To & Advice: Home Projects
Enjoy step-by-step guidance and conquer your next DIY painting project with ease.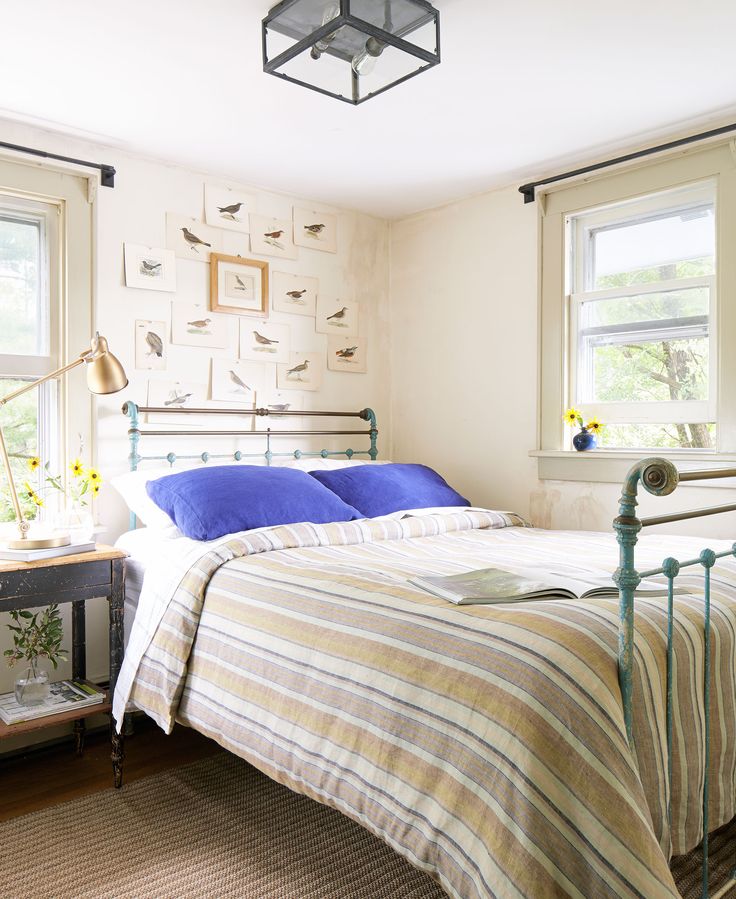
Get Advice
DIY bed made of metal - making and painting in photo
DIY bed made of metal - making and painting in photos.
Bedroom furniture can be made by hand from various materials, based on the requirements of the overall interior and furnishings. One of these options is a metal bed, which is not so difficult to make with your own hands. You can choose a model suitable for almost any style.
A metal bedroom bed will last much longer than a regular wooden bed.
This design can be a real decoration for any interior, it will not only complement the design, but also become its key element. To assemble such a bed yourself, you must first make a sketch indicating all sizes, then prepare the appropriate materials and tools. .
.
How to determine the dimensions?
To assemble a beautiful and comfortable bed, you must first determine its dimensions. Usually for one person a width of at least 70 cm is enough, but 80-100 cm is best for proper comfort. When choosing a model, it is taken into account whether a single or double design is needed. To determine the length of the bed, an average height of 170 cm is usually taken into account, but it is best to do 190-200 cm, although everything is individual here.
When choosing the dimensions of the future bed, a number of factors must be taken into account:
Measuring and marking tools.
Preparing for work
To make a metal bed with your own hands, you must first make calculations and purchase all the materials that are required for work. Of the materials, steel pipes, square sections, channels, corners will be needed.
In this case, the work will be done as quickly and efficiently as possible, there will be no waste. If the metal is purchased by the meter, then it is necessary to add at least 10% to the total volume for cutting.
After that, you need to make a list of all the tools that will be needed for the job. The main tool will be a welding machine, with which structural elements will be connected. When working with such equipment, safety rules must be observed, the work itself must be carried out in a spacious room, use personal protective equipment.
Consumables
Without a pipe cutter, the installation of a metal bed will not be possible.
The do-it-yourself bed will be made of a metal profile pipe with dimensions of 20 * 20 mm, the frame for the bed will be made of a steel channel 65 * 32 mm. For thrust bearings and plugs, you will need a metal corner 40 * 40 mm and with a thickness of 2 mm. In more detail, the specification of materials for the manufacture of the bed is as follows:
Scheme of the metal bed.
The size of the future design will be as follows: length 190-200 cm, width 80-200 cm. The height of the mattress will be 20 cm, it is better to take independent spring blocks.
If we take into account the amount of material per footage, then the general calculation is as follows:
Tools for work
To assemble a metal bed, you need to prepare the following tools:
After all the structural elements are ready, it is necessary to make brackets from channel scraps. They will be needed to attach the bed frame. The brackets are welded with a continuous seam to the headboard along their entire length, since subsequently it will be on them that the greatest load will be. First, small brackets are welded, after them - large ones.
When the work with the back is finished, it is necessary to start making frames, of which there will be two. Subsequently, such a bed will be much easier to disassemble for transportation than a structure that has only one frame. The sequence of work is extremely simple. It is necessary to connect the elements prepared for the frame at a right angle. You can use a special square to control. We'll have to check the diagonals, and then weld the parts together at the joints.
In more detail this process would be:
The main types of channel.
Finished structure painting
After the metal bed is assembled, it is necessary to start work on preparing its decorative design. There are a huge number of decorating options. Usually, metal structures are painted, the color is selected based on the general situation. To do this, follow these simple steps:
Scheme for painting metal with a brush.
Any color can be used for painting, but attention should be paid to the overall environment. For example, if the interior is modern and strict, then it is best to choose monochrome and soft shades for the bed. If there are a large number of dark tones in the finish, the bed is also painted with a dark paintwork composition.
Before painting, the metal should be covered with a layer of primer, which will ensure better adhesion of the paint to the surface of the structure.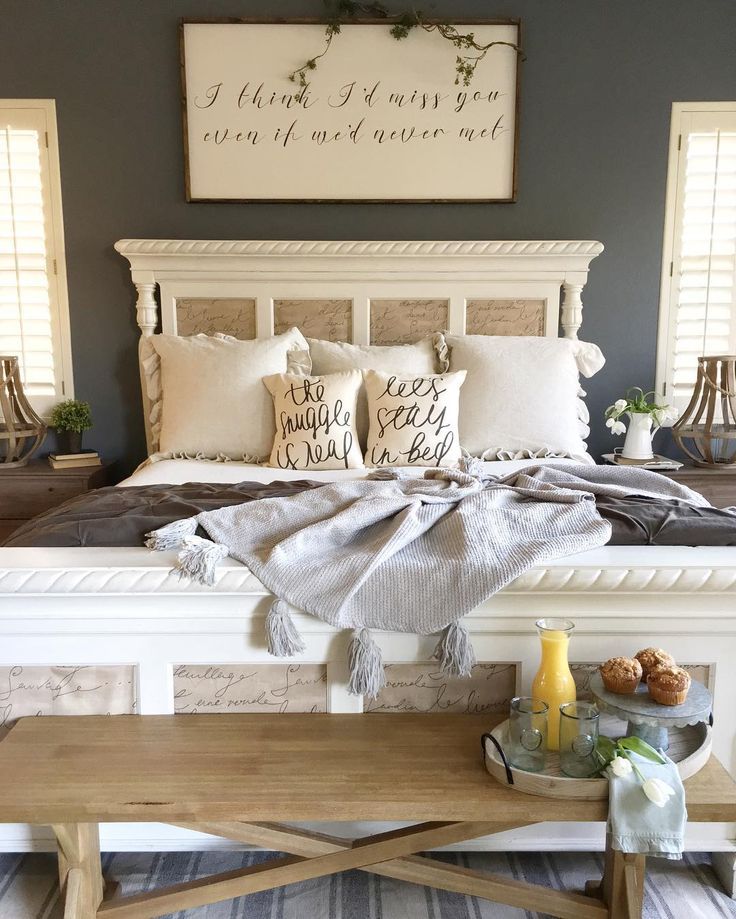 The primer mixture is selected of a type that is suitable for working with metal, the primer is applied with a brush. When this layer dries, it is necessary to process the surface with sandpaper, remove all irregularities.
Scheme for painting a metal bed with a spray gun.
It is recommended to paint a metal bed with an airbrush, setting the flame diameter to the required size. In this case, the painting will be completed as soon as possible, it will turn out to be of high quality, and the paint consumption will decrease several times. But if there is no airbrush, then you can paint the structure with a thin brush. The number of layers is 2-3, the thickness of each should not be too large. The brush should be chosen only of high quality, otherwise, during work, hairs will fall out of it, which will greatly spoil the appearance of the furniture. Each layer must dry before the next one is applied. If necessary, after the paint has dried, a layer of varnish is applied.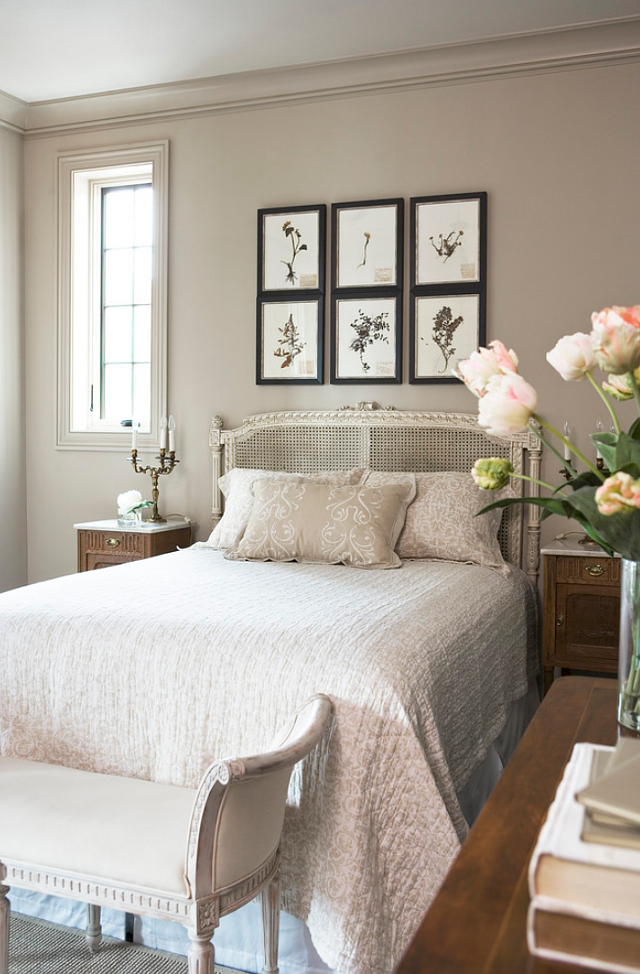
When using polymer coatings for painting the bed, the sequence of work will be as follows:
Do-it-yourself metal bed is beautiful and fashionable, although you need to have skills in working with such material, with a welding machine. The design itself is extremely simple, but attractive, suitable for any style of bedroom.
Overview DIY metal bed - manufacturing and painting.
Let's tell you how to beautifully paint the bed yourself at home
Refresh the look of an old bed with painting . With its help, you can radically change the color of the product or update the original coating. To paint the bed, you will need certain tools and materials. Not all paints are equally safe, so it's important to know what you're looking for.
What materials and tools are needed
For painting, you will need primer, varnish, paint, putty, sandpaper of low hardness, brushes of different sizes, roller, spatula. If the product has been previously painted, a chemical wash must be used. You will need sponges and brushes to remove the old coating.
Paint safety comes first!
For painting the bed, paints are suitable that do not contain heavy metal salts, smelly solvents, volatile impurities, dangerous oxides. Many manufacturers even have special lines of dyes designed for furniture. 4 types of paints are suitable for painting the bed:
- Acrylic . They are easily distributed over the surface, dry quickly. Resistant to water. It is important to choose water-based acrylic paints.
- Water based . A great option for masking small cracks. The main plus is the absence of a nasty smell when applied.
- Nitro . different wide color gamut, dry very quickly. A coating created with nitro paint will last 4-5 years.
- Oily wax. This product is suitable for coloring wood in natural tones. It is quickly absorbed, creates a water-repellent layer on the surface.

Aerosol paints are available. They are quickly applied, but differ in too much consumption.
Features of painting the bed at home
Renovation of the coating is started 3 weeks before the date of intended use of the product. After this time, the bed will completely dry and weather. The algorithm for painting furniture made of chipboard and wood will differ from the procedure for painting metal products.
How to paint a wooden or chipboard bed
The bed must be completely dismantled before any work can begin. It is recommended to remove the bolts and other small items in a safe place so as not to lose them in the process. Procedure steps:
1. Removal of the old coating. Use a chemical wash, sponge, spatula.
2. Removing dirt and dust.
3. Filling cracks with putty.
4. Sanding parts.
5. Application of primer.
6. Paint application by brush or roller.
7. After the first coat has dried, apply the second coat. It is recommended to apply 2-3 coats of paint.
8. Coat parts with varnish for extra protection.
9. Wait until the paint is completely dry and then put the bed back together.
If bubbles appear or the paint layer is destroyed, the surface must be cleaned, degreased, and repainted.
How to paint an old metal bed
The procedure will be similar. First take apart the bed. Each part must be washed in warm soapy water, carefully removing all contamination. Wipe down the components. Next steps:
1. Sand the parts. Wipe off dust with a damp cloth.
2. Apply primer. It is needed for a stronger adhesion of paint to metal.
3. Apply the first coat of paint to the parts. This should be done after the primer has dried. Repeat the procedure 2-3 more times.
4. Wait for the paint to dry completely. Assemble the bed.
Which color to choose for a baby bed?
When choosing materials, you can focus on paint for allergy sufferers.